- 08/27/2020
- 10 Min Read
- By: Christian Schaefer
How To Replace The Alternator and Serpentine Belt On A Volvo C30 (Volvo P1)

Walking out to your car on a wintery morning only to find that the battery is dead can be classified as a nightmare. To make matters worse, the car dies from a lack of electrical power on the way to work. Something in the charging system has gone kaput, and you're left stranded in the cold. Most commonly, your alternator has given up the ghost. These units do last a while but have several components that can go bad.
While replacing the alternator and serpentine belt on a Volvo C30 isn't a job for beginners, it won't take an expert to complete. There are many components that will need to be removed to get to the alternator and belts. However, the extra components will only need simple hand tools to be removed. Completing the job yourself will save you a good chunk of change.
Volvo models and years applicable:
|
|
|
|
Symptoms of a failing Volvo C30 alternator:
- Battery drains while the car is running
- Low voltage generated while the vehicle is running
- Dim or flickering headlights
- Dim or flickering interior lights
- Electrical systems such as the radio, power windows, or sunroof do not function
Symptoms of a Volvo C30 serpentine belt failure:
- Squealing Noises
- Power steering failure
- Belt fraying/splitting
- Visible cracks on the belt
- Engine overheating/running hot
The alternator's job is to keep the battery charged. When the alternator, or anything involved in driving it, starts to fail, the vehicle's electrical system will suffer. Without electricity, nothing works. The biggest tells of a failing alternator are shown when something like the turn signal is switched on. You'll notice the other electrical systems dim, and, at idle, the RPMs may drop.
Several chain auto parts stores can test an alternator and battery's functionality. If their test shows that the alternator is functioning properly, the issue may lie with the serpentine belt system. A pulley mounted to the crankshaft drives the serpentine belt and is responsible for spinning the alternator, water pump, power steering pump, and air conditioning compressor. If a belt fails, everything it runs will cease to function.
Belt tensioners keep the belt taut. The bearings in the rollers on the tensioner will wear over time and eventually seize if not replaced on time. A seized roller will inevitably cause a belt to break and leave you stranded.
What will it cost to replace the alternator and serpentine belt on a Volvo C30?
This job isn't cheap, but completing it in your driveway or garage will save you money. The alternator is the priciest part of the bunch at $307.86; after you send back the broken alternator, you'll receive the $75 core charge. This job also requires a special tool to remove the alternator pulley. With all of the parts and the tool, the total cost is $518.48.
To have these parts replaced at a dealership or independent shop, the total cost will near $1000. While being of the same quality, the parts will cost more from the dealership with their markup, and you'll shell out just as much on the labor charge.
How long will it take to replace the alternator and serpentine belt on a Volvo C30?
Because Volvo's feature engines that are mounted transversely, the alternator and belt system are impossible to get to from the engine bay. The passenger's fender liner needs to come out as well as the belly pan and several of the intake components. Altogether, set aside a good couple of hours to complete the job carefully.
Tools required to replace the alternator and serpentine belt on a Volvo C30:
- Multimeter
- 7mm Socket
- 8mm Socket
- 10mm Socket
- 13mm Socket
- 19mm Socket
- T25 Socket
- T30 Socket
- T50 Socket
- Torque Wrench
- Flat-head Screwdriver
- Pick
- Ratchet Extensions
- Ratchet set
Parts required to replace the alternator and serpentine belt on a Volvo C30:
- Volvo Engine Splash Shield Hardware Kit
- Volvo Alternator
- Volvo Drive Belt Kit
- Alternator Decoupler Pulley Socket
- Volvo Serpentine Belt Tensioner Tool
Steps required to replace the alternator and serpentine belt on a Volvo C30:
Step 1: Gain access to the serpentine belt
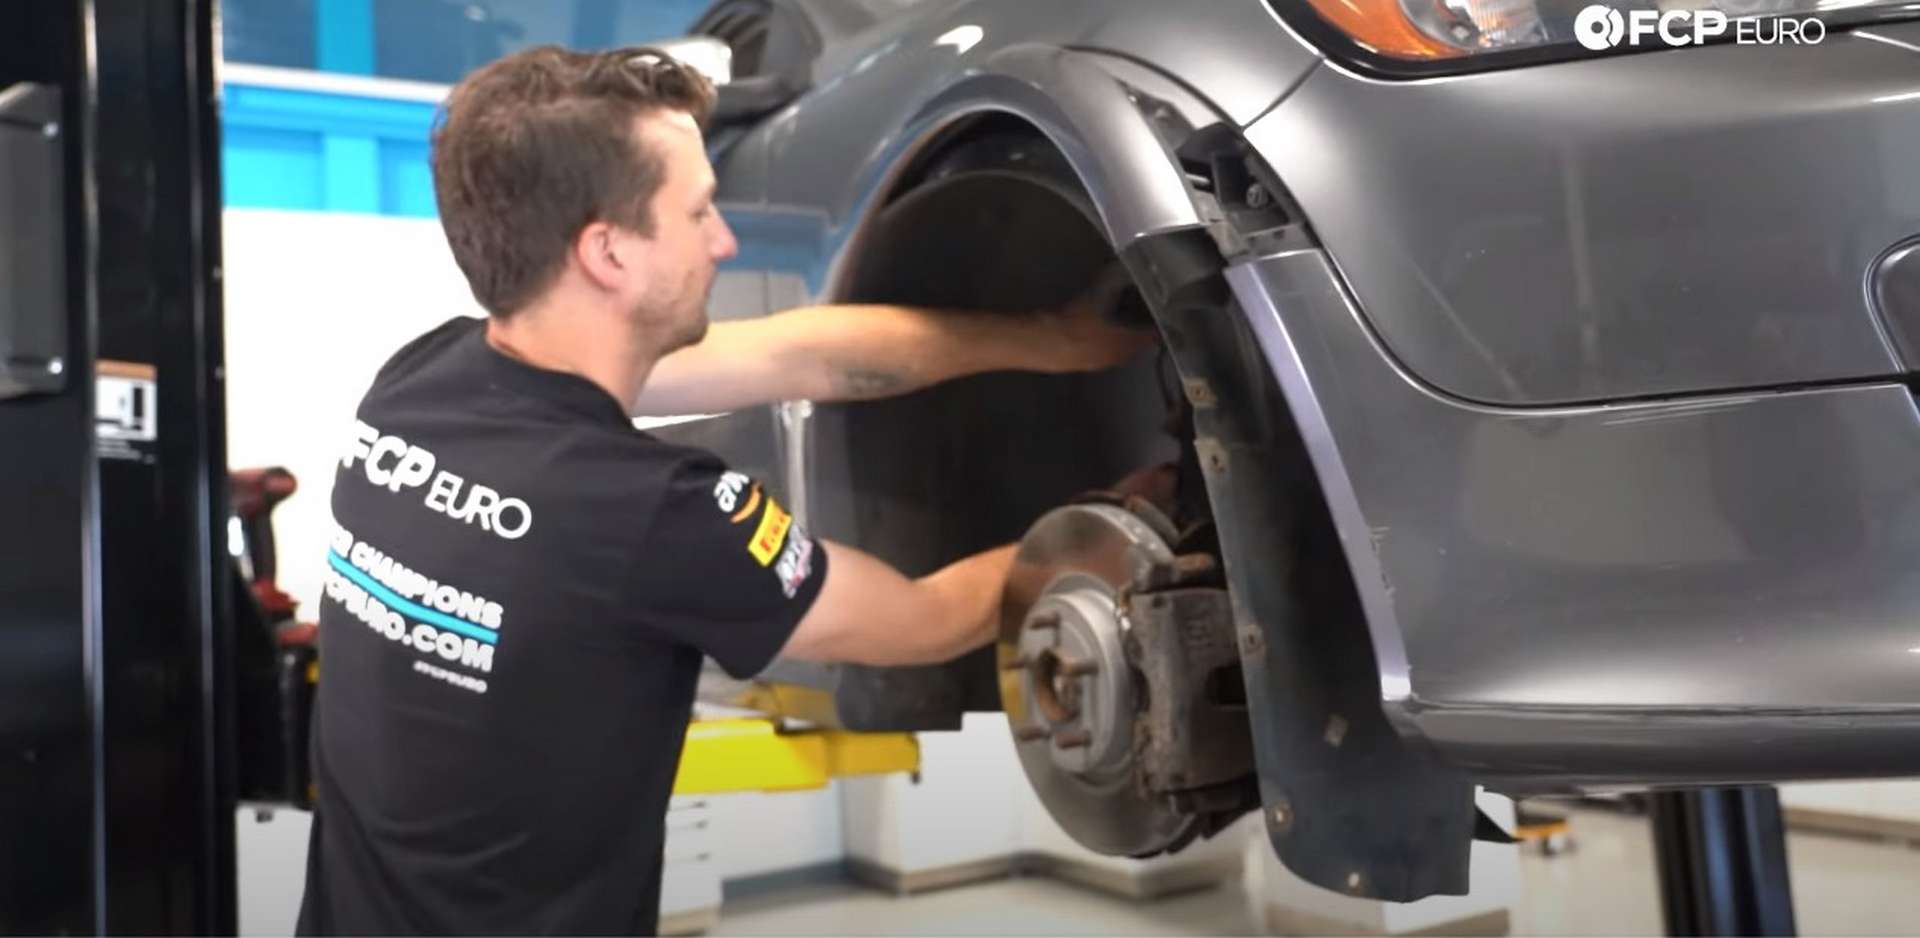
Because the engines in Volvos are mounted transversally, the front of the engine faces the passenger's side. To access it, you need to go through the wheel well.
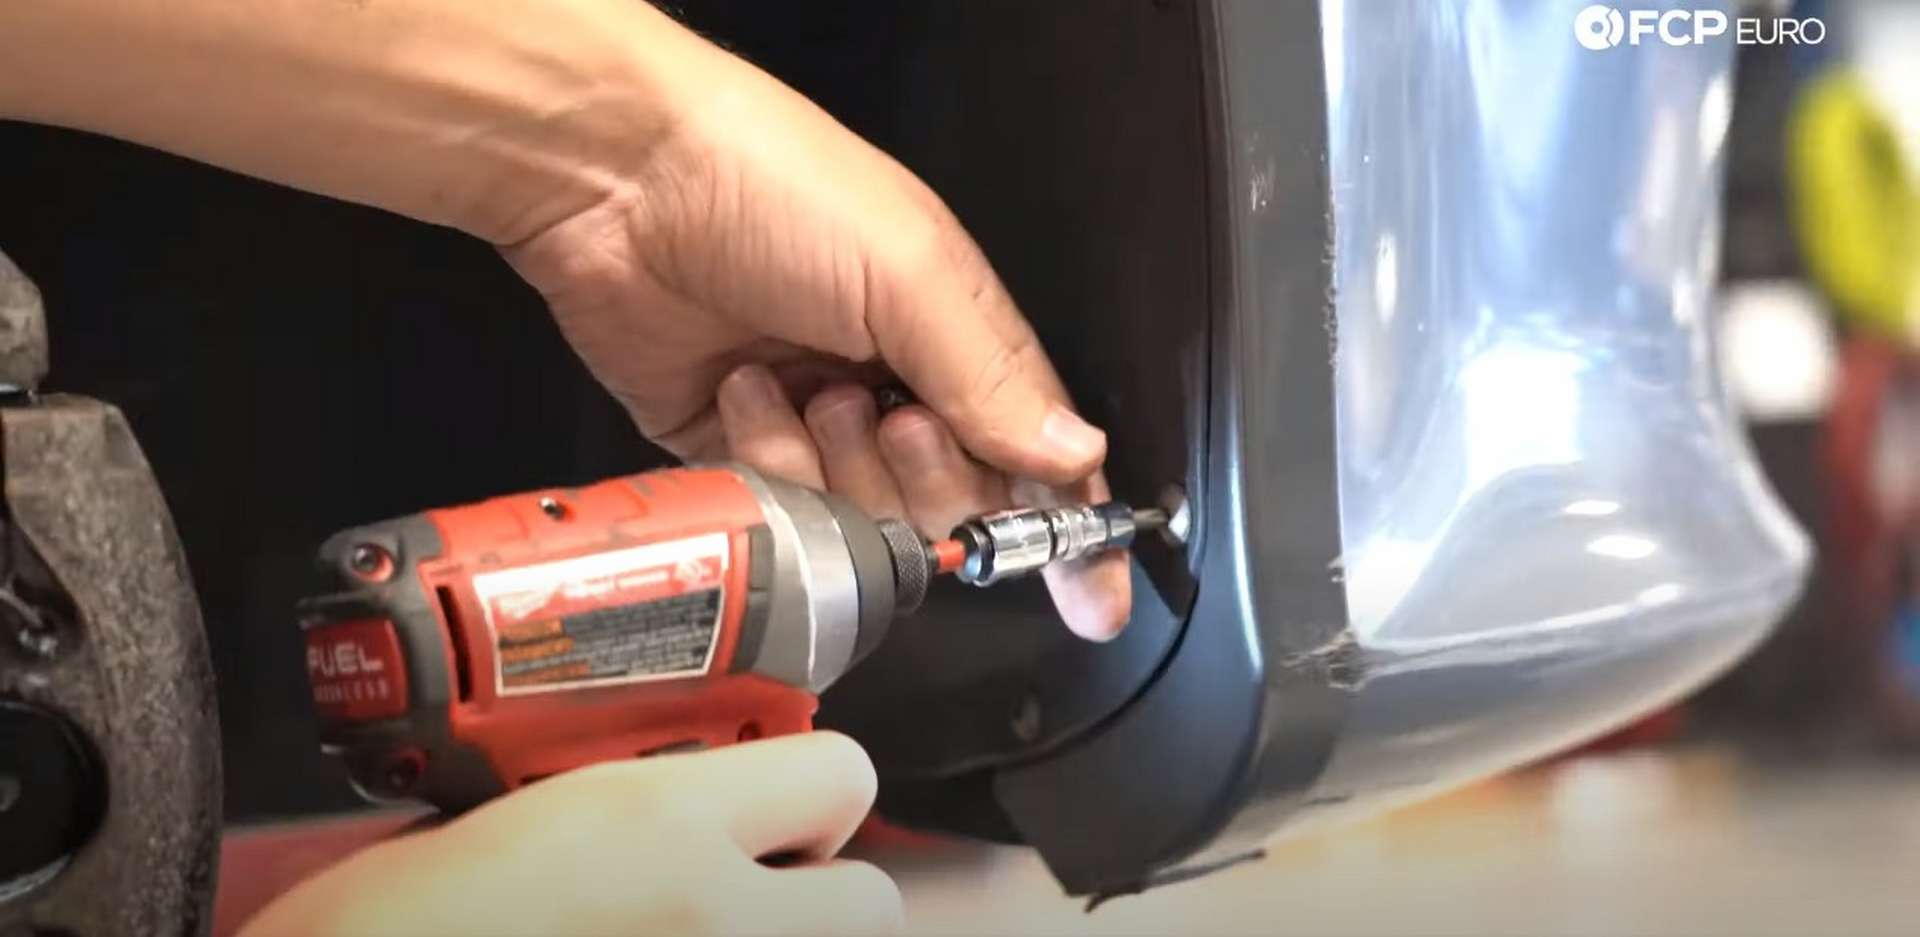
Start by jacking up the vehicle and removing the wheel and its lug nuts with a 19mm socket. The plastic fender liner is held to the fender's edge with several fasteners and the chassis by two plastic nuts. Start by removing the nuts with a 10mm socket. Then move onto the fasteners and use a T25 socket to remove them.
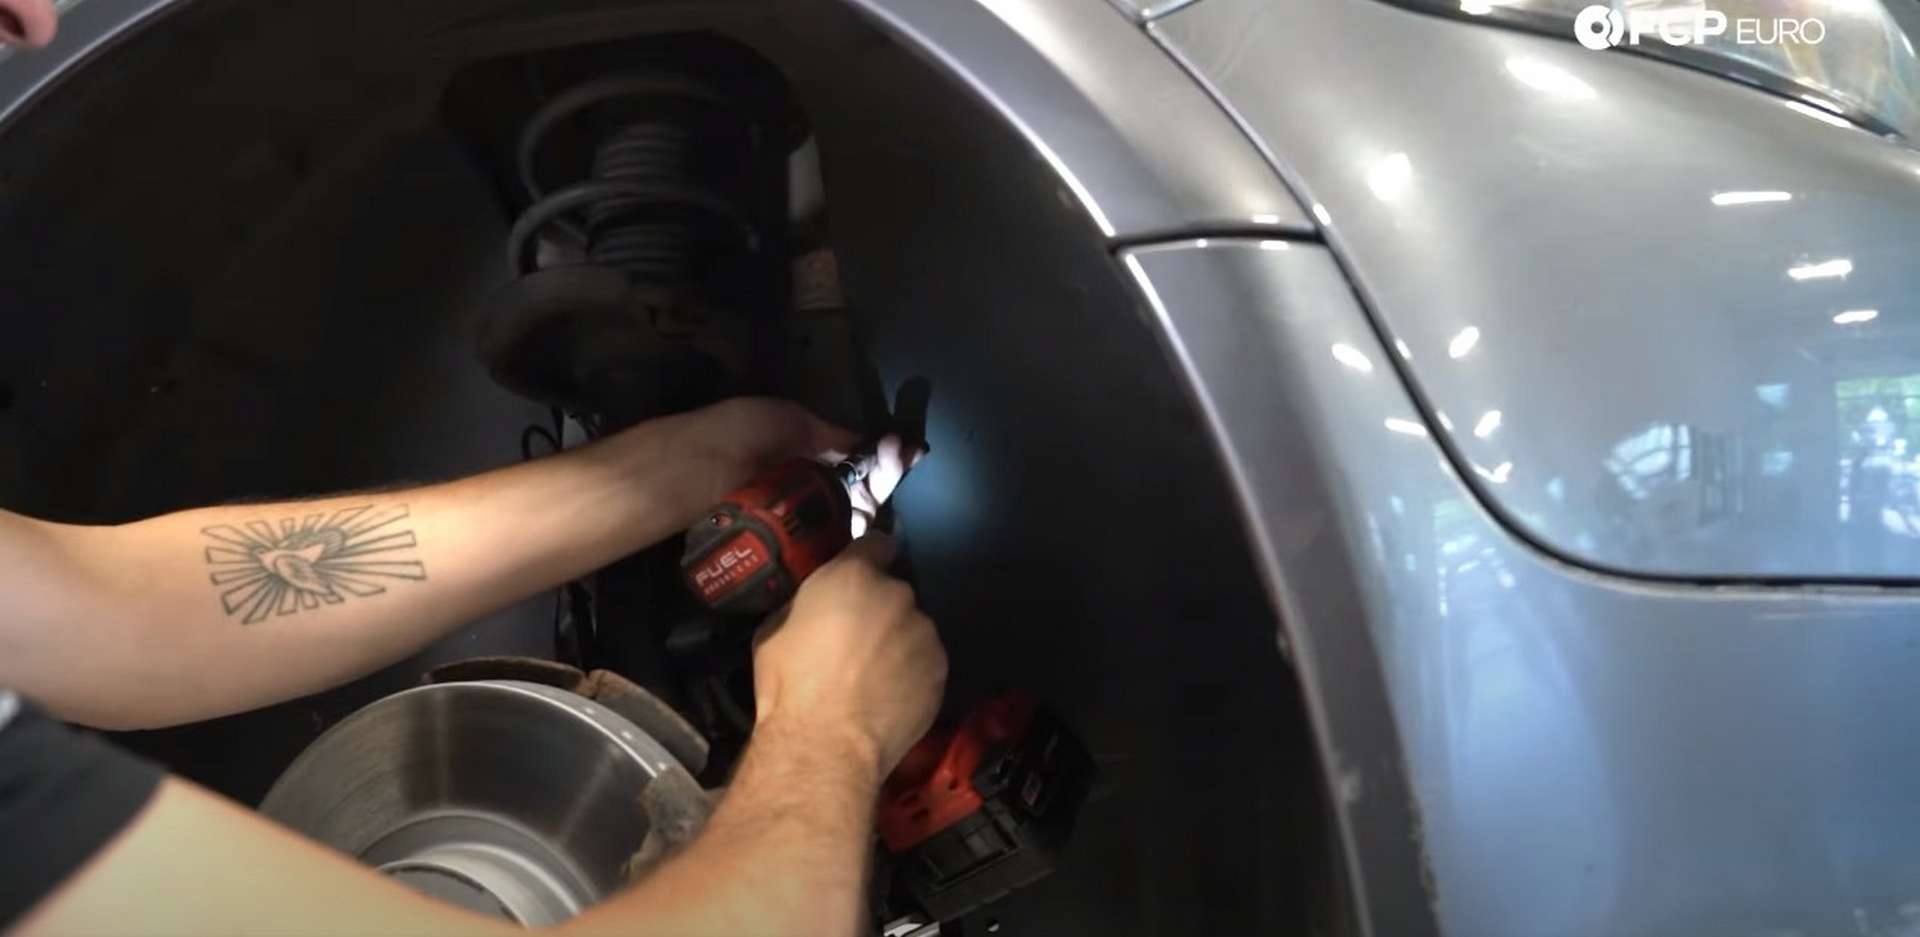
Grab the edge of the liner and pull it out of the fender. Then pull the liner away from the car and out of the wheel well.
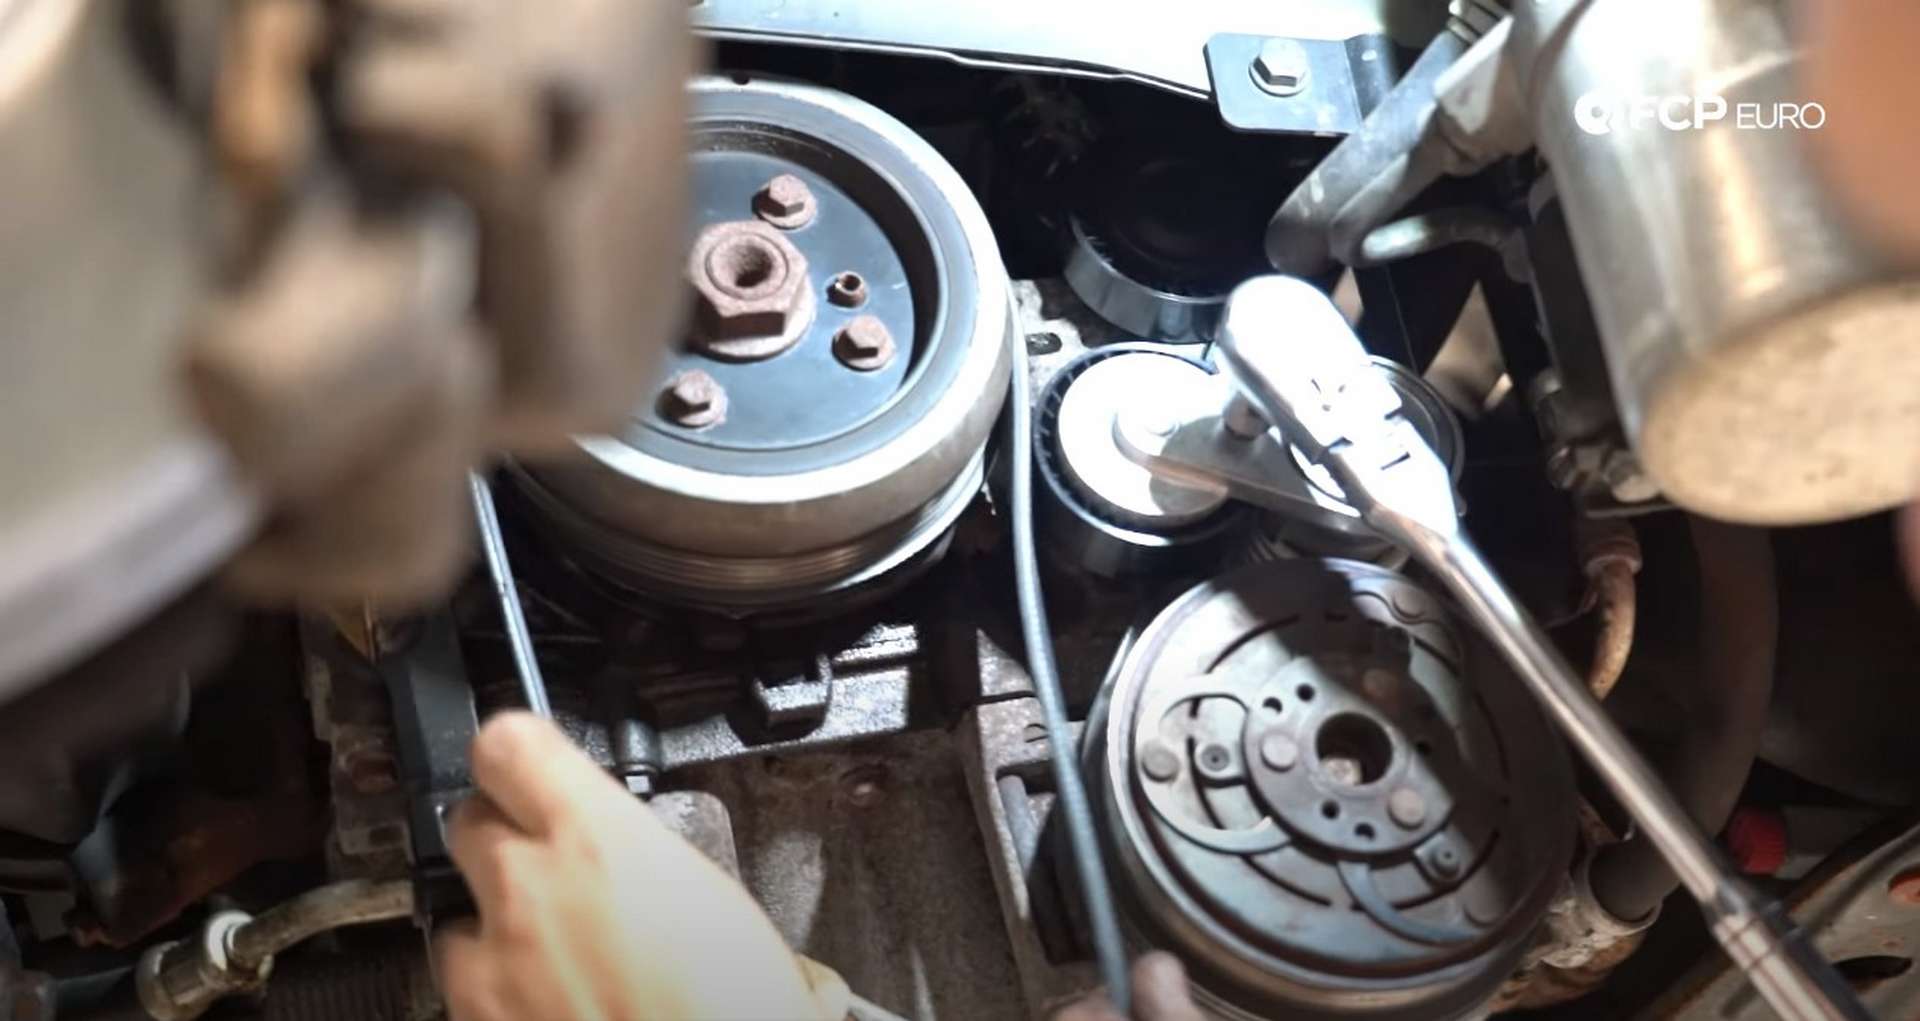
Step 2: Remove the belts
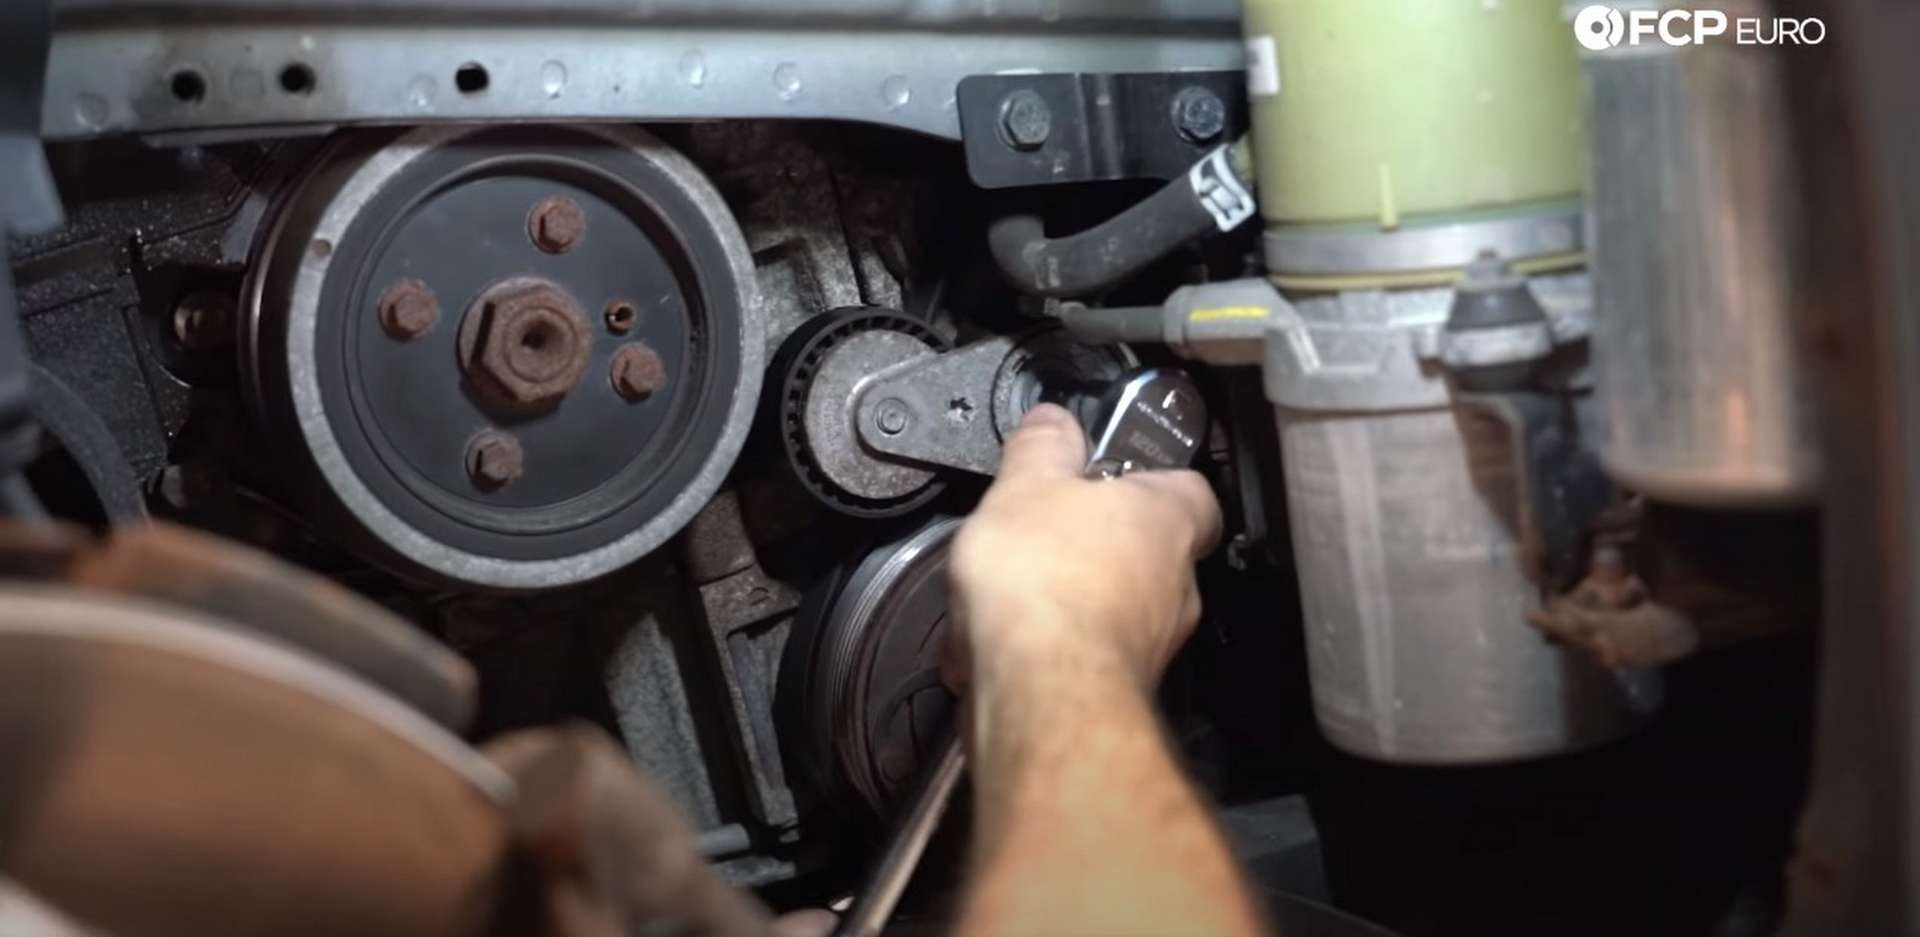
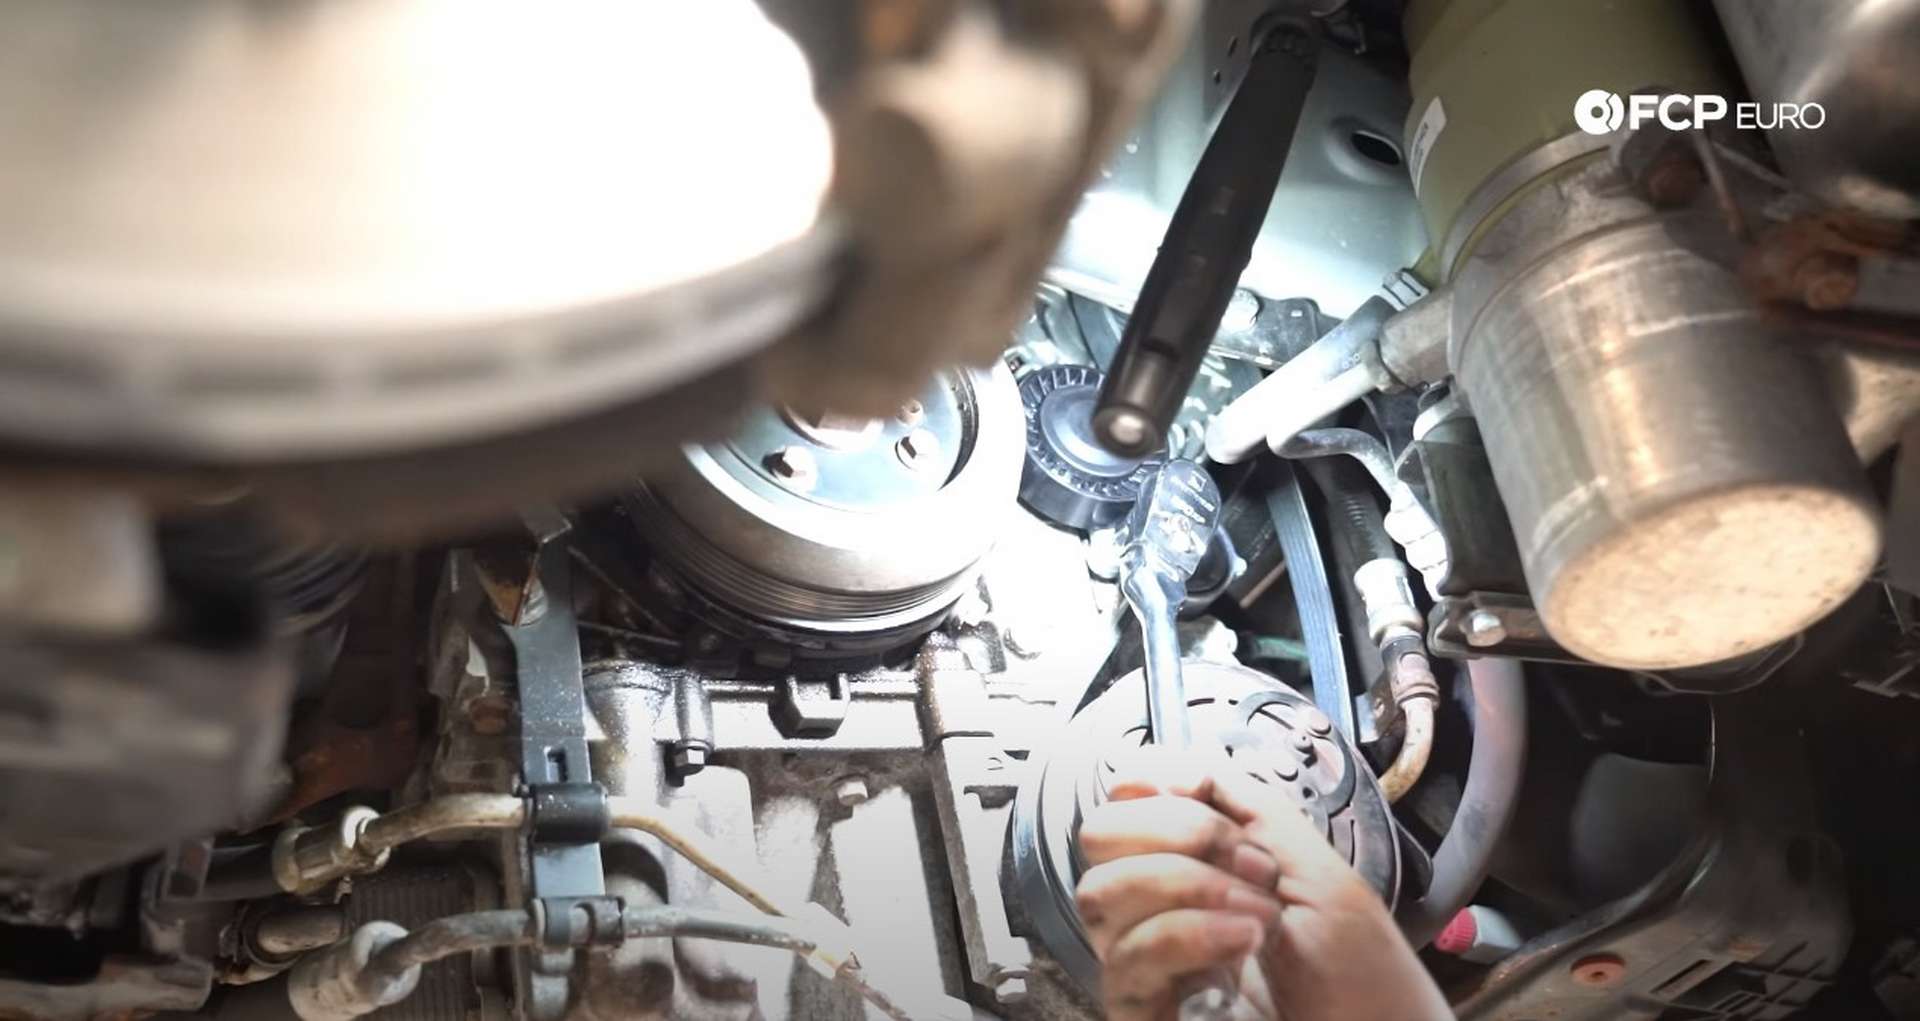
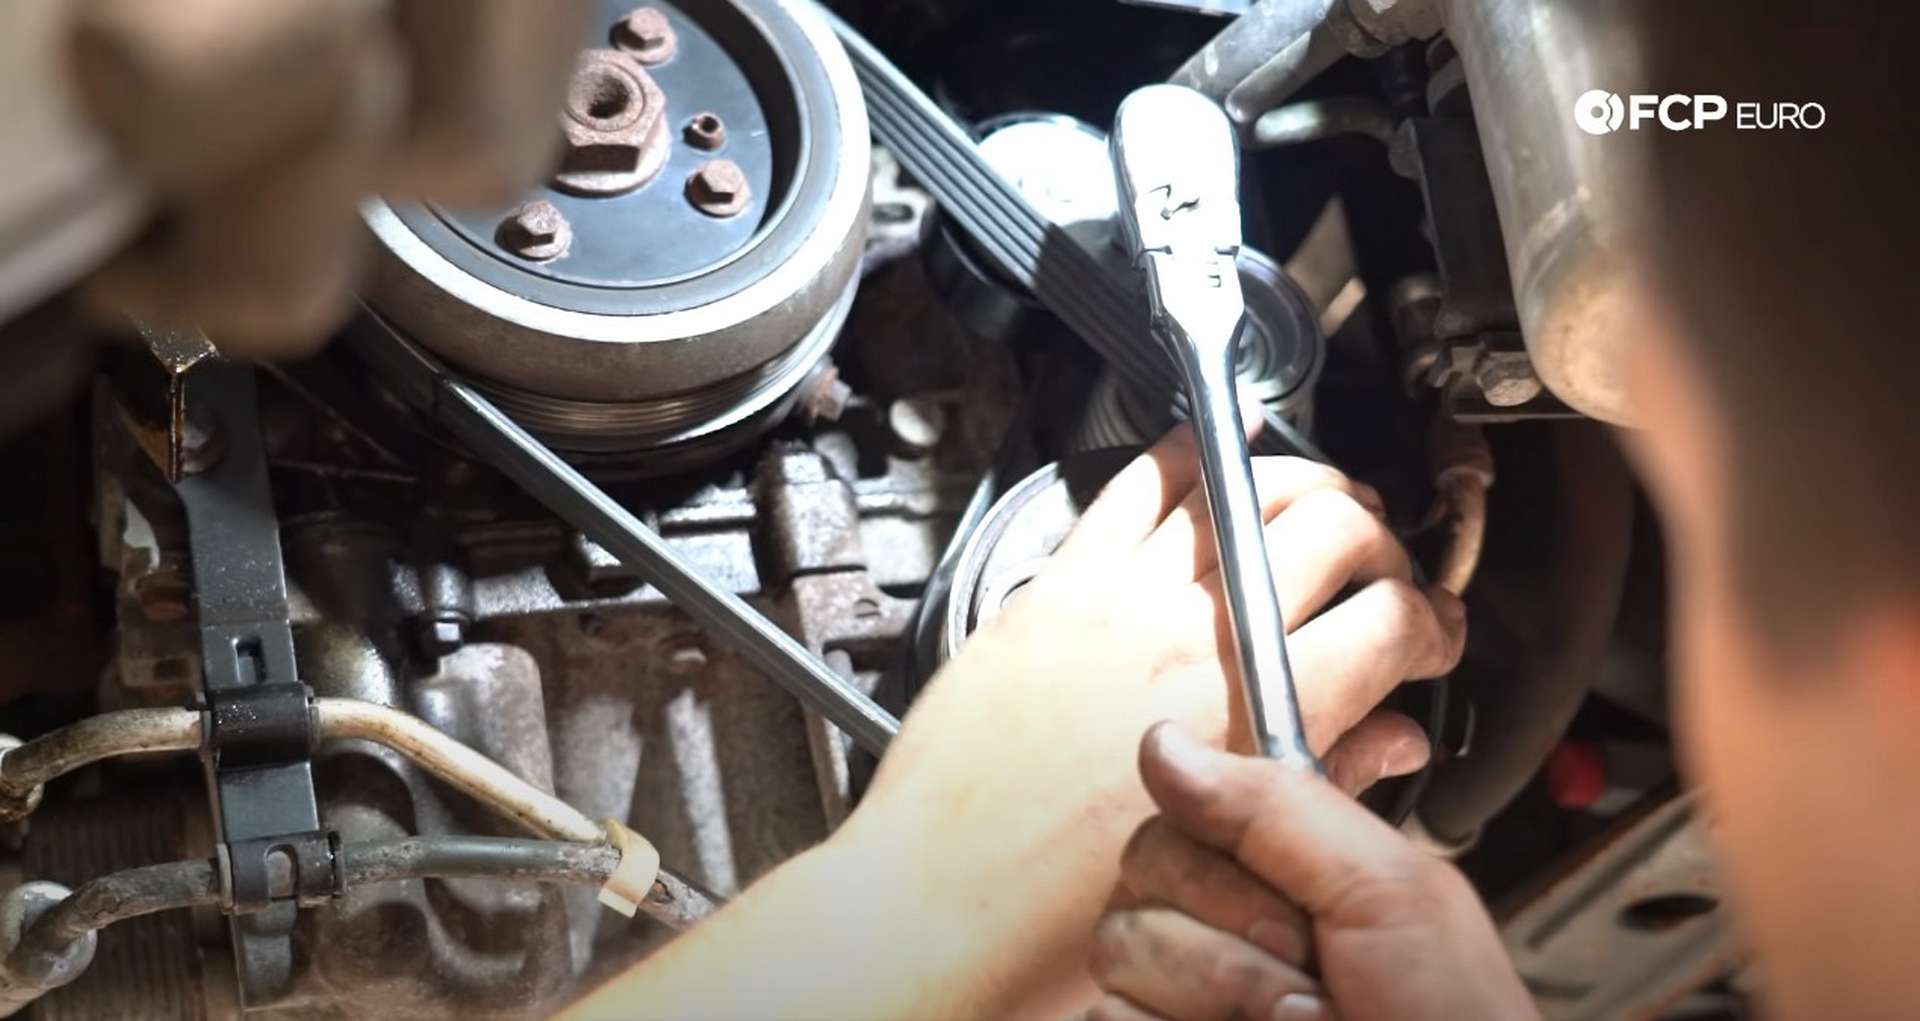
Now its time to remove the belts. Use a T50 socket with an extension to release the tension from the tensioner. Place the socket into the center of the tensioner and rotate it clockwise. Remove the belt and then release the tensioner.
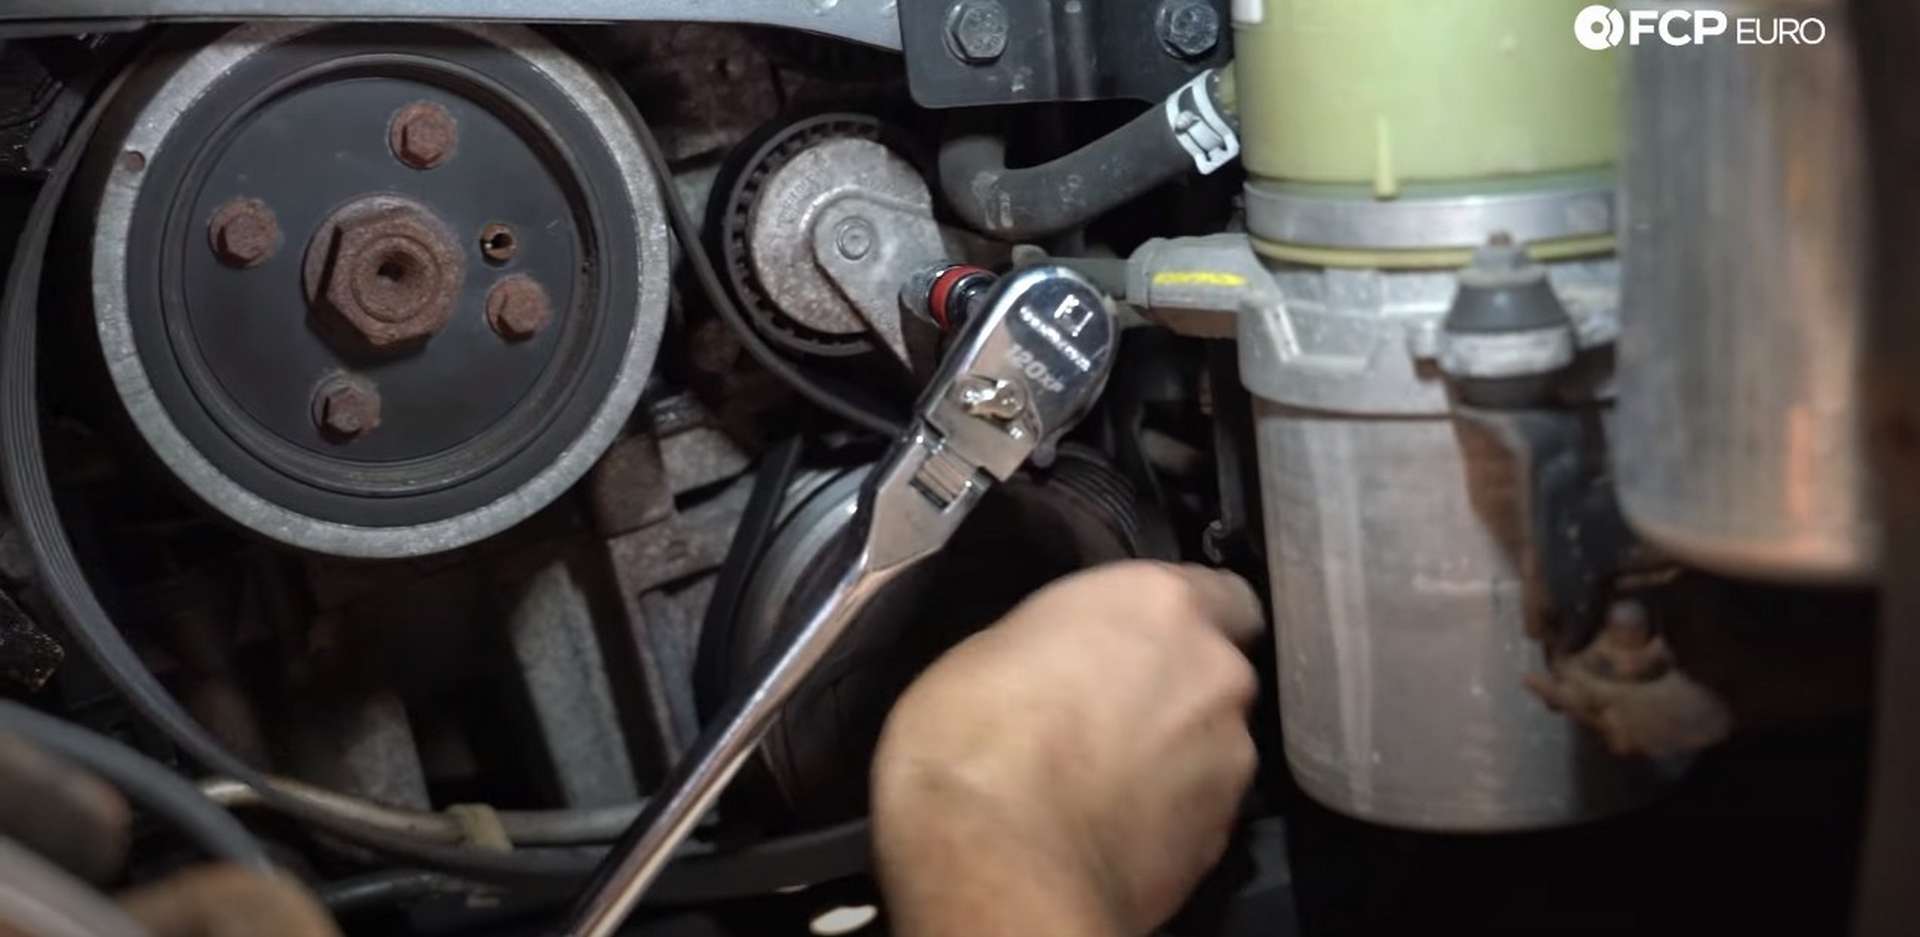
Then, remove the tensioner from the engine block with a 13mm socket.
Use the T50 socket to remove the tension from the inner belt by rotating the inner belt tensioner counterclockwise; then, remove the belt.
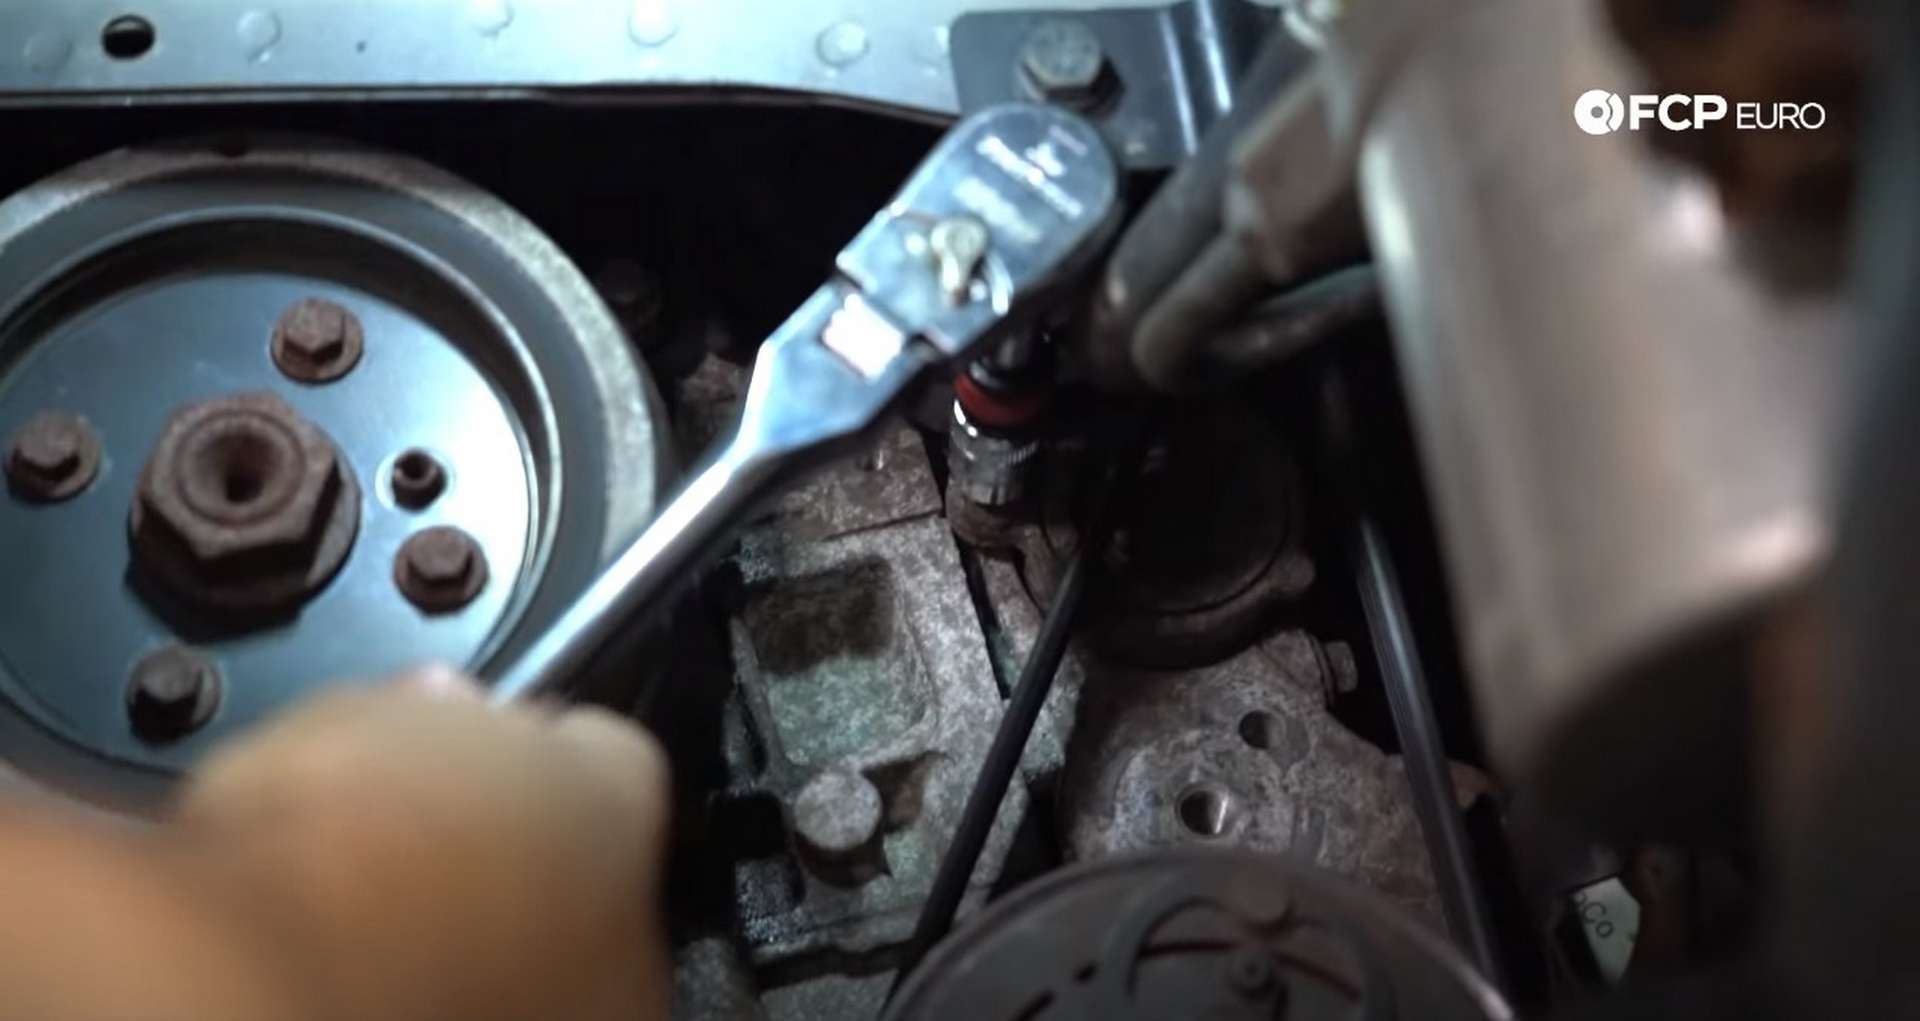
Remove the tensioner mounting bolt with a 13mm socket, but leave the tensioner in place.
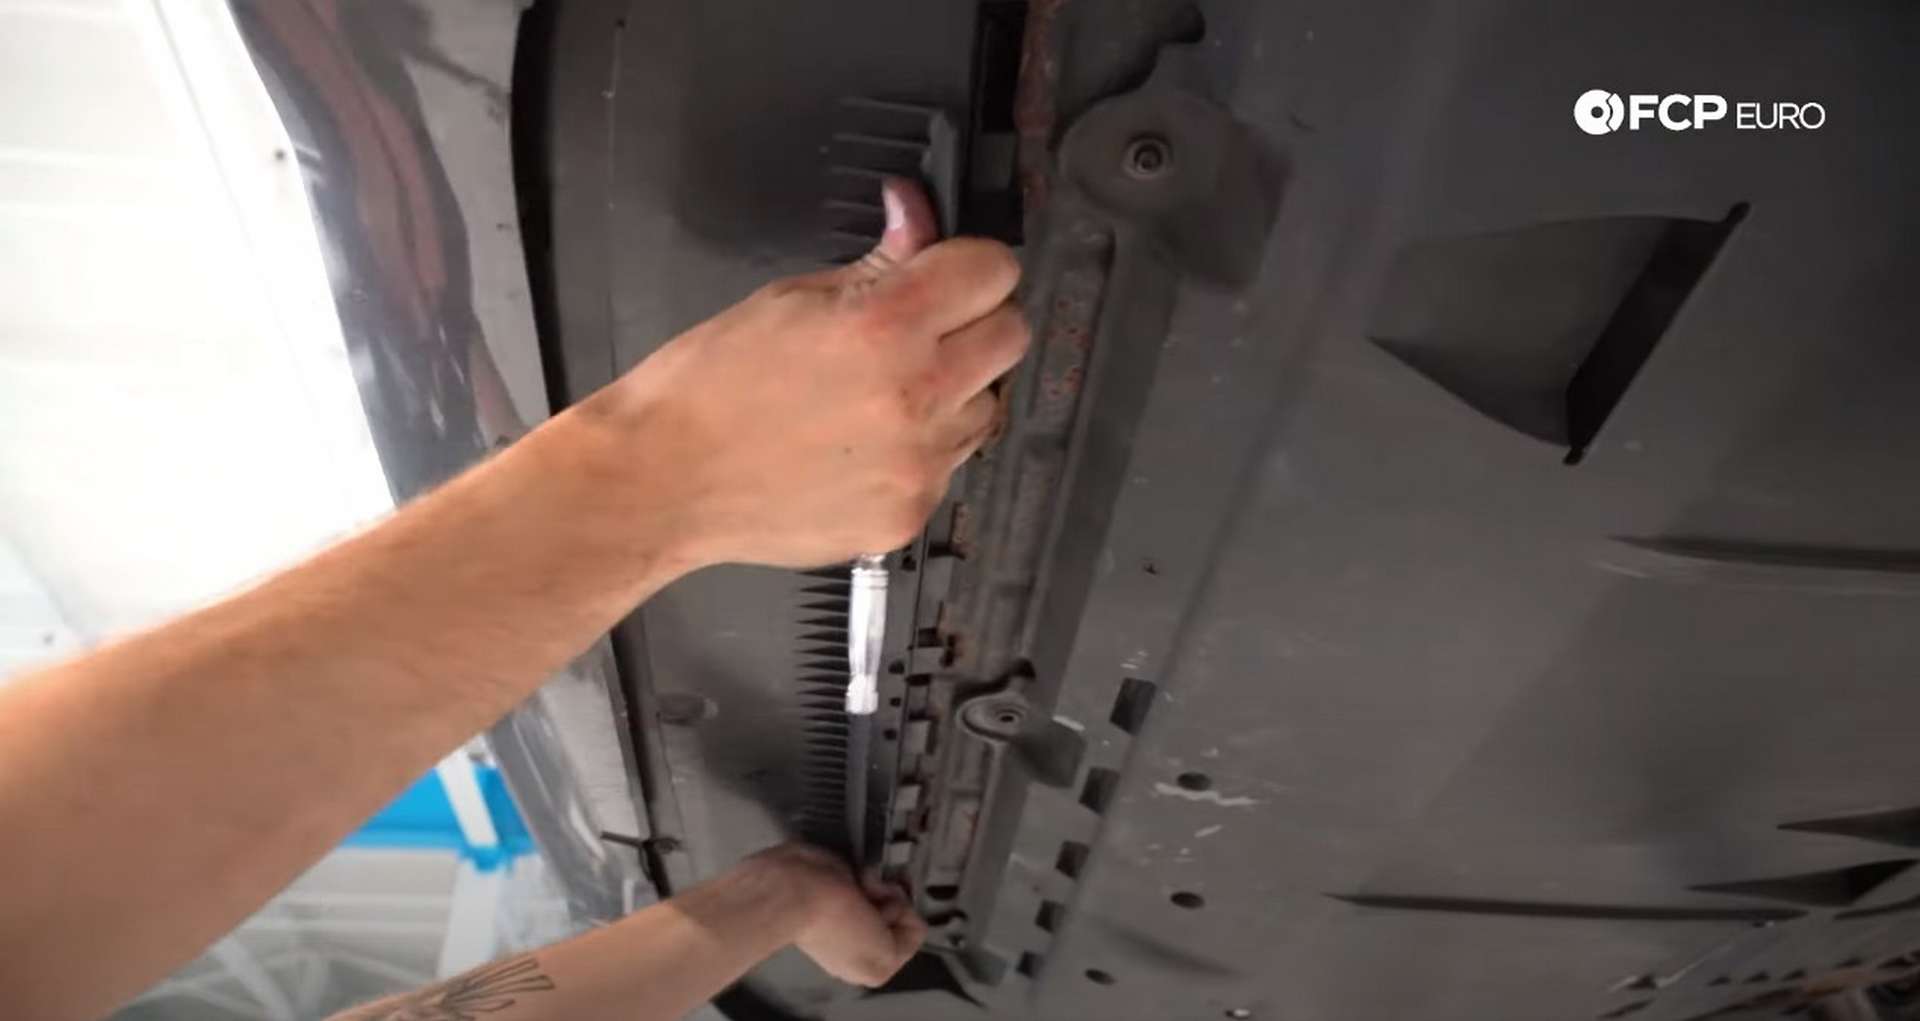
Step 3: Remove the belly pan and intake components
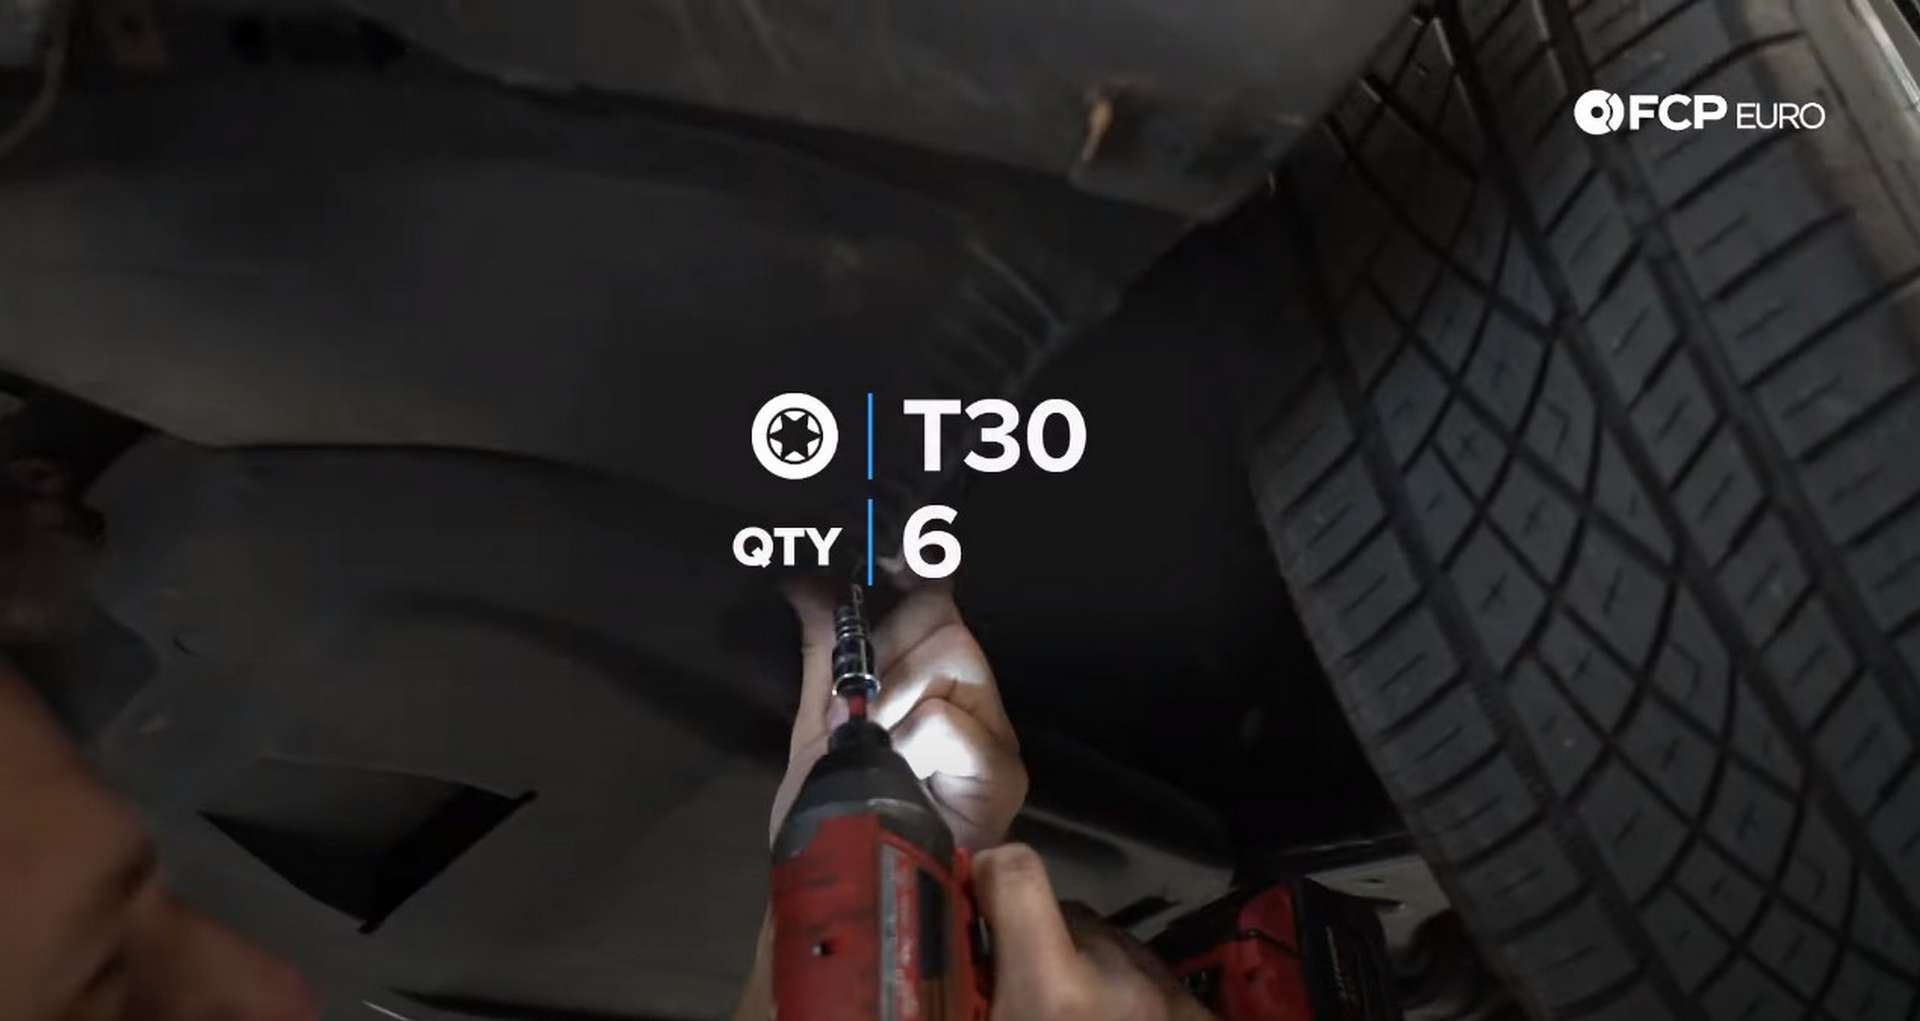
Use a T30 bit socket to remove the six fasteners holding the belly pan to the car's underside.
Remove the front underside air spoiler by removing the two T25 fasteners that mount it to the bottom of the bumper.
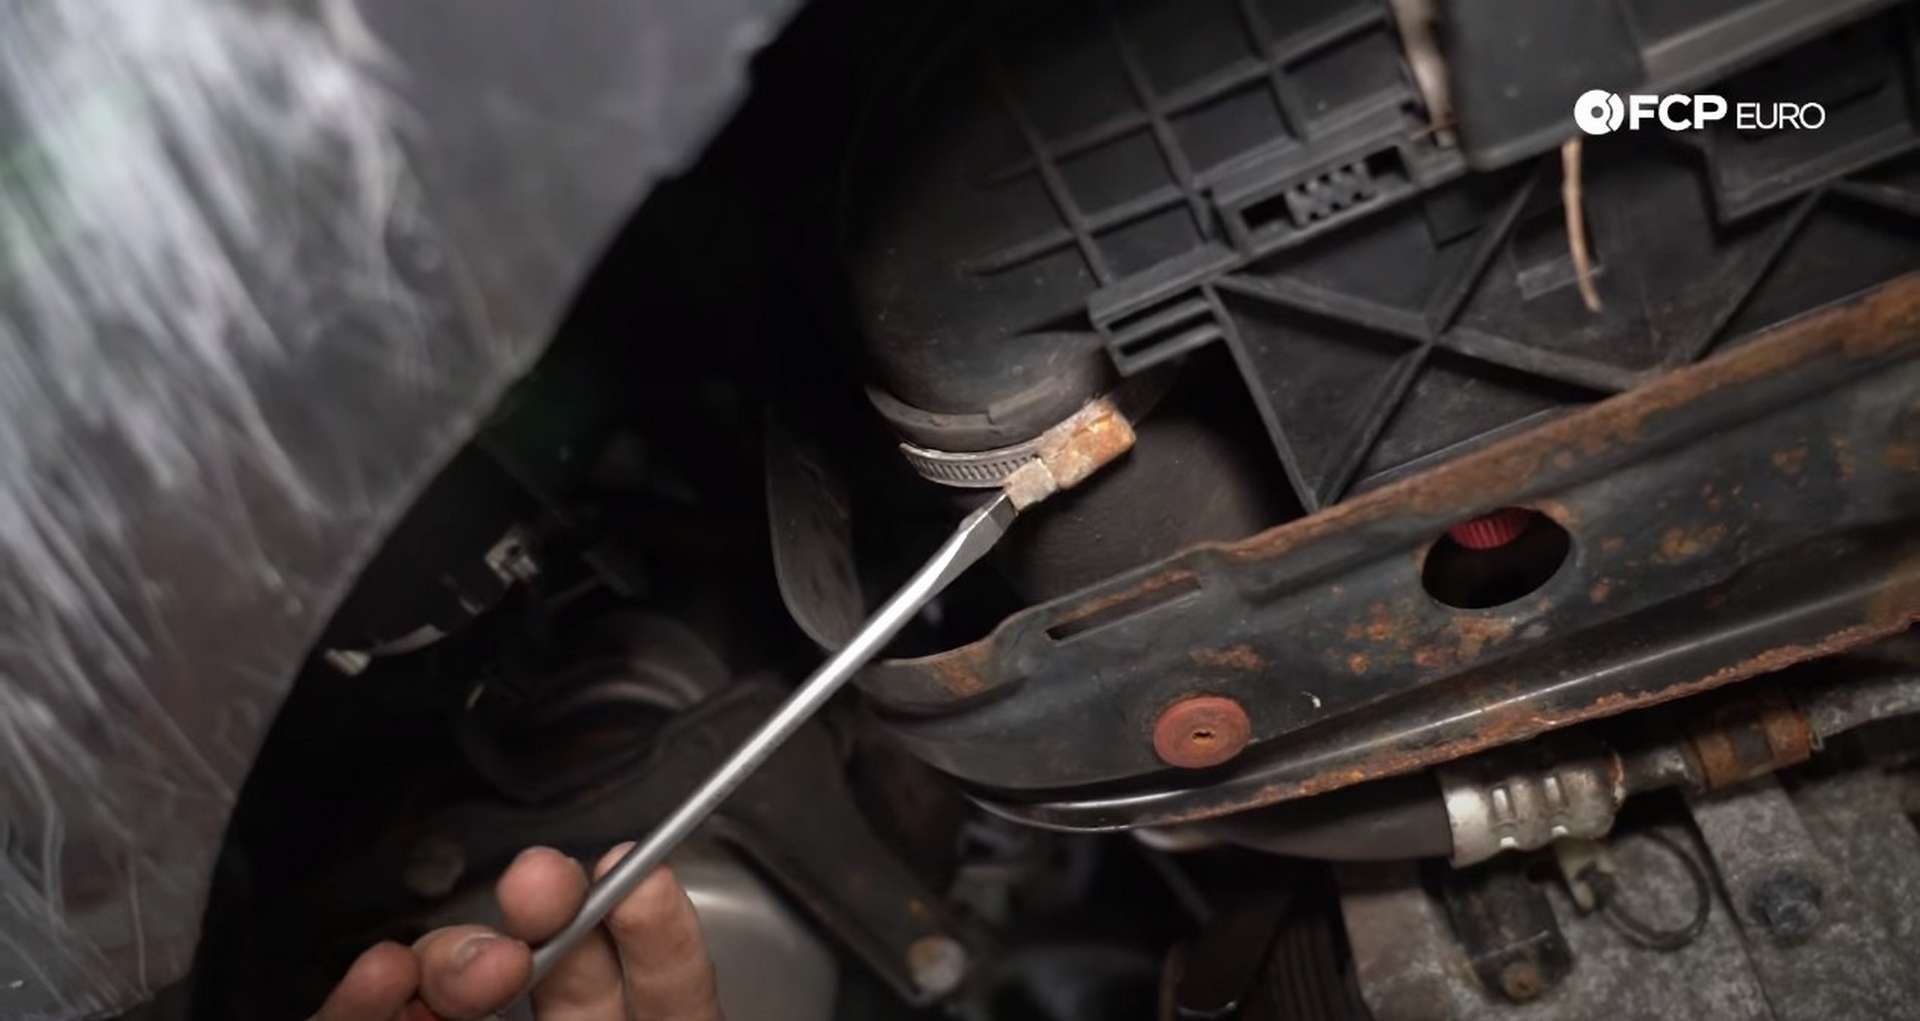
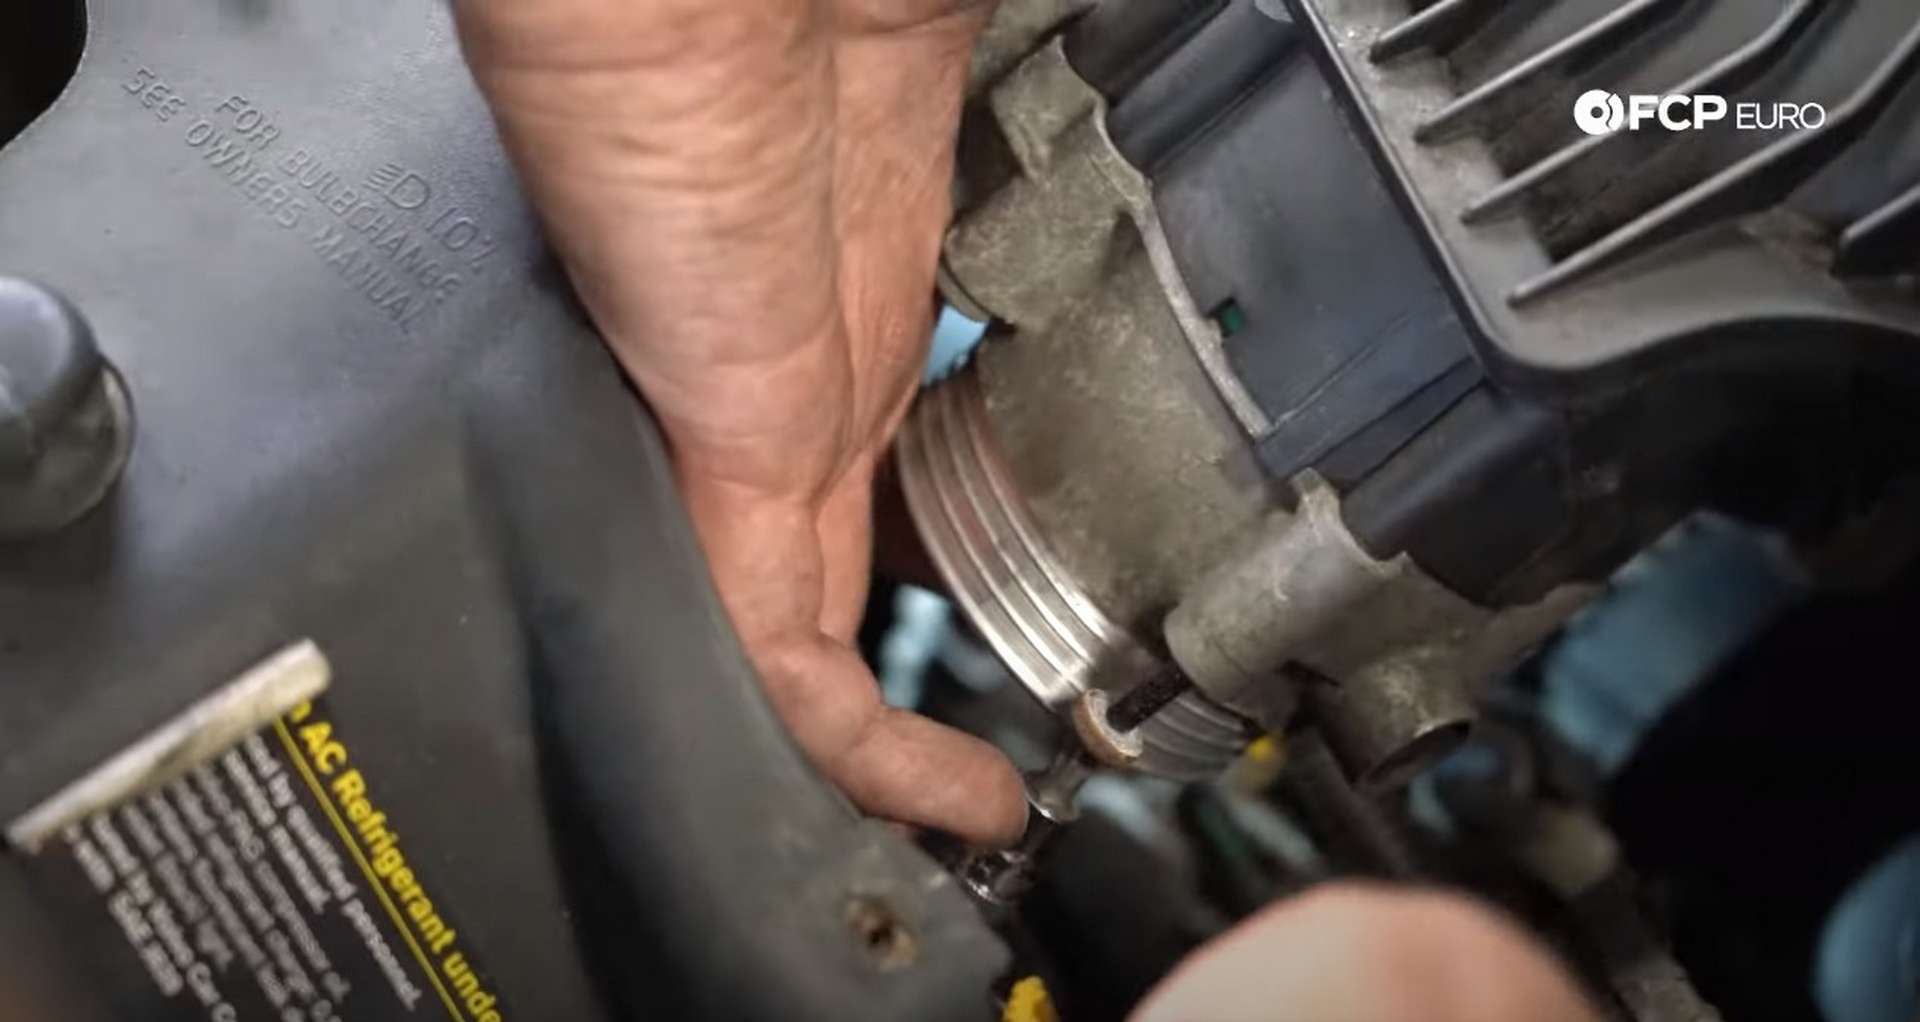
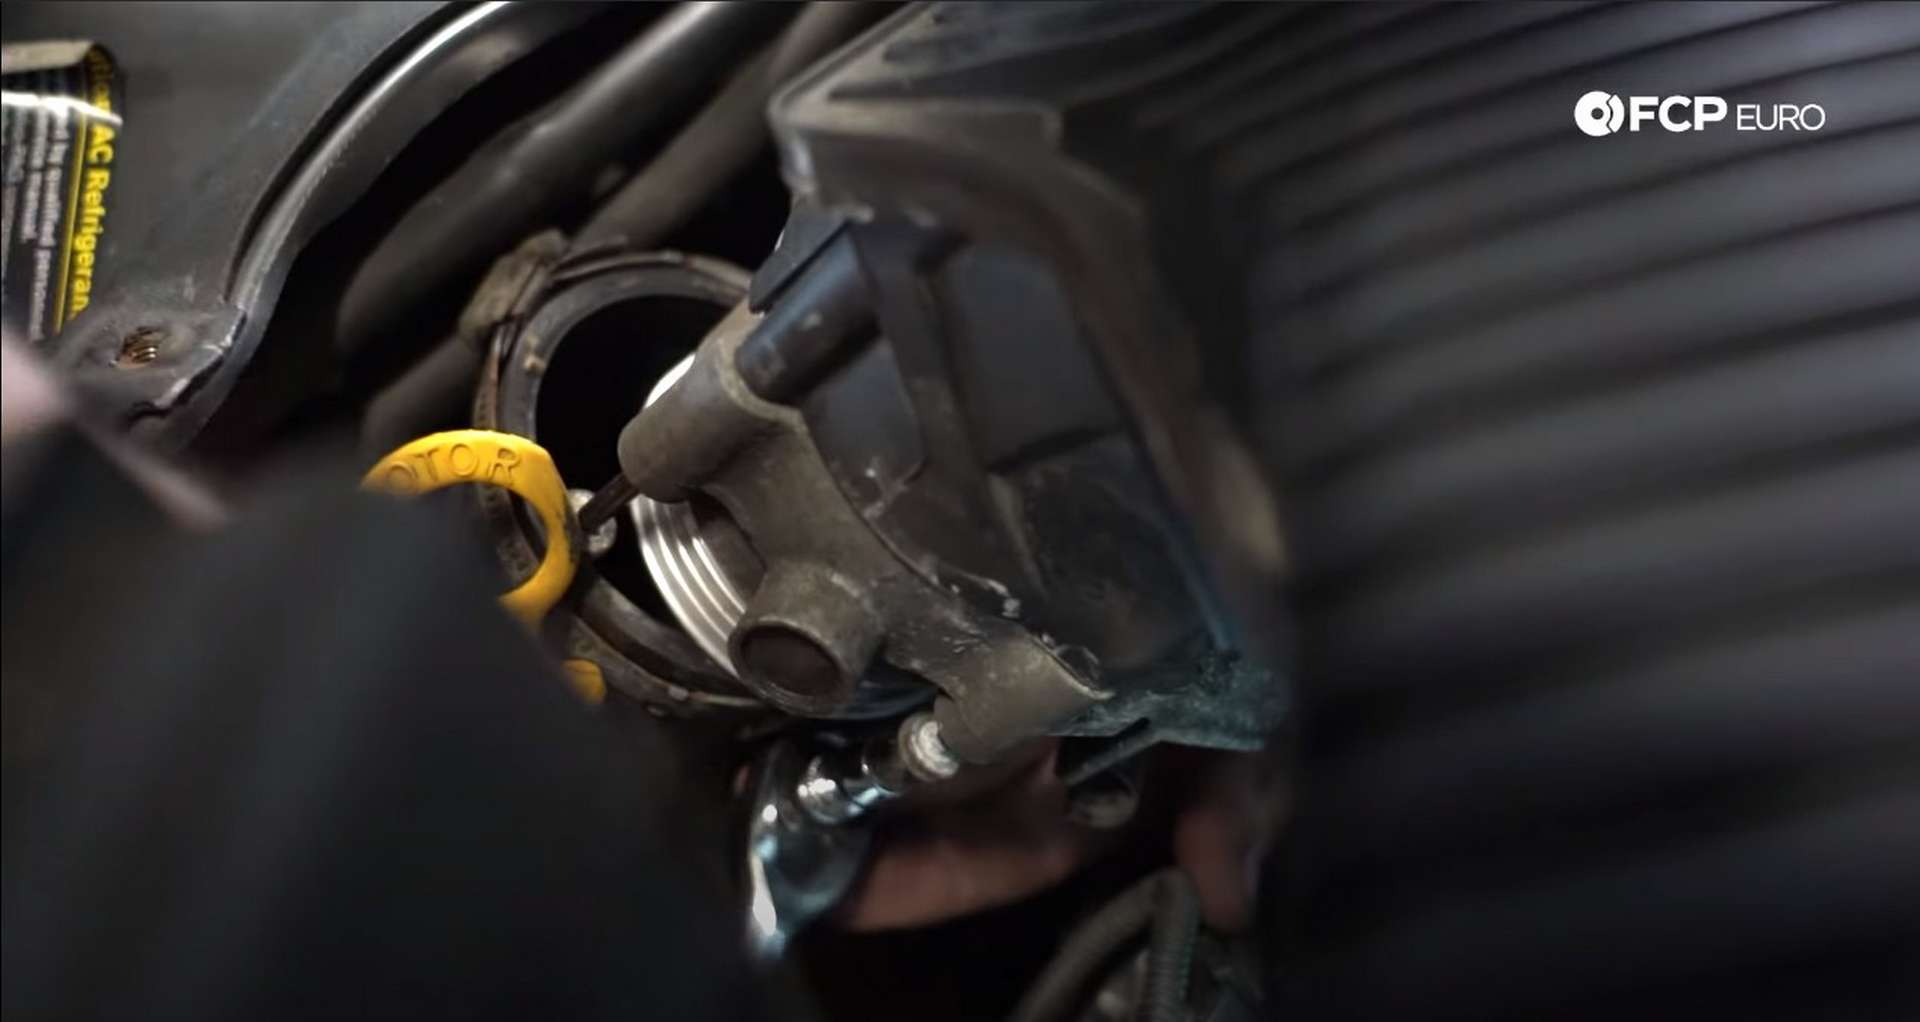
The charge pipe is what takes the charged intercooler air and feeds it to the throttle body. Loosen the clamp that holds the pipe onto the intercooler with a flathead-screw driver or a 7mm socket. Then, twist the pipe back and forth while pulling to work it off of the intercooler.
Next, head back into the engine bay. Lift on the front of the battery cover and then pull out, removing it. Use a 10mm socket on the terminal closest to the firewall to remove the battery's negative cable.
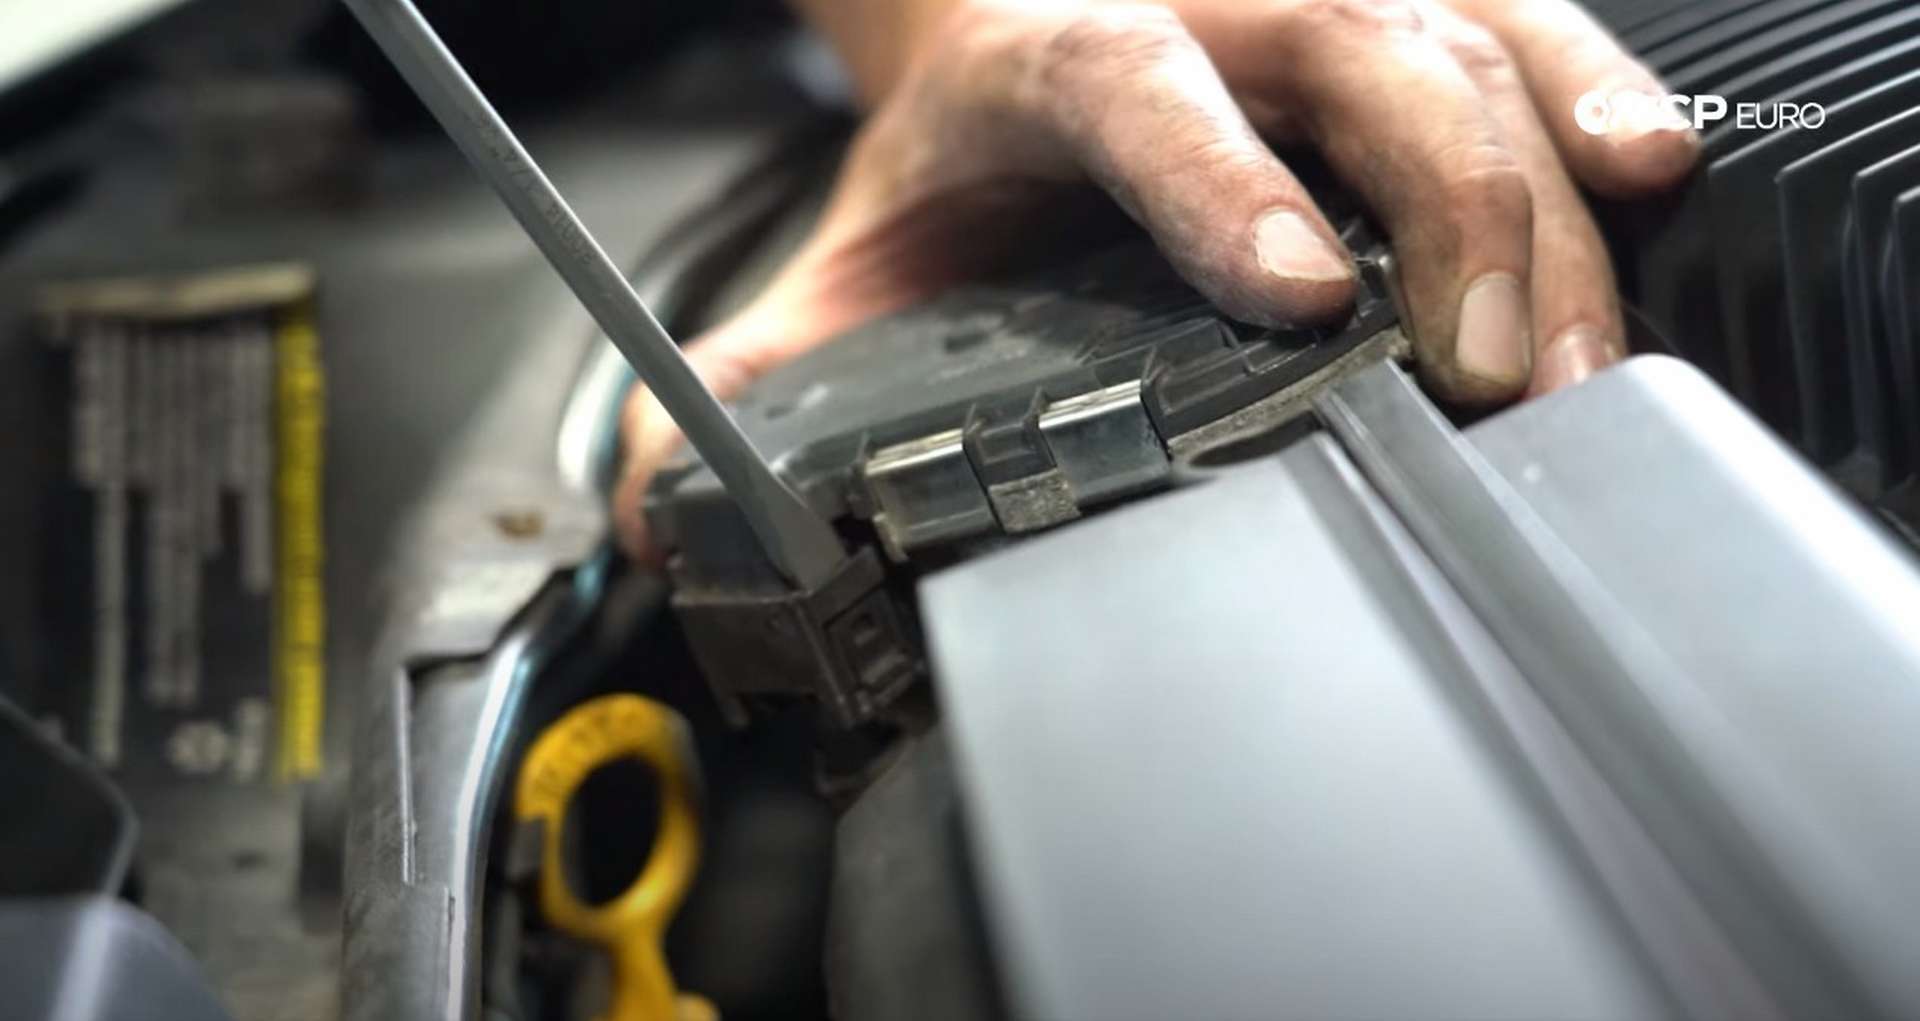
After that, remove the two airbox snorkel fasteners with an 8mm socket. Pull up on the front of the snorkel to free it of the two locking tabs and then pull it up and out of the engine bay. Pull outward on the 90° pipe that connects the snorkel to the airbox to remove it from the airbox.

Next, use a 7mm socket or flathead screwdriver to loosen the clamp that holds the charge pipe to the throttle body. Pull the charge pipe off of the throttle body. Then, use an 8mm socket to remove the bolt that secures the oil dipstick tube to the oil filter housing. Spin the dipstick tube around in a way that gives you more room to remove the charge pipe and to have a more precise shot at the alternator.
Use a T30 bit socket and remove the four bolts that secure the throttle body to the intake manifold. Remove the reusable throttle body gasket and unplug the throttle body from the wiring harness. Use a flathead-screwdriver to help remove the wiring harness plug if you have trouble removing it with your fingers.
With the throttle body removed, the charge pipe will have enough clearance to be removed. Wiggle the charge pipe around until it clears anything in its way and then remove it from the engine bay.
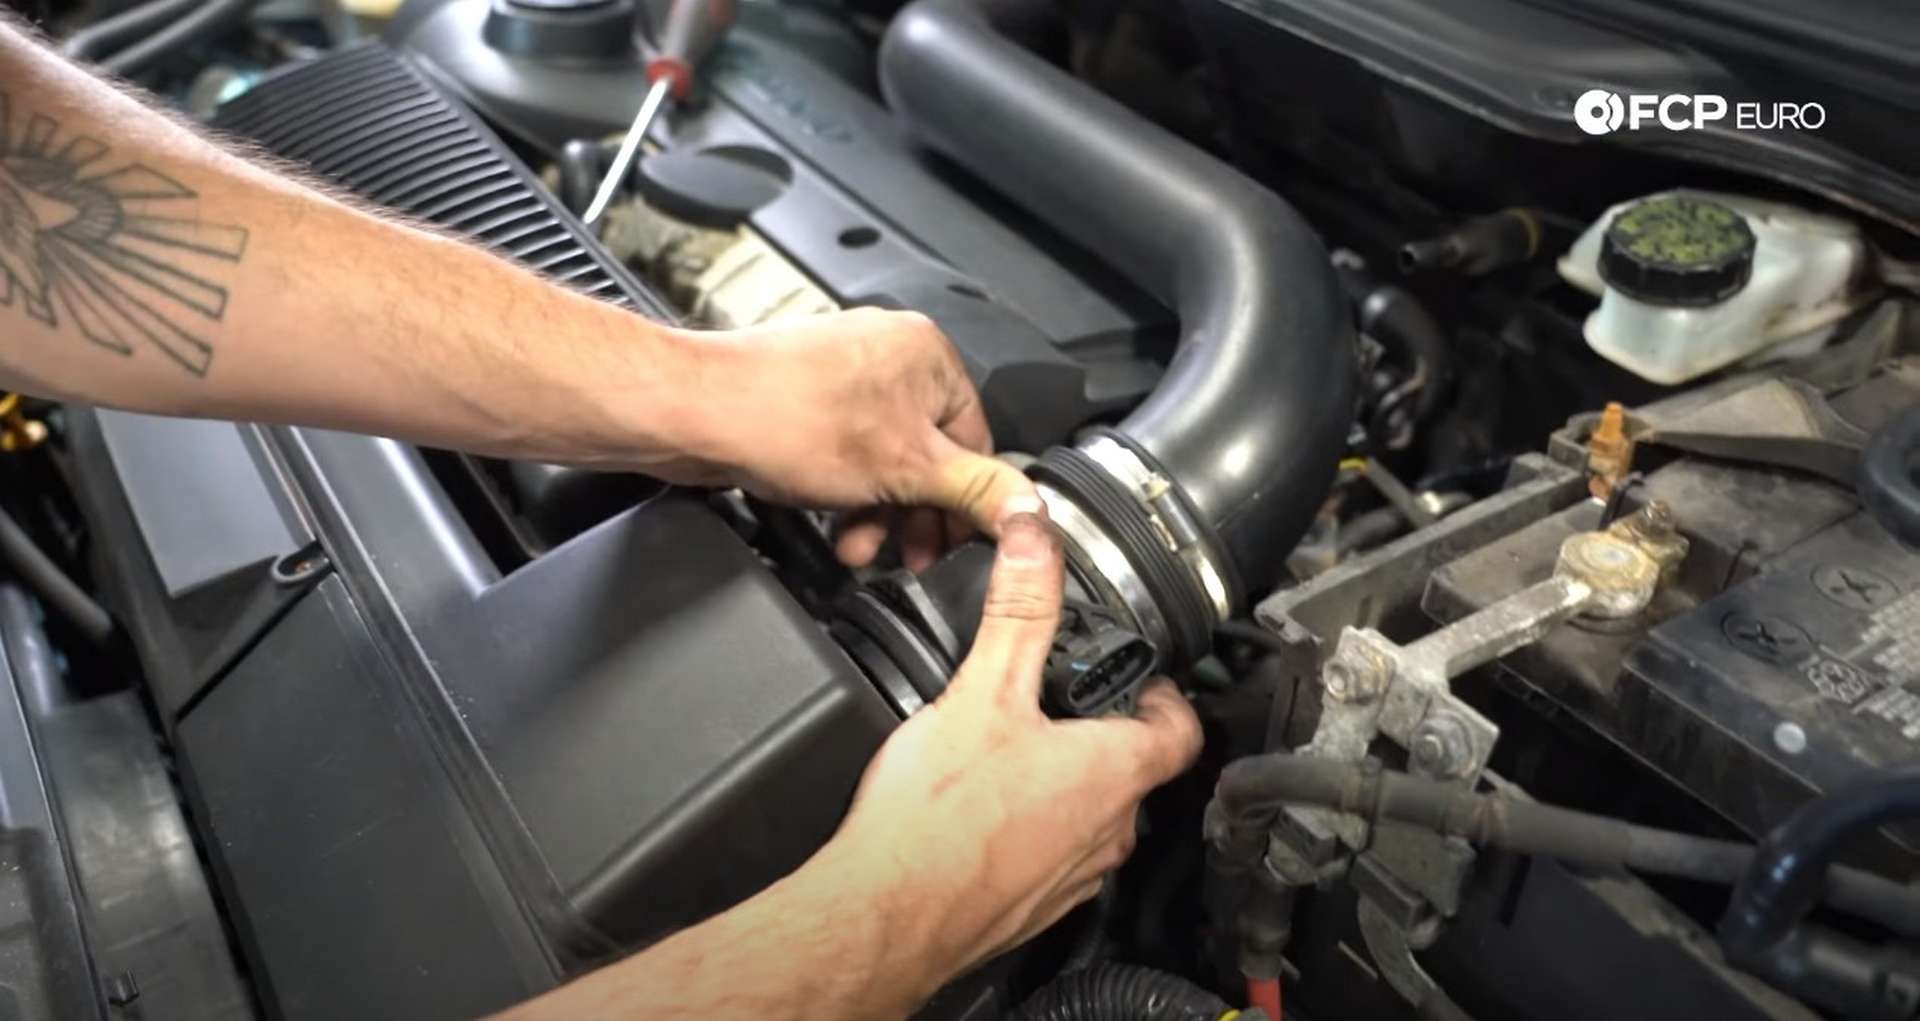
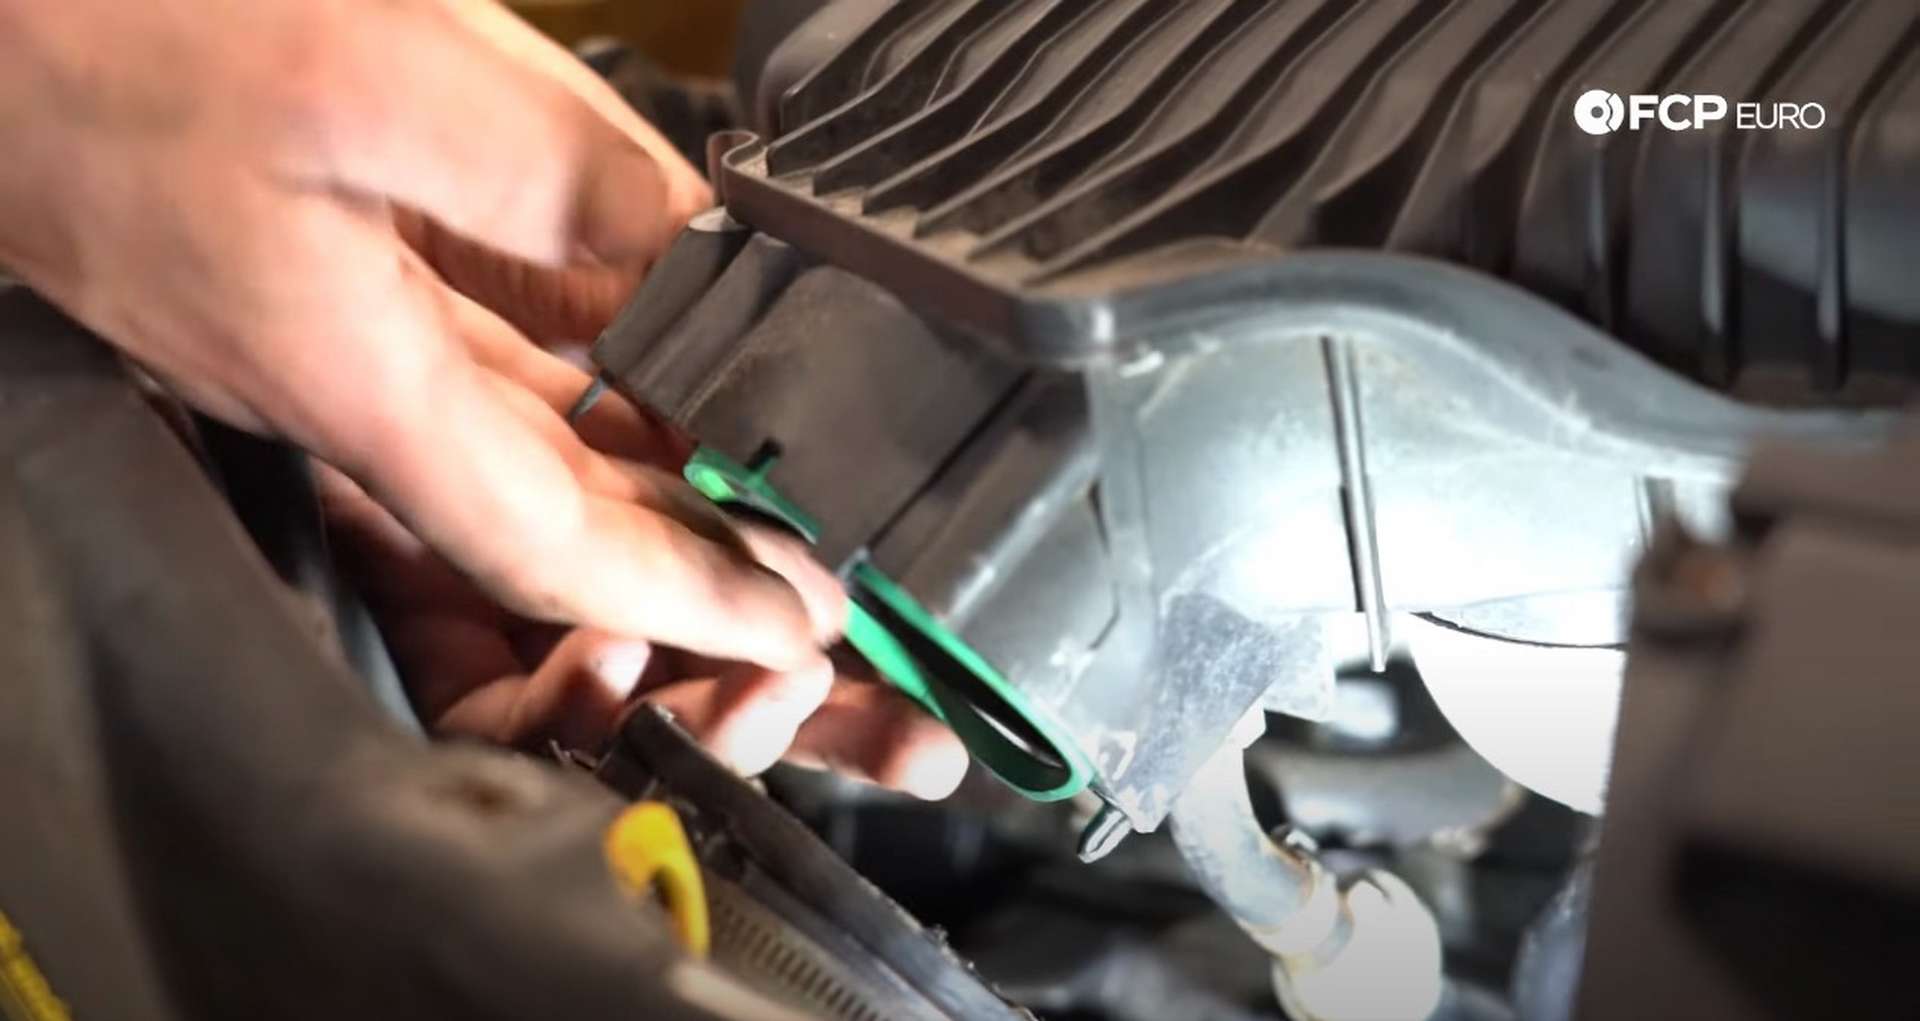
Push in on the tab on the bottom of the plug for the mass airflow sensor to remove it from the housing. Loosen the clamp connecting the mass airflow sensor housing to the intake pipe behind it with a flathead screwdriver or a 7mm socket, and then remove the two screws that hold the sensor housing to the airbox with a T25 bit socket.
Pull up on the airbox to remove it from its isolating grommets after the sensor housing is removed. Slide the airbox towards the driver's side of the engine bay to allow more room for the alternator removal. Remove the ECM cover on the front of the airbox to give the airbox to more room to move.
Step 4: Replace the alternator
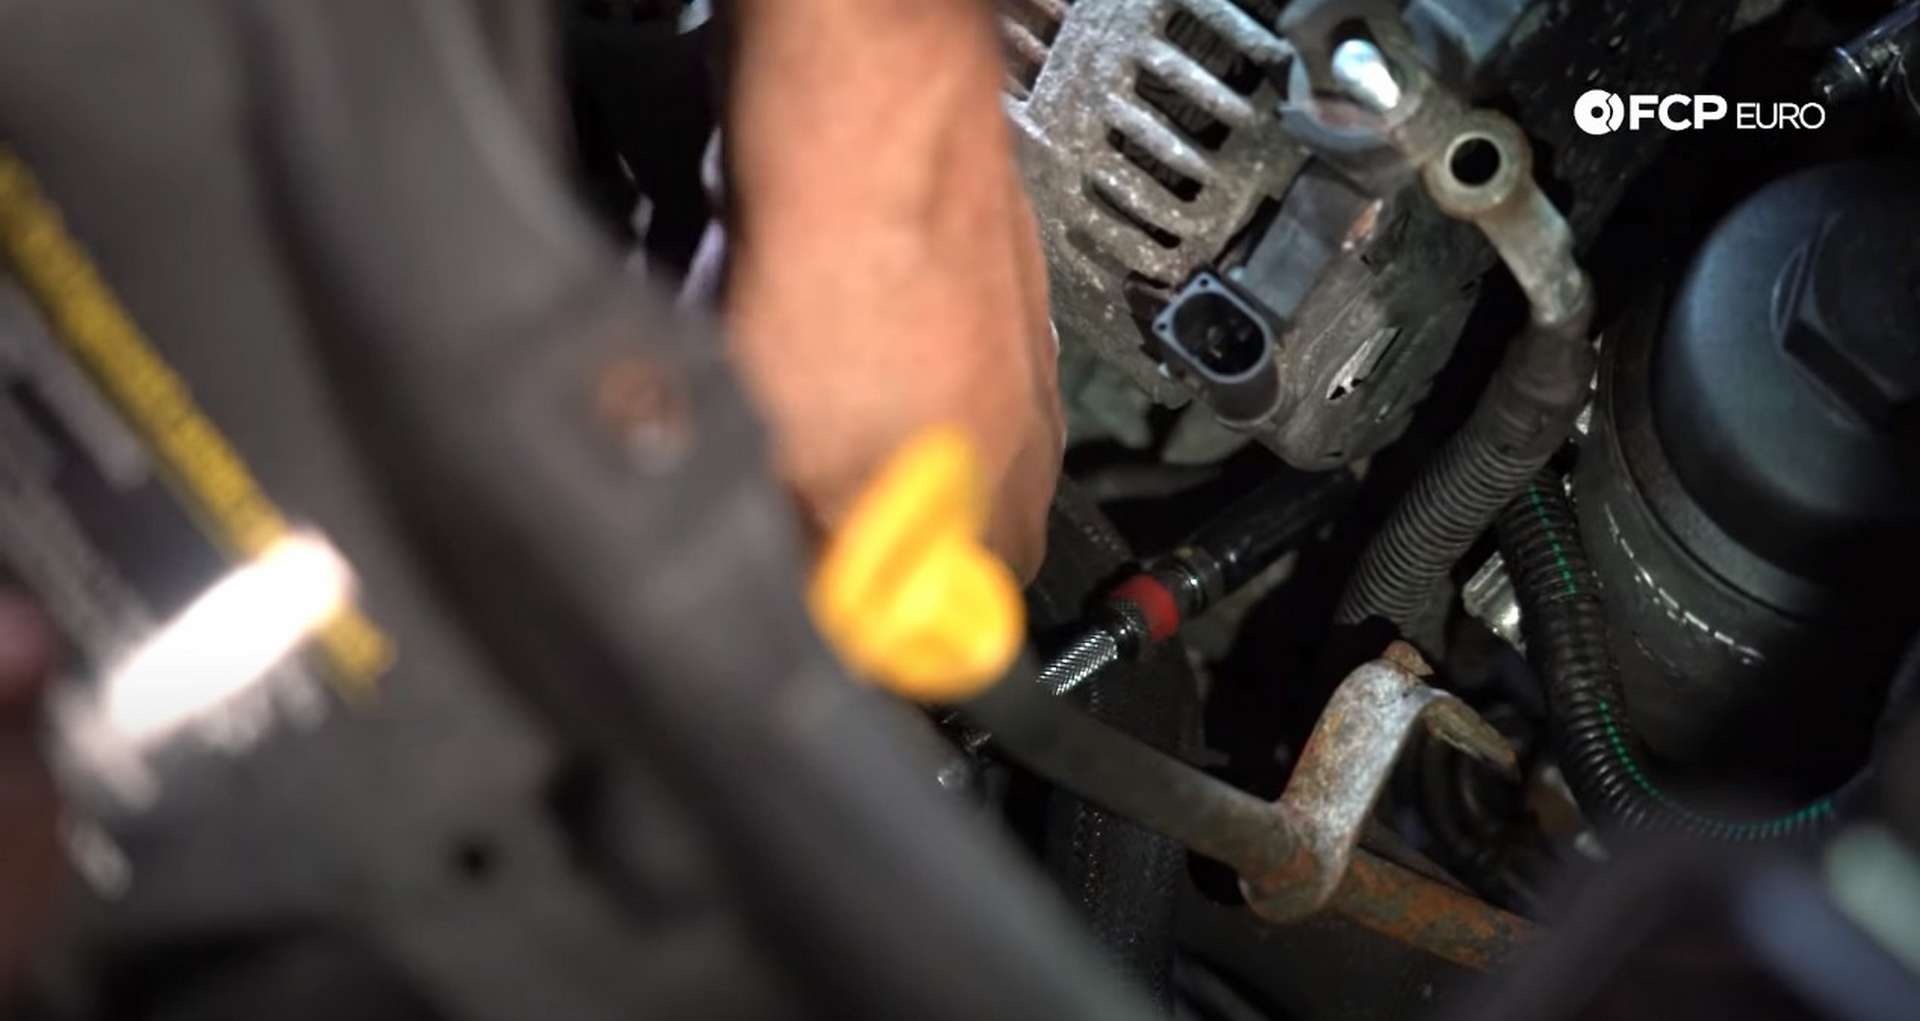
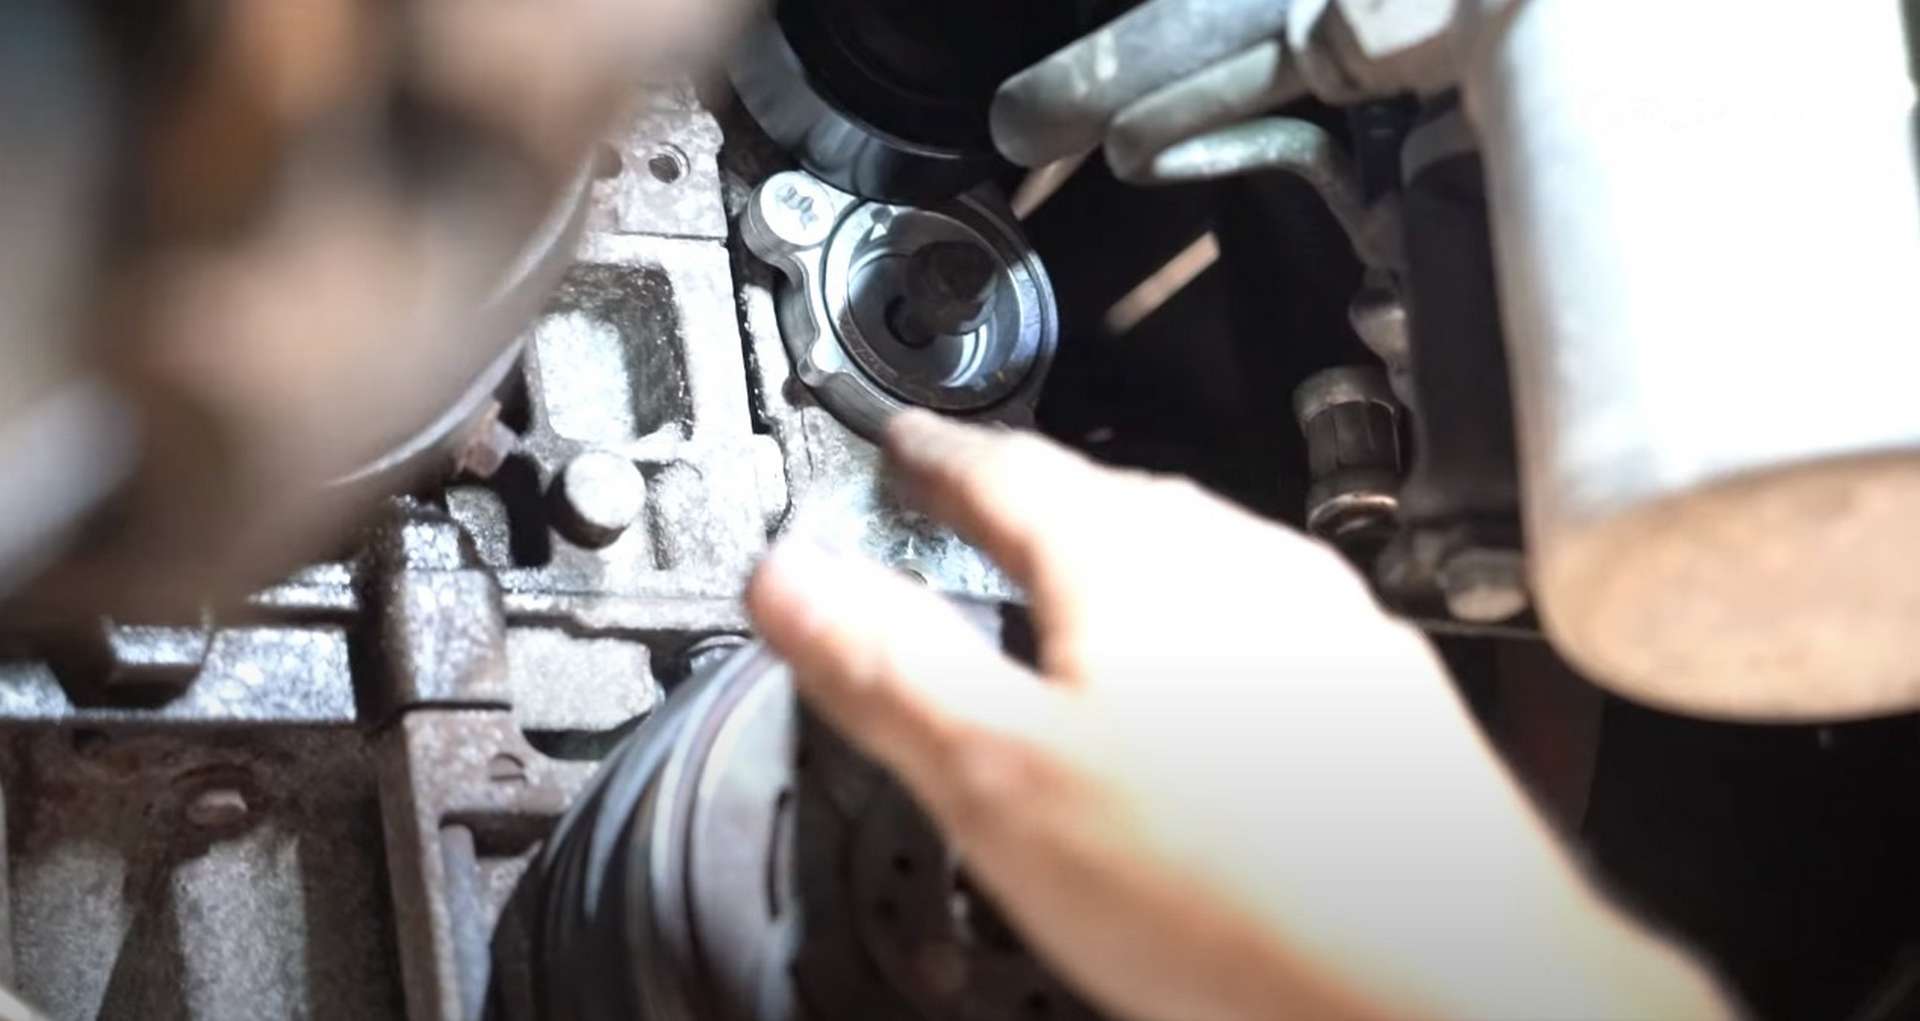
On top of the alternator is its main power lead. Use a pick to remove the protective cap and remove the nut that secures the lead with a 13mm socket. Remove the lead from the stud. Next to the main power stud is the plug for the voltage regulator. Remove the plug and push the harness out of the way.
Three bolts secure the alternator to the engine block. Use a 10mm socket to remove the bolts.
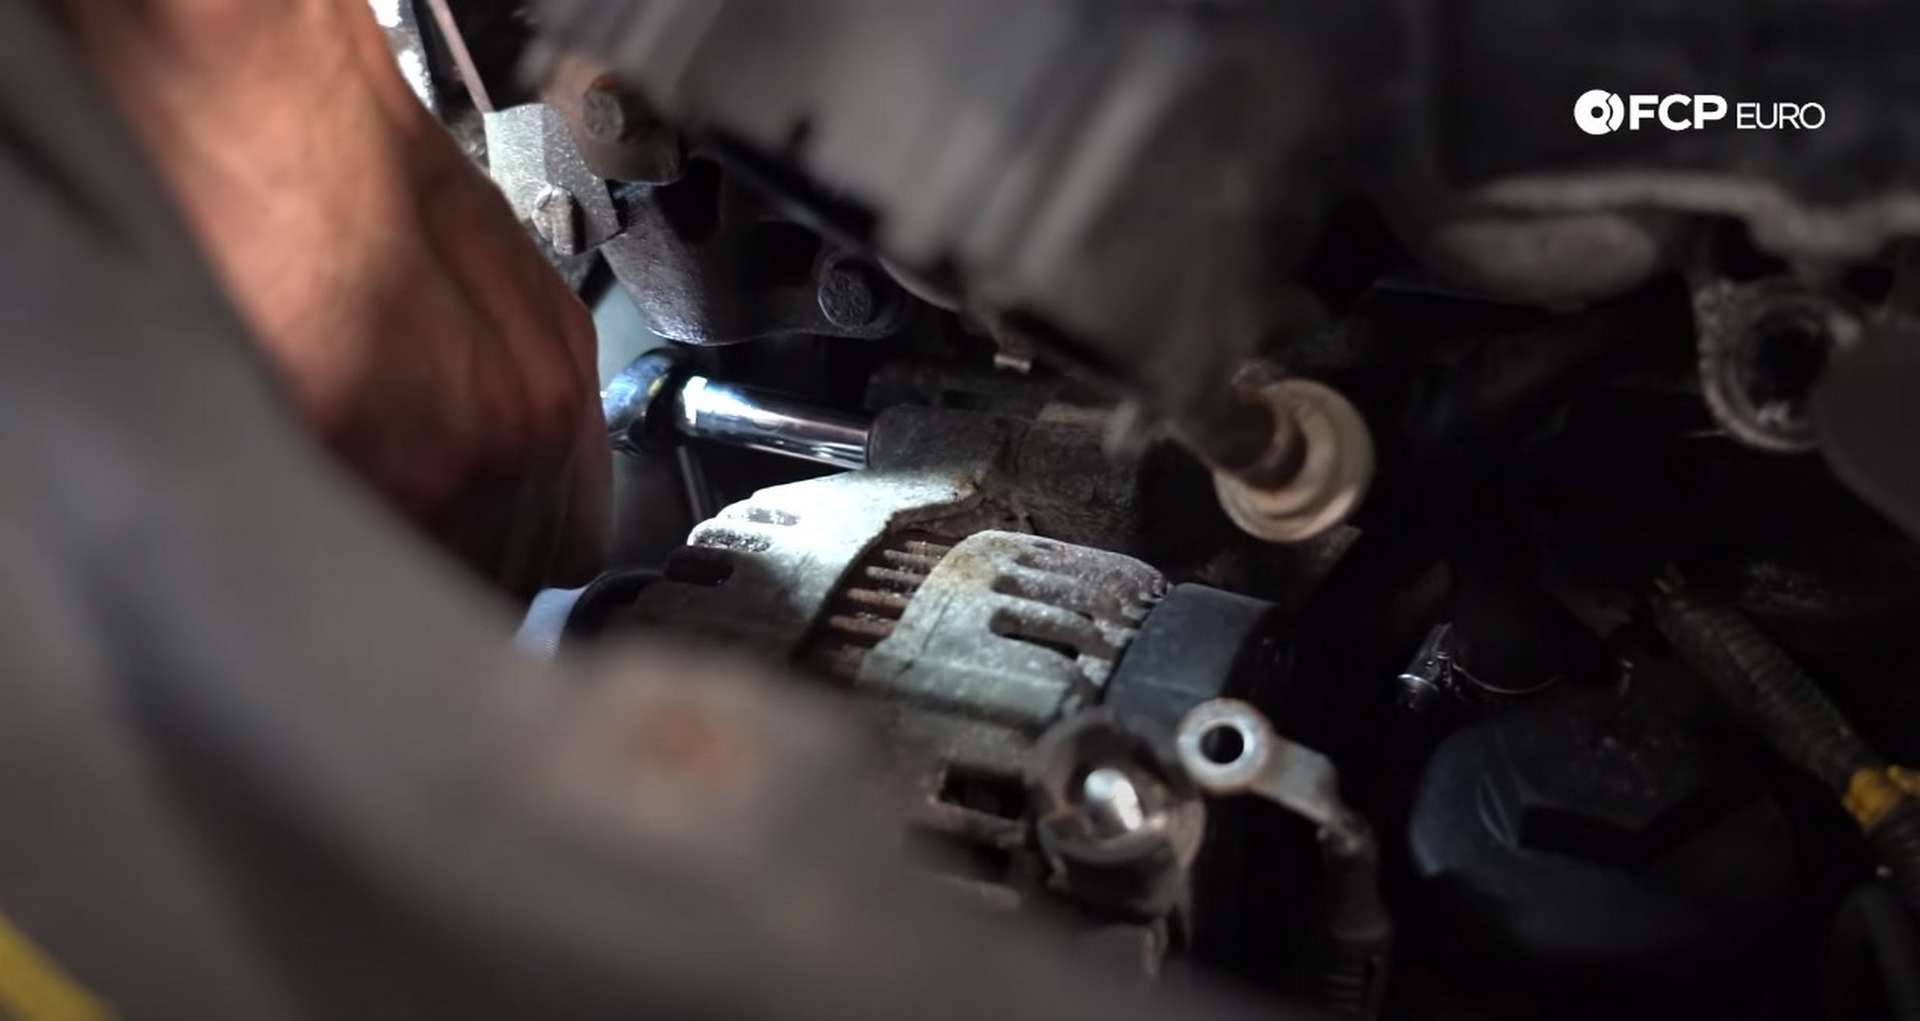
The top bolt can be visible, but you'll need to feel around under the alternator to find the bottom two heads.
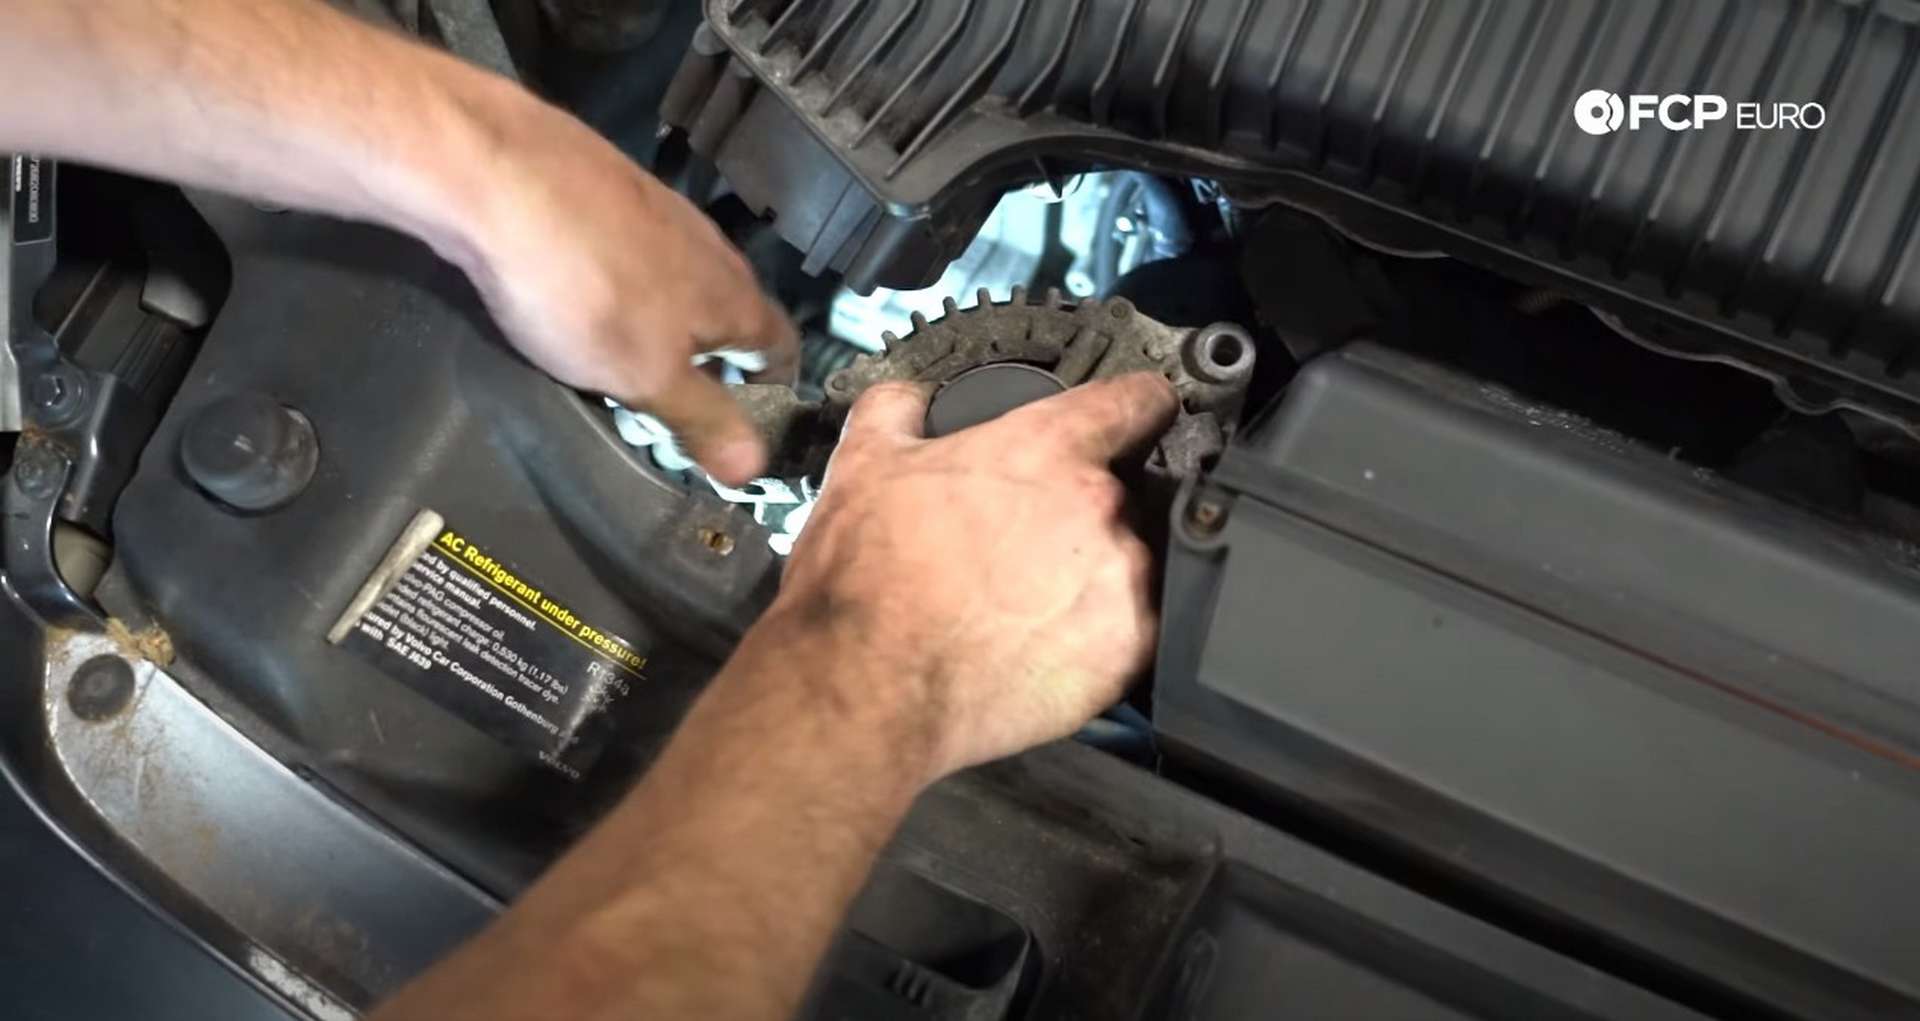
Rotate the alternator around so that the pulley is facing up and then remove it from the engine bay.
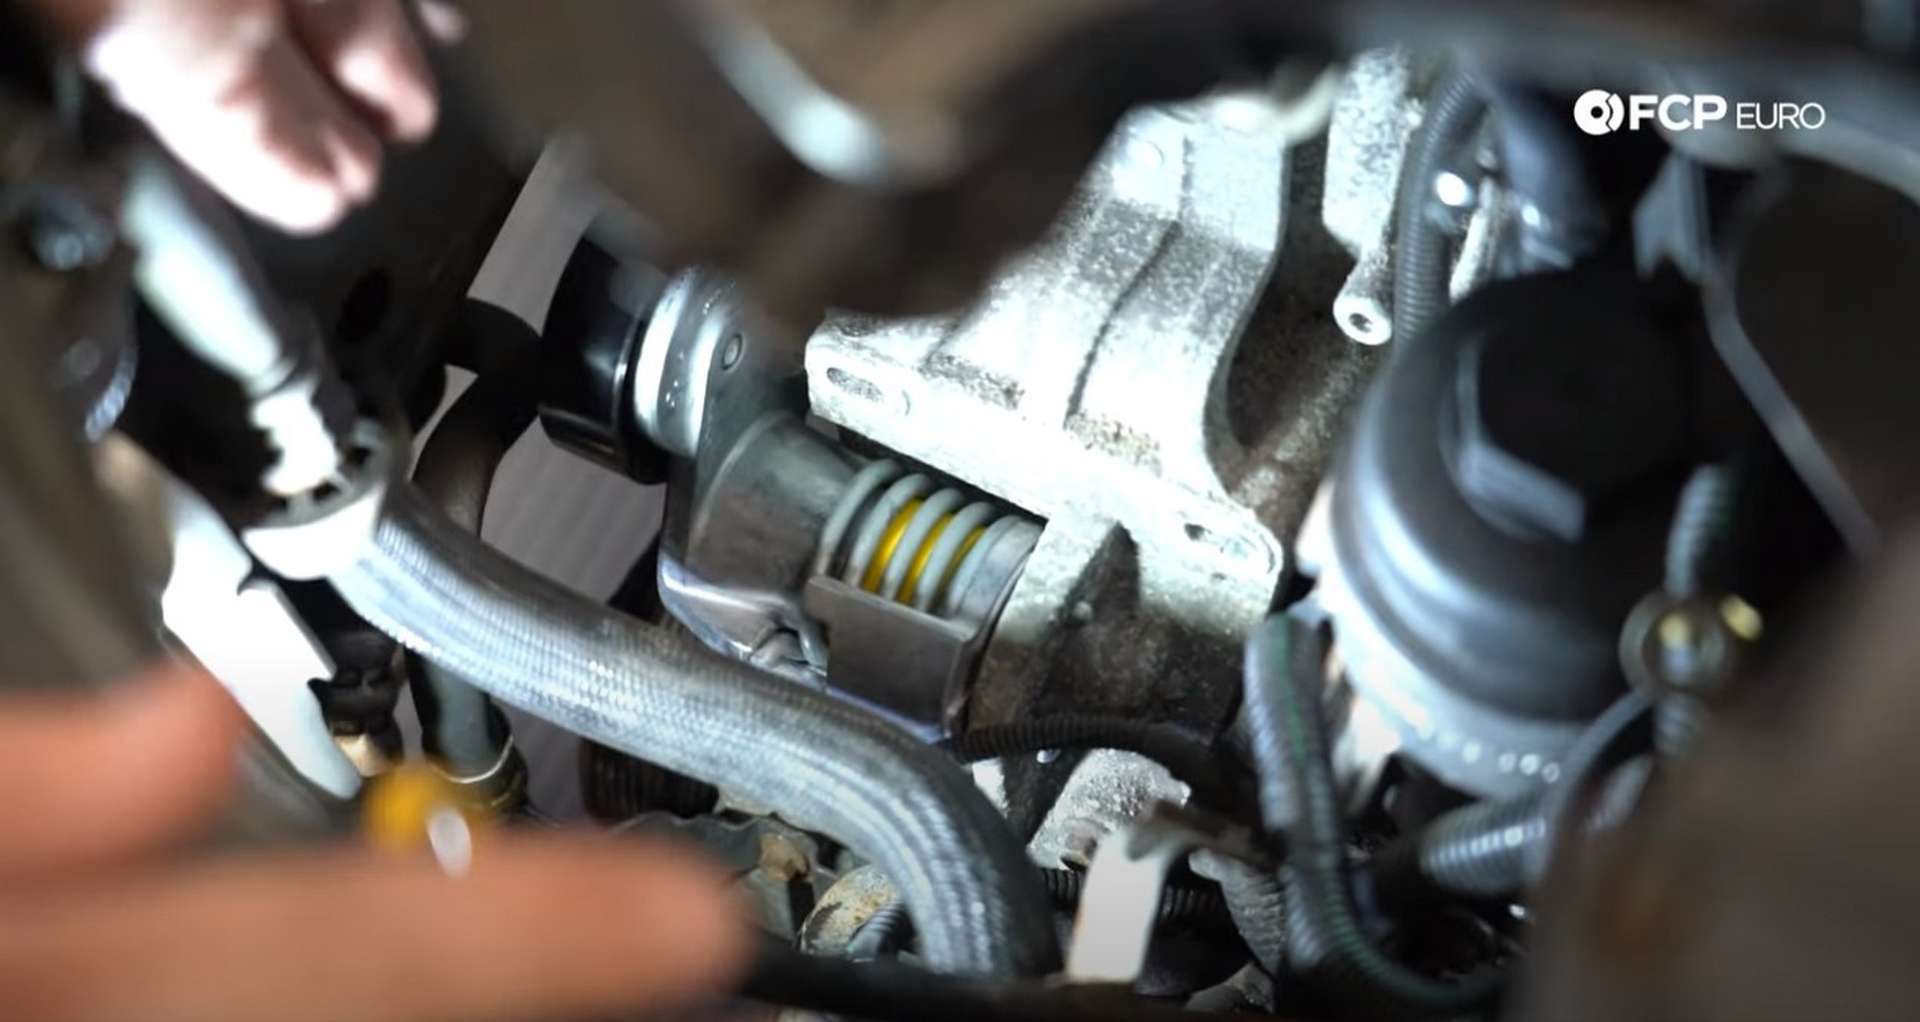
Now that there is plenty of space, remove the inner belt tensioner from the engine bay.
Take the new inner tensioner and put it into position. The two pins on the back of the tensioner will fit into two holes on the engine block.
Take the new alternator and sneak it into place in the opposite way it was pulled out. Put the top mounting bolt into the alternator and leave it loose. Then, thread in the two bottom bolts. Tighten them up with a 10mm socket and torque them to 50Nm.
Bring the wiring harness back over to the alternator and plug in the voltage regulator. Then, remove the new nut for the main power lead and slide the ring end of the lead onto the stud. Tighten down the nut with a 13mm socket and torque it to 15Nm. Replace the insulating cap once the nut is torqued.
Step 5: Reinstall the intake components
Snake the charge pipe back into its position in the engine bay. Then, use an 8mm socket to re-secure the oil dipstick tube to the oil filter housing.
Reseat the throttle body gasket into the intake manifold and refit the throttle body. Make sure that the motor for it is towards the passenger's side of the engine bay. Start the threads on all four of the screws before using a T30 bit socket to tighten them down.
Refit the charge pipe to the intercooler, but leave the clamp loose. Plug the throttle body connection back in as well.
Pull the airbox back into position and feat it onto its three rubber grommets. Replace the ECM cover if removed. Refit the mass airflow sensor housing back into the airbox and tighten down the mounting screws with a T25 socket. Tighten down the clamp with a 7mm socket or flathead-screwdriver and plug the harness back into the sensor.
Then, head back under the car and refit the charge pipe to the intercooler. Tighten down the clamp with a 7mm socket or flathead-screwdriver.
Step 6: Install the new tensioners and belts
Thread in the bolt for the new inner belt tensioner by hand and then tighten it with a 13mm socket. Torque the bolt to 24Nm.
Slip the new belt over the alternator pulley. Then, use a T50 bit socket to rotate the tensioner counterclockwise to allow the other end of the belt to be slipped over the inner grooves on the crankshaft pulley. Release the tensioner when the belt is aligned on all of the grooves on both pulleys.
The new outer tensioner has pins on its backside that line up with holes inside the inner belt, just above the crankshaft pulley. Line up the pins and holes, and seat the new outer tensioner into place.
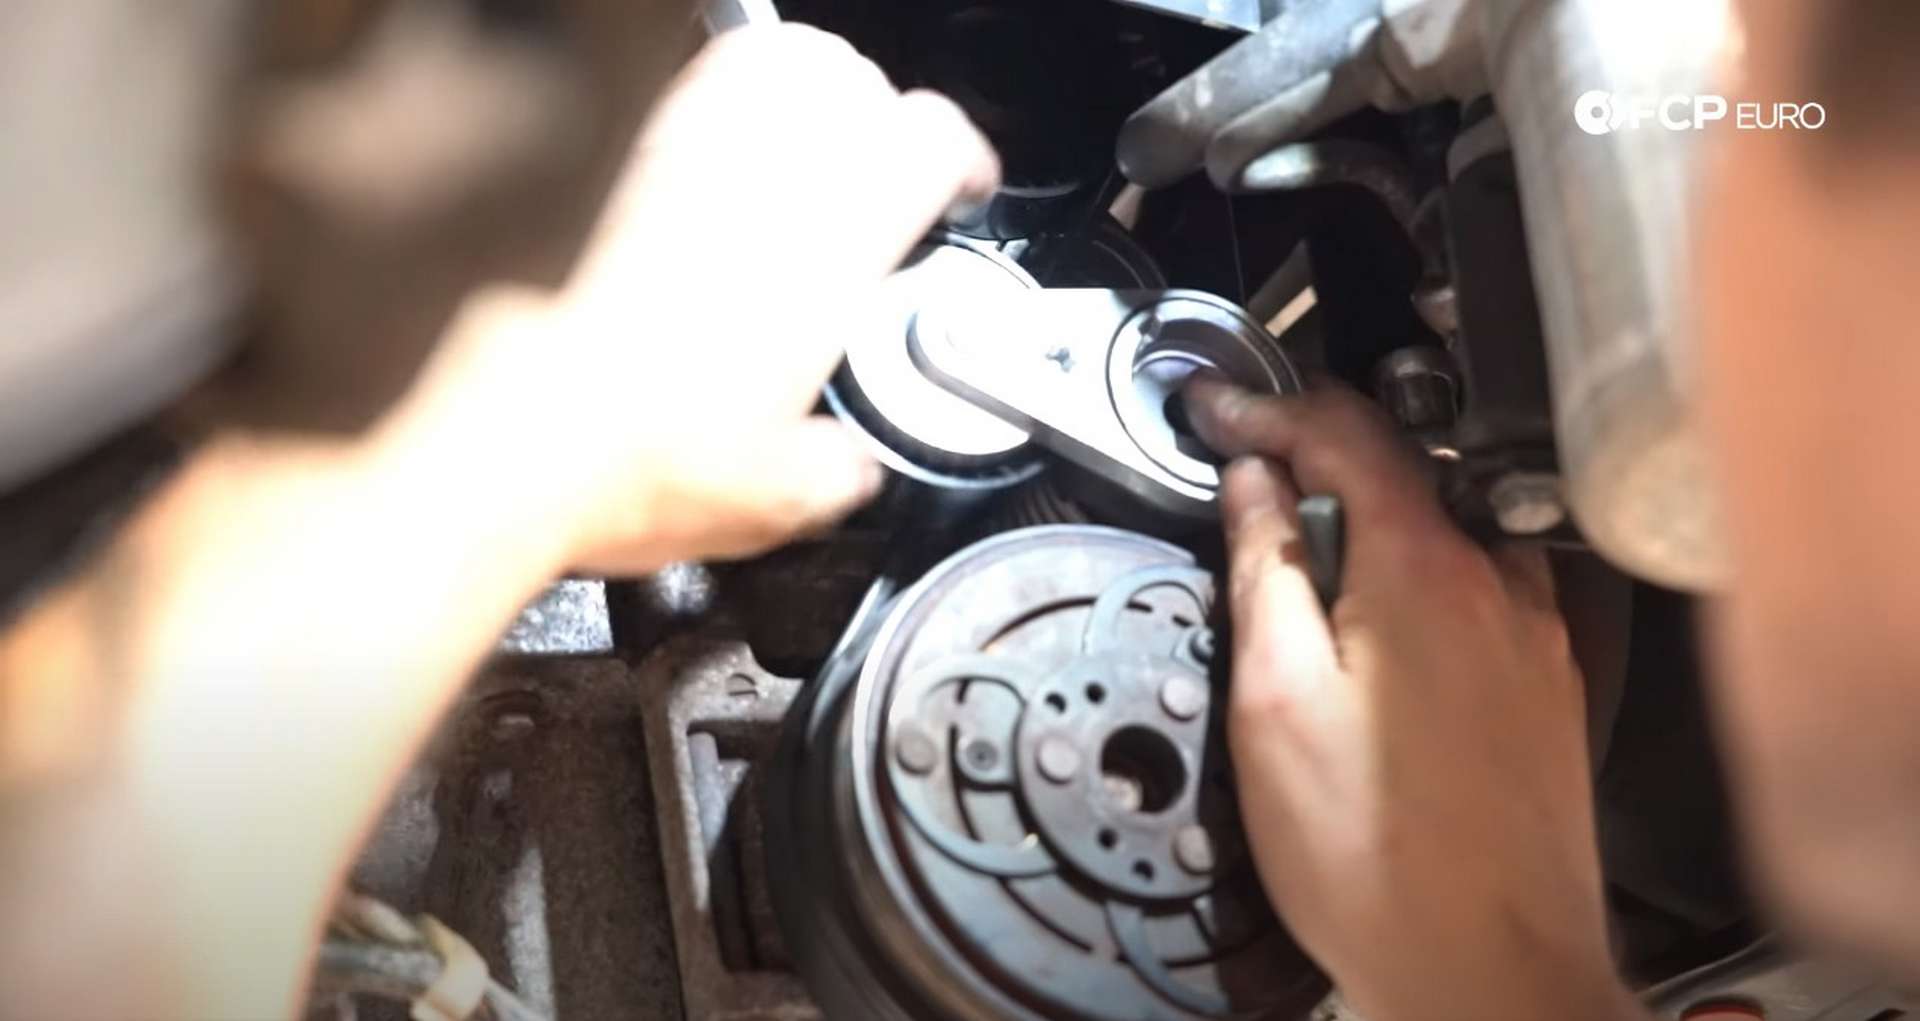
Thread in the bolt used to secure the tensioner to the engine block by hand and tighten it with a 13mm socket. Torque the bolt to 24Nm.
Slip one end of the outer belt around the crankshaft pulley. Use a T50 bit socket to rotate the outer tensioner clockwise to remove the tension from it and then slip the other end of the belt around the A/C compressor. Release the tensioner when the belt is fully seated onto both pulleys.
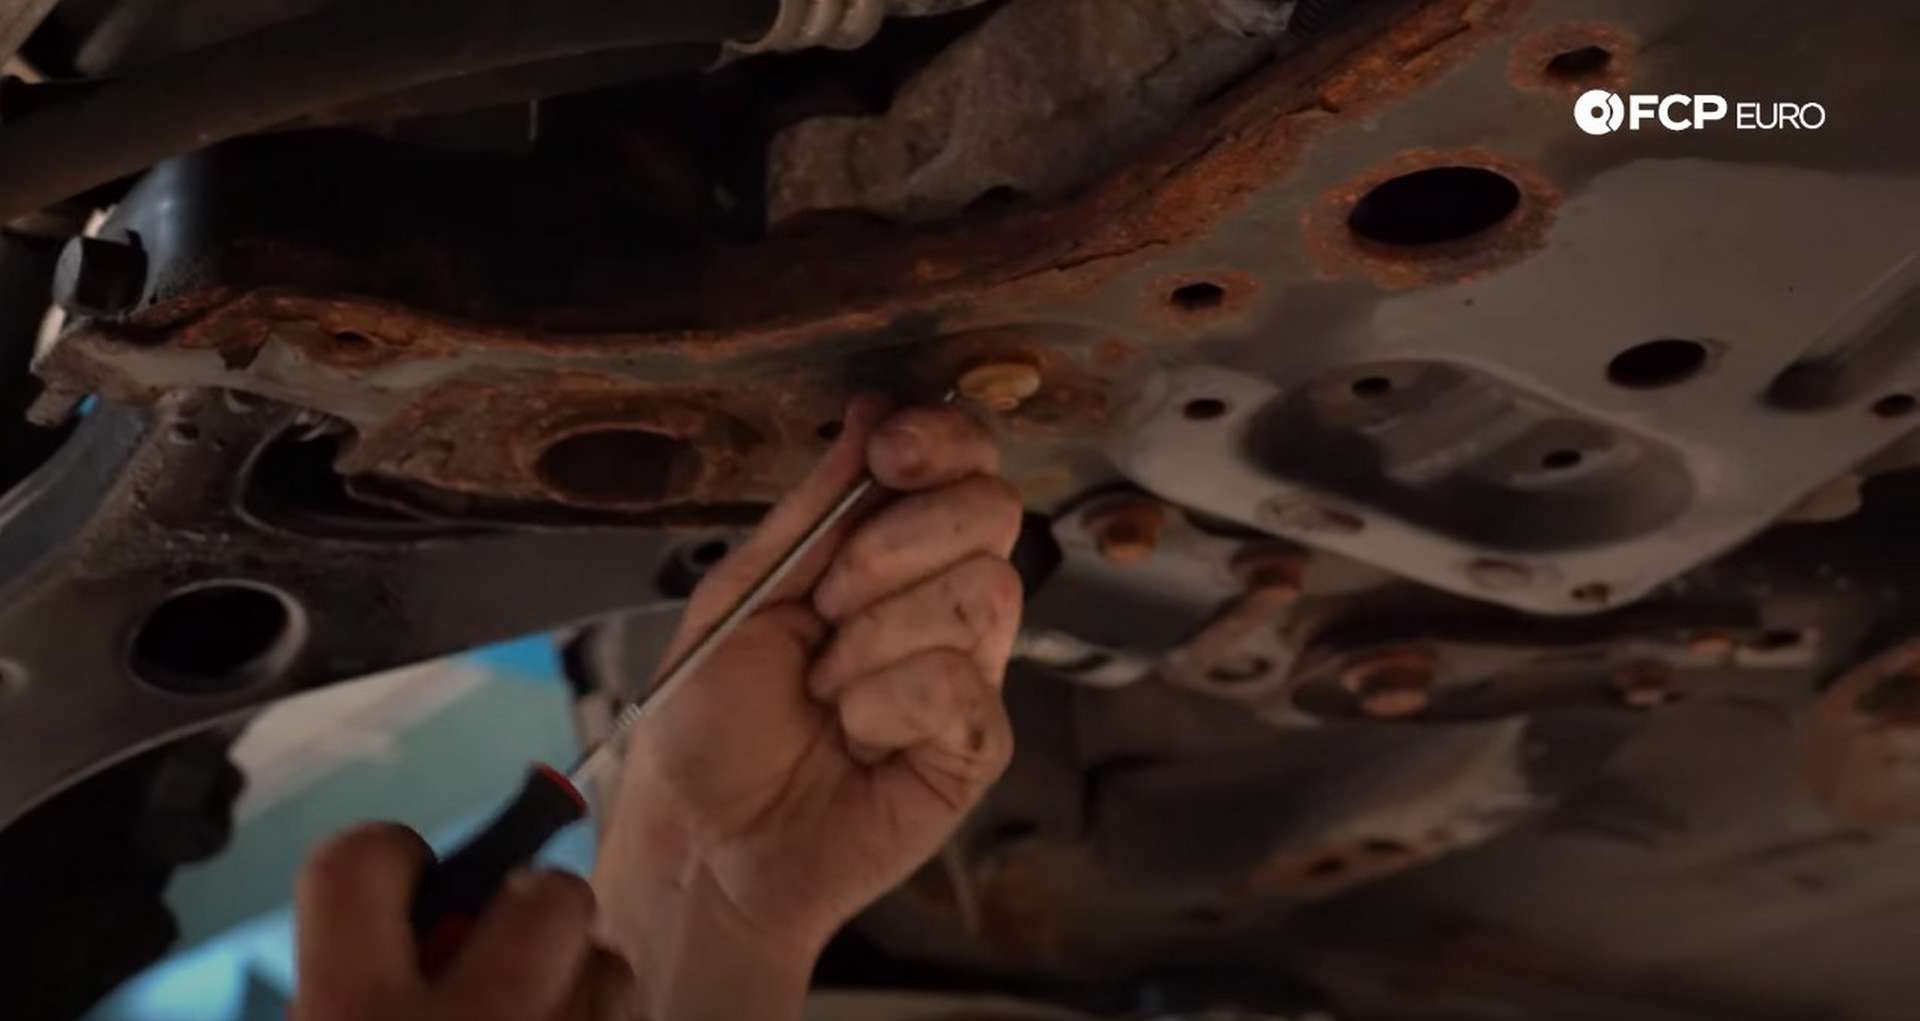
Step 7: Reinstall the belly pan
Volvo uses screws that thread into removable plastic clips to hold the belly pan to the body. Over time, the clips will wear, and the belly pan won't be held as tightly to the body. Included in the parts list for this DIY is a replacement set of screws and clips.
Two red clips sit into the bottom of the radiator support rail to help secure the belly pan fasteners. Reach over the top of the rail and push the clips out. Push the new red clips into their place. There are two white clips towards the back of the subframe. Use a hook pick to free the old white clips from the subframe and then place the new white clips into their place.
Next, slide the front air spoiler into place and secure it to the bumper with its two T25 fasteners.
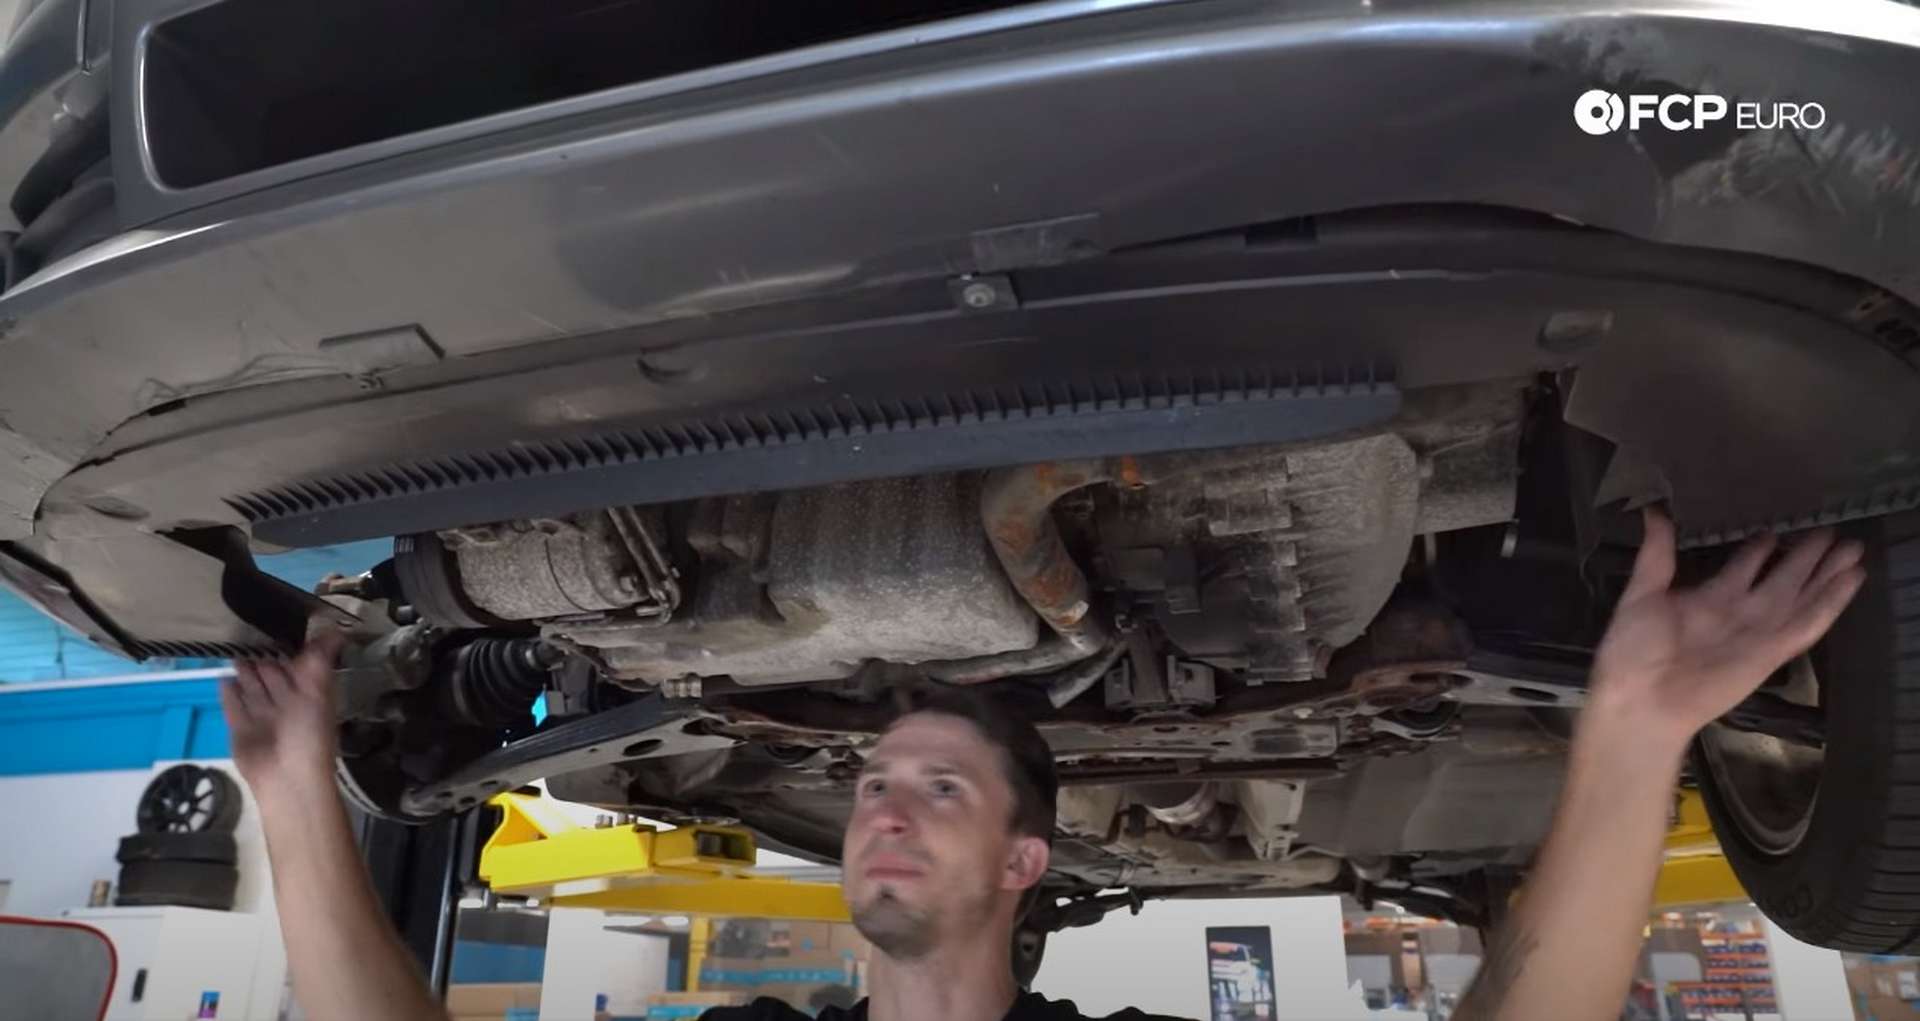
Then, slide the front of the belly pan into the air spoiler and push the two locating tabs at the back of the pan, into the subframe. Fasten the pan to the car with the six T25 fasteners.
Step 8: Check your work
Before putting the car back together, start the car to make sure that everything is working correctly.
First, tighten the charge pipe to throttle body clamp with a 7mm socket or a flathead screwdriver. Then, reconnect the negative battery cable to the negative terminal on the battery. Tighten the battery clamp with a 10mm socket.
Start the car and check to see that all of the belts are spinning properly. With the car still running, use a multimeter to check the voltage on the battery. Place the positive lead on the positive terminal and the negative on the negative. If the multimeter reads around 14 volts, your system is running properly.
Step 9: Reinstall the remaining parts
Slide the tabs on the rear of the battery cover into the slots behind the battery and then push the front down to secure it. Put the 90° airbox elbow into the airbox and then attach the snorkel to the elbow. Tighten down the two snorkel mounting bolts with an 8mm socket.
Refit the inner fender liner. Insert the T25 fasteners first but leave them loose. Then get the two inner plastic nuts started on their threads. Tighten everything once the fender liner is aligned.
Put the wheel back onto the studs and tighten the lug nuts with a 19mm socket.
Volvo C30 Alternator Install Torque Specs:
- Volvo Alternator Mounting Bolts = 50Nm or 37 ft-lbs of torque
- Volvo Alternator Power Lead Nut = 15Nm or 11 ft-lbs of torque
- Volvo Tensioner Bolts = 24Nm or 17.7 ft-lbs of torque
Your Volvo should have plenty of electrically trouble-free miles ahead with a brand new alternator and serpentine belt system. If you're interested in more DIYs for your Volvo, you can visit volvo.fcpeuro.com and subscribe to our YouTube channel.


