
The sport sedan started with BMW, and their F30 3-series continued in that legacy. While not shy on power, the real excellence comes from its chassis and suspension, and just like everything else, the suspension needs to be maintained. When bushings and joints wear out, tolerances weaken, and the steering feel becomes diluted. Even for BMWs entry-level 3-series, precise steering feel and control are a must. Through regular driving, the bushings and joints will eventually wear, leading to a need for replacement.
As these parts wear, you may not notice the effect; only when there is an excess of play does it become apparent. When it comes to replacement, there are several different options. BMW offers factory standard replacement parts, and aftermarket companies offer upgrades in flavors ranging from mild to wild. You should replace these parts once the mileage gets close to the six-figure mark, no matter your driving preference.
BMW models and years applicable:
This DIY covering how to replace BMW F30 front control arms applies to 2-series, 3-series, and 4-series xDrive BMW F30 models.
Symptoms of worn BMW F30 control arm bushings & ball joints:
- Vague steering feel
- Clunking when going over bumps
- Clunking when turning the wheel
- Darty steering under braking
Right around the 100,000mi mark, you should inspect the bushings and ball joints for wear. If you can easily move the ball joints around by hand, they need replacement. The pivot bushings are more or less the same; if you can easily twist them by hand, their effectiveness is no longer sufficient.
The car will eventually tell you when these items are due for immediate replacement. Clunking from the front end will be audible while driving and is an excellent indicator that it's time for a bushing change. The steering will gradually become vague you drive the car, and you may not notice it. However, when it feels like the wheels do one thing and the steering wheel does another, you should check the front suspension as soon as possible.
How long will it take to replace the front control arms on a BMW F30?
The length of the replacement is determined by where you live and what tools you have available. BMWs from up north will have to deal with corrosion to the ball joints, potentially lengthening the job up to half an hour. Rust penetrant and A MAP gas torch will help to free anything stuck by corrosion. Generally speaking, expect the replacement to take around an hour and a half, give or take half an hour.
How much will it cost to replace the front control arms on a BMW F30?
The Lemforder kit that we offer includes all four front control arms with new bushings and ball joints installed in them. The kit will run you right around $300. You don't need any special tools for the job; however, a torque wrench is necessary, and an electric impact wrench will make the process quicker. If you don't have either, we recommend you pick them up.
If you have a chassis with xDrive, you'll need two new axle bolts. To get the thrust arm out, the axle needs to be removed from the hub to allow you enough room to get the arm out. The bolts are aluminum stretch bolts, so you have to replace them after each use. They cost about $14 apiece, so tack on around another $30 to the job's cost.
Parts required to replace the front control arms on a BMW F30:
- Lemforder Front Control Arm Kit
- Axle Bolt x2 (xDrive Only)
Tools required to replace the front control arms on a BMW F30:
- 8mm Socket
- 17mm Socket
- 18mm Socket
- 21mm Socket
- T40 Torx Bit Socket
- 17mm Hex Bit Socket
- 18mm Wrench
- 21mm Wrench
- Ratchets
- Torque Wrench
Steps required to replace the front control arms on a BMW F30:
Step 1: Remove the axle nut
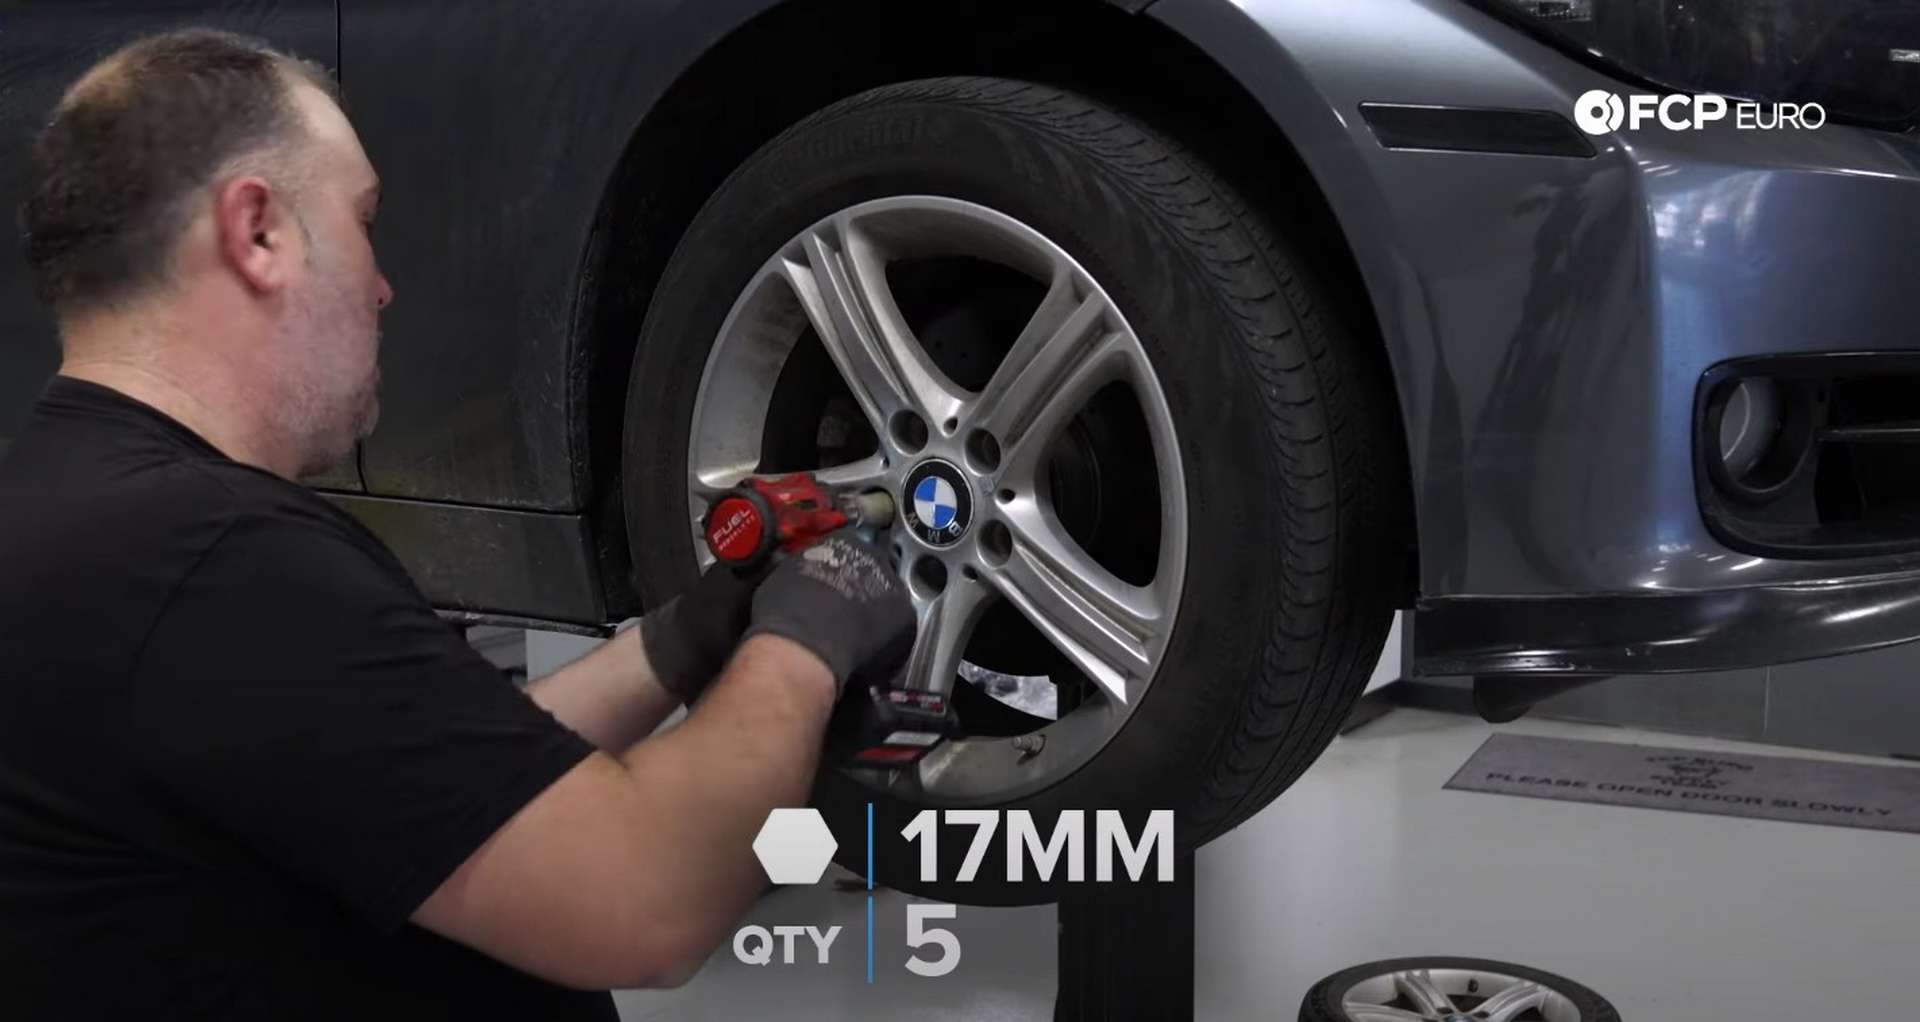
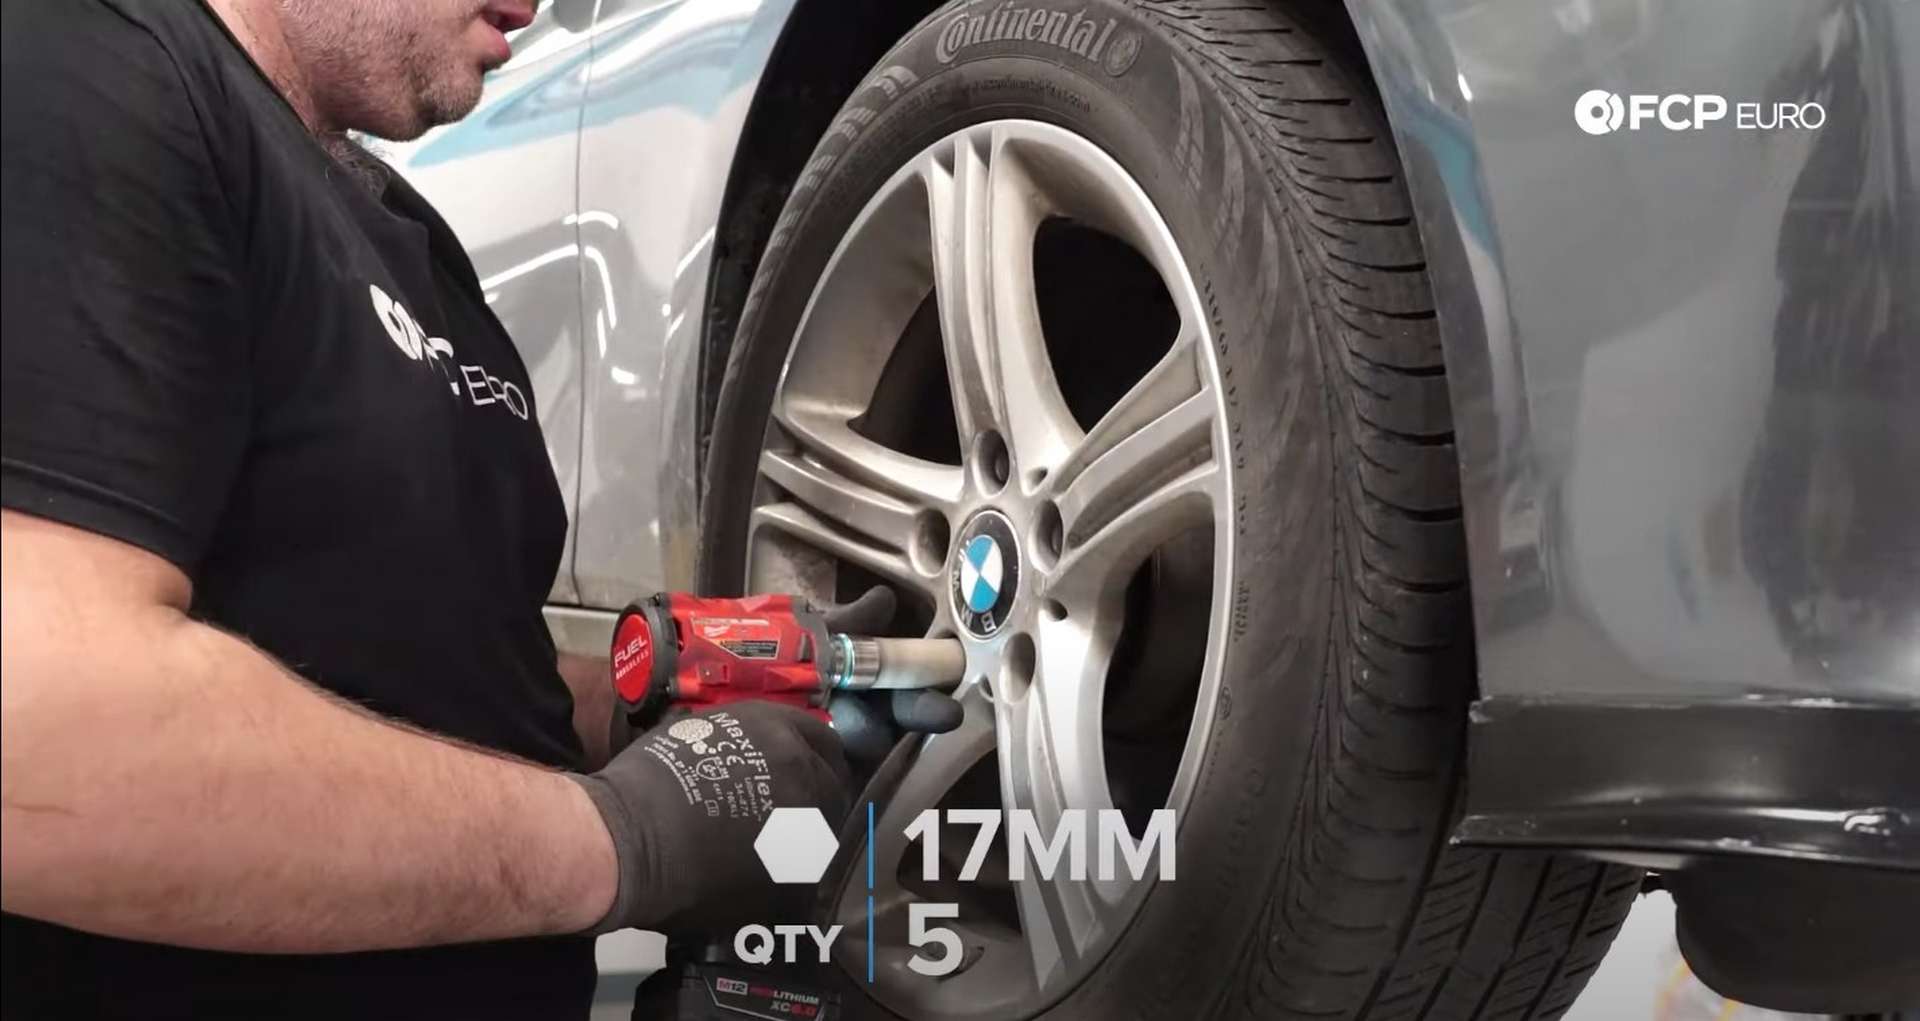
Jack up the front of the car and place it onto jack stands. Then use a 17mm socket to remove the lug bolts.
If your F30 has xDrive, you need to remove the axle from the hub to have enough space to remove one of the arms. Use a 17mm hex bit socket to remove the axle bolt from the hub. If you don't have xDrive, skip to the next step and ignore any axle-related talk.
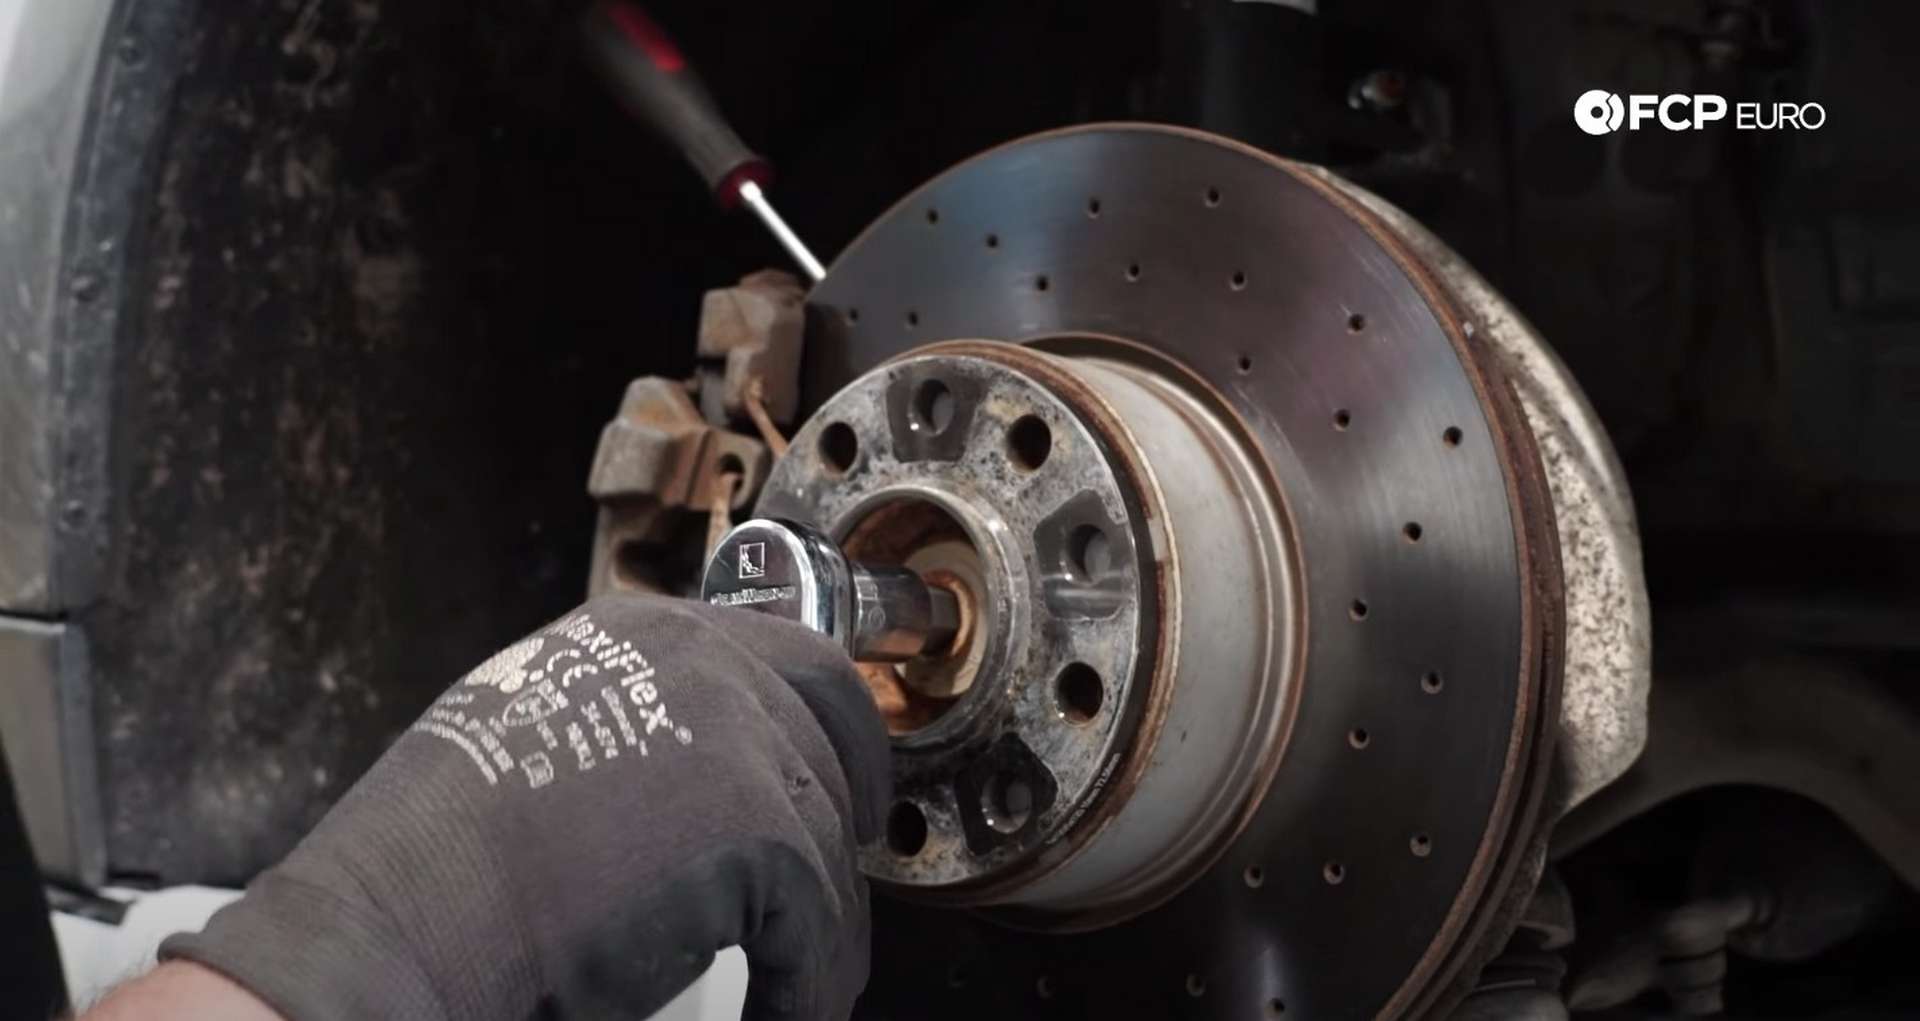
With the bolt out, you can pull the axle away from the hub when you need to.
Step 2: Remove the thrust arm
Assess the condition of the parts you're removing. If corrosion is present on the ball joint threads, spray them with a penetrating lubricant to make removing the nut easier for yourself.
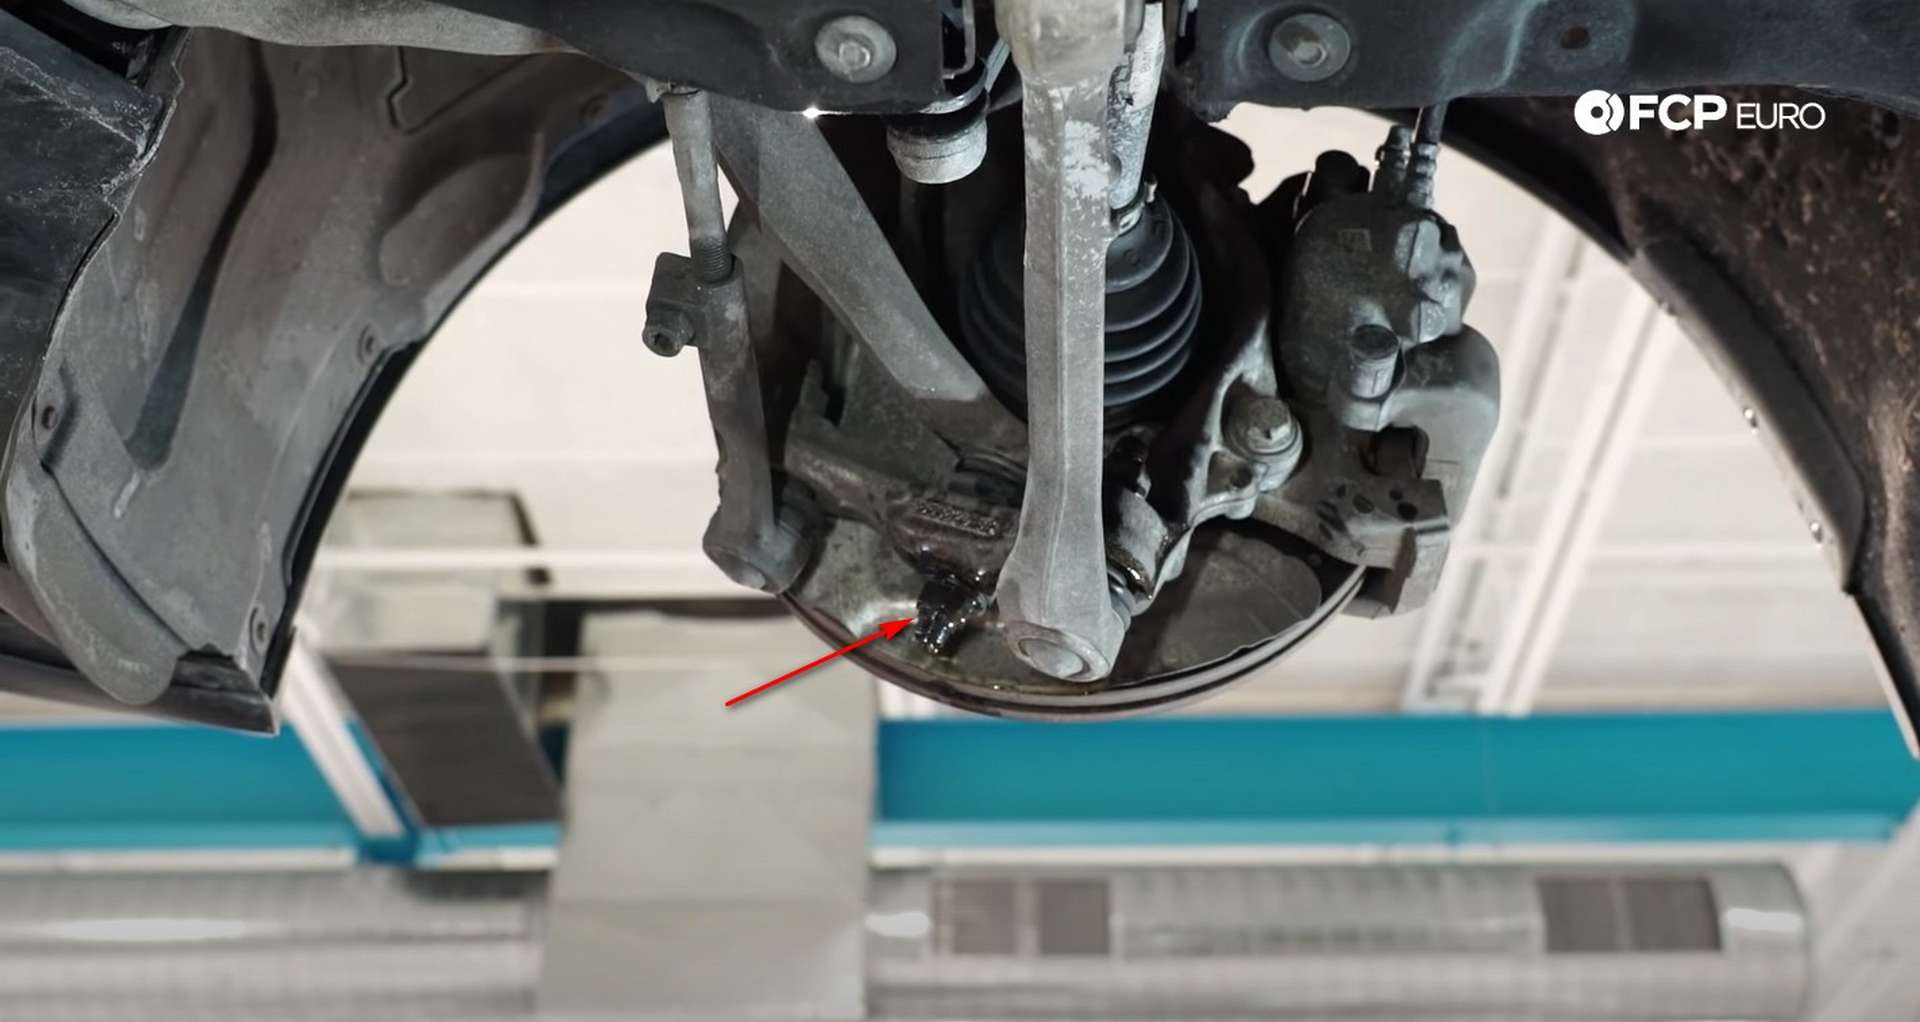
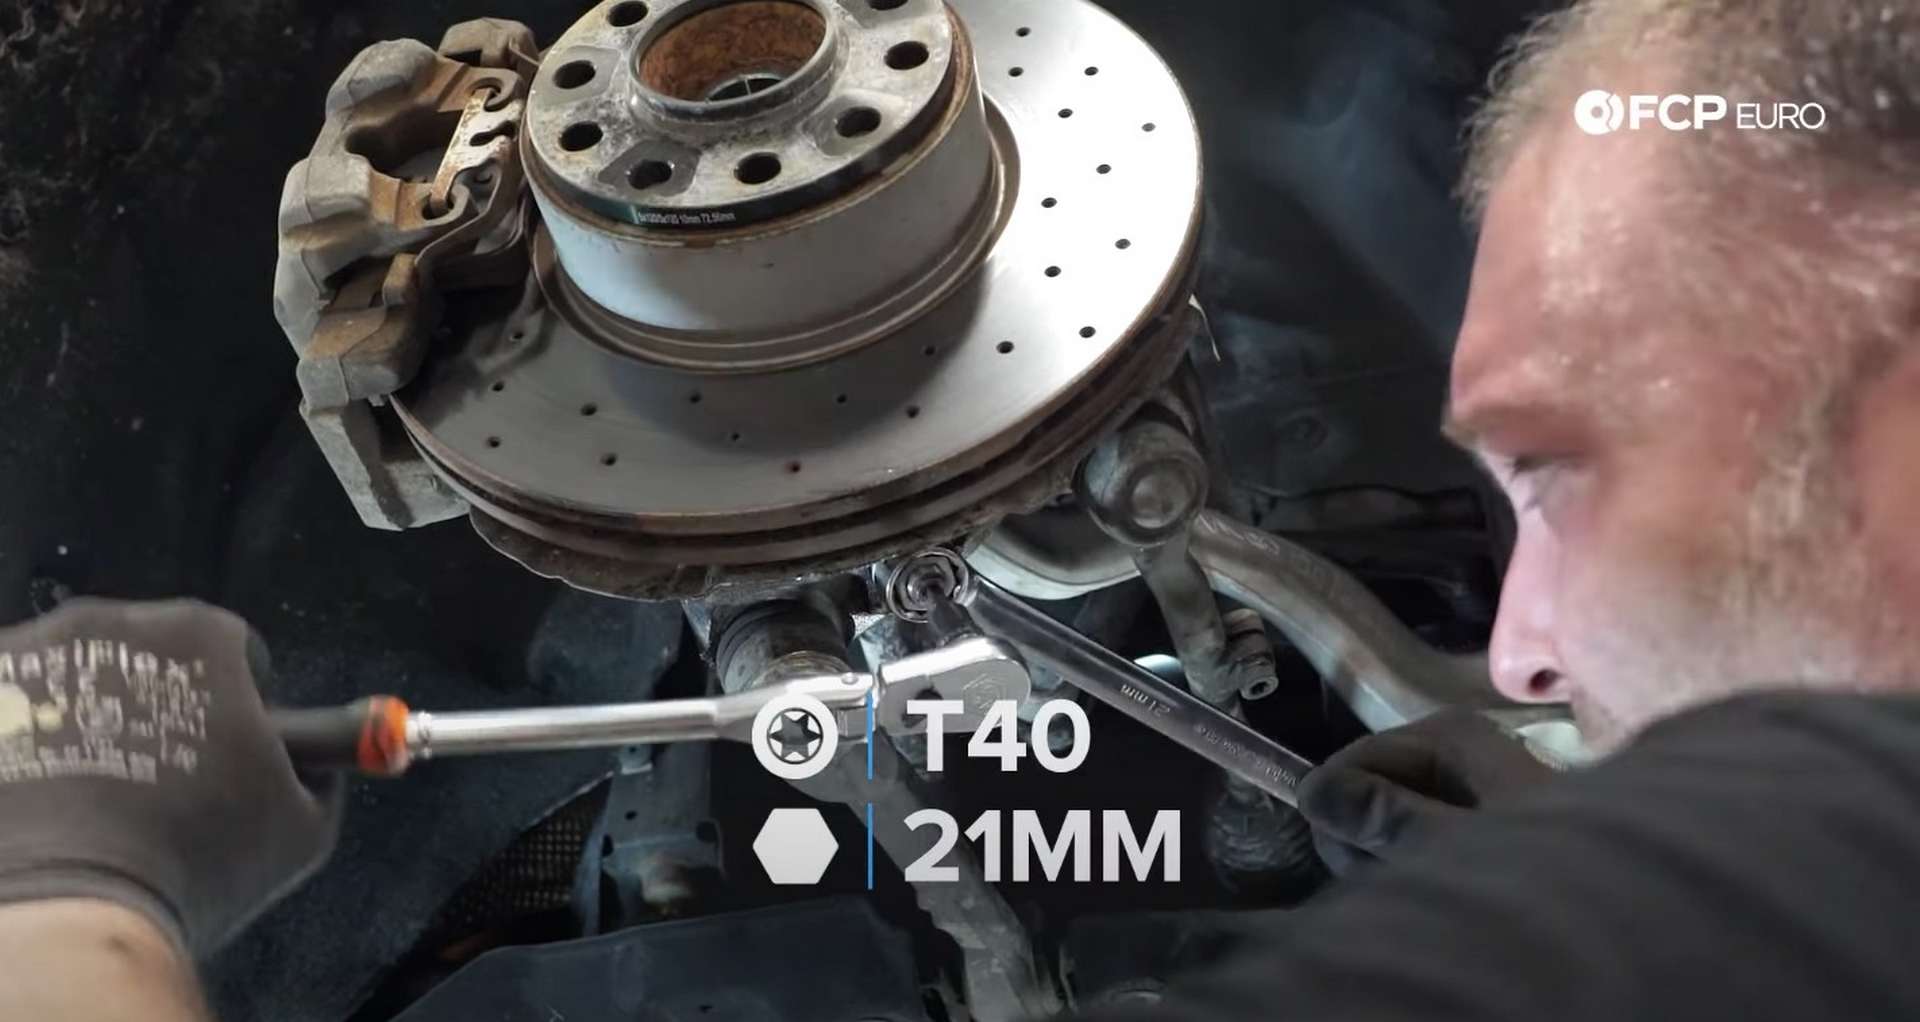
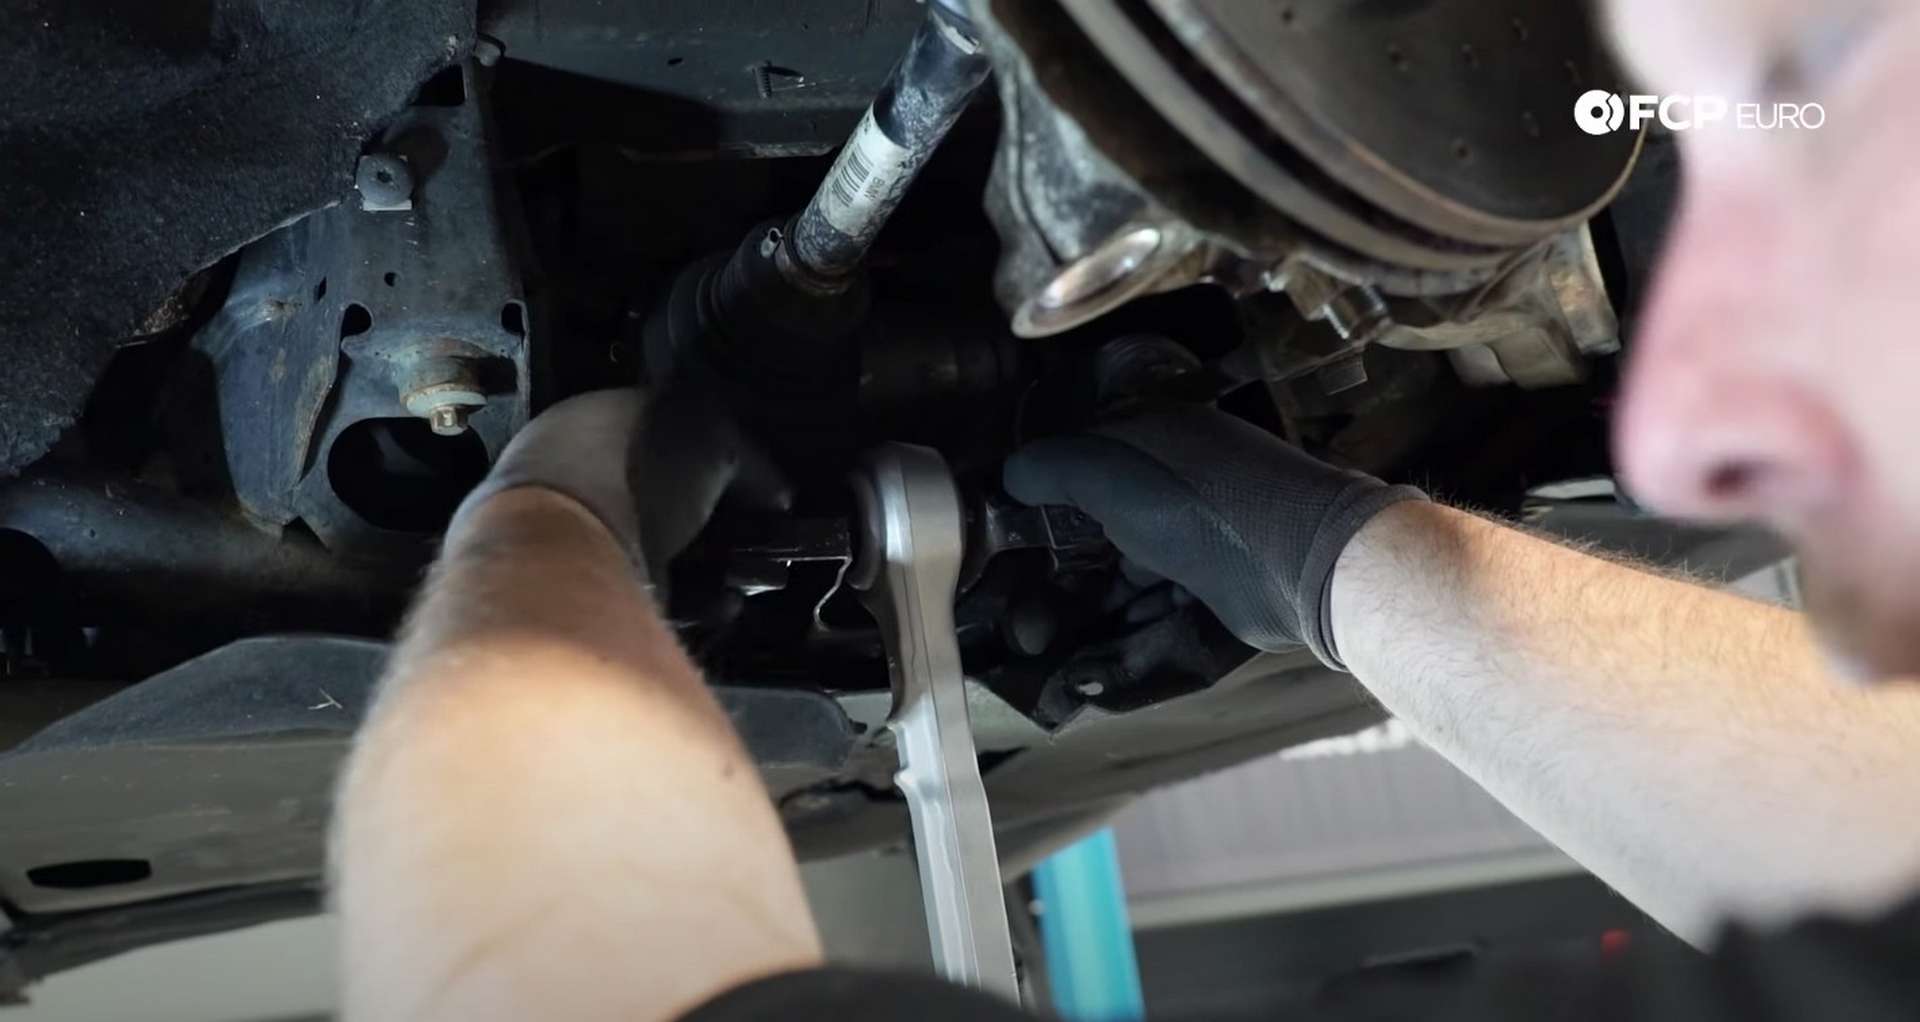
Use a 21mm socket to remove the nut from the ball joint. The nut may not want to leave the threads and start to spin the ball joint. If that's the case, use a 21mm wrench to remove the nut and counter hold the ball joint with a T40 Torx bit socket.
If the ball joint doesn't leave the knuckle, corrosion is holding it captive. Hit the top of the threads with a hammer to get the ball joint free. If that doesn't work, a MAP gas torch and a pickle fork will surely do the trick.
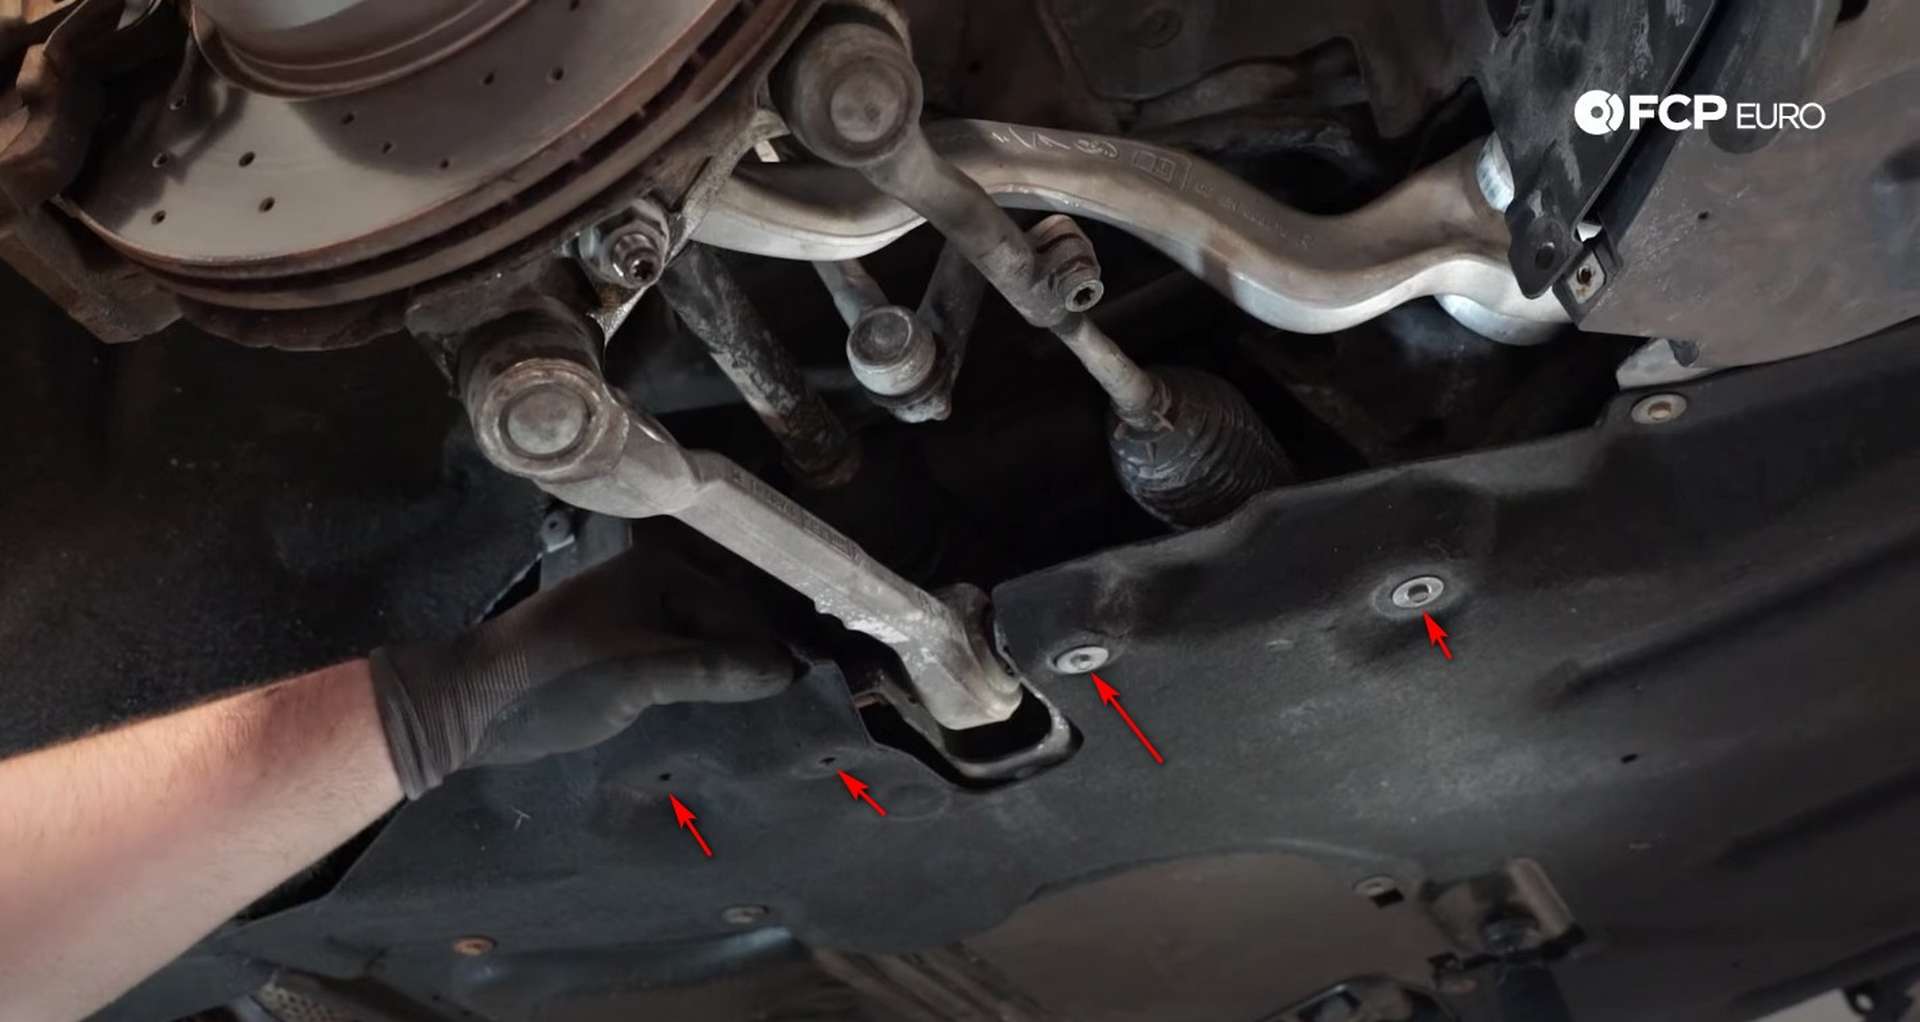
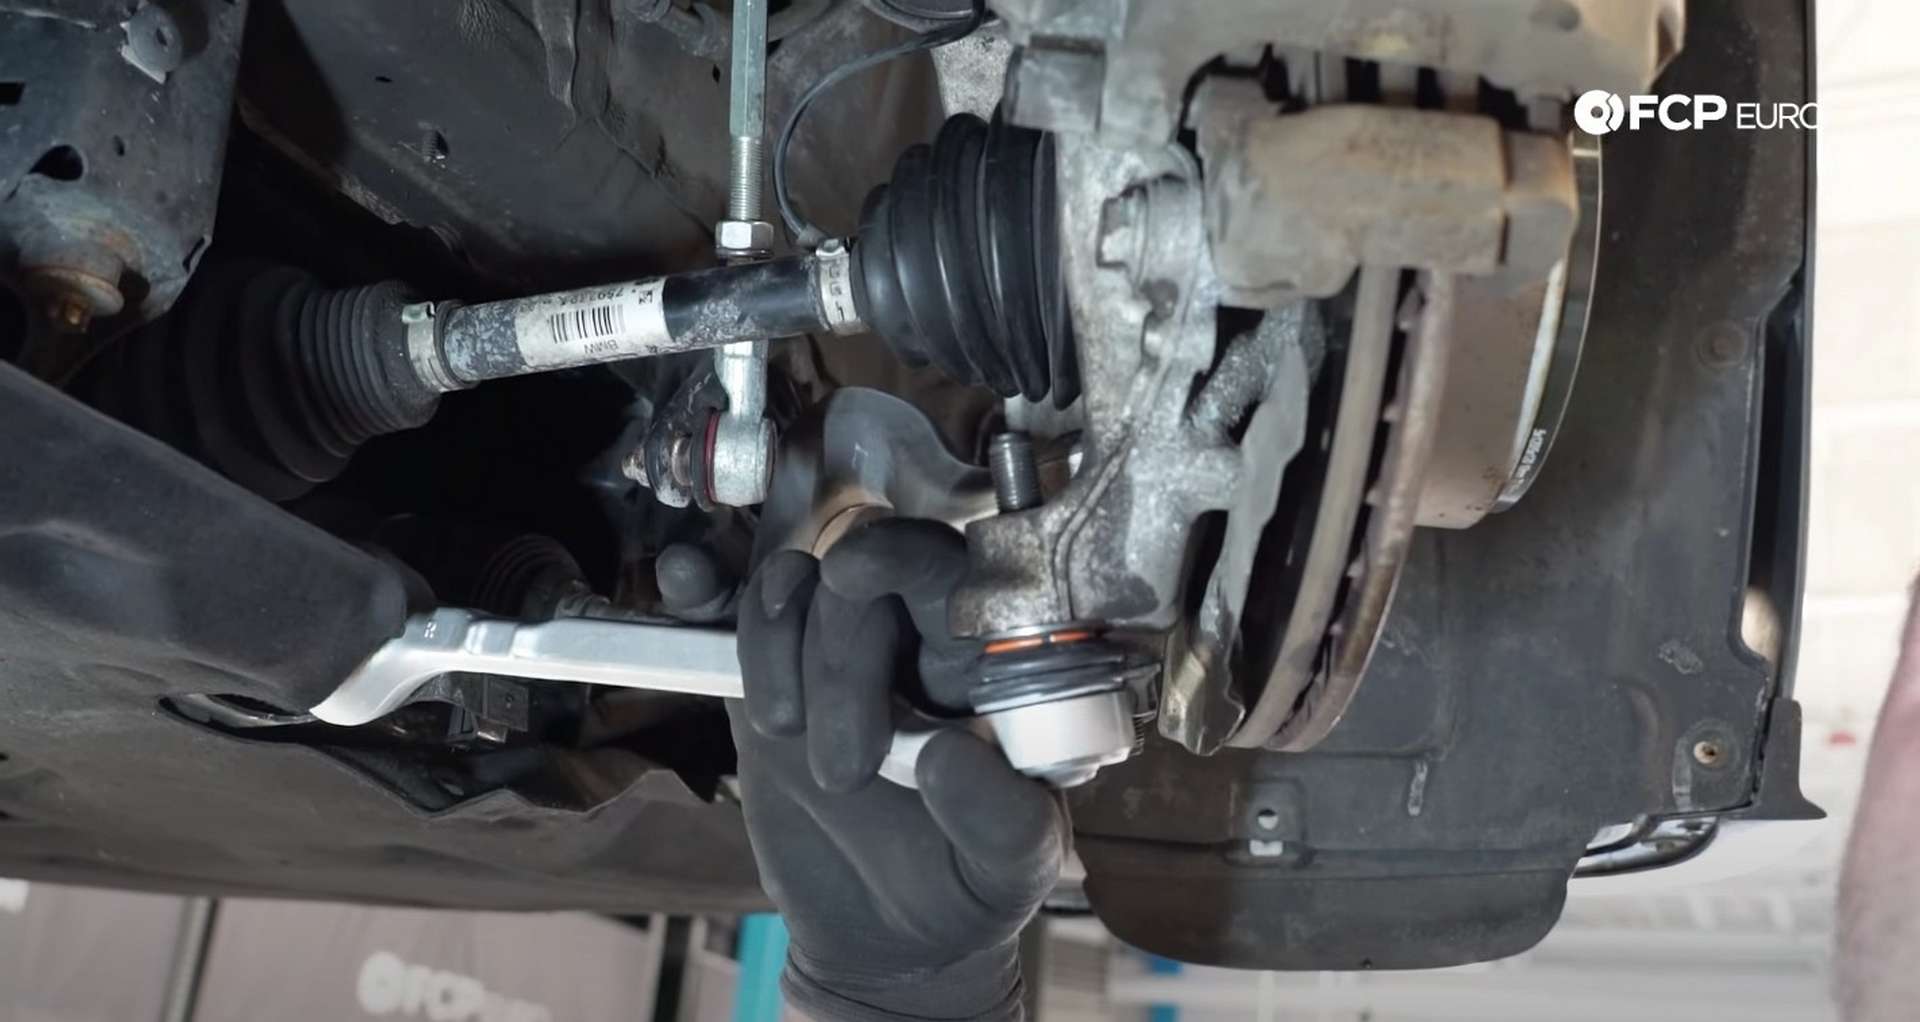
The bolt for the inner pivot of the arm is located behind the front wheel well liner. Use an 8mm socket to remove the liner's four fasteners.
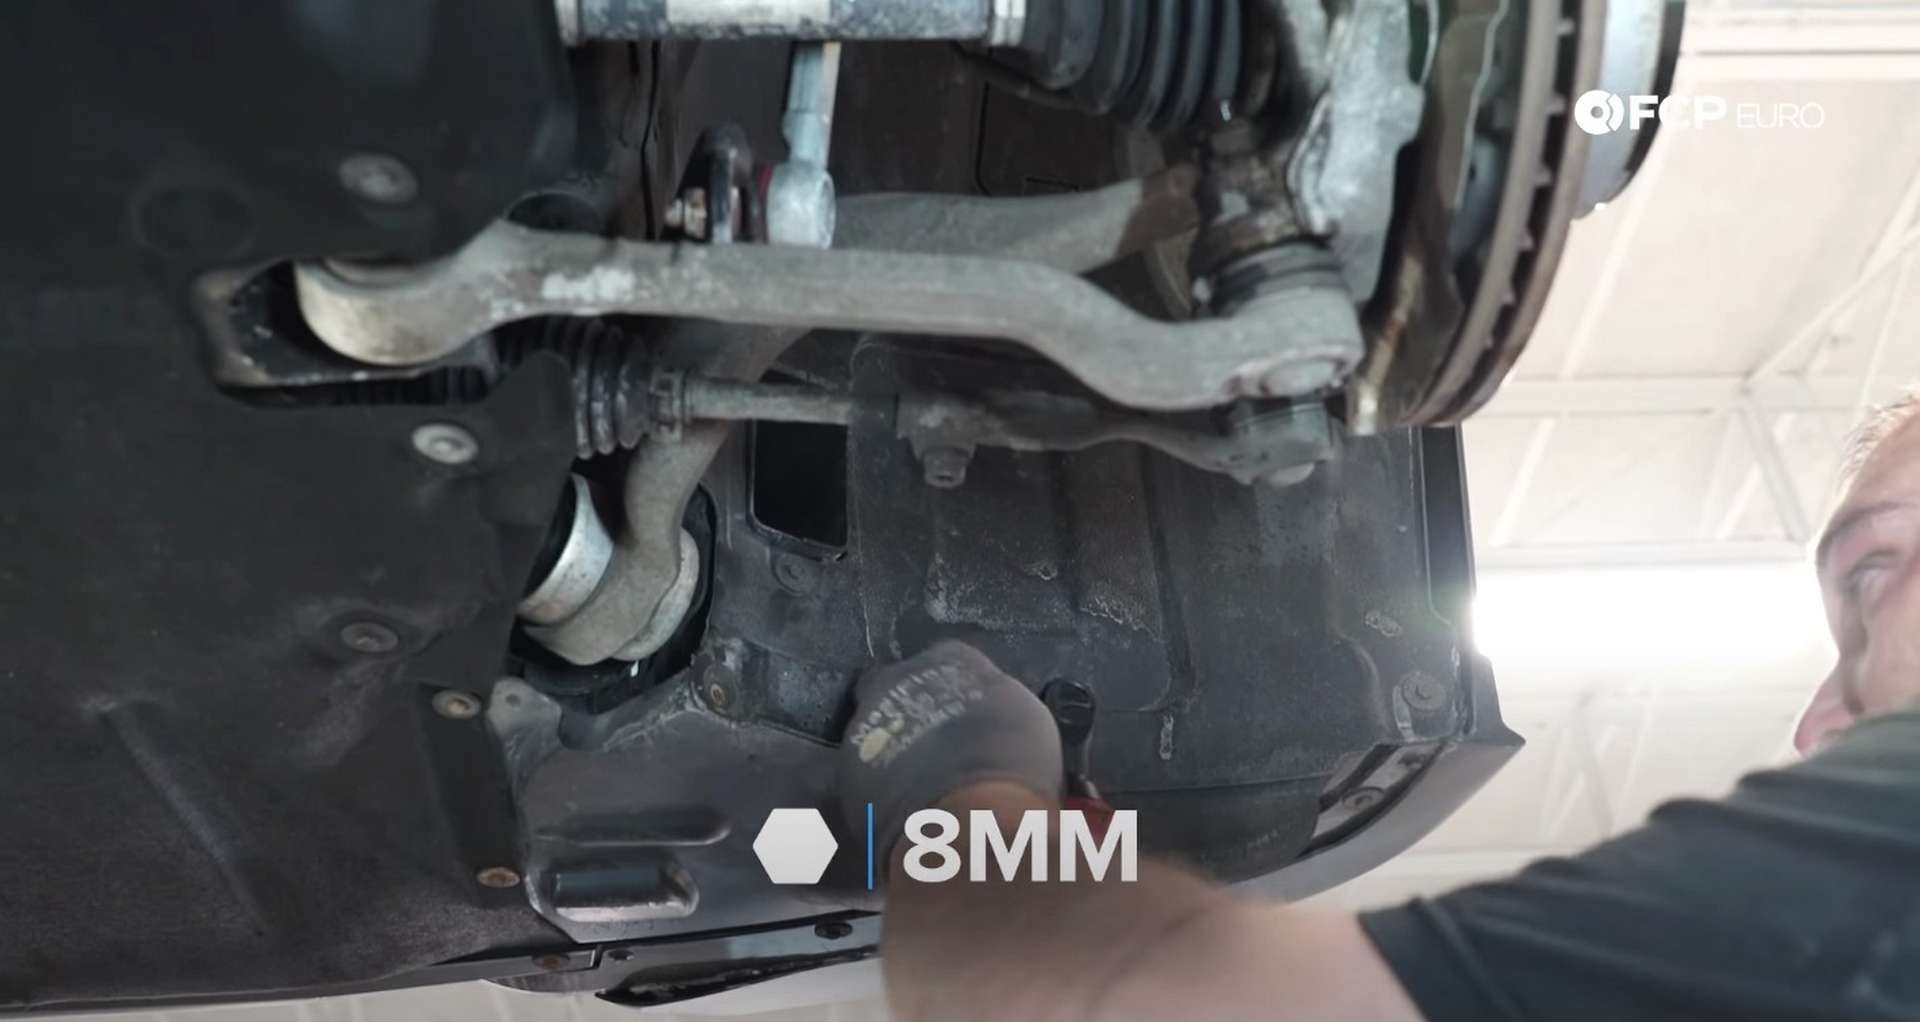
Then, peel back the liner and remove the arm's inner mounting bolt with an 18mm socket.
With the inner bushing bolt out, the arm is free of the chassis. Move the axle out of the way and remove the thrust arm if you have xDrive. If you don't have xDrive, you don't have an axle to move.
Step 3: Install the new thrust arm
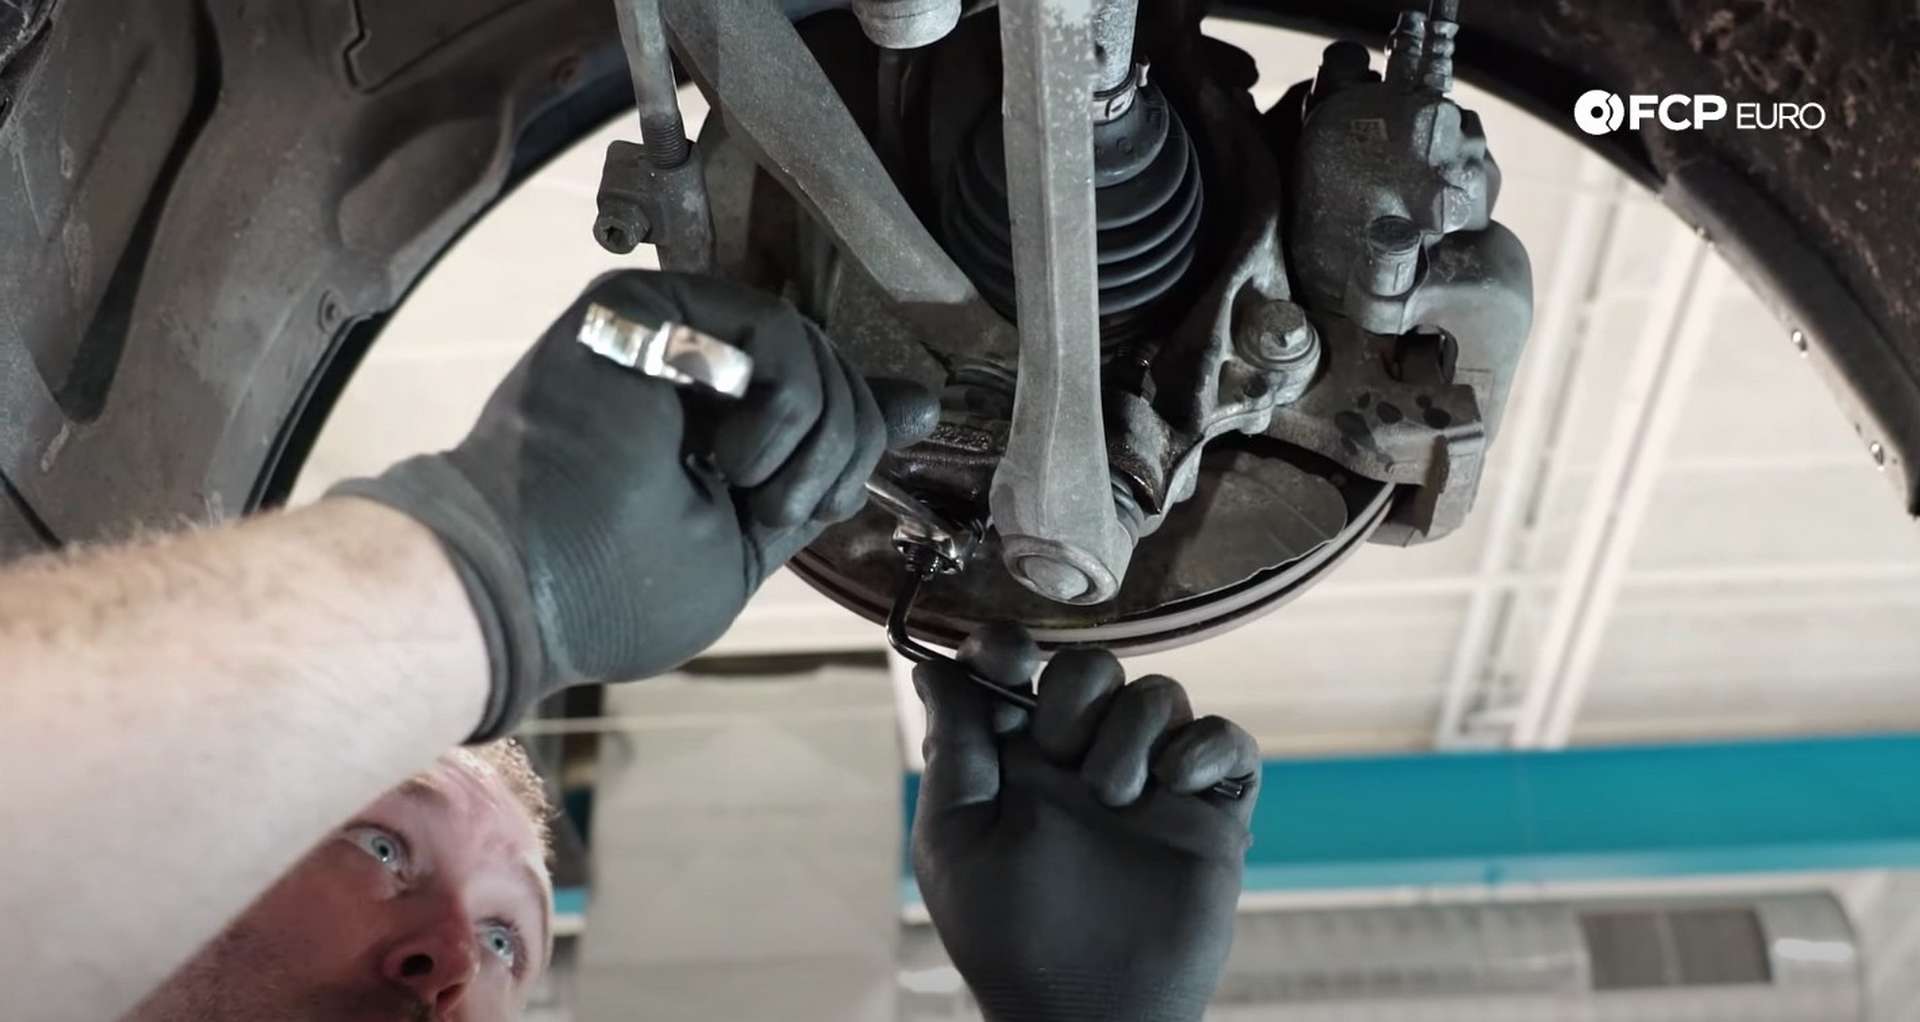
Look at the thrust arms provided in the kit and choose the correct one for the side you're working on. Then, take the arm and refit it to the chassis, and start that by getting the ball joint situated in the knuckle.
Thread the nut on once the ball joint's threads are through the knuckle. Then, push the other side of the arm into position and secure it to the chassis by threading in the new mounting bolt. Be sure to thread in the bolt by hand to prevent any cross-threading.
Use an 18mm socket to tighten the arm's inner mounting bolt. However, don't tighten it too much, as you'll need to torque it at ride height. Use a 21mm wrench for the ball joint nut and a T40 Torx bit socket to counter hold the ball joint threads.
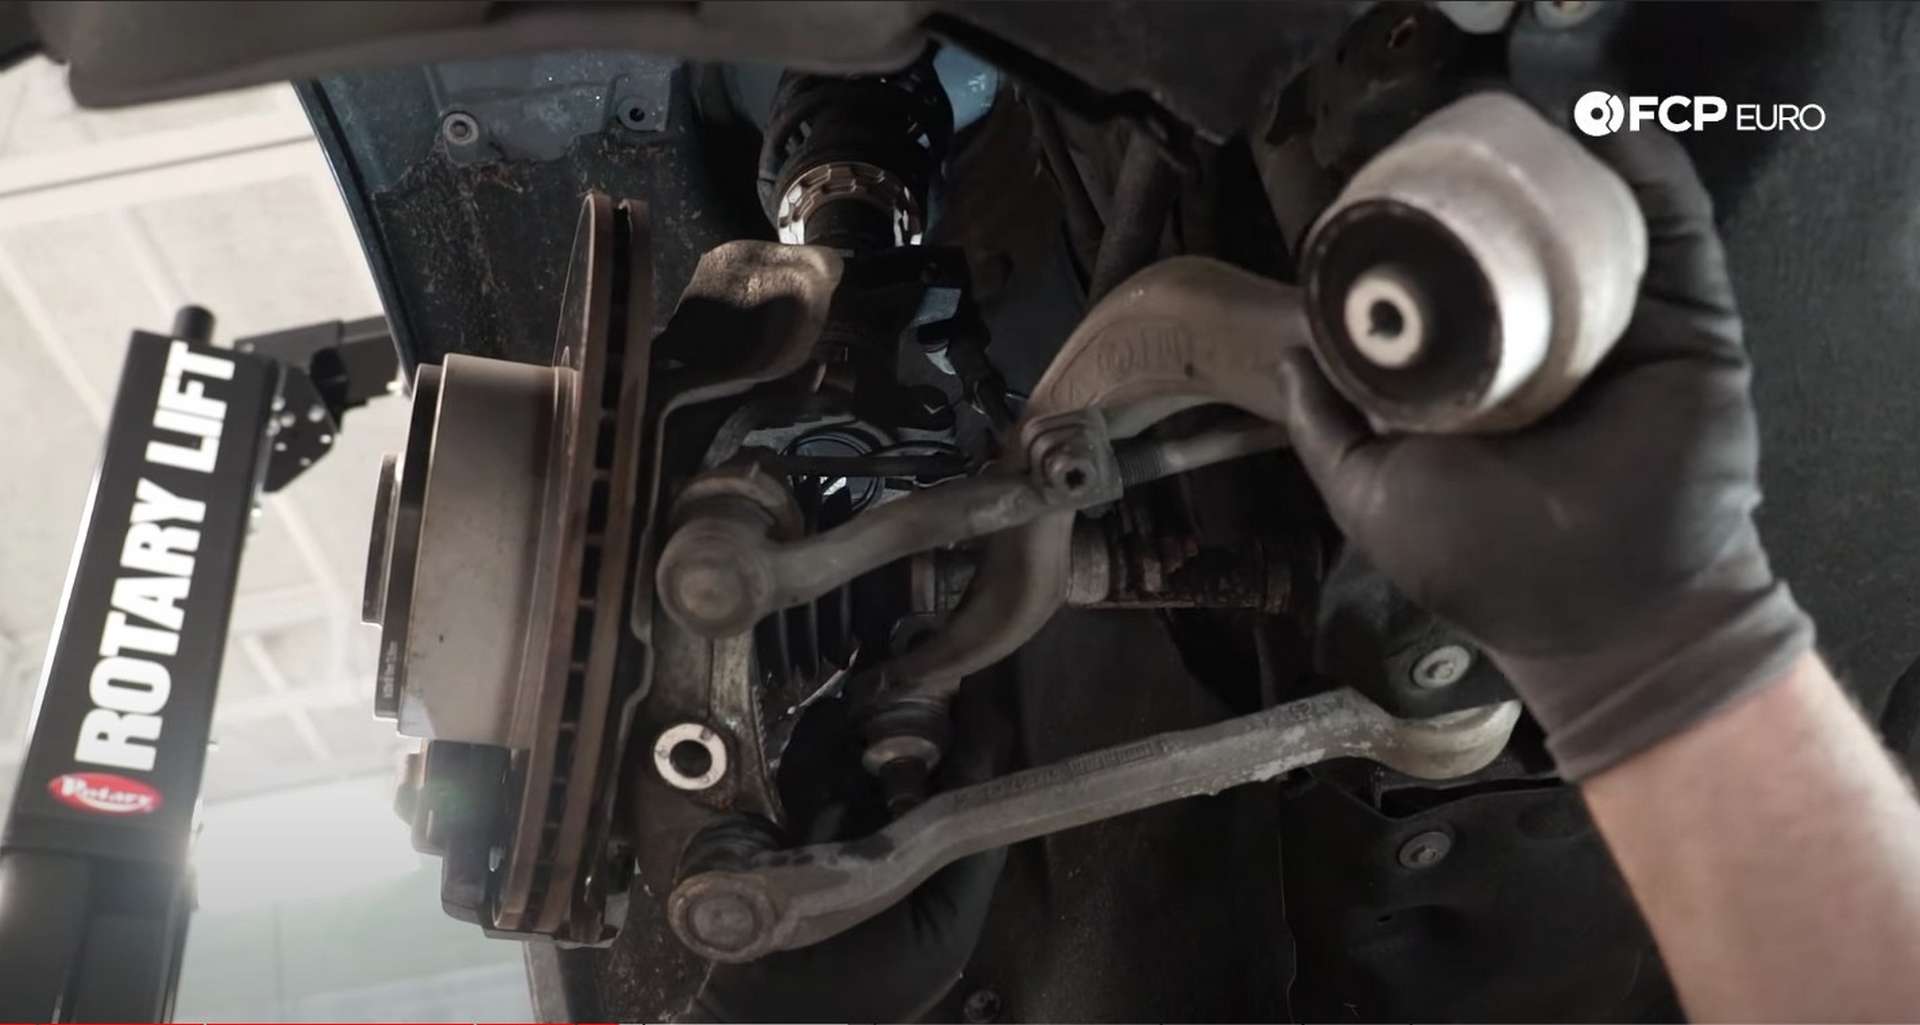
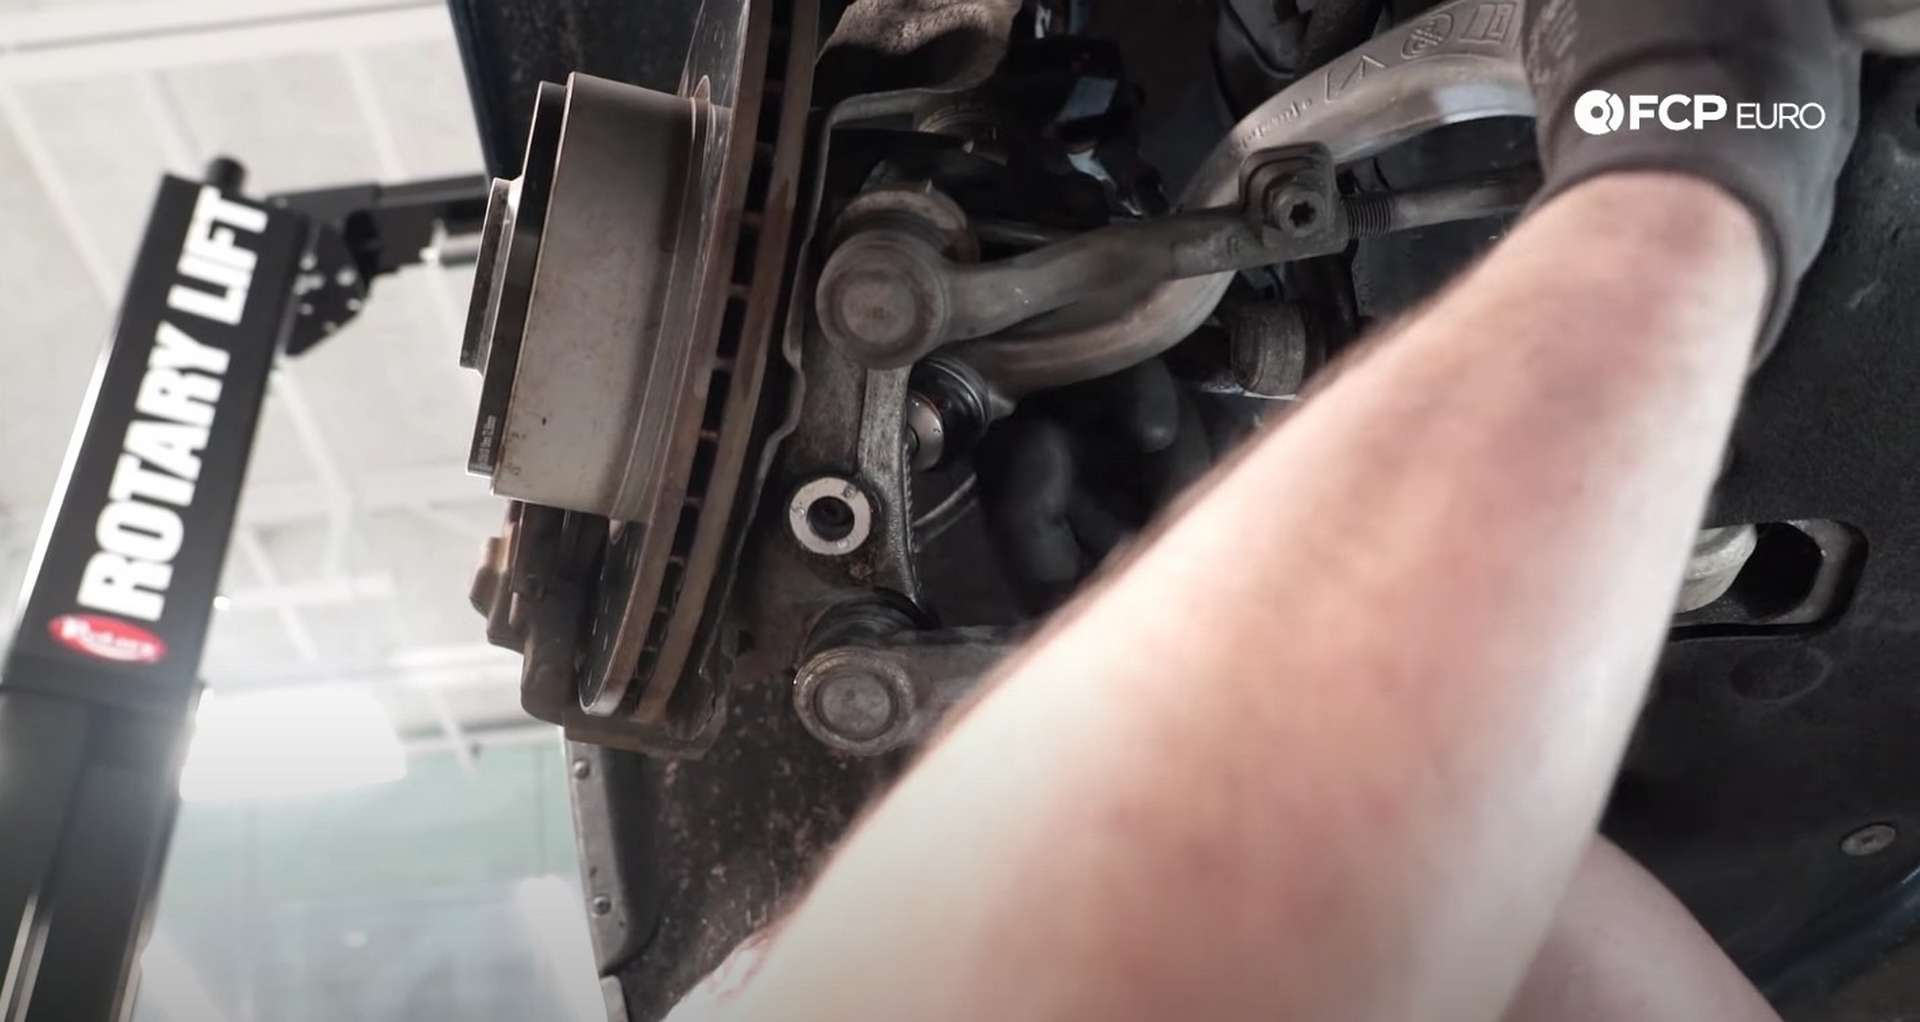
Step 4: Remove the lower control arm
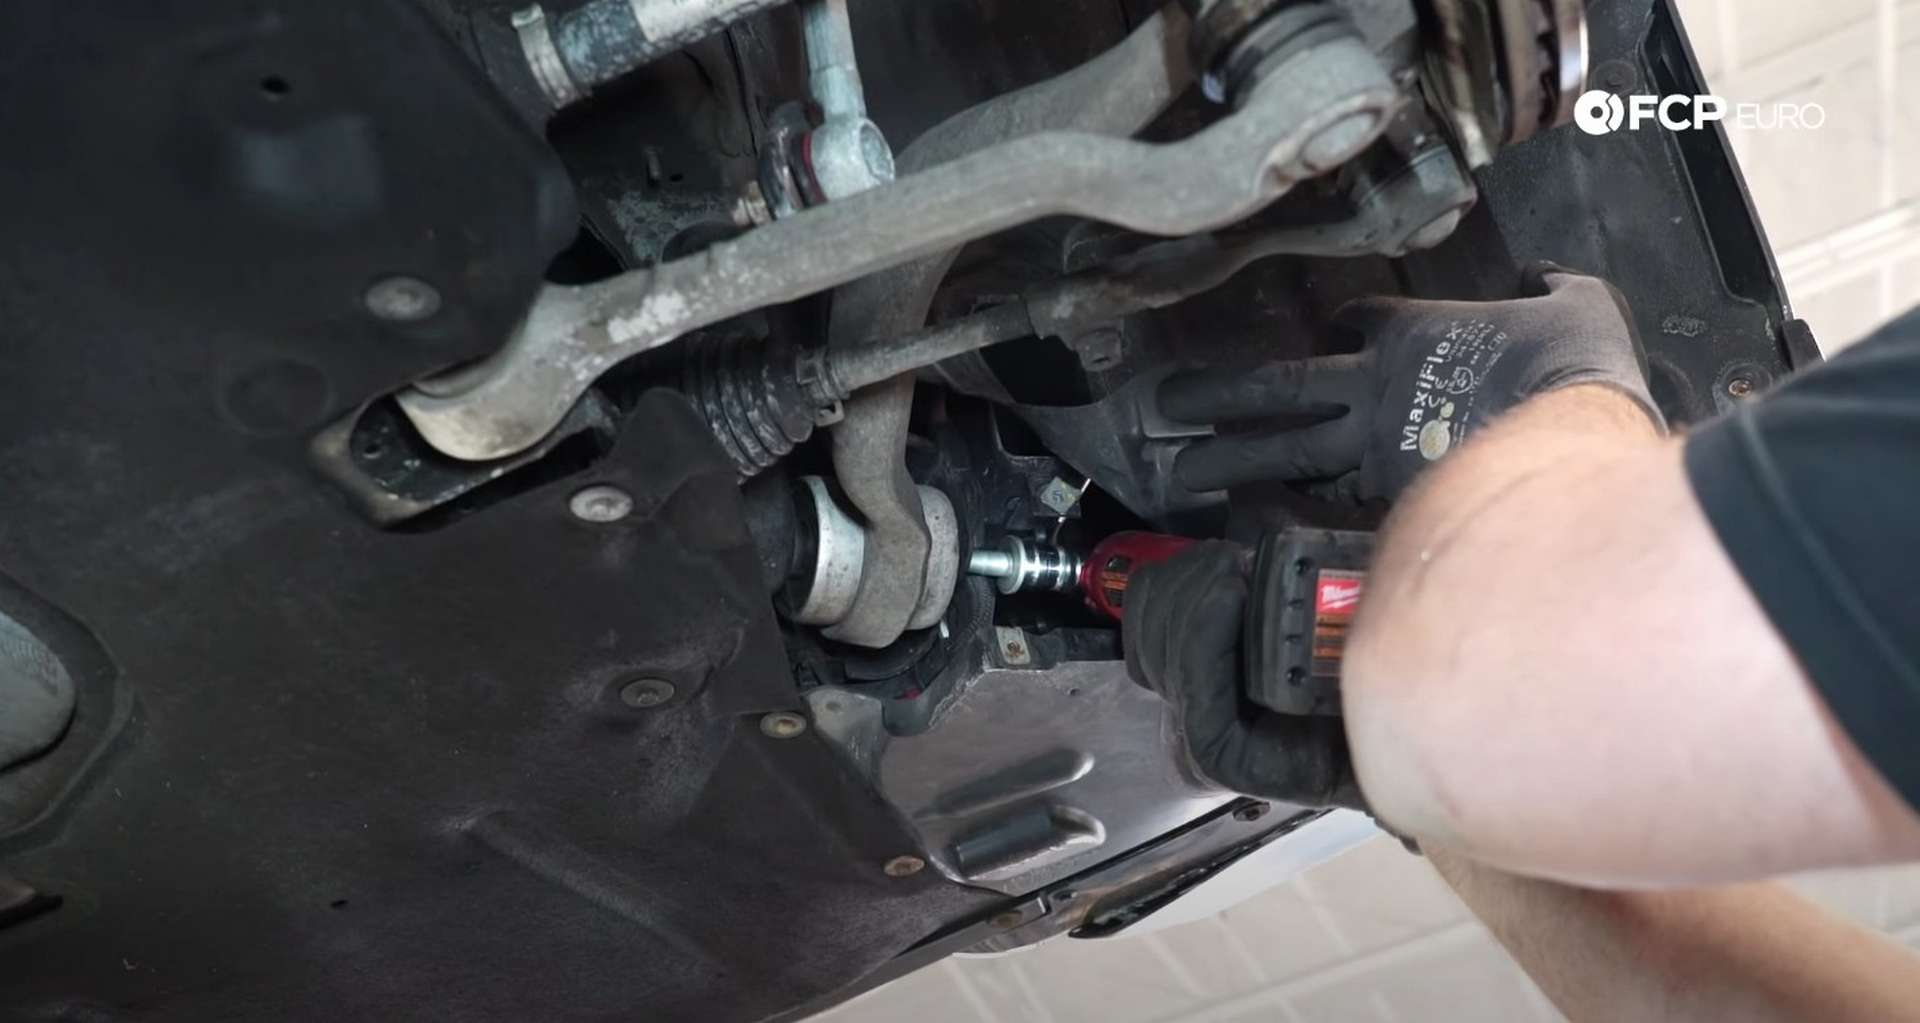
Use an 8mm socket to remove the fasteners holding the splash shield in the way of the inner mounting bolt.
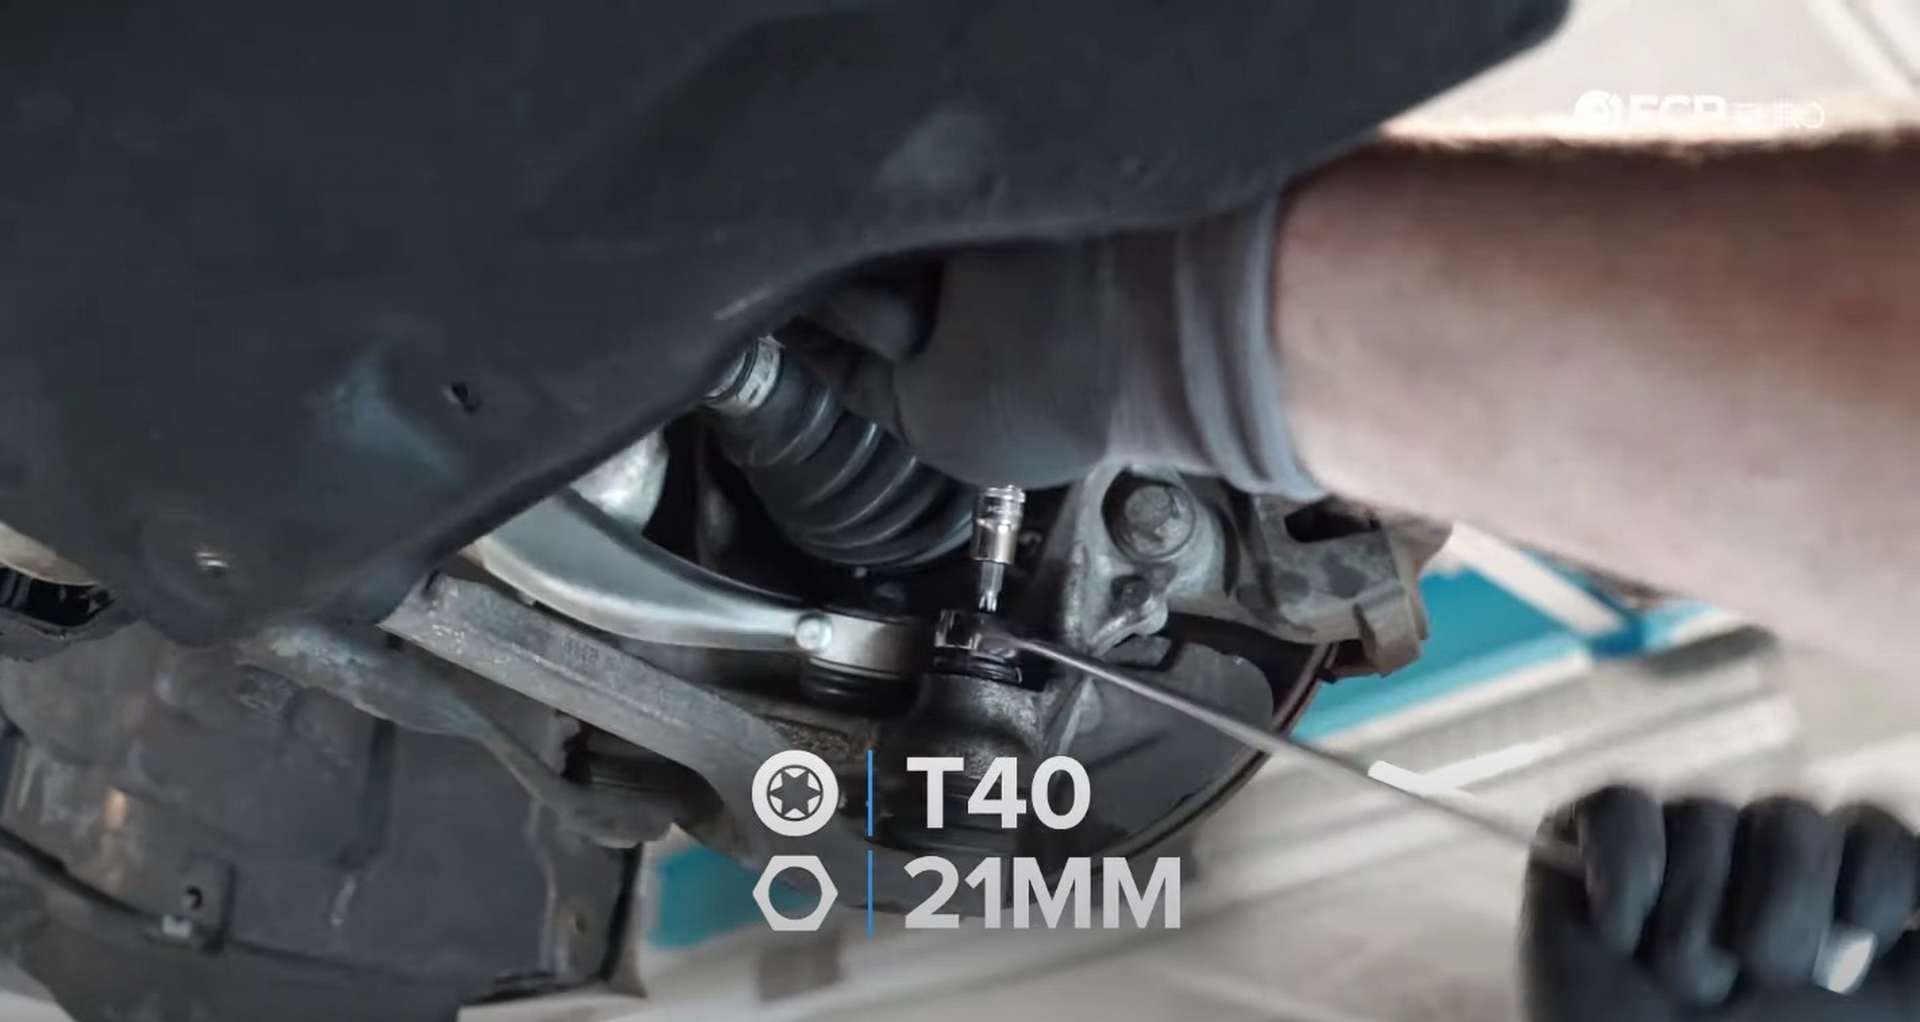
Then, use a 21mm socket or wrench to loosen the ball joint nut. If the threads start spinning with the nut, use a T40 Torx bit socket to counter hold them. Use a hammer on the threads, a pickle fork, a MAP gas torch, or all three to free the ball joint from the knuckle if the ball joint is stuck.
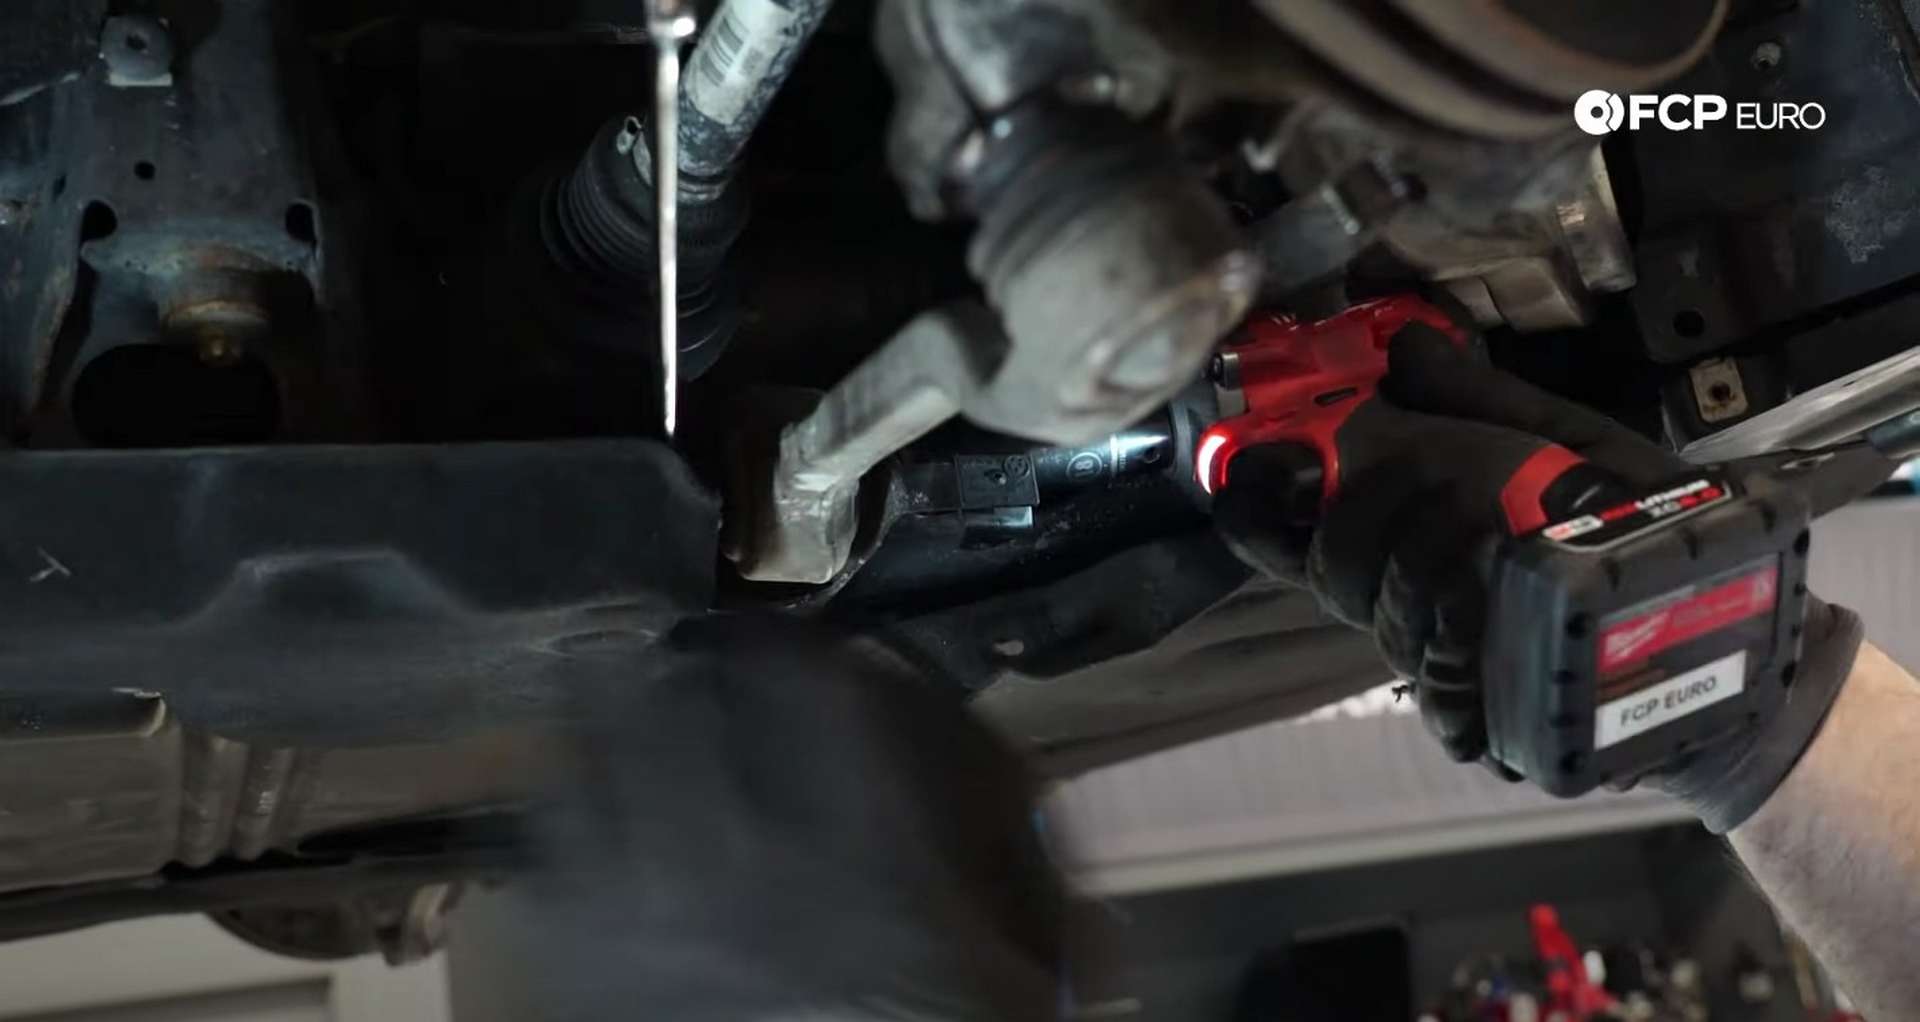
Once you remove the nut, move onto the inner mounting bolt. Use an 18mm socket and wrench to remove the nut and counter-hold the bolt head.
You'll be able to pull the control arm down and out after you remove the inner bolt.
Step 5: Install the new lower control arm
Take the new control arm and fit the inner bushing into position in the subframe. Then secure it to the subframe with its mounting bolt and nut. Put the bolt through the arm and subframe before threading no the nut by hand. Leave the nut and bolt loose to give yourself movement to install the ball joint in the knuckle.
Next, move the knuckle as necessary to get the ball joint threads into position through the knuckle. Then, thread on the 21mm nut. Use the 21mm wrench along with the T40 Torx bit socket to tighten the nut.

If you have xDrive, refit the axle to the wheel hub and thread in the axle bolt. Tighten the axle bolt with a 17mm hex bit socket.
Step 6: Torquing the bolts
Place a jack underneath the lower control arm's ball joint and raise it until it lifts the chassis off of the jack stand. The suspension is now at ride height, and you can start torquing bolts.
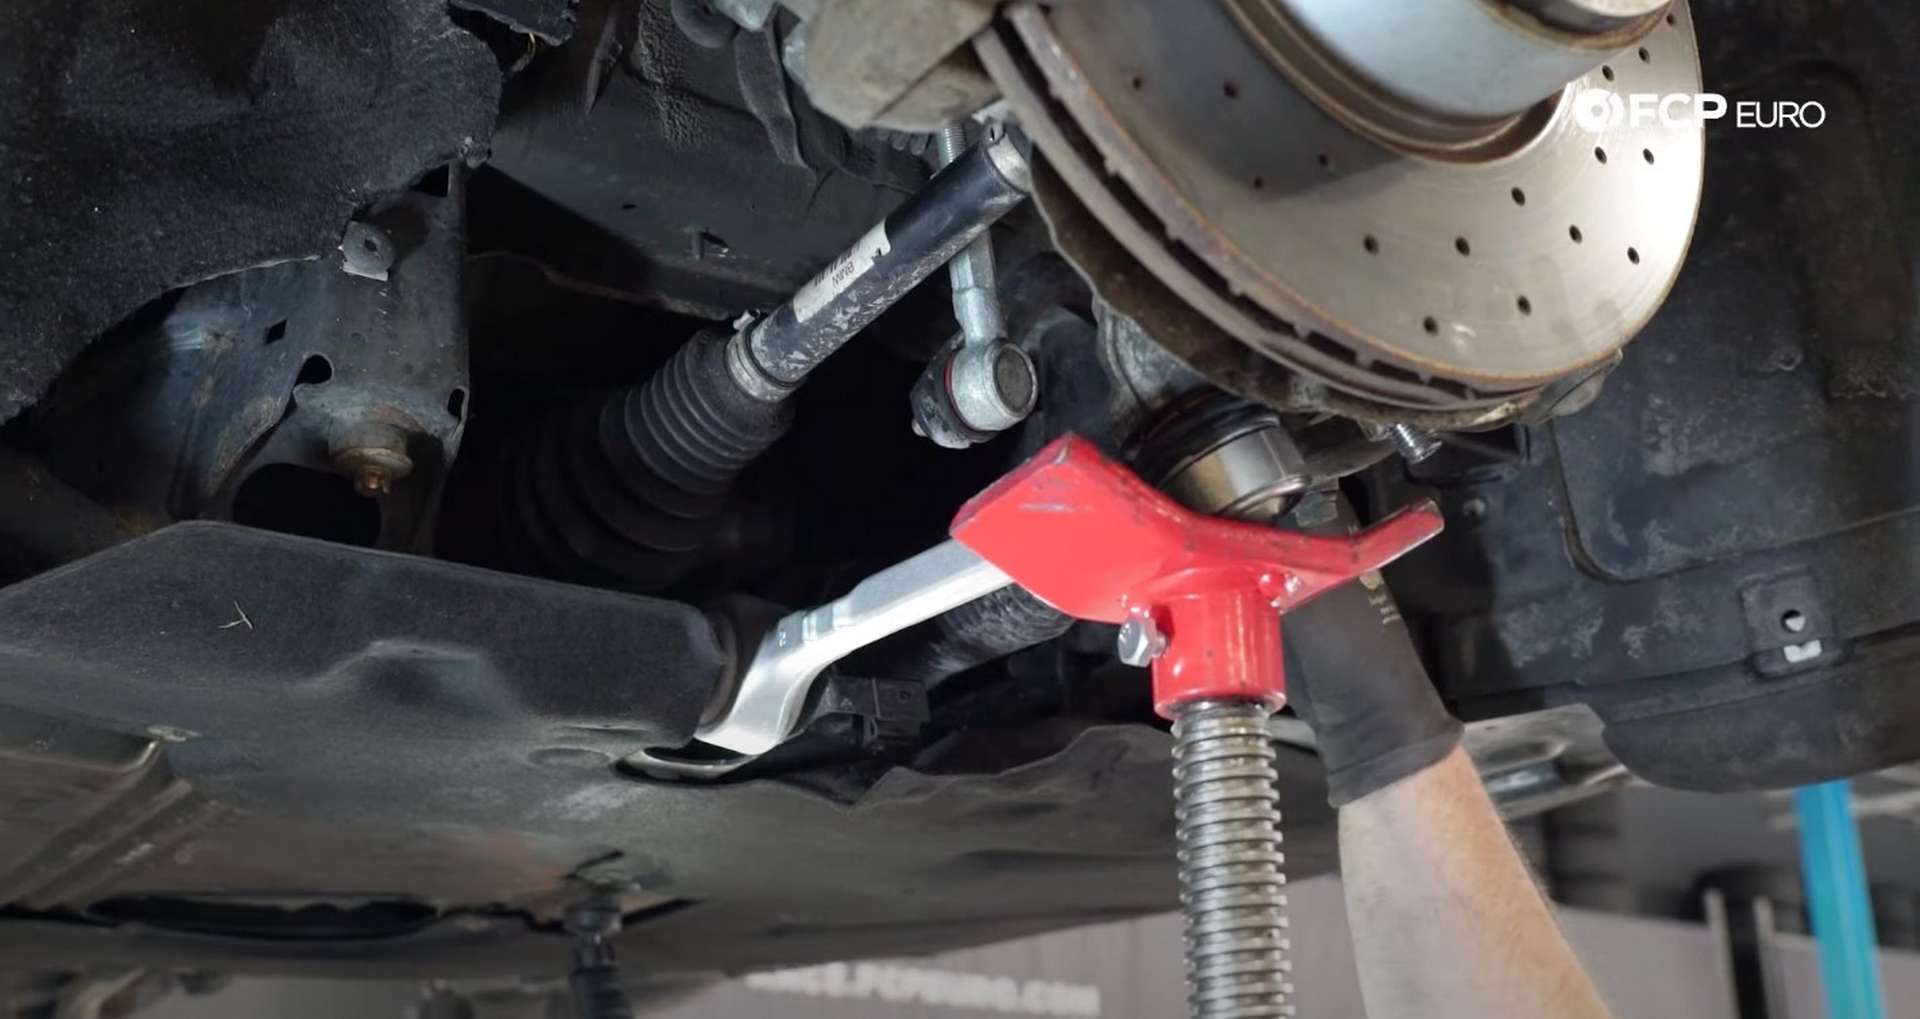

Use an 18mm socket to torque the thrust arm's inner bolt to 100Nm, plus 90° of rotation. Then, use an 18mm socket and wrench to tighten the nut and counter-hold the lower control arm's bolt head. Torque the lower control arm's bolt to the same toque spec as the thrust arm.
Next, use a 21mm socket to torque both ball joint nuts to 175Nm. Then, use a 17mm hex bit socket to torque the axle bolt to 210Nm, plus 90° of rotation. If you can, have a helper hold the brake pedal down to stop the hub from rotating and allow you to torque the axle nut. Otherwise, place a heavy-duty screwdriver through the caliper bracket and into the rotor's vanes to hold the wheel hub.

Lastly, refit the wheels. Start the lug bolts by hand before using a 17mm socket to drive them in.
BMW F30 Front Control Arm Torque Specs:
- BMW Thrust Arm Bolt = 100Nm or 74 ft-lbs, of torque, plus 90°
- BMW Lower Control Arm = 100Nm or 74 ft-lbs, of torque, plus 90°
- BMW Thrust Arm Ball Joint Nut = 175Nm or 129 ft-lbs, of torque
- BMW Lower Control Arm Ball Joint Nut = 175Nm or 129 ft-lbs, of torque
- BMW Axle Bolt = 210Nm or 155 ft-lbs, of torque, plus 90°
There you have it. Replacing the front control arms on an F30 BMW 3-series is straightforward and easily achievable in your driveway. If you're interested in more DIYs for your BMW, you can visit bmw.fcpeuro.com and subscribe to our YouTube channel.


