
The condition of the rubber windshield seals on your vehicle directly correlates to how dry the interior of your vehicle is. The BMW E90 has notoriously bad windshield seals that crack and flake off over time. Once they flake off, they allow moisture to get between the chassis and windshield, and that will cause rust to form around when windshield and allow water to leak into the interior. Additionally, the cracked seal allows an excess of wind noise and looks horrible.
The windshield of the BMW E90 doesn’t need to come out to replace the weather seal. You can accomplish this DIY at home with only a couple of tools and some patience. Follow the steps as best you can and use the video for the best visual guides.
BMW models and years applicable:
|
|
|
|
|
Symptoms of failing windshield trim:
- Cracked and flaking windshield trim
- Excessive wind noise around the windshield
- Water leaking into the interior from the windshield
Determining whether or not your windshield trim needs to be replaced is as easy as looking at it. The most significant sign that it is failing is the visual of pieces falling off or missing. Beyond that, any visible water leaks from the top of the windshield will give it away.
How much will it cost to replace the windshield trim on my BMW E90?
The trim piece from BMW costs $29.65. A dealership will charge more for the seal and will charge you for the labor cost. Expect them to charge an hour for the labor at around $120 an hour.
How long will it take to replace the windshield trim on my BMW E90?
This job doesn’t have a set time. There isn’t much to do, but it rewards being meticulous and patient. Windshield glass is not cheap to replace, and a fresh seal isn’t easy to remove. Set aside half an hour, minimum, to ensure you’ve done everything properly.
Tools required to replace the windshield trim on my BMW E90:
Parts required to replace the windshield trim on my BMW E90:
Steps required to replace the windshield trim on my BMW E90:
Step 1: Remove the old windshield seal
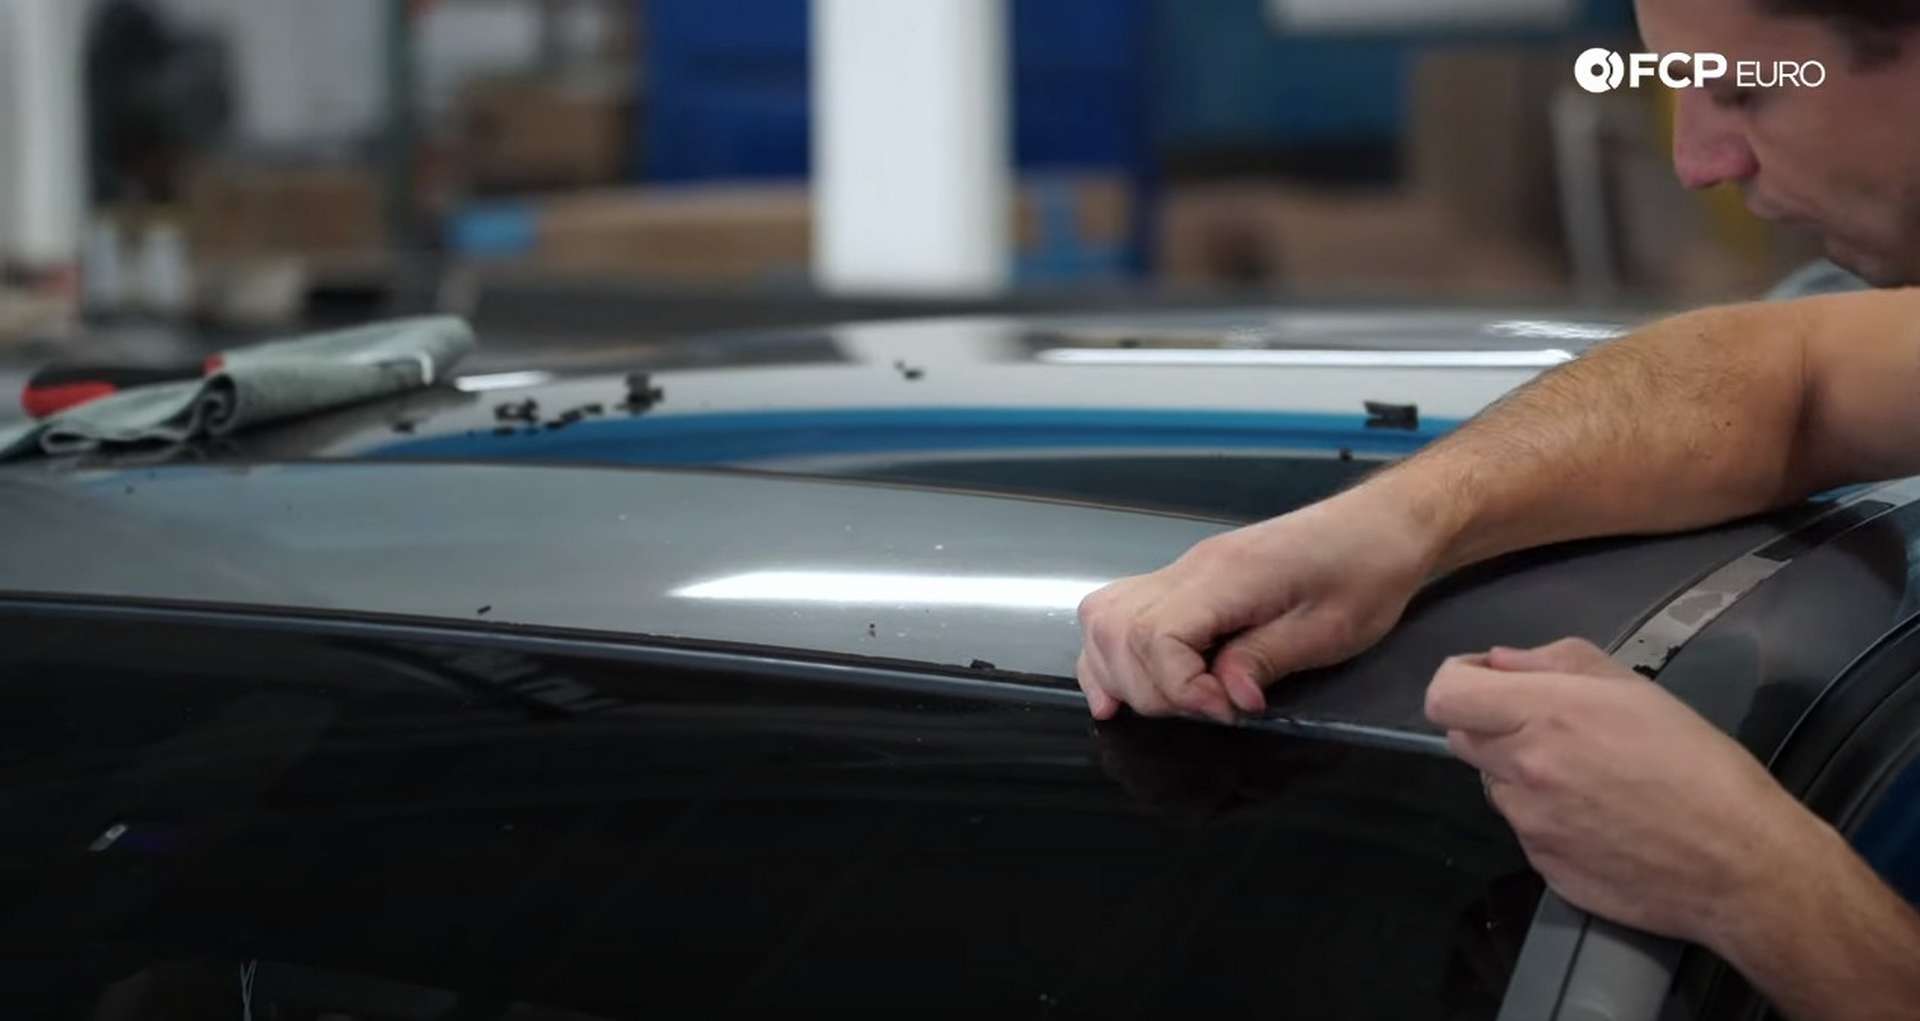
Use a pick or your fingers to remove as much of the dried windshield seal as you can. The seal is only glued to the car at the edge of the roof, so most of the seal will come off easily.
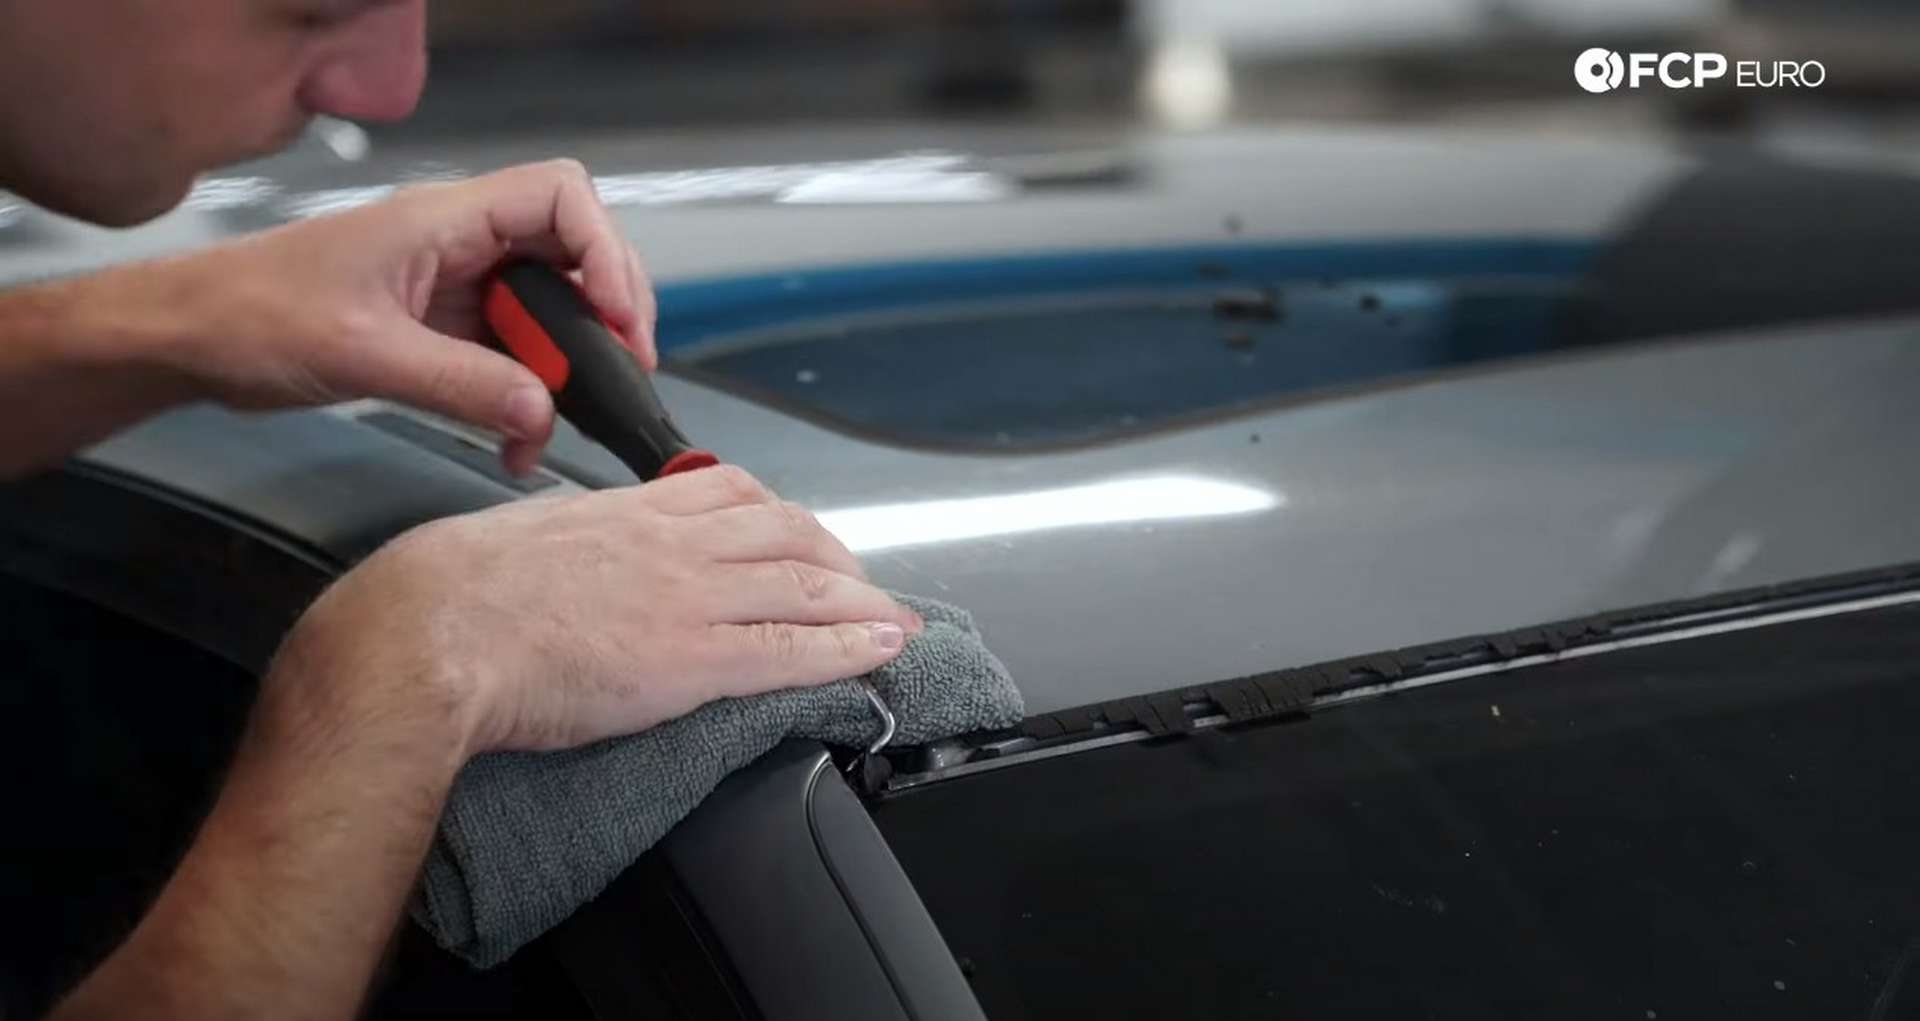
Around the upper edge of the windshield is a metal strip that holds the seal against the glass. Use a pick to pry up one of the corners of the strip gently. Push the corner of the strip away from the windshield and then lift on it. You should now be able to pull the strip off of the windshield.
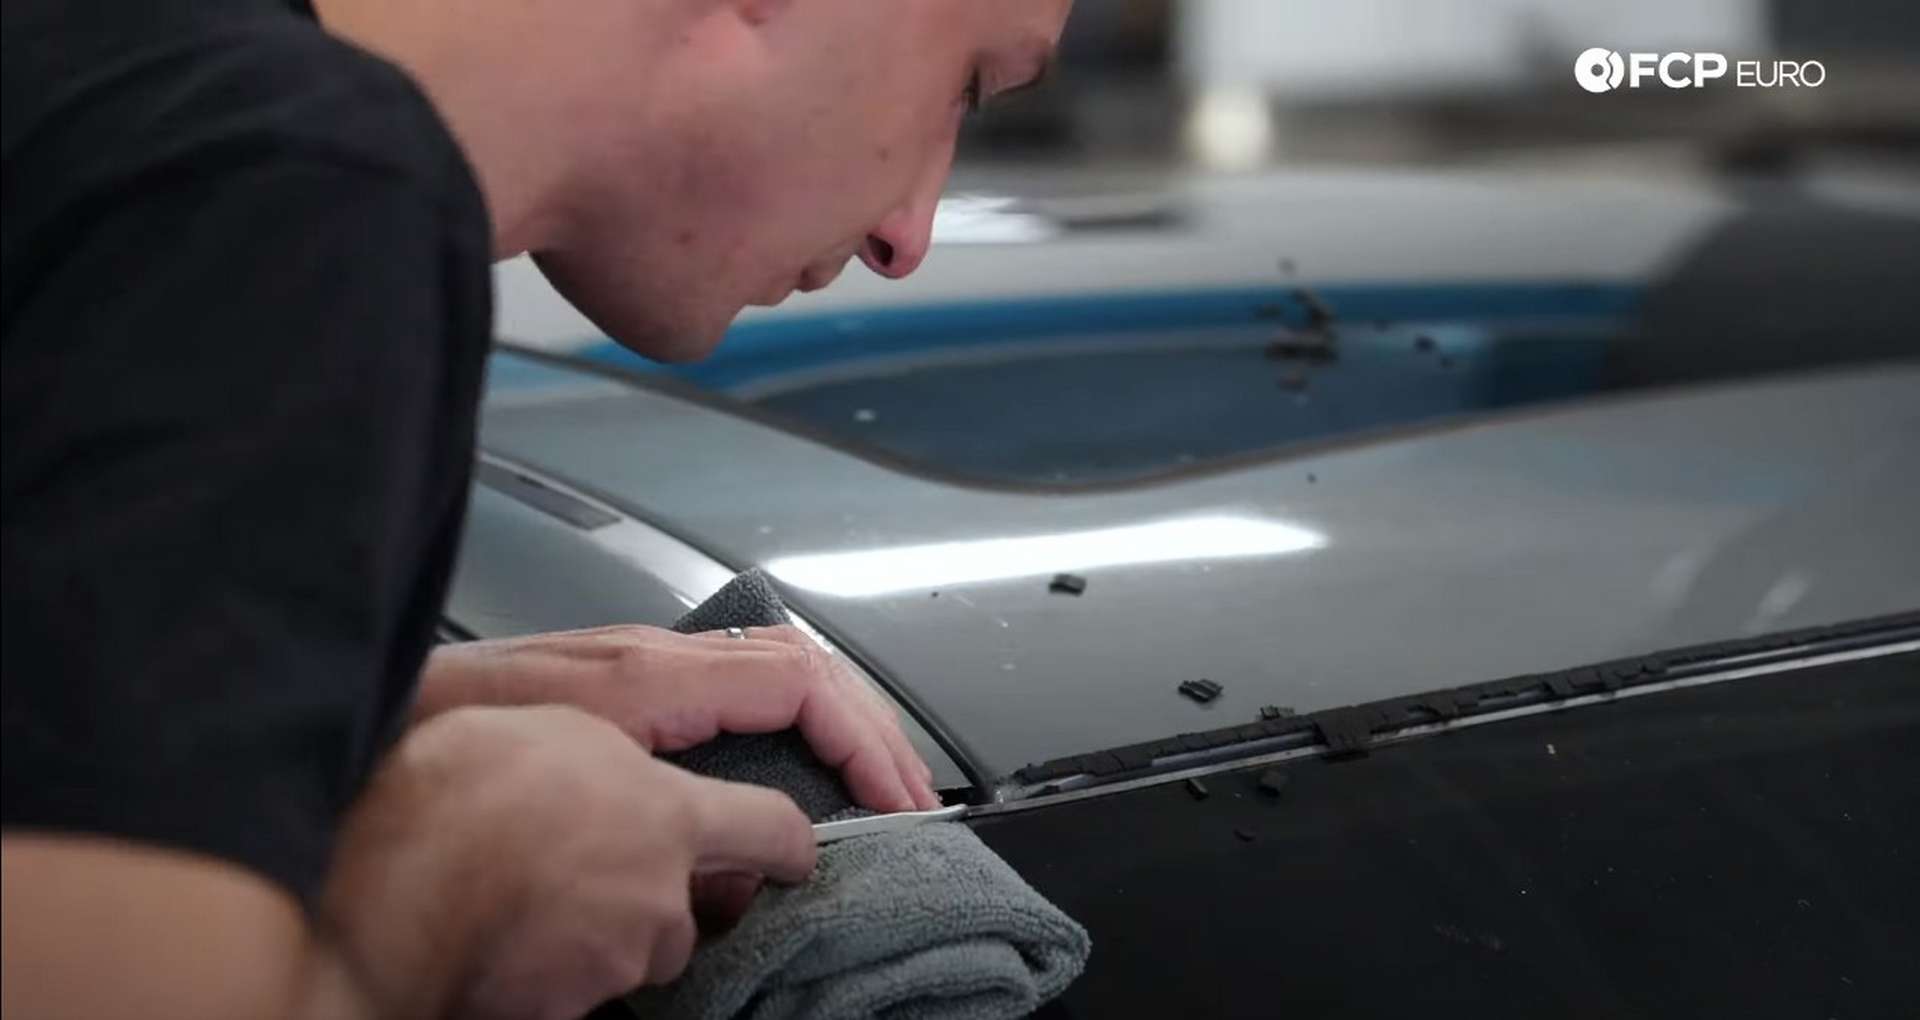
Then, use your fingers or a plastic trim tool to pick off the seal’s remaining bits from the roof.
Step 2: Prepare the roof for the new seal
Grab a vacuum or a can of compressed air and clean the roof and windshield channel of any loose seal fragments. The old bits of the seal will prevent the new one from seating correctly.
Then, use some degreaser on a rag to clean the roofline of the old glue. Make sure no bits of old glue remain in the windshield channel.
Step 3: Install the new windshield seal
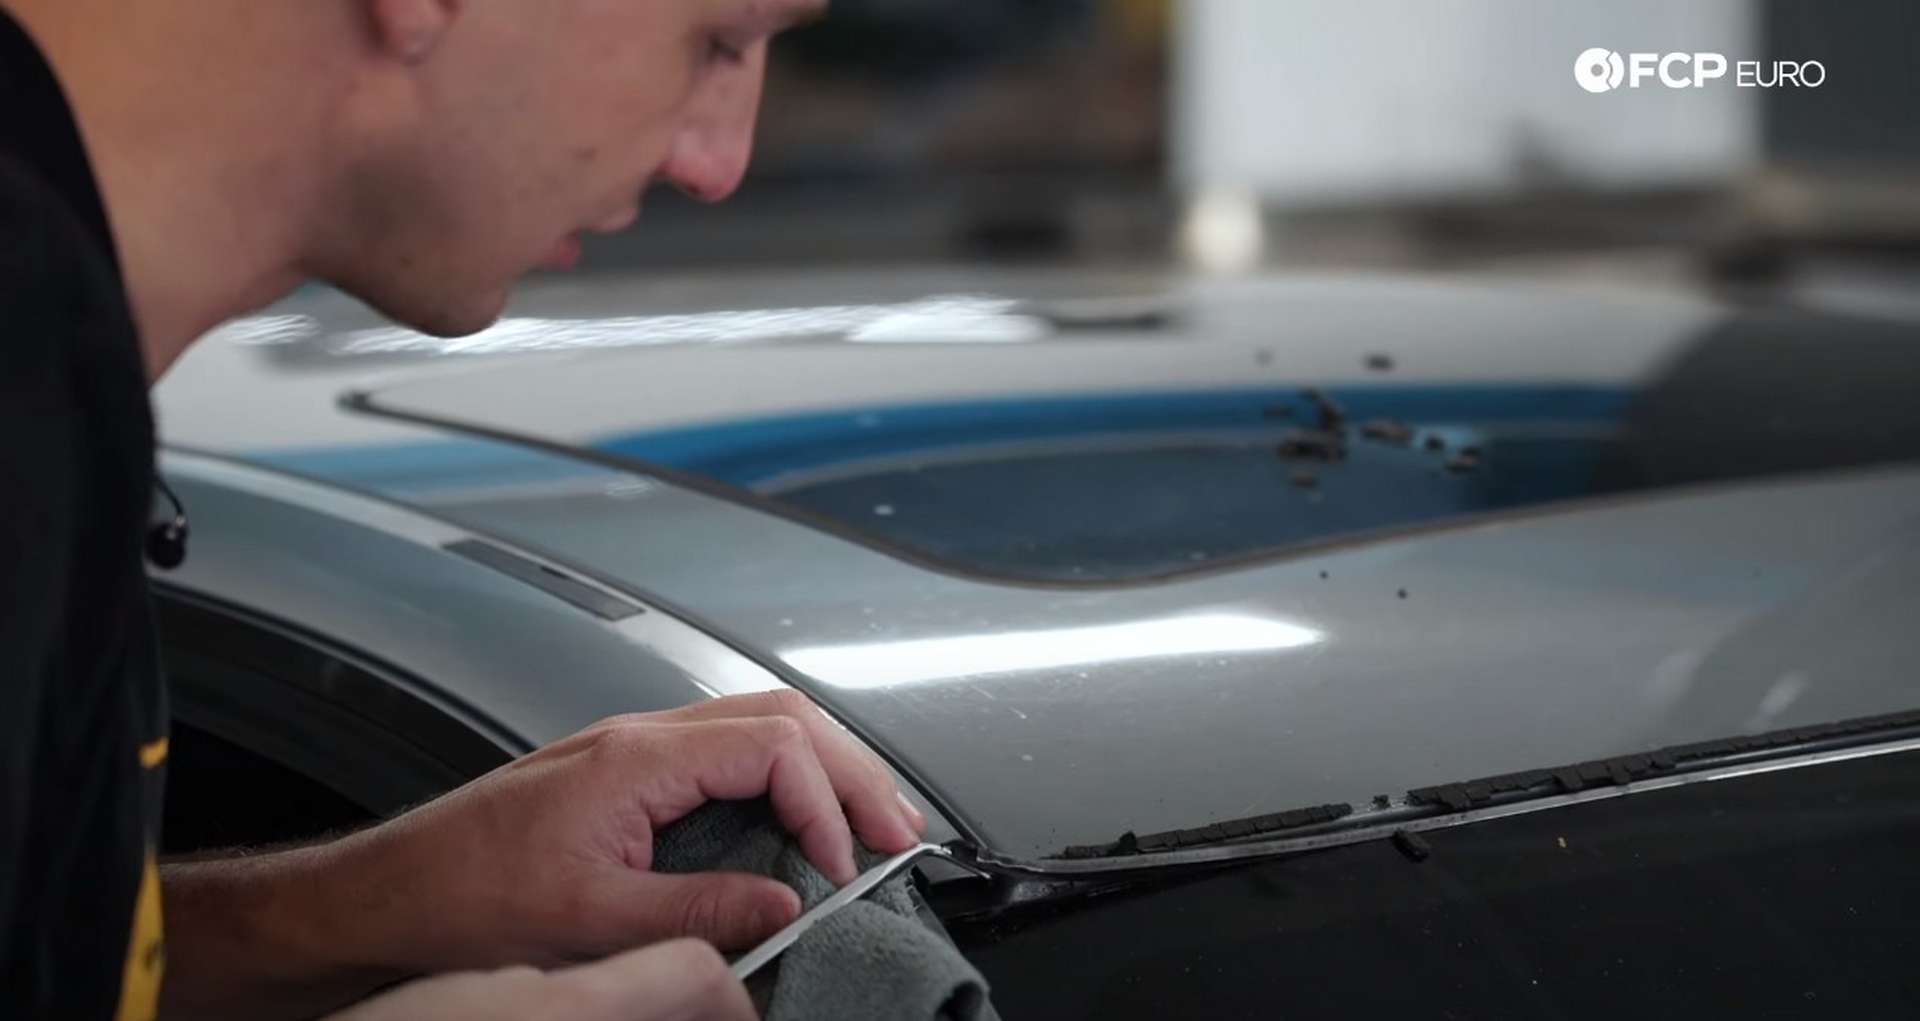
The metal strip inside the new seal needs to hook around the windshield’s edge before anything else. Start both corners of the seal away from the edges of the windshield. Those areas are very tight and have an increased risk of cracking. Get the corners hooked around the windshield’s edge and then push them into their respective corners. Push the middle of the seal around the edge gradually while pushing the corners outward.
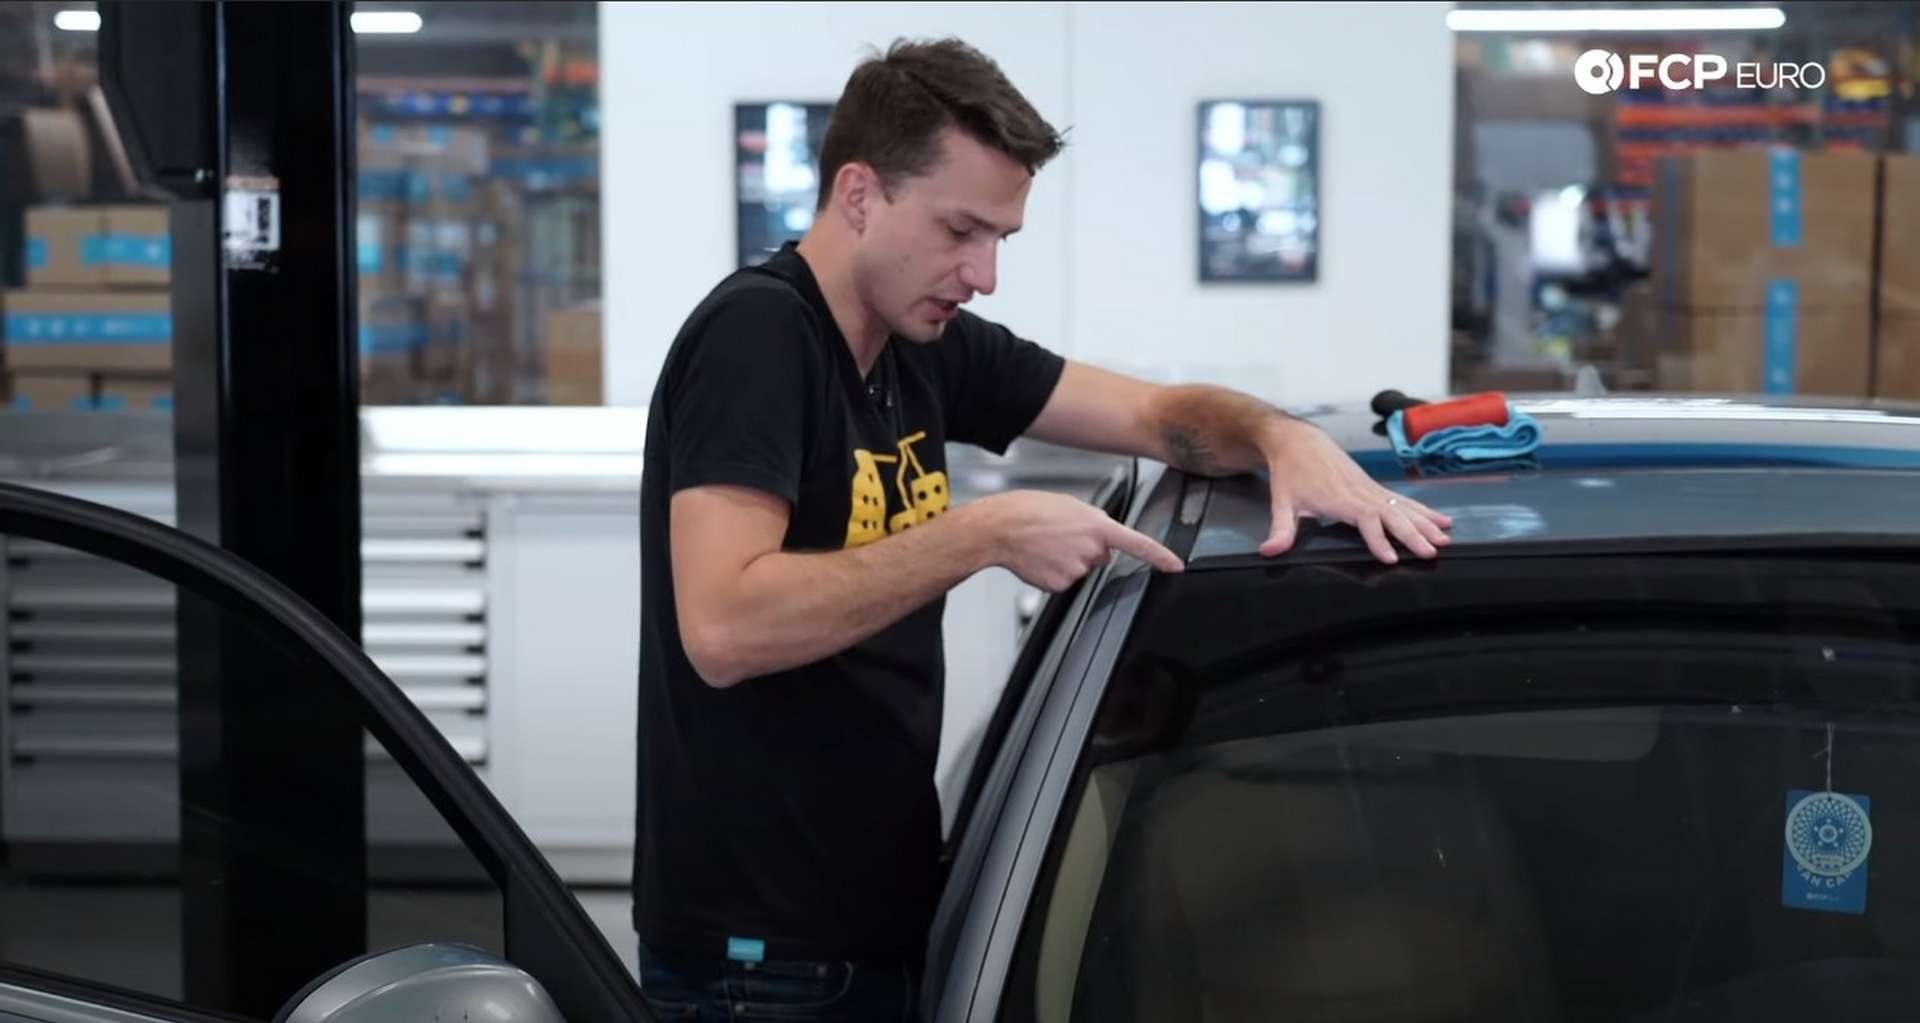
You can get one corner situated and work your way across to the other corner, but you’ll have to be careful when installing the other corner. Use a trim tool to pry up on the side windshield trim to give yourself more space to properly seat the corner.

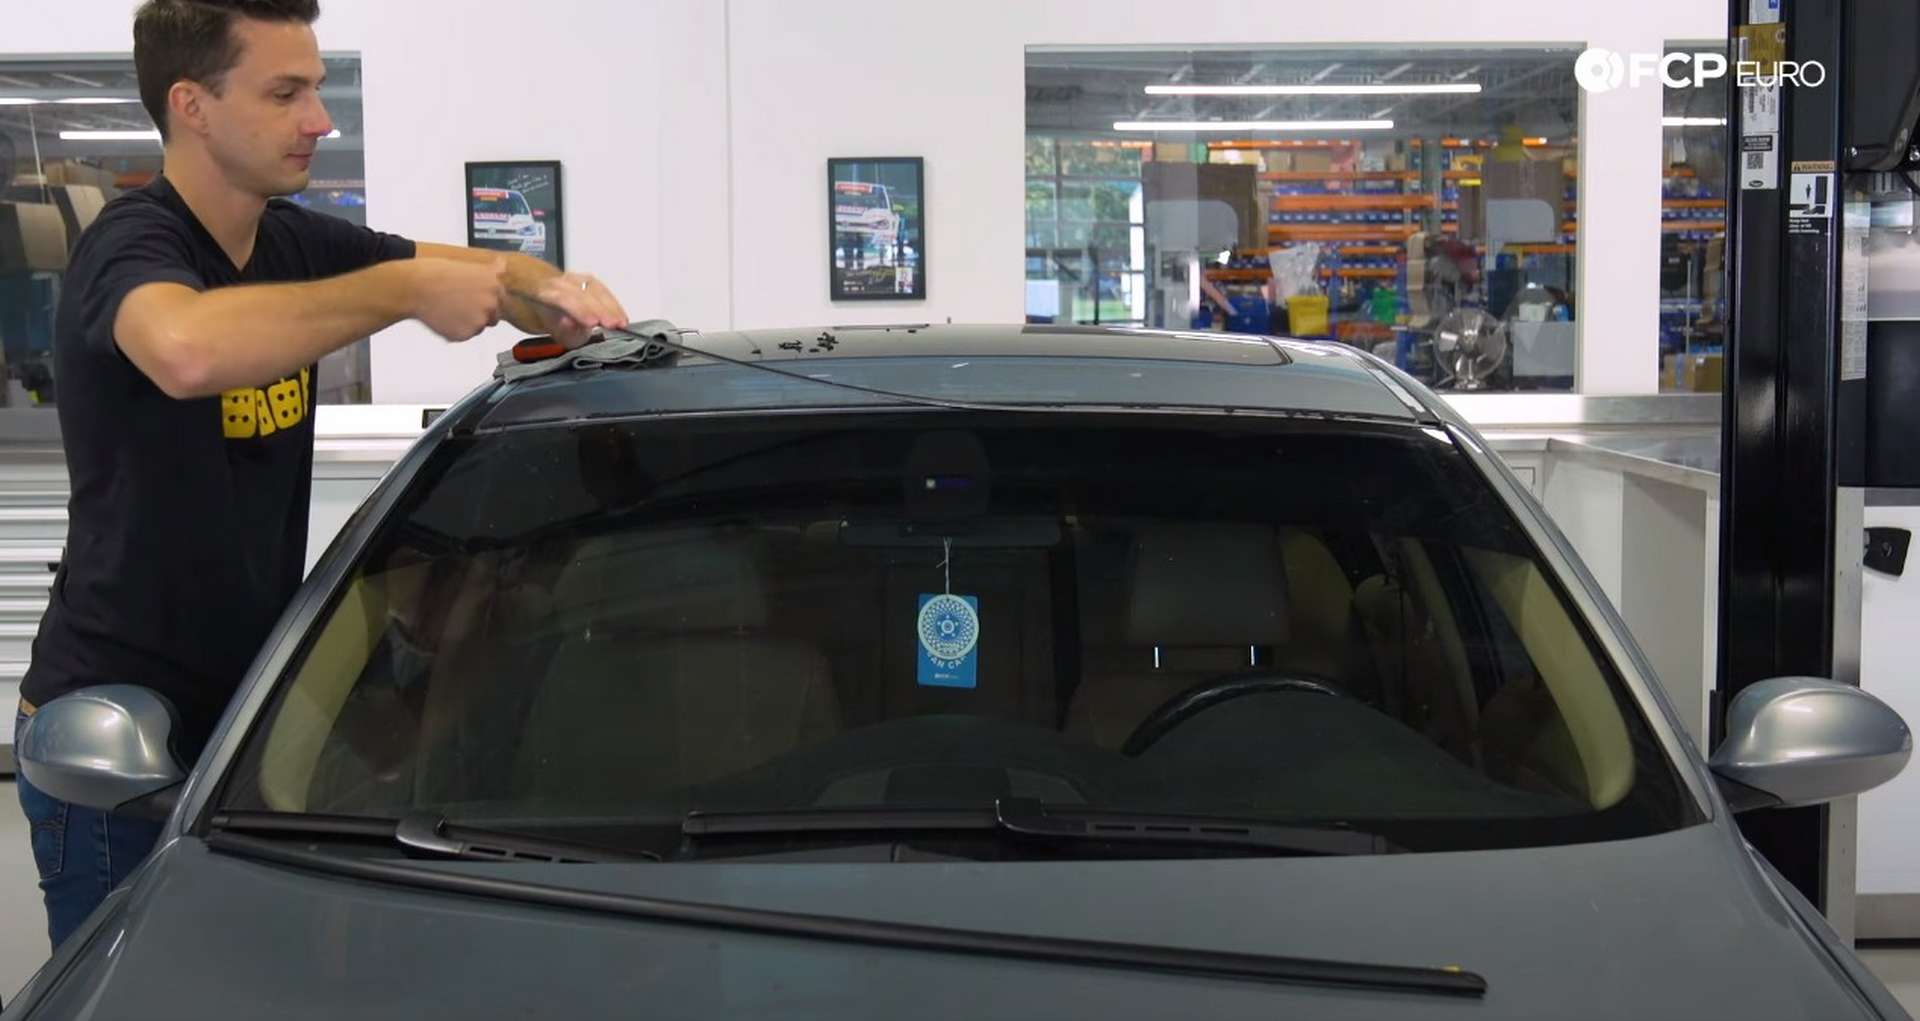
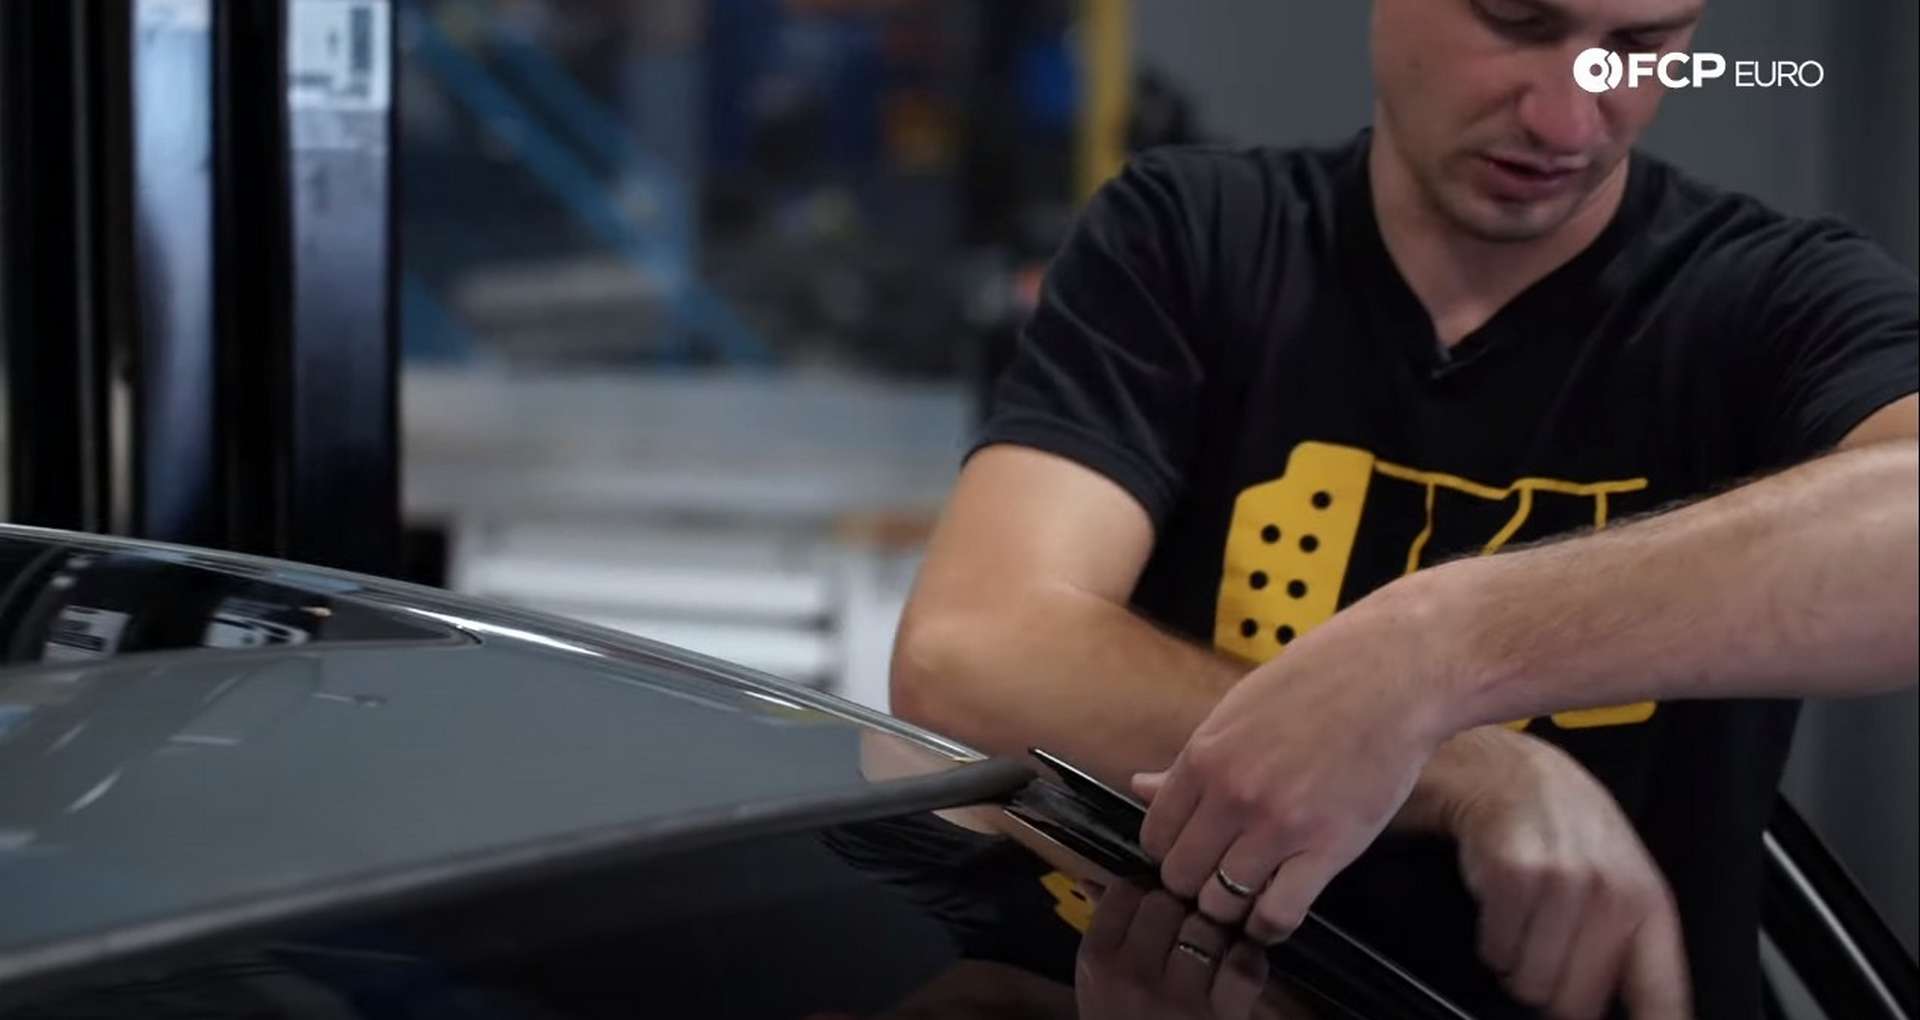
Use a rag-covered mallet to tap down on the seal to ensure that the metal strip is fully seated. Then, lift the back of the seal and remove the protective strip that covers the adhesive. Push down on the seal as you pull the protective strip off of the seal to prevent any gaps from forming.
Hopefully, this job takes care of the water leak or crazy wind noise coming from the top of your windshield. If you're interested in more DIYs for your BMW, you can visit bmw.fcpeuro.com and subscribe to our YouTube channel.


