- 07/12/2021
- 5 Min Read
- By: Christian Schaefer
How To Replace BMW E90 Tie Rods (BMW 128i, 325i, 328i, 335i, X1, & More)

BMW’s E90-generation of sport sedan is one of the most easily accessible performance sedans on the used markets. Their relative simplicity and great handling characteristics make them a great choice for the new enthusiast. However, the BMW E90 well over ten years old, and not every owner is mechanically responsible. Replacing worn steering and suspension components is a great way to ensure your BMW is driving just the way the factory intended.
Good steering feel is a large part of BMW’s sport sedans, and the tie rods and tie rod ends are a huge part of that. The tie rod’s inner joint and the tie rod end’s ball joint wear over time leading to a vague or sloppy steering feel. Thankfully, those components are easily replaceable right at home in your driveway with a few simple tools. Follow the steps below to replace those tie rod assemblies quickly and correctly.
BMW Models and Years Applicable:
|
|
|
|
|
|
|
|
|
|
|
Symptoms of worn BMW E90 tie rods:
- Loose steering feel
- Clunking or knocking sound from the front wheels
The tie rods and the tie rod ends are directly responsible for connecting the steering rack to the steering knuckle. Both the inner tie rod and the tie rod-end use joints to pivot and move with the suspension and steering system to keep the car in control. When those joints wear, the wheels become easier to turn, giving the steering a loose feeling and causing the wheels to react more with the road around them. In short, the wheels will react more to the road surface than to what your hands are telling them to do.
How much will it cost to replace BMW E90 tie rods?
We offer a kit from Lemforder with all of the parts you need to replace the tie rods. This kit will run you about $135. Additionally, you will need to go for an alignment after you complete the replacement. Changing the tie rods affects the toe angle, and you can’t set that without the proper equipment. Set aside around another $150 for the alignment to be safe.
How long will it take to replace BMW E90 tie rods?
Replacing the tie rods on the front of a BMW E90 should take around an hour per side. However, the job’s actual length is determined by where the vehicle resides and its previous maintenance. Vehicles in regions with extensive corrosion issues will likely have corroded hardware that can extend the replacement time.
Parts required to replace BMW E90 tie rods:
Tools required to replace BMW E90 tie rods:
Steps required to replace BMW E90 tie rods:
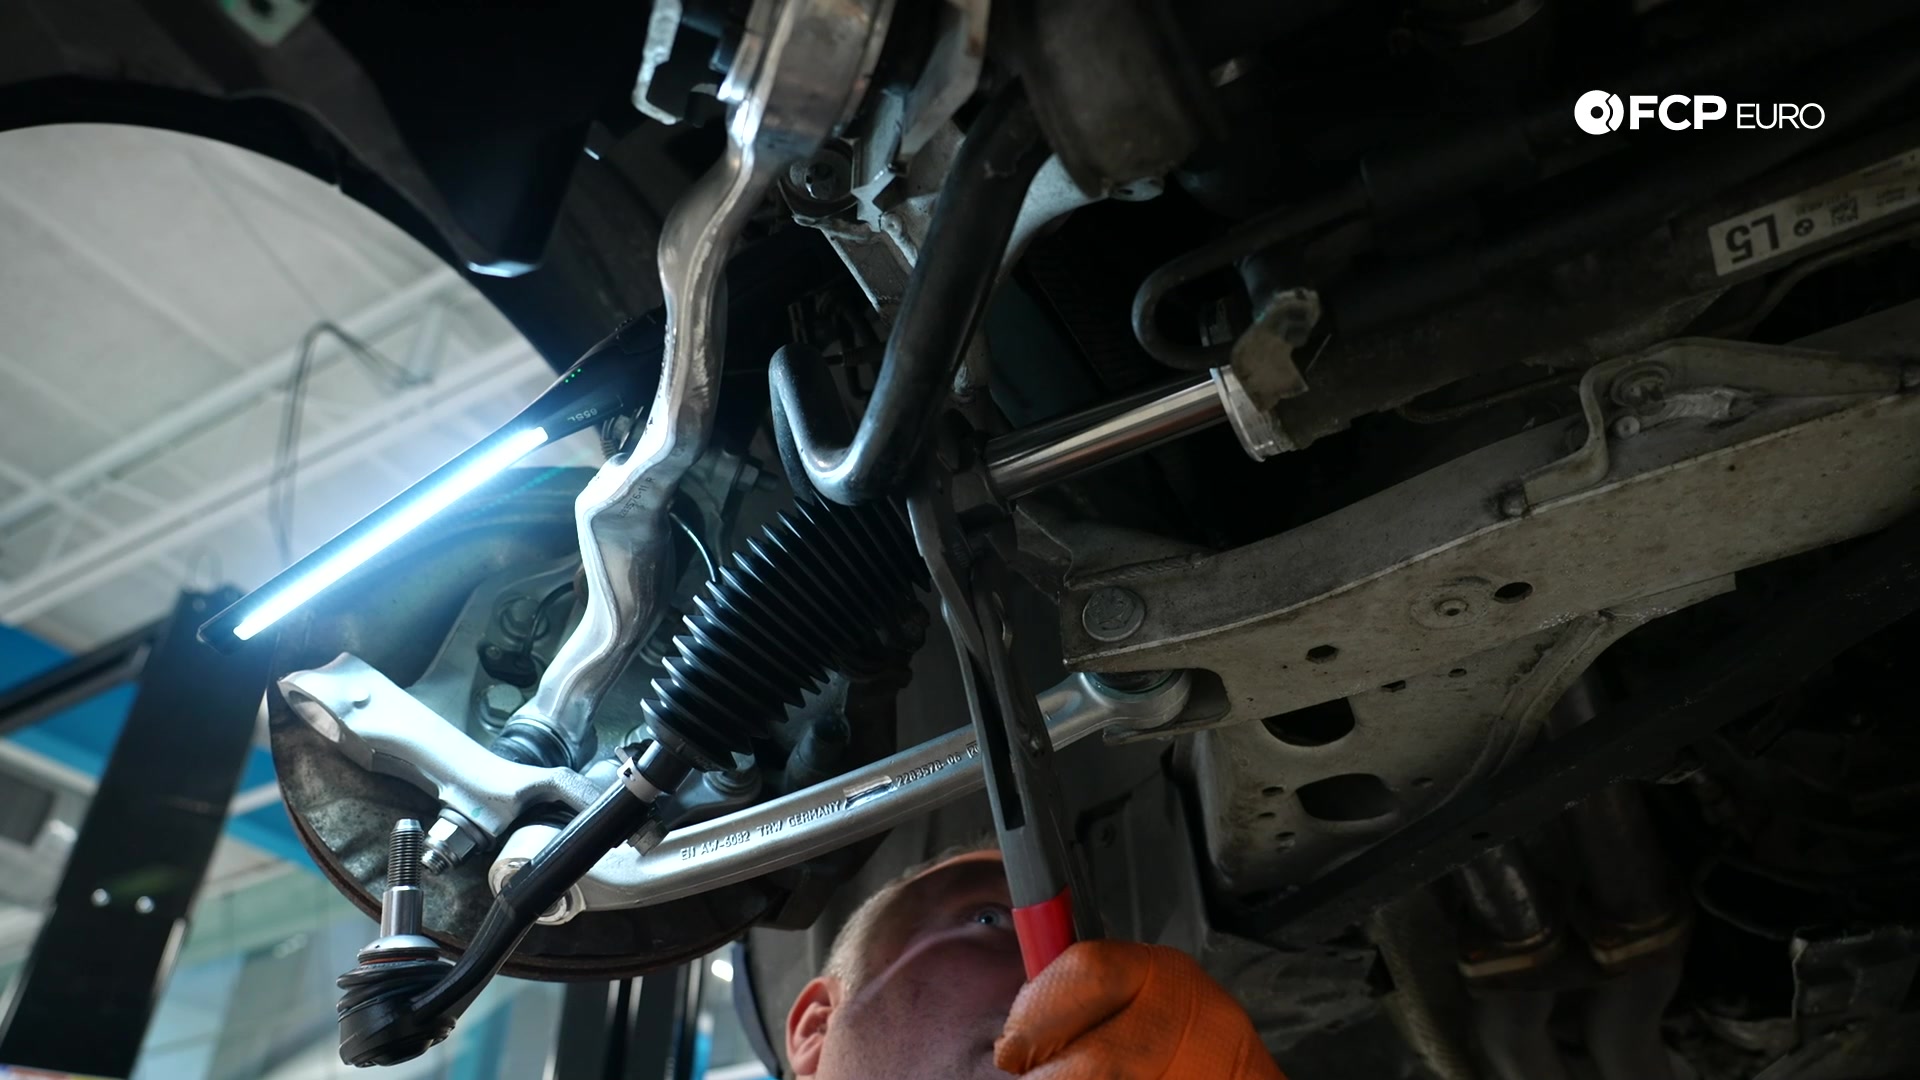
Step 1: Disconnect the tie rod end from the knuckle
Jack up the front of the vehicle and remove the wheels. Use a 17mm socket to remove the lug bolts. Then locate the tie rod end on the knuckle.
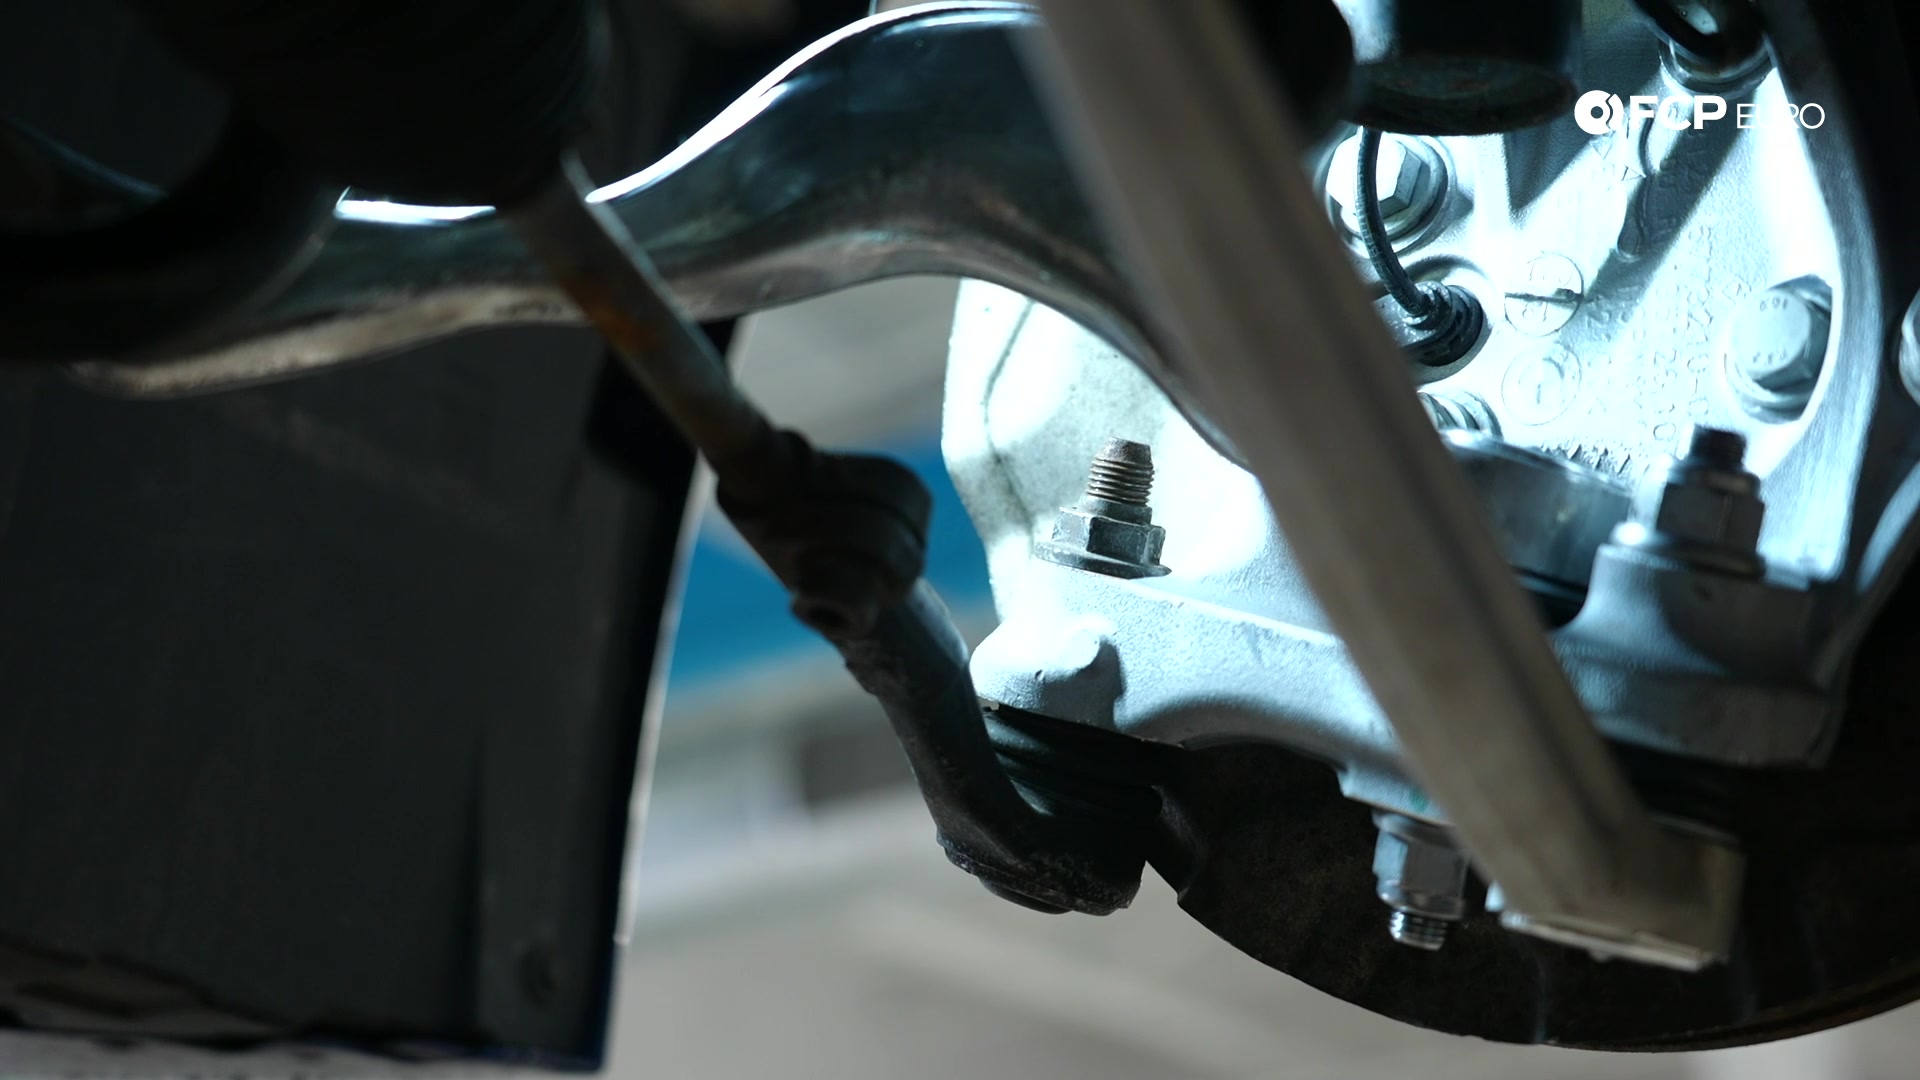
The tie rod end connects to the leading side of the knuckle, so turn the steering wheel to the side of the vehicle you’re working on to give yourself the best access. Then, use a 21mm wrench to loosen the tie rod end’s nut.
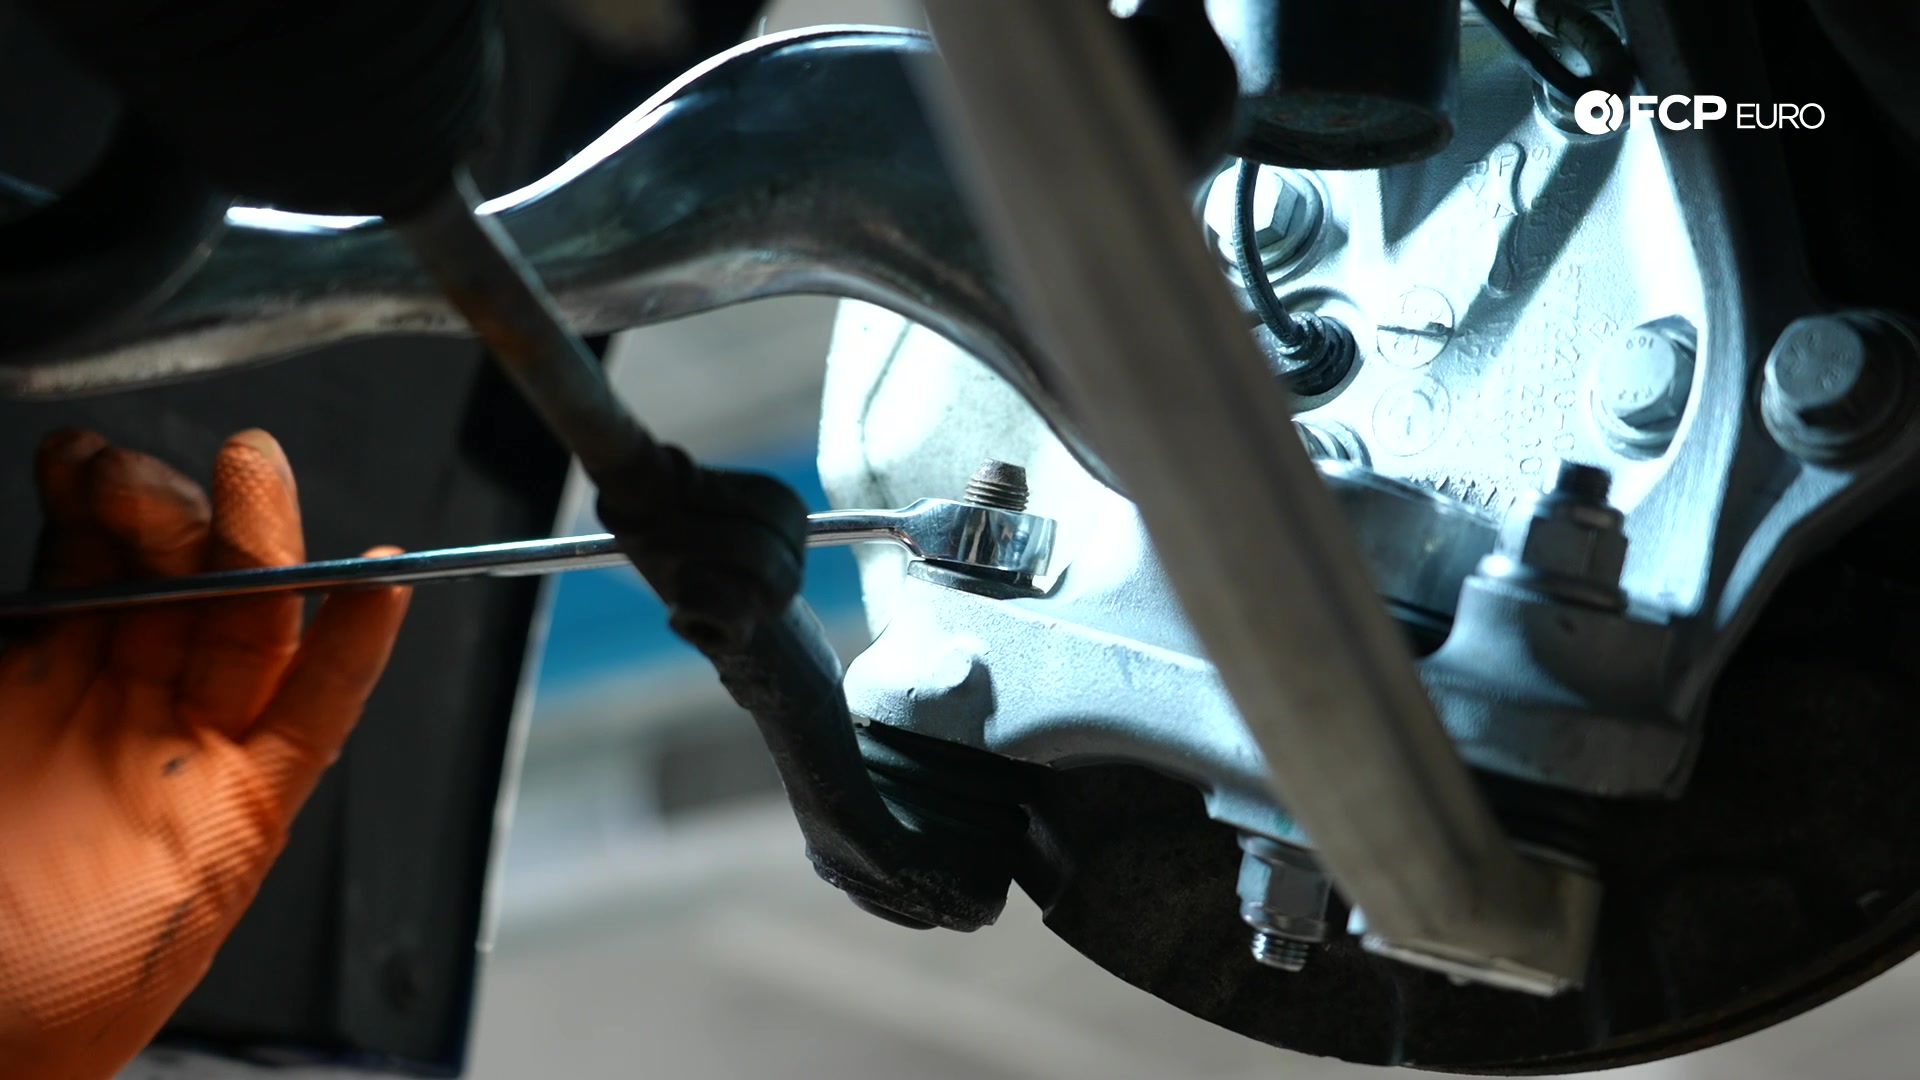
Once you get the nut loose, remove it from the ball joint’s stud. Counter hold the stud with a T40 Torx bit socket and spin the nut with a 21mm wrench if the nut grabs the stud and starts to spin it.
Pull the tie rod end out of the knuckle once you remove the nut. Tap the top of the ball joints stud with a hammer if it refuses to come out of the knuckle. Corrosion is keeping it stuck in place, but the shock from the hammer will let it free.
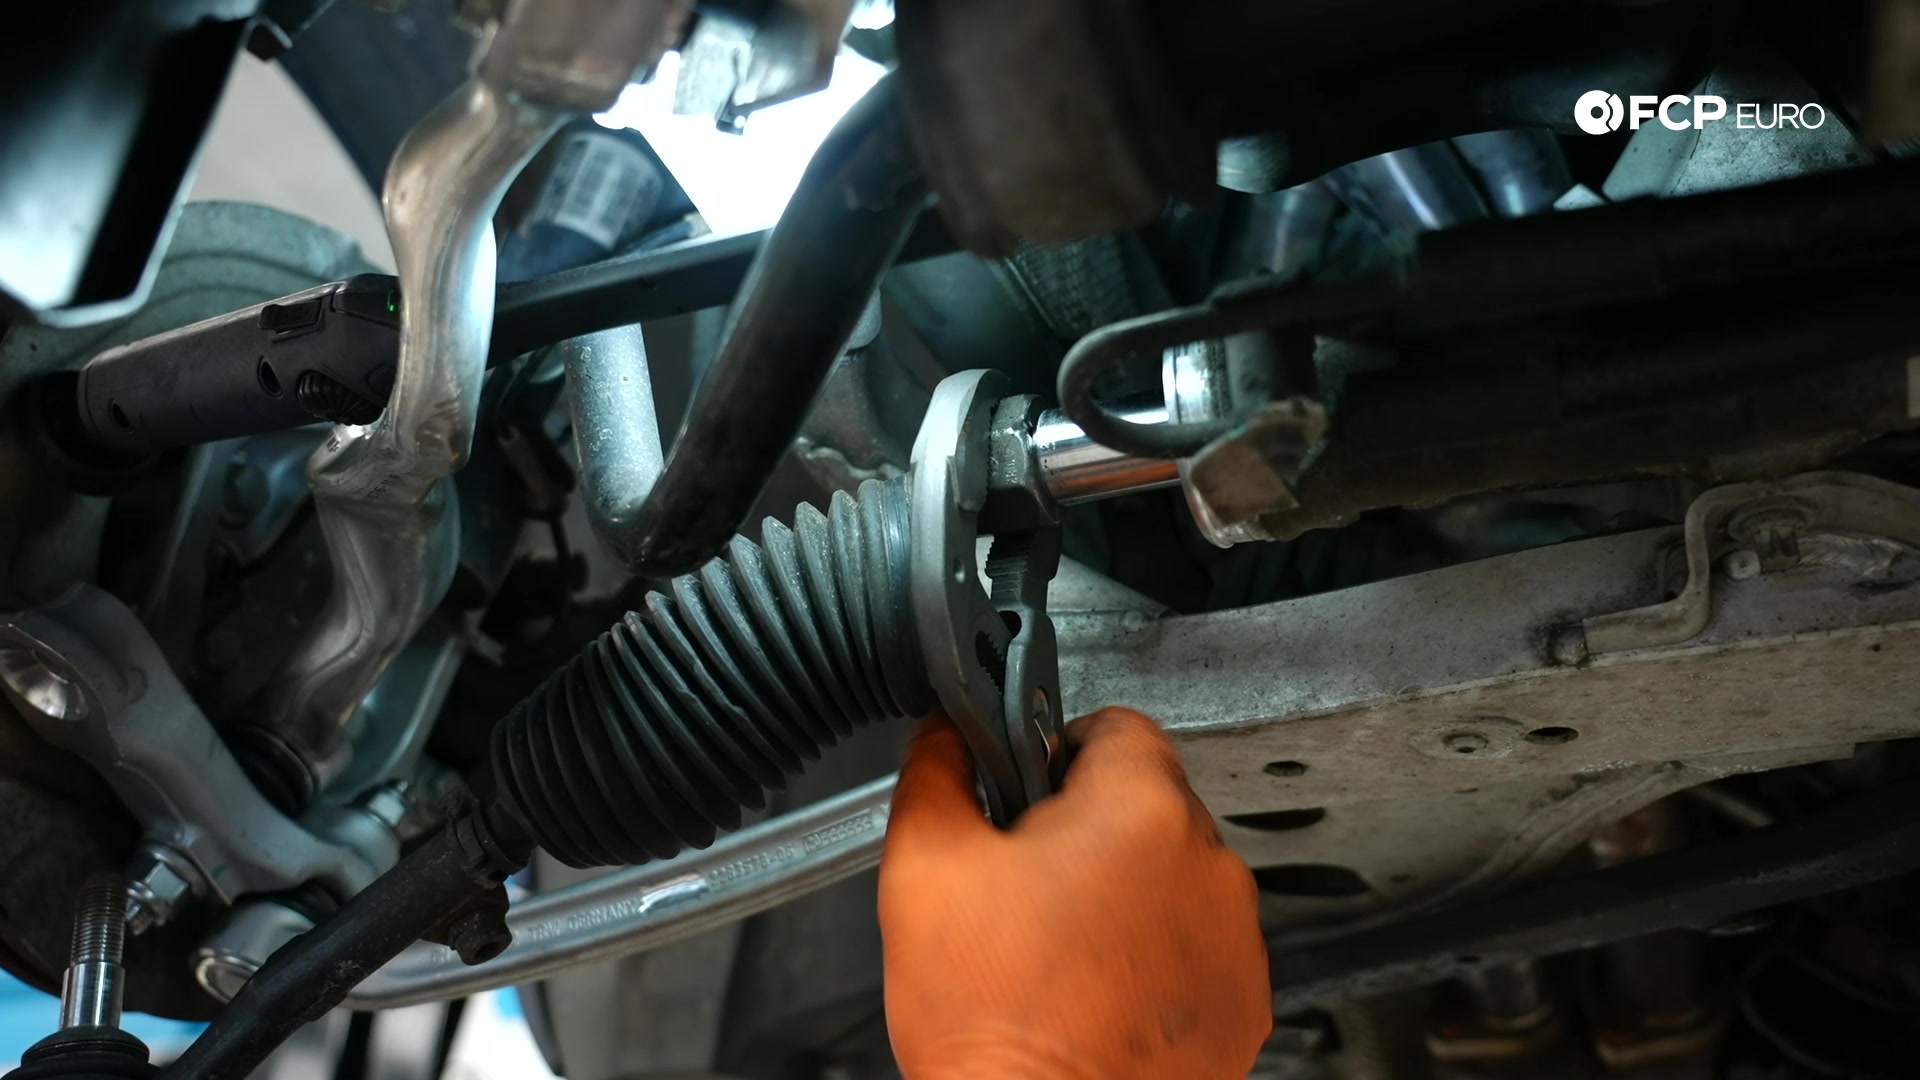
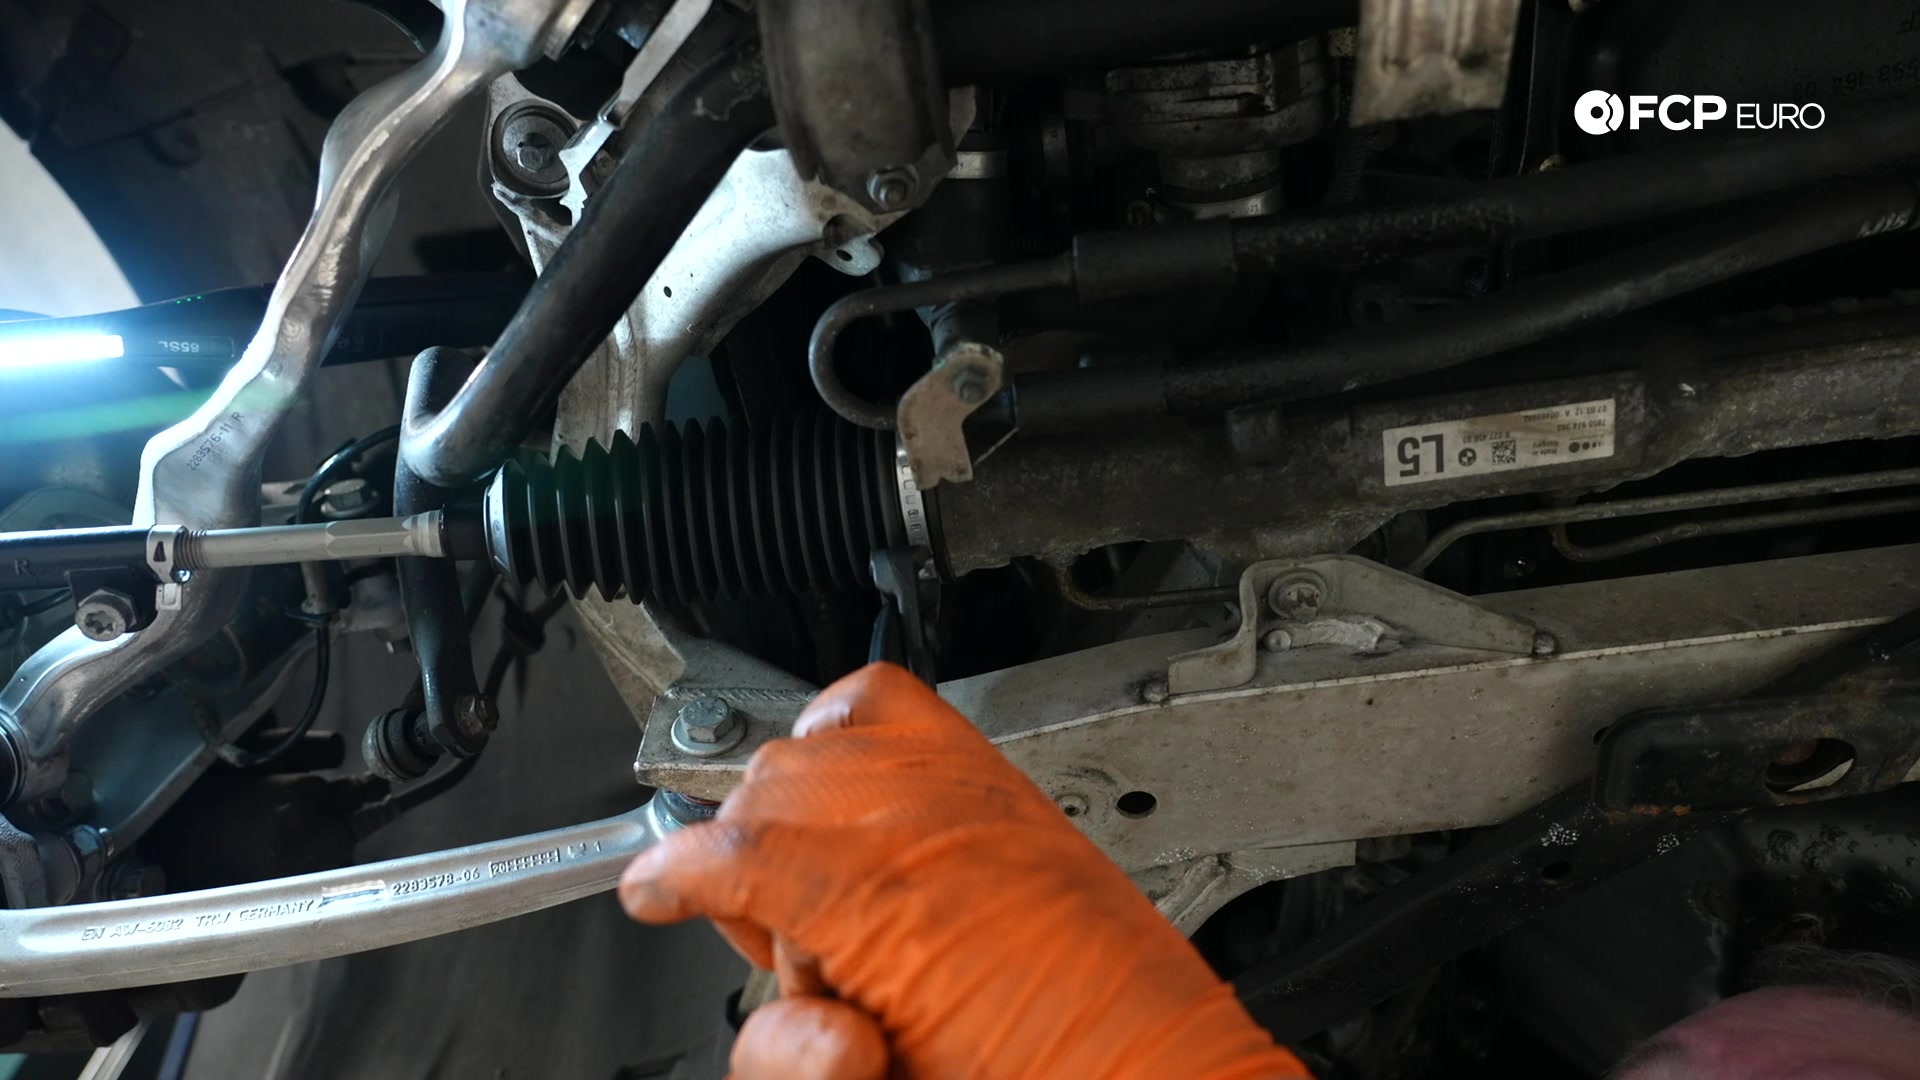
Step 2: Disconnect the tie rod from the steering rack
The inner tie rod attaches to the steering rack under the boot. You need to remove the clamp that holds the boot to the steering rack to get to the inner tie rod. Use a pair of diagonal cutters to clip through the clamp. It is one-time use, so don’t worry about breaking it.
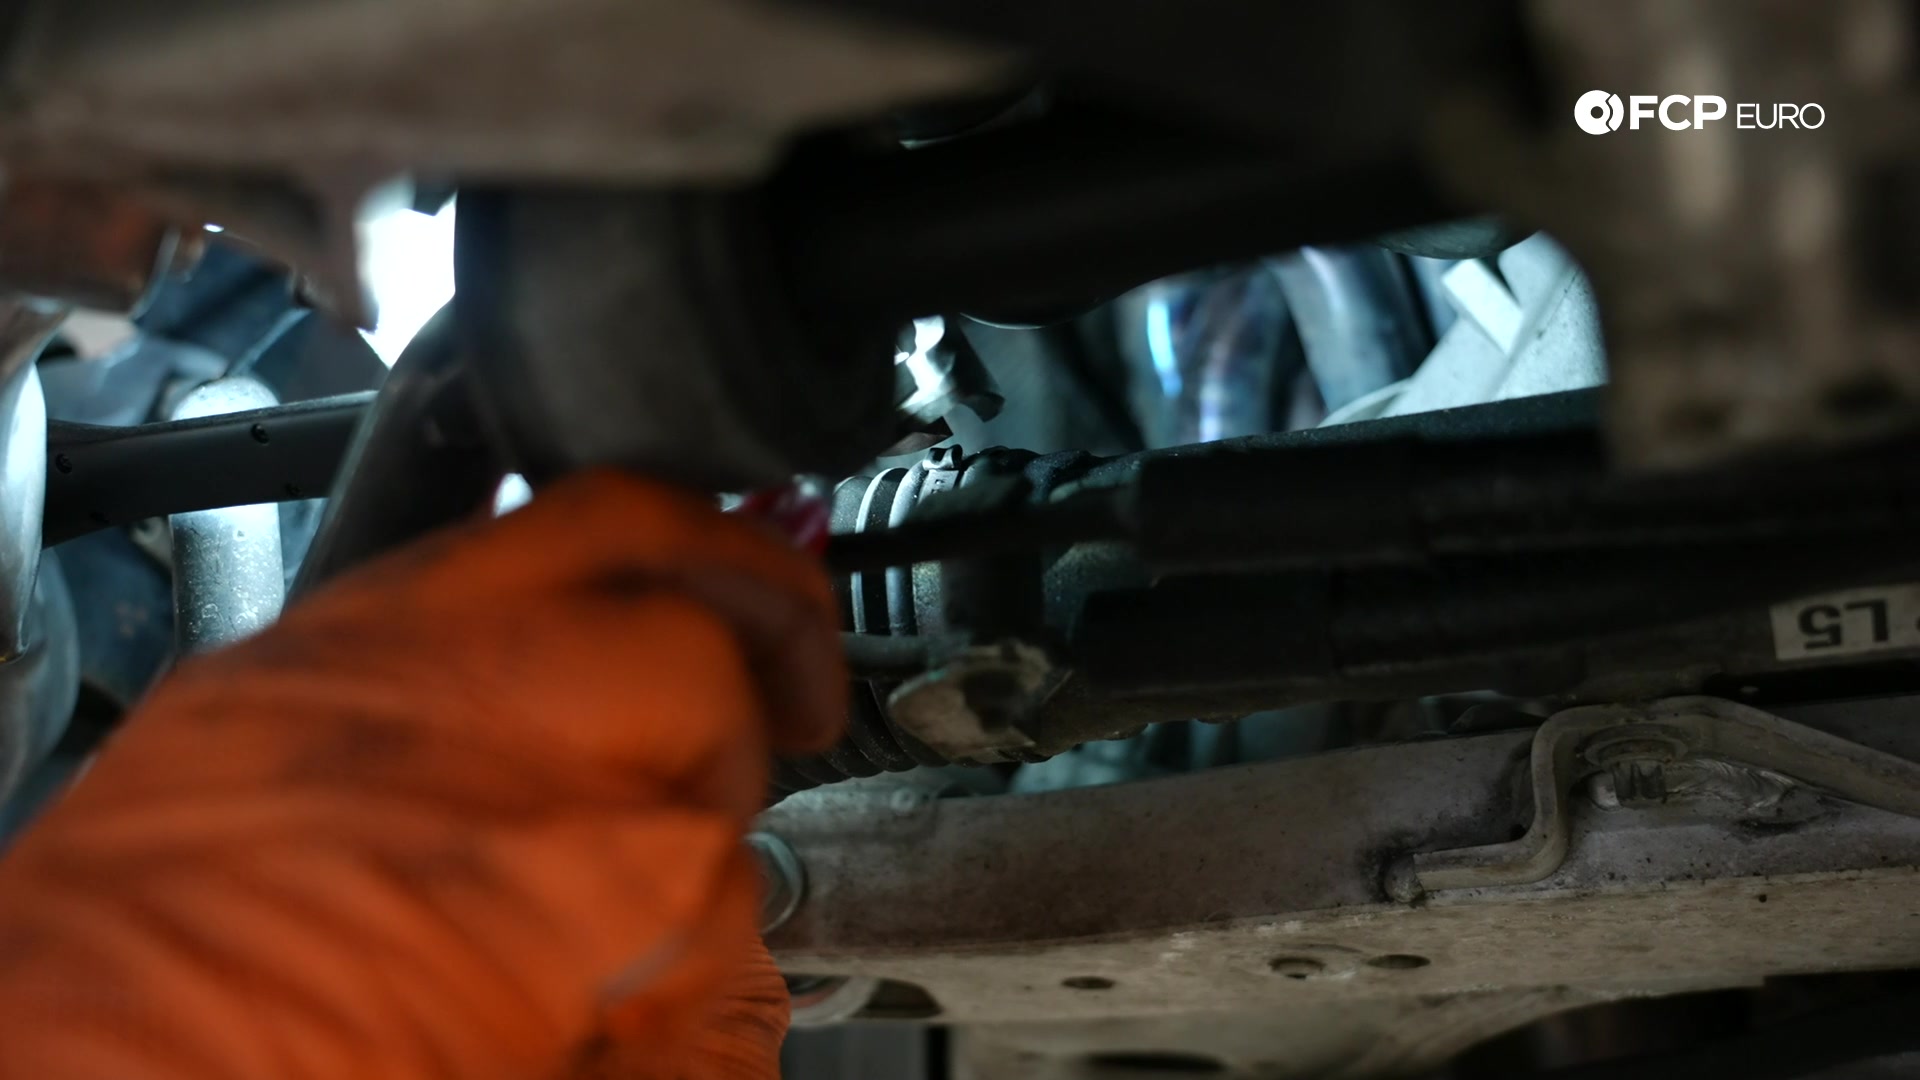
Use some slip-joint pliers or channel locks to remove the clamp from the outer end of the boot. Then, slide the boot off of the rack and expose the inner tie rod’s connection.

Use the channel locks to grip and rotate the tie rod counterclockwise. Once the tie rod is loose, you should be able to spin it off by hand.
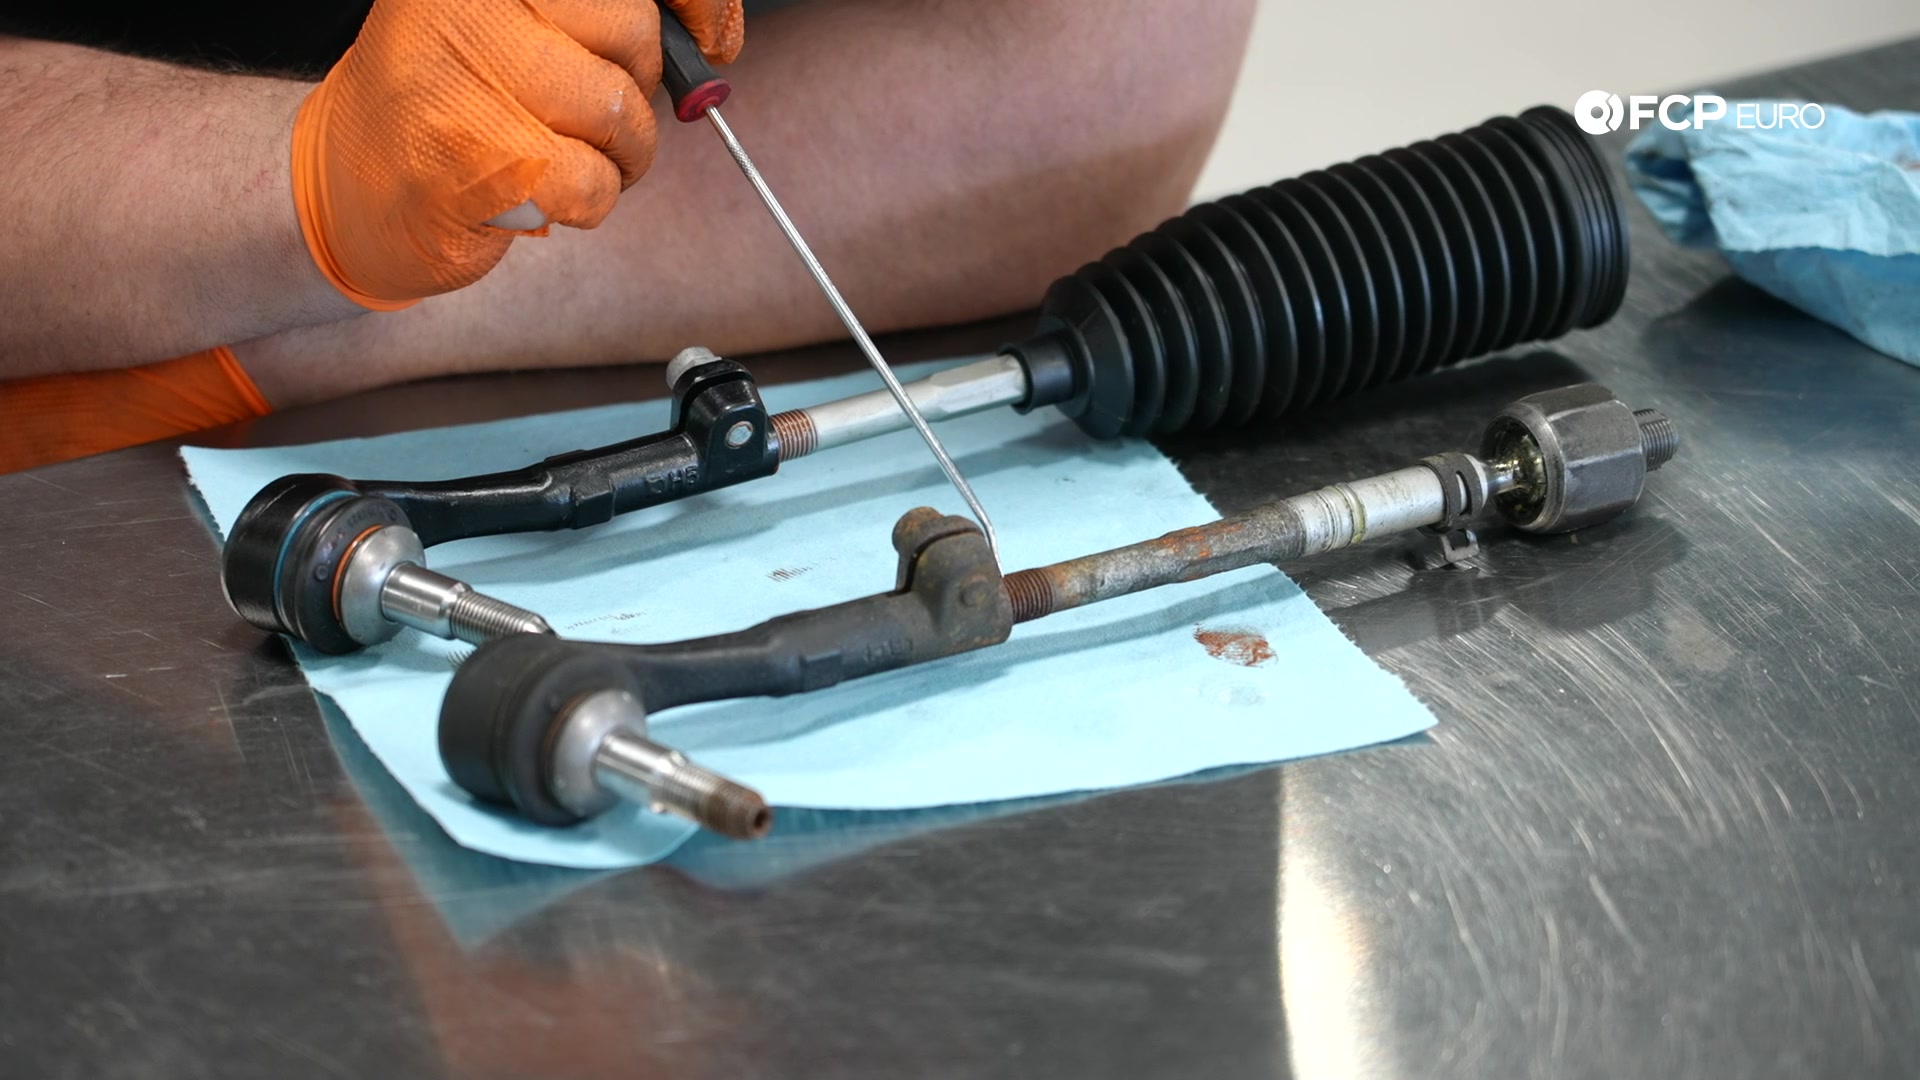
Step 3: Prepare the new tie rod
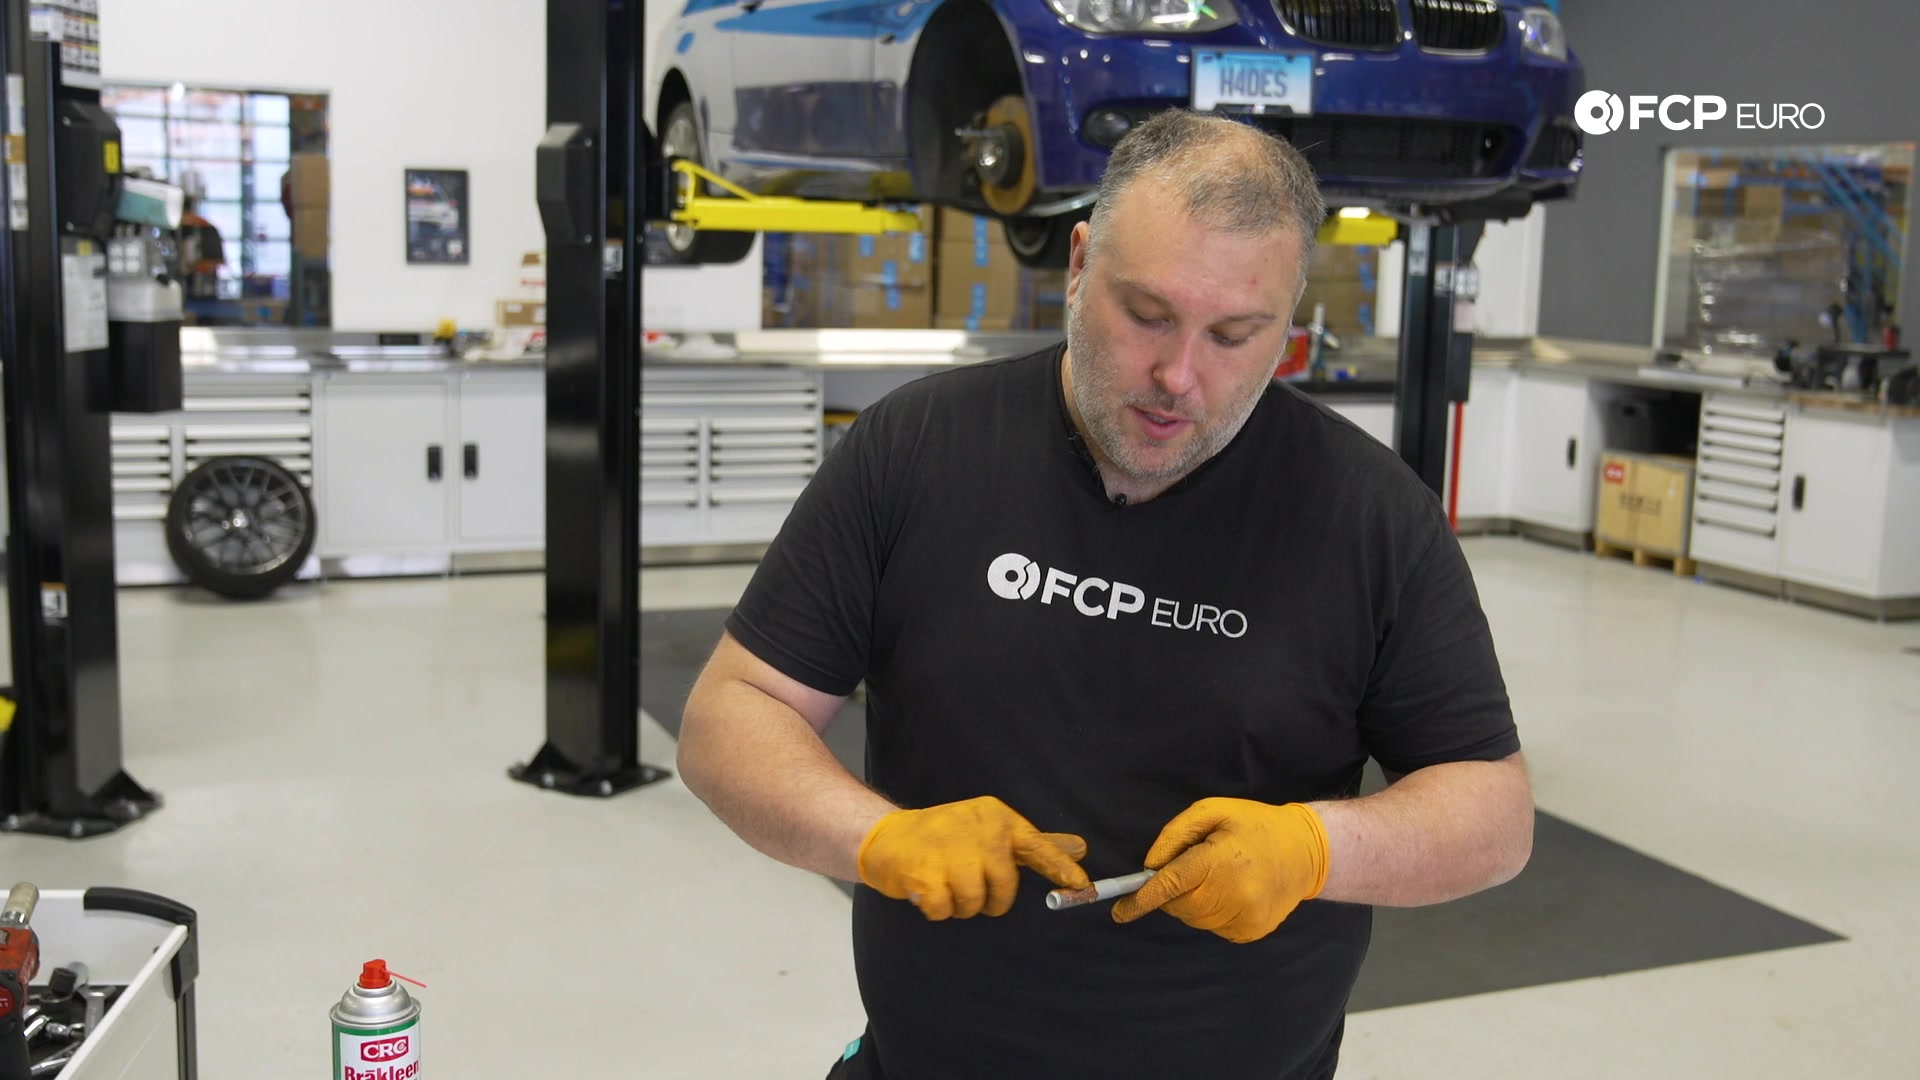
The tie rod and tie rod end are included in the kit, but you have to assemble them. Put the old tie rod assembly onto a work surface for an eyeball toe alignment. You want to set up the new tie rod assembly to the same length as the old one, so the vehicle is driveable to wherever you’ll be getting an alignment after the installation.
First, coat the outer portion of the tie rod in anti-seize. That isn’t strictly necessary, but the anti-seize will make any future tie rod end replacements much less involved. Then, slide on the new rack boot. Pull it into position on the tie rod and secure it with the new clamp included with the kit.
After that, thread on your tie rod end. Try to set the rod end to the same place it is on the old assembly. One of the easiest ways to do that is to count the number of threads exposed behind the rod end. Optionally, you can use a measuring tape to get the length of threads exposed and transfer that to the new assembly.
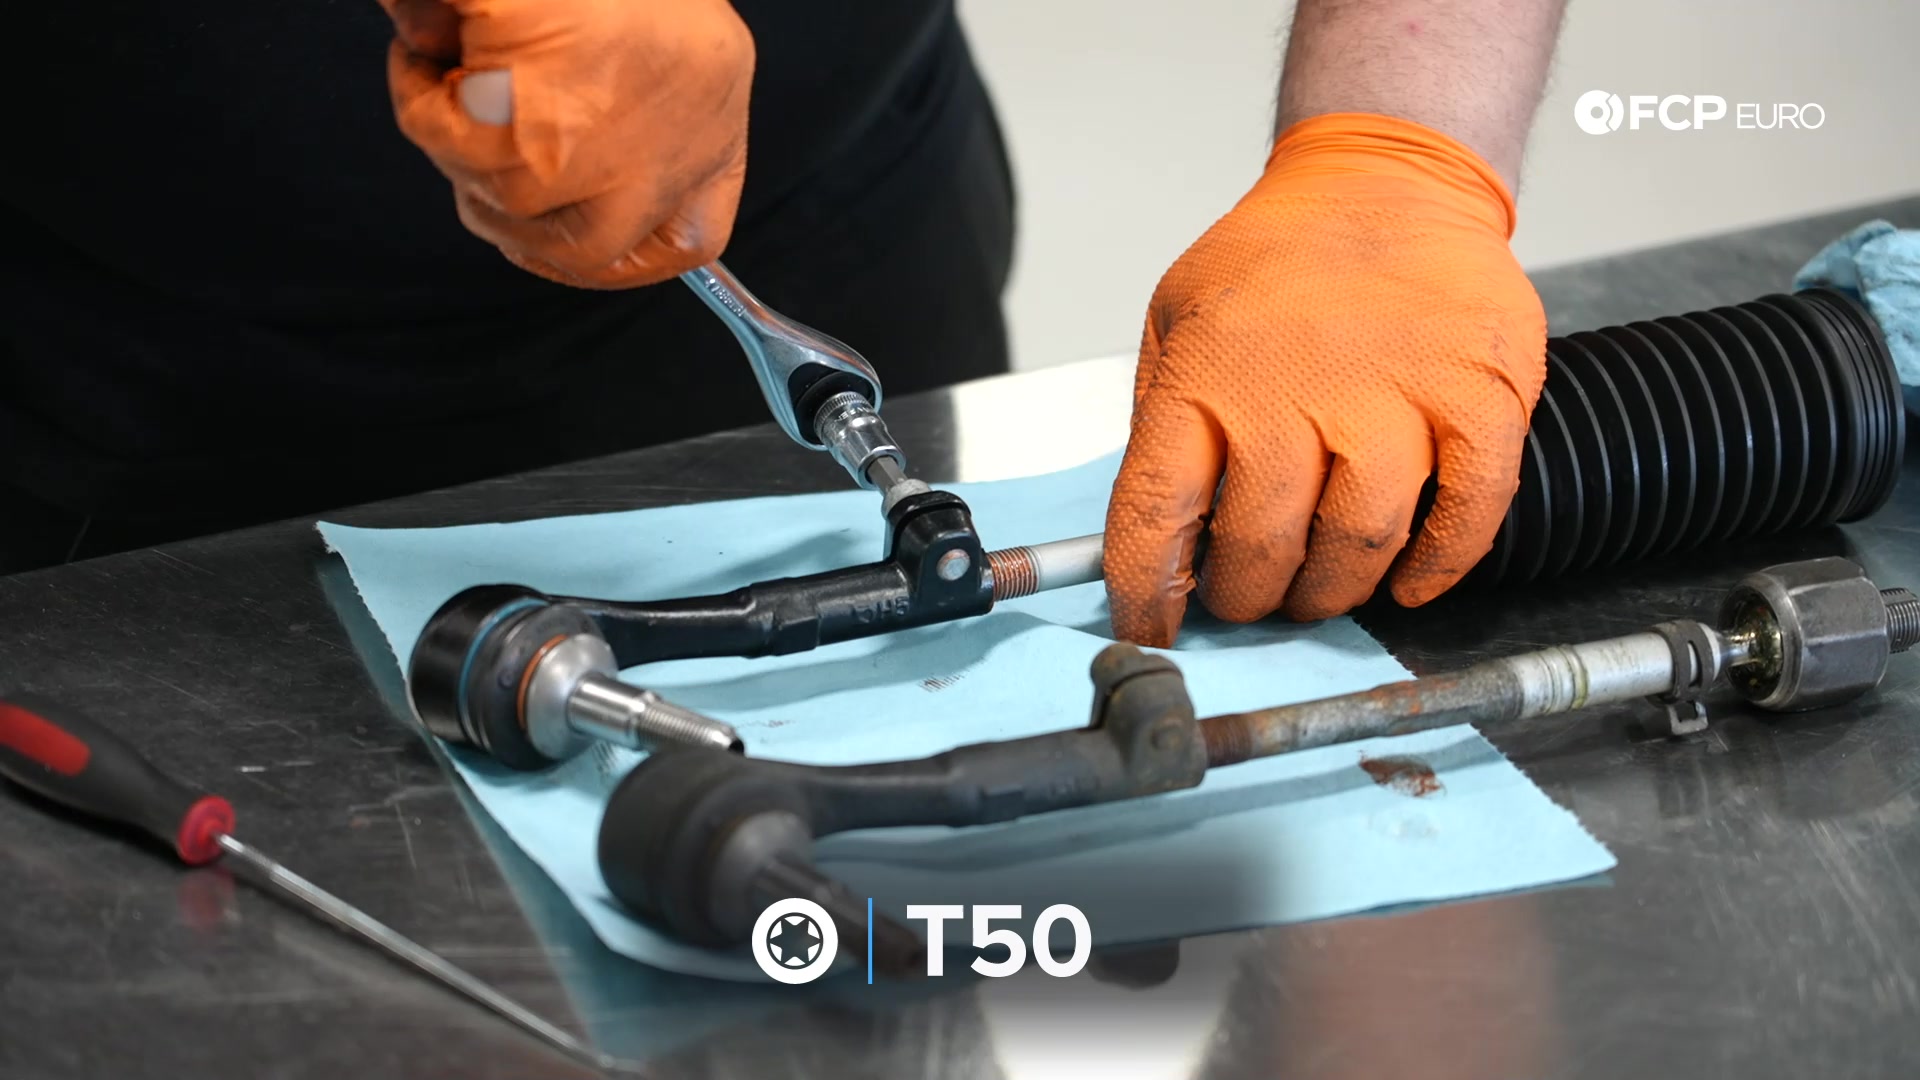
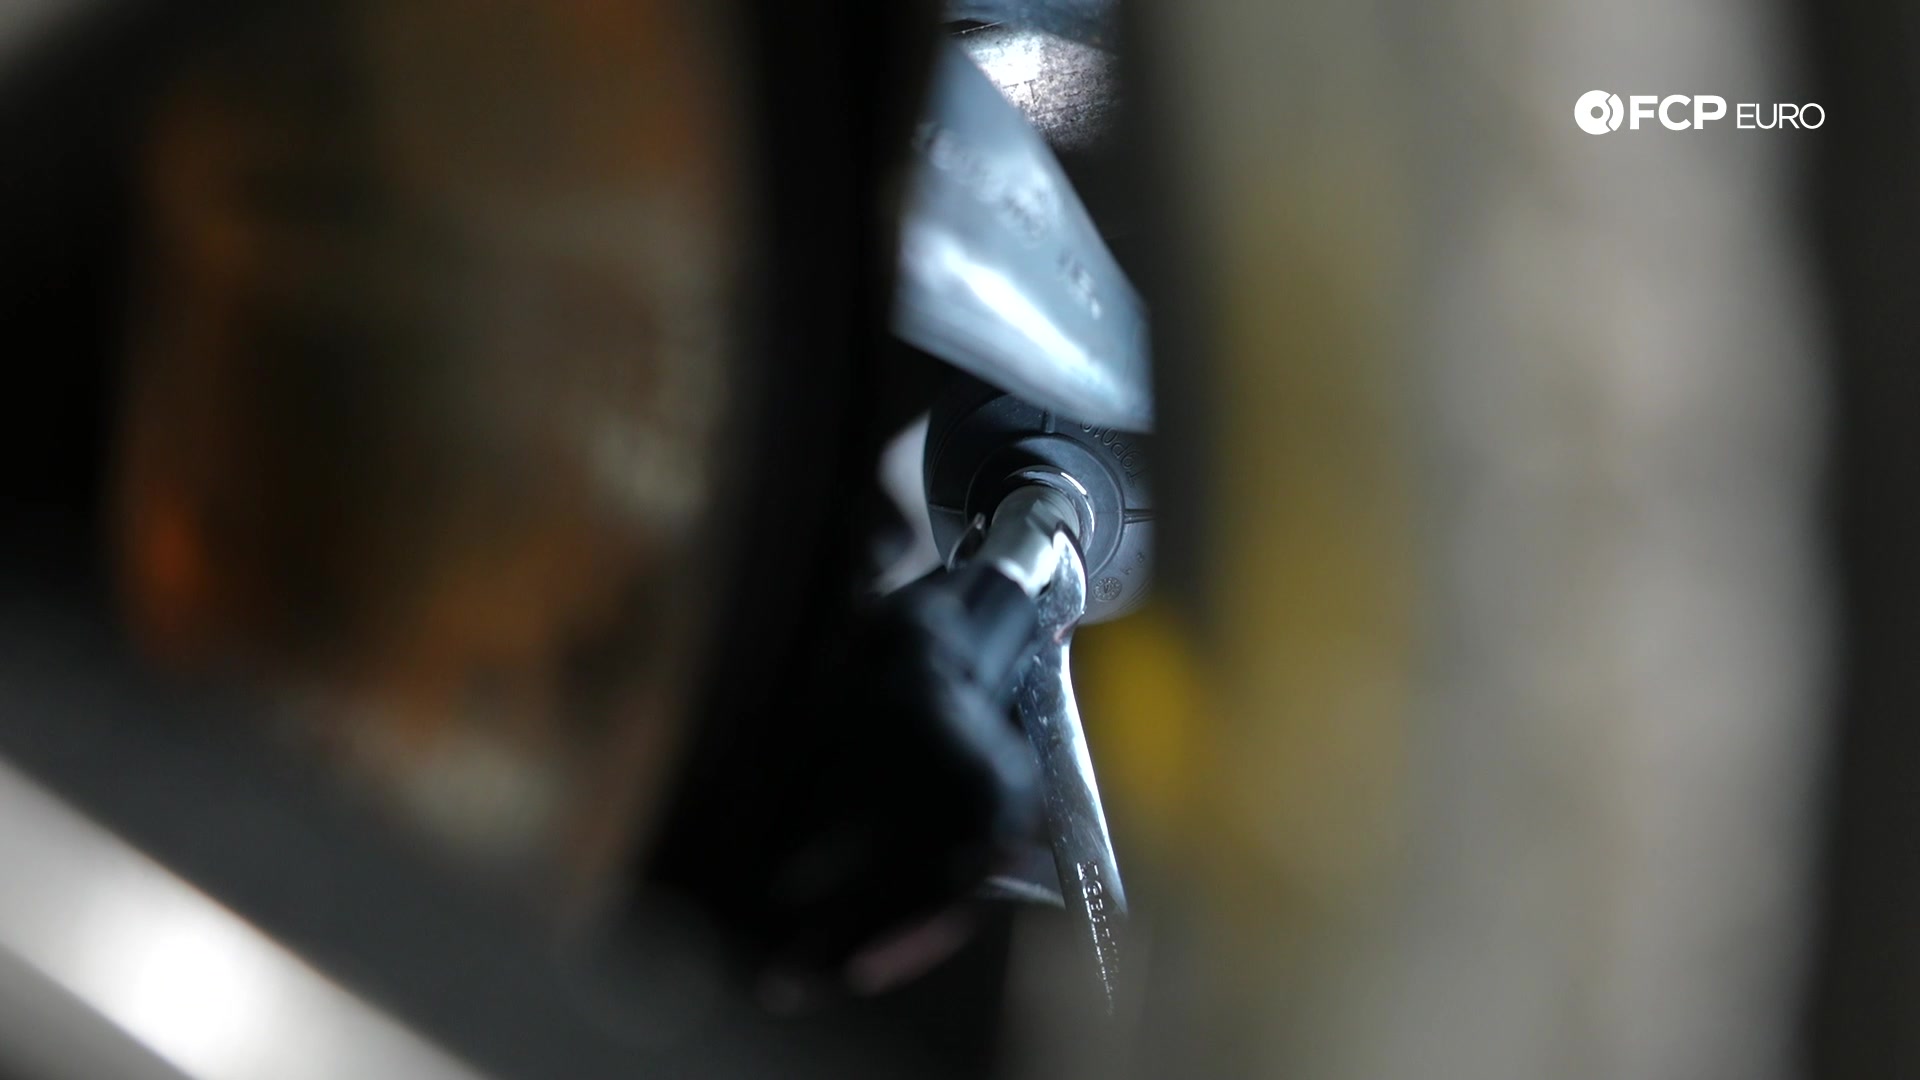
Once you set your eyeball toe alignment, dab some anti-seize onto the pinch bolt’s thread and thread it into the tie rod end. Use a T50 Torx bit socket to tighten the pinch bolt.
Step 4: Install the new tie rod assembly
Thread the tie rod assembly into the steering rack. Use the channel locks to tighten the assembly until it bottoms out in the rack.
Next, get the boot situated on the rack and clamp it down. Pull the oetiker clamp as tight as you can by hand before using diagonal cutters or the oetiker clamp pliers to crimp the clamp. After that, slide on the boot’s outer clamp. Use a pair of slip-joint pliers or channel locks to get the clamp situated on the boot.
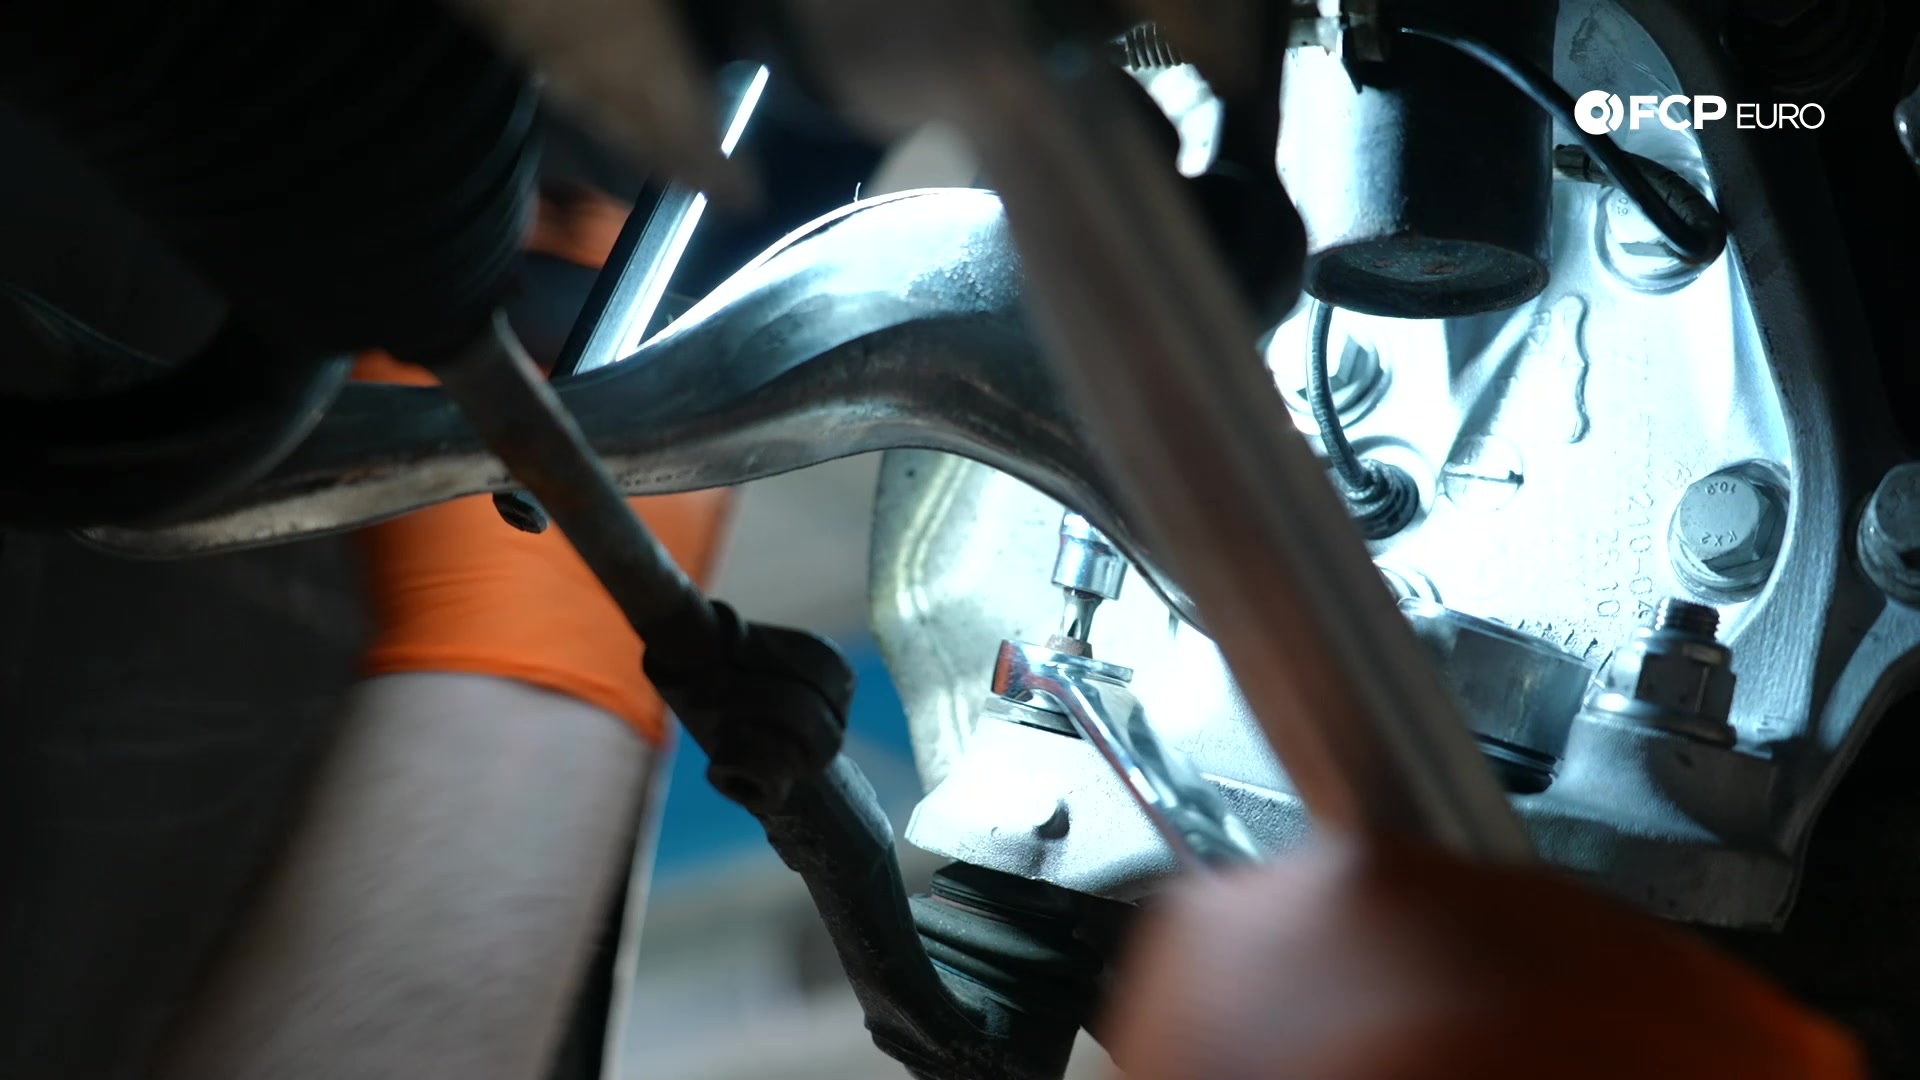
Next, get the rod end situated into the knuckle. Get the stud through the knuckle until you can thread on the retaining nut. Thread the nut on by hand before using a 21mm wrench to tighten it. Counter-hold the ball joint’s stud with a T40 Torx bit socket if the nut spins the stud.
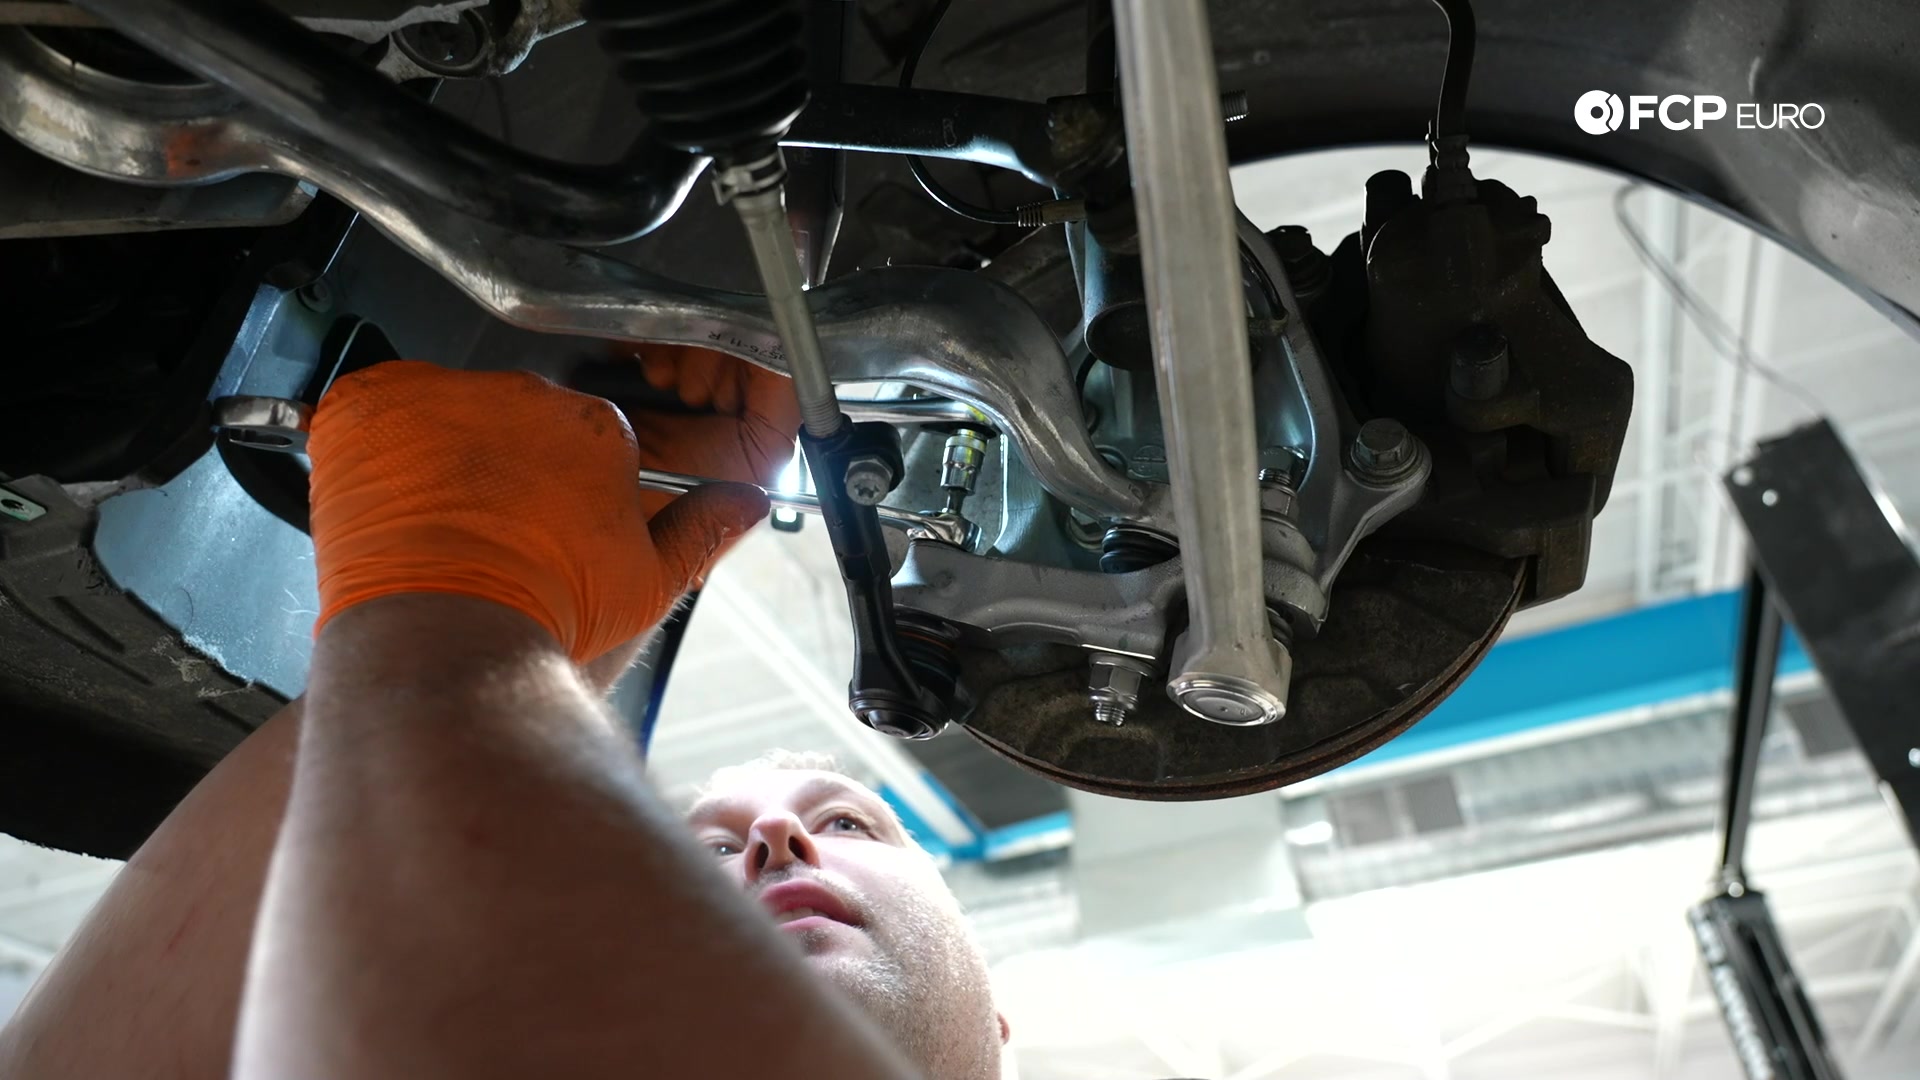
Use a 21mm socket to torque the nut to 175Nm. Then, refit the wheel and set the car onto the ground. Use a 17mm socket to torque the lug bolts to 120Nm.
Step 5: Check the alignment
Hop into the car and roll it up and down the driveway a few times to settle the suspension. Then check the alignment of the steering wheel. An alignment shop will make it perfect, but you will still have to drive the car there. Point the steering wheel straight and check the alignment of the wheels. If the corner you just worked on is noticeably out-of-whack, lift the vehicle and adjust the toe.
With the car in the air, use a T50 Torx bit socket to loosen the tie rod end’s pinch bolt. Then, use a 13mm wrench on the tie rod to rotate it and change the toe. Rotate the rod clockwise to shorten the length and bring the front of the wheel in toward the car. Rotate the rod counterclockwise for the opposite effect.
Let the car down and roll it back and forth a few times again before checking the toe. Lift it again and torque the pinch bolt to 40Nm if all looks good; otherwise, continue making adjustments to the tie rod length.
BMW E90 Tie Rod Torque Specs:
- BMW Tie Rod End Pinch Bolt = 40Nm or 29.5 ft-lbs
- BMW Wheel Lug Bolts = 120Nm or 90 ft-lbs
The work is over, but the job isn’t done. As with most suspension jobs, you will now need to get your vehicle properly aligned by an independent shop or dealership. Without a proper alignment, you could cause premature wear of your tires and the suspension components you’ve just replaced. If you're interested in more DIYs for your BMW, you can visit bmw.fcpeuro.com and subscribe to our YouTube channel.


