- 08/31/2020
- 7 Min Read
- By: Christian Schaefer
How To Replace BMW E36 Front Control Arms & Bushings

The BMW E36 has become one of the most affordable entries into the European sports sedan or coupe market. Their relative affordability and solid chassis make them great for low-budget motorsports while still being competitive. However, their attractive handling characteristics can take a significant hit if the front suspension bushings and ball joints have been pushed past their wear points. The chassis’ sharp handling will turn into a vague and uninspiring mess when neglected.
Parts are plentiful for the BMW E36, and can be swapped from the most hardcore versions to the softest. Control arm ball joints and bushings are relatively easy to replace and aren’t too expensive to upgrade for spirited use. Replacing them requires a decent number of hand tools but is certainly a doable driveway job.
BMW models and years applicable:
|
|
|
|
|
|
|
|
|
|
Symptoms of bad BMW E36 front control arms and bushings:
- Clunking and popping can be heard when your vehicle travels over bumps or dips in the road
- Your steering feels disconnected from the rest of the car
- Your vehicle is slow to react to steering input
- Your vehicle wanders around and has difficulty driving in a straight line
- Your vehicle cannot be aligned properly due to play in suspension components
In the BMW E36’s front suspension system, the control arm ties all of the main suspension components together. The arm mounts to the chassis, to the subframe, and the wheel hub, allowing the suspension only to move up and down.
At the rear of the arm is a stud that passes through a separate bushing that mounts to the chassis. This bushing can be changed separately to the control arm if needed. The arm uses ball joints to connect to the knuckle and the subframe. The ball joints allow the arm to move up and down freely while negating any lateral movement.
As the ball joints and rear bushings wear down, excess play will form in them. The excess play leads to a lack of stiffness, creating a vague softness in the suspension feel. Along with sloppy steering, the worn control arm bushings will put extra strain on the remaining suspension components.
What will it cost to replace the control arms on a BMW E36?
The cost of parts for the job comes in just under $270. For that, you’ll get every part required to do the job. For another $150, you can buy the special tool required to install the new rear bushings onto the control arms. If you choose not to buy the tool, you can take the arms and bushings to a local automotive shop and use their press to install the bushings.
The job isn’t particularly difficult and wouldn’t cost a shop a lot of time to complete it. Estimate to pay for around two hours of labor for a professional shop to replace the arms.
How long will it take to replace the control arms on a BMW E36?
The E36 chassis is getting up there in age, so many of the chassis’ has seen many miles. With perfect working conditions, the right tools, and old hardware that doesn’t fight being removed, the job can be completed in a couple of hours. Set aside an afternoon to give yourself time to deal with any possible hiccups along the way.
Tools required to replace the control arms on a BMW E36:
- Floor Jack
- Jack Stands
- 13mm Wrench
- 16mm Wrench
- 17mm Wrench
- 18mm Wrench
- 19mm Wrench
- 21mm Wrench
- 24mm Wrench
- 13mm Socket
- 16mm Socket
- 17mm Socket
- 18mm Socket
- 19mm Socket
- Ratchet
- Pickle Fork (Ball Joint Separator)
- Torque Wrench
- Hammer
- BMW Control Arm Bushing Tool
Parts required to replace the control arms on a BMW E36:
- BMW Rear Control Arm Bushing (Left Side)
- BMW Rear Control Arm Bushing (Right Side)
- Lemforder Control Arm Kit
Steps required to replace the control arms on a BMW E36:
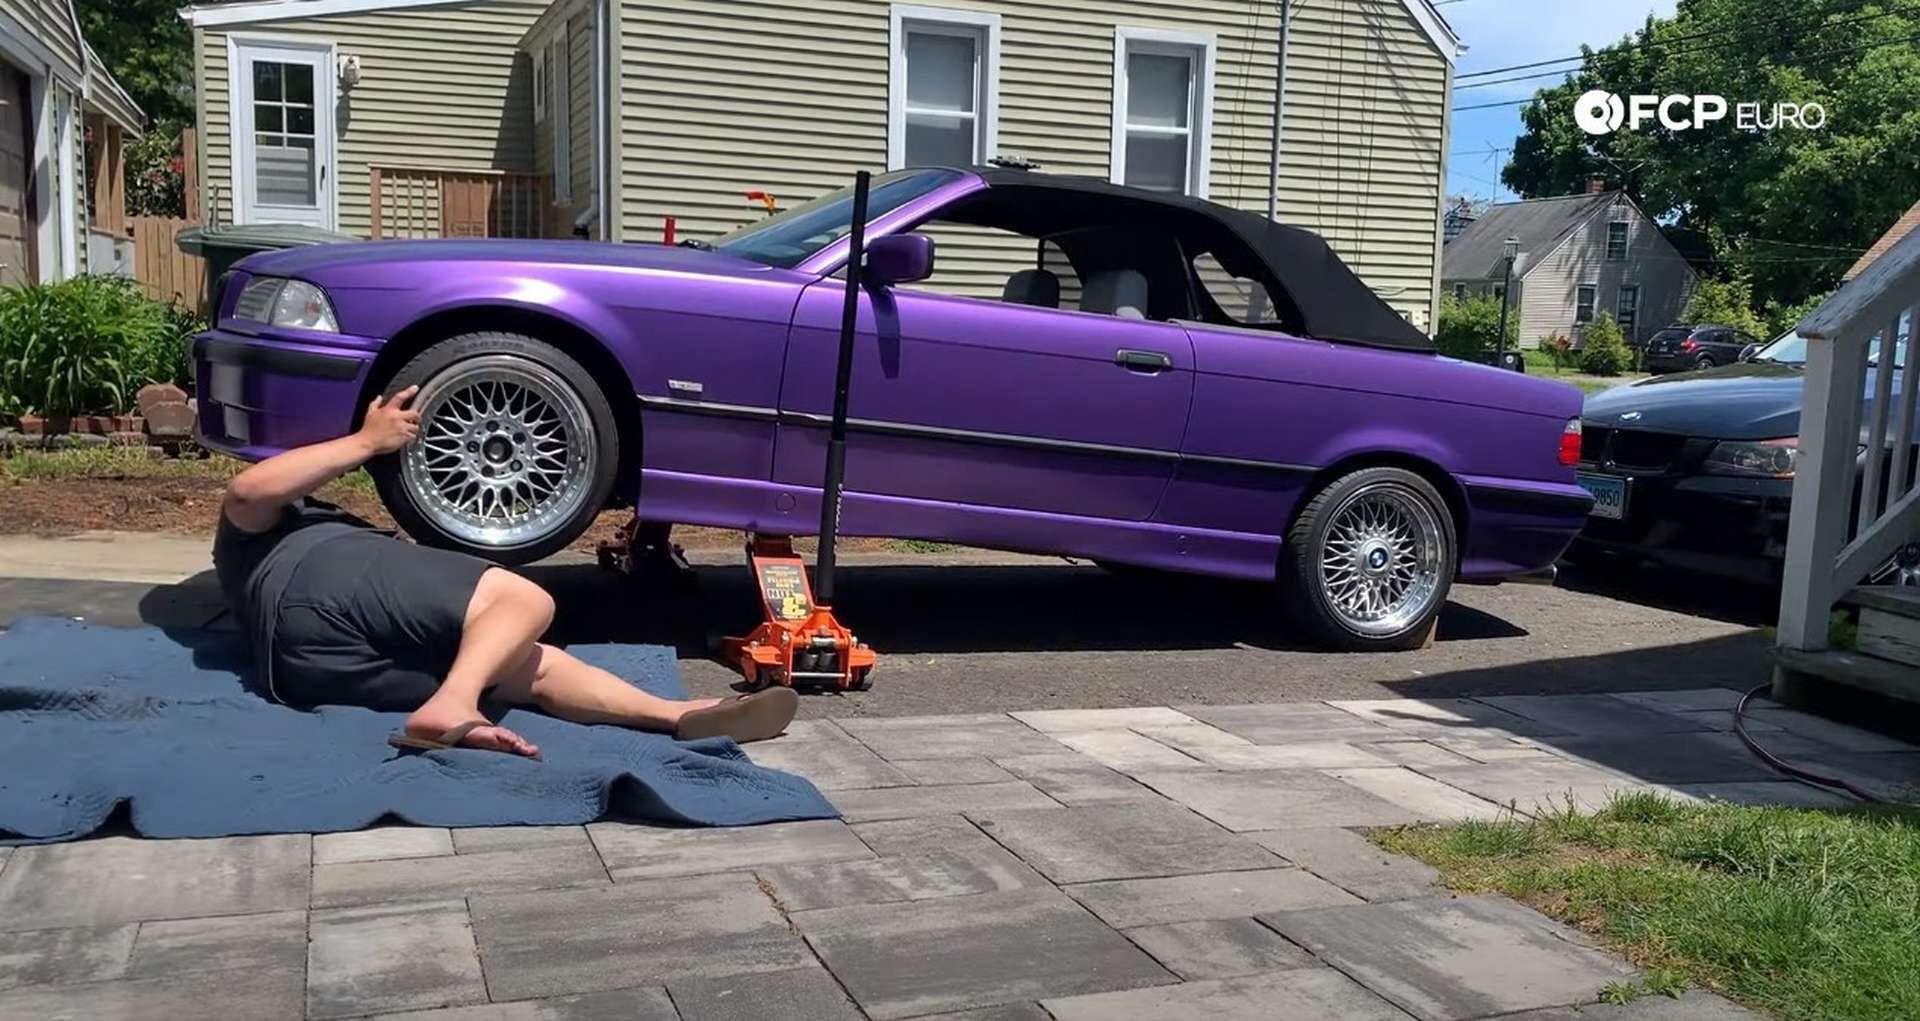
Step 1: Jack up the car and remove the wheels
Use a floor jack to raise the nose of the car. Place jack stands under the jack points behind the front wheels and lower the vehicle onto them. Use a 17mm socket to remove the lug nuts and then pull off the wheels.
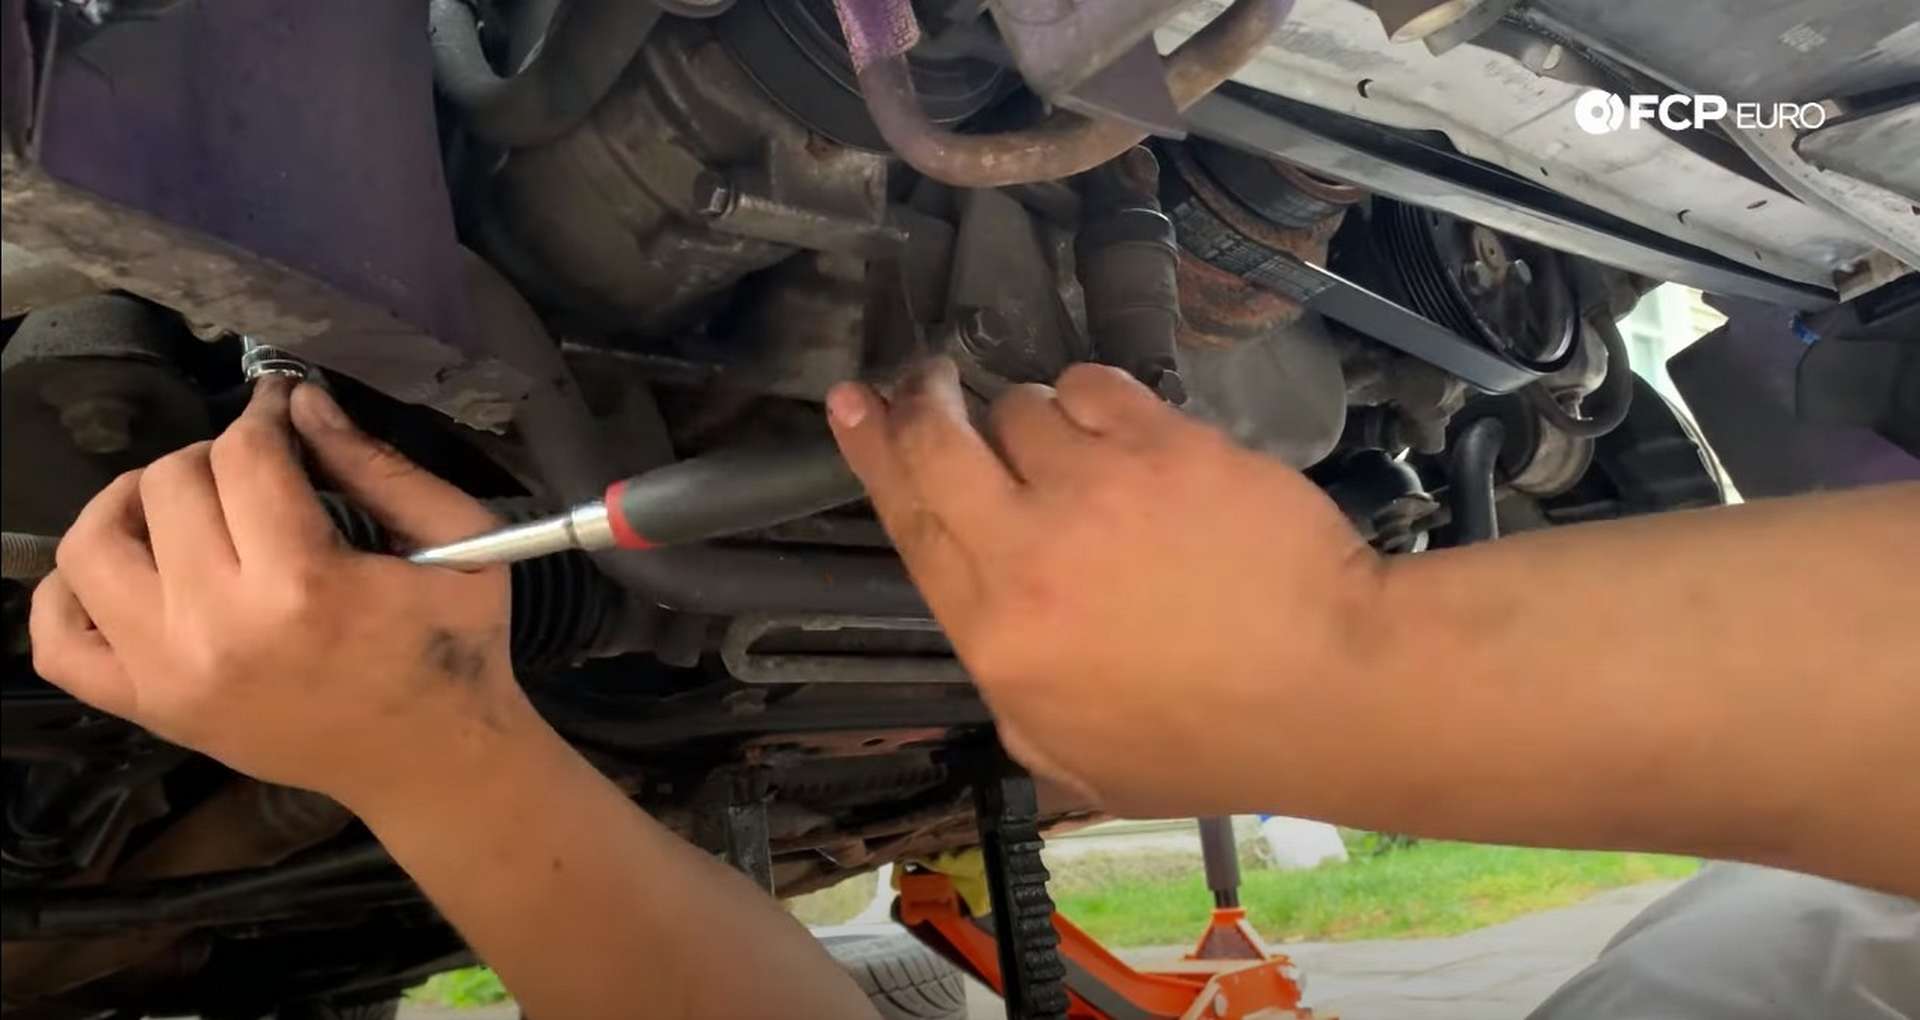
Step 2: Remove the swaybar endlink
First, separate the sway bar endlink from the swaybar. Use a 16mm socket to remove the nut from the swaybar endlink while counter holding the link with a 16mm wrench.
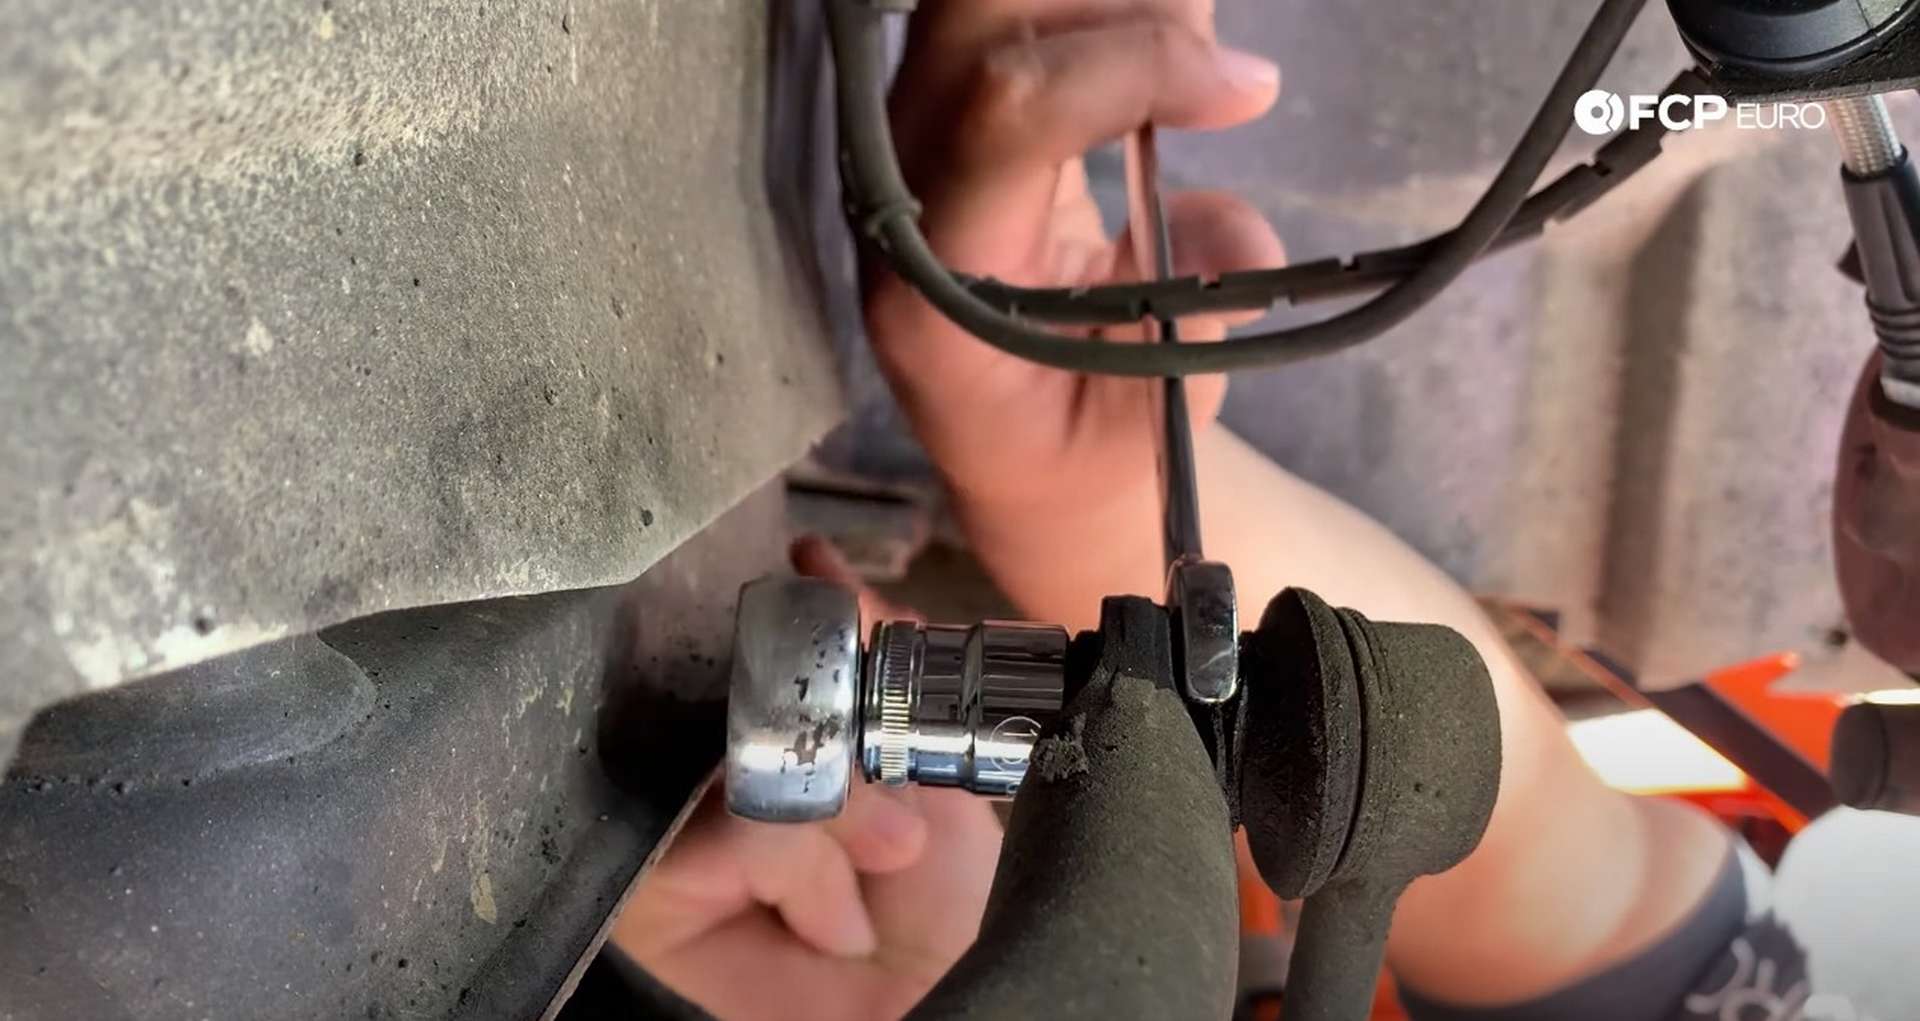
Next, get under the control arm and remove the 16mm nut securing the swaybar endlink bracket to the arm. Removing the bracket and link as one piece will give you leverage if either the bracket nut or lower endlink bolt are corroded.

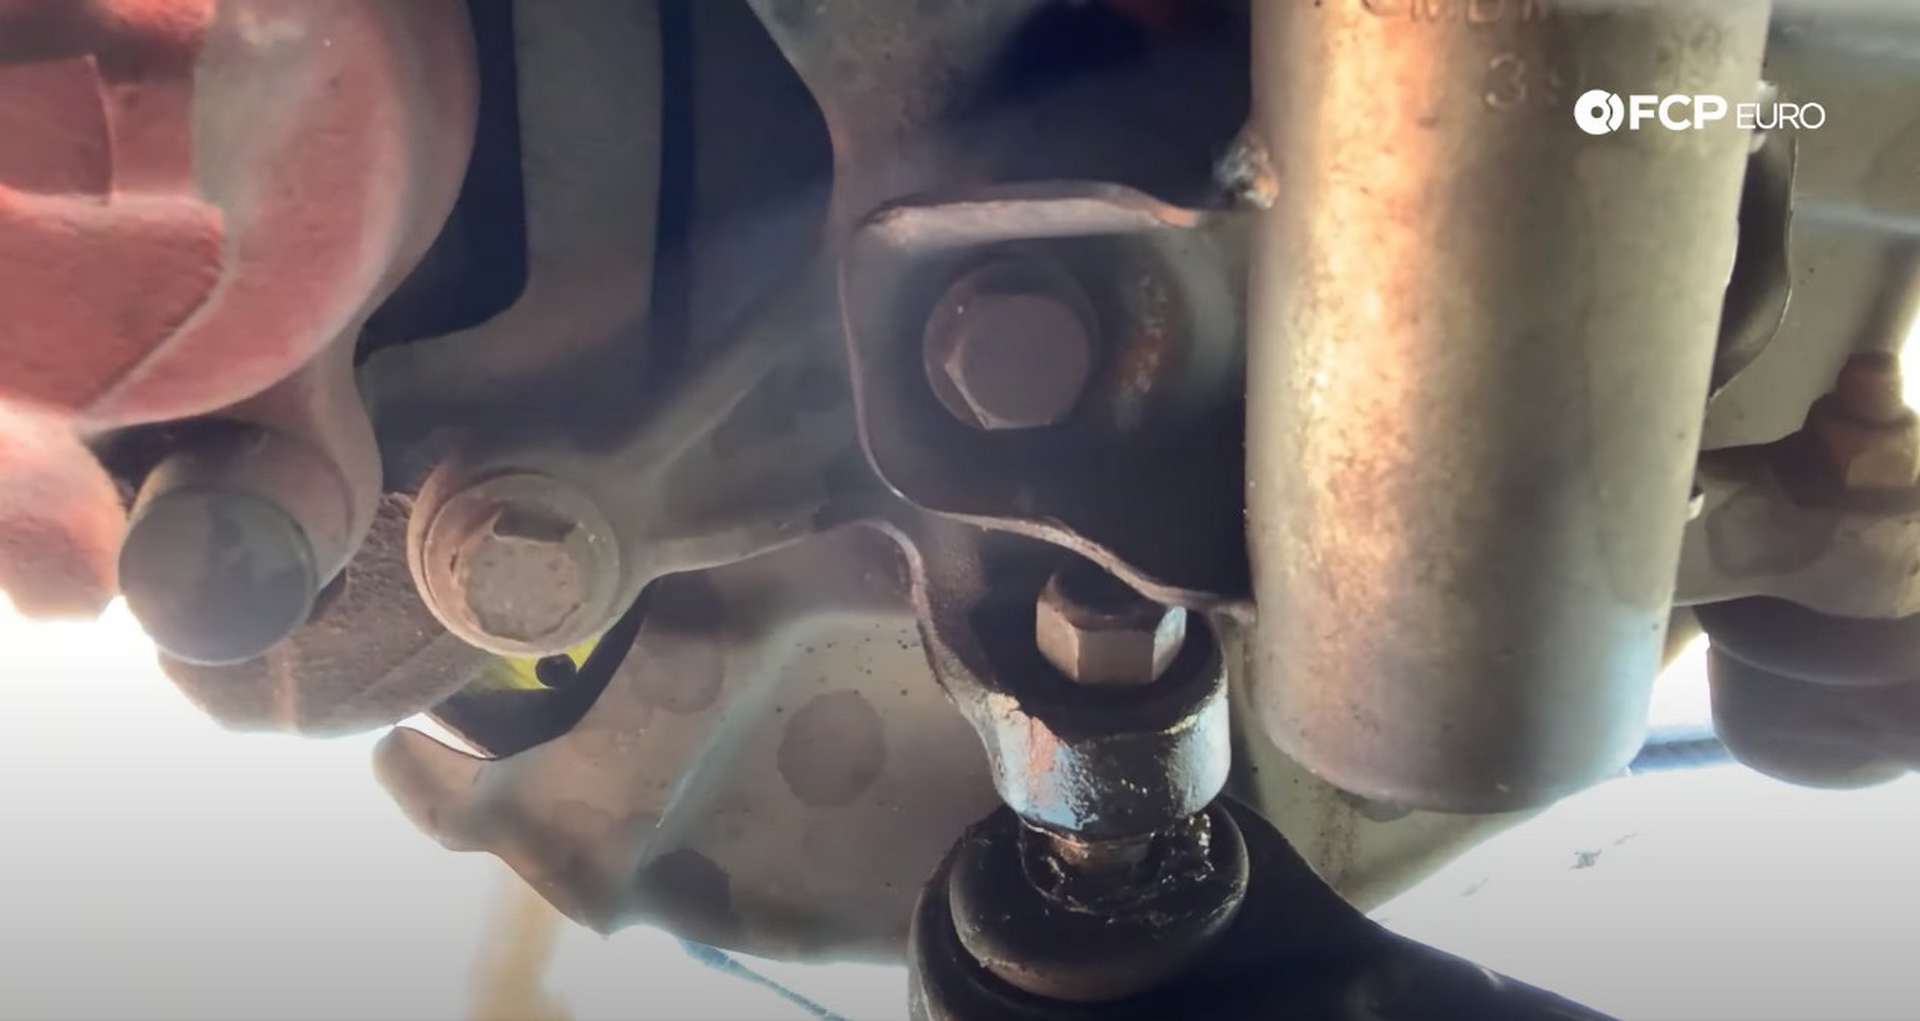
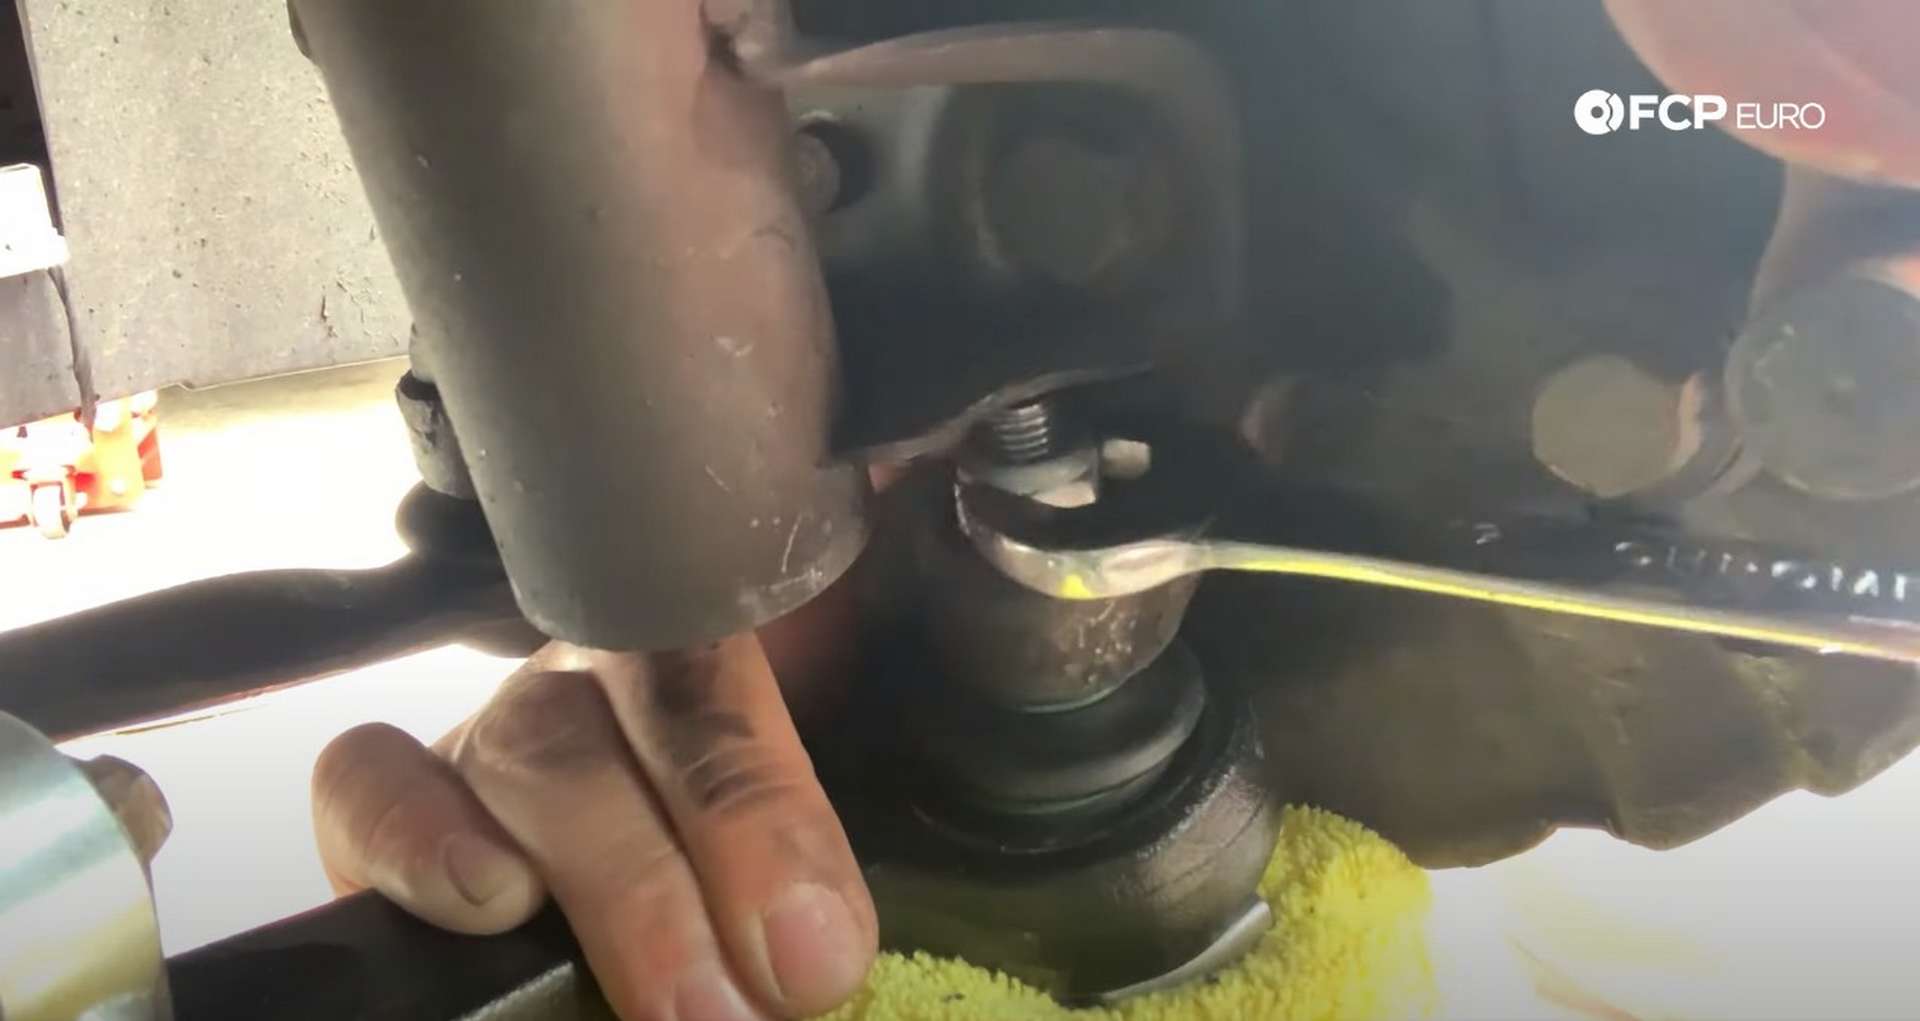
Step 3: Outer Ball Joint Removal
The outer ball joint nut is an 18mm from the factory. OE replacement parts, like Lemforder, may use a larger or smaller size, so have several wrenches handy. Use the correct size wrench, an 18 in our case, and remove the nut from the ball joint.
The nut will be on very tight, so the bigger the wrench, the easier the nut will come free. Use a rust penetrant if you live in an area where rust is typical. Space is tight, and leverage is key here.
Fit the ball joint separator between the knuckle and the ball joint. Hit the separator’s back with a hammer until it forces the ball joint out of the knuckle.
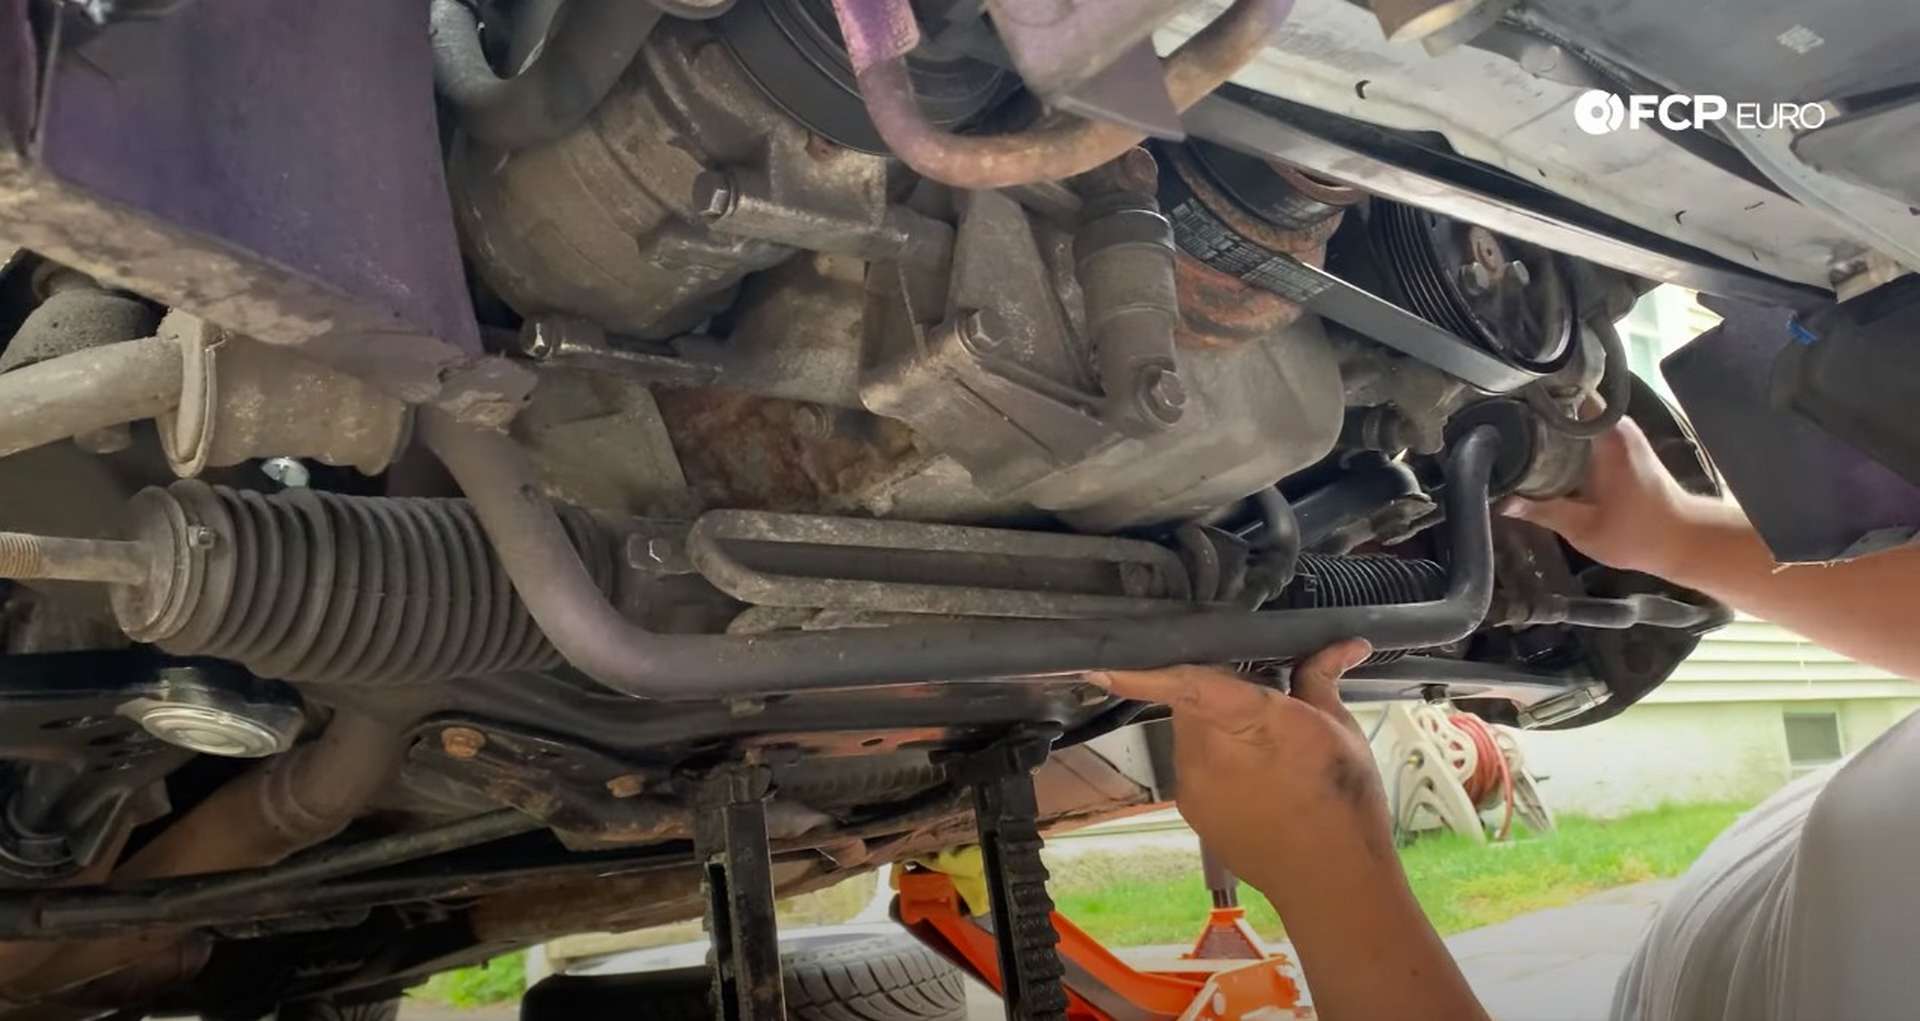
Step 4: Remove the rear bushing
Use a 17mm socket to remove the two bolts that mount the bushing to the chassis.
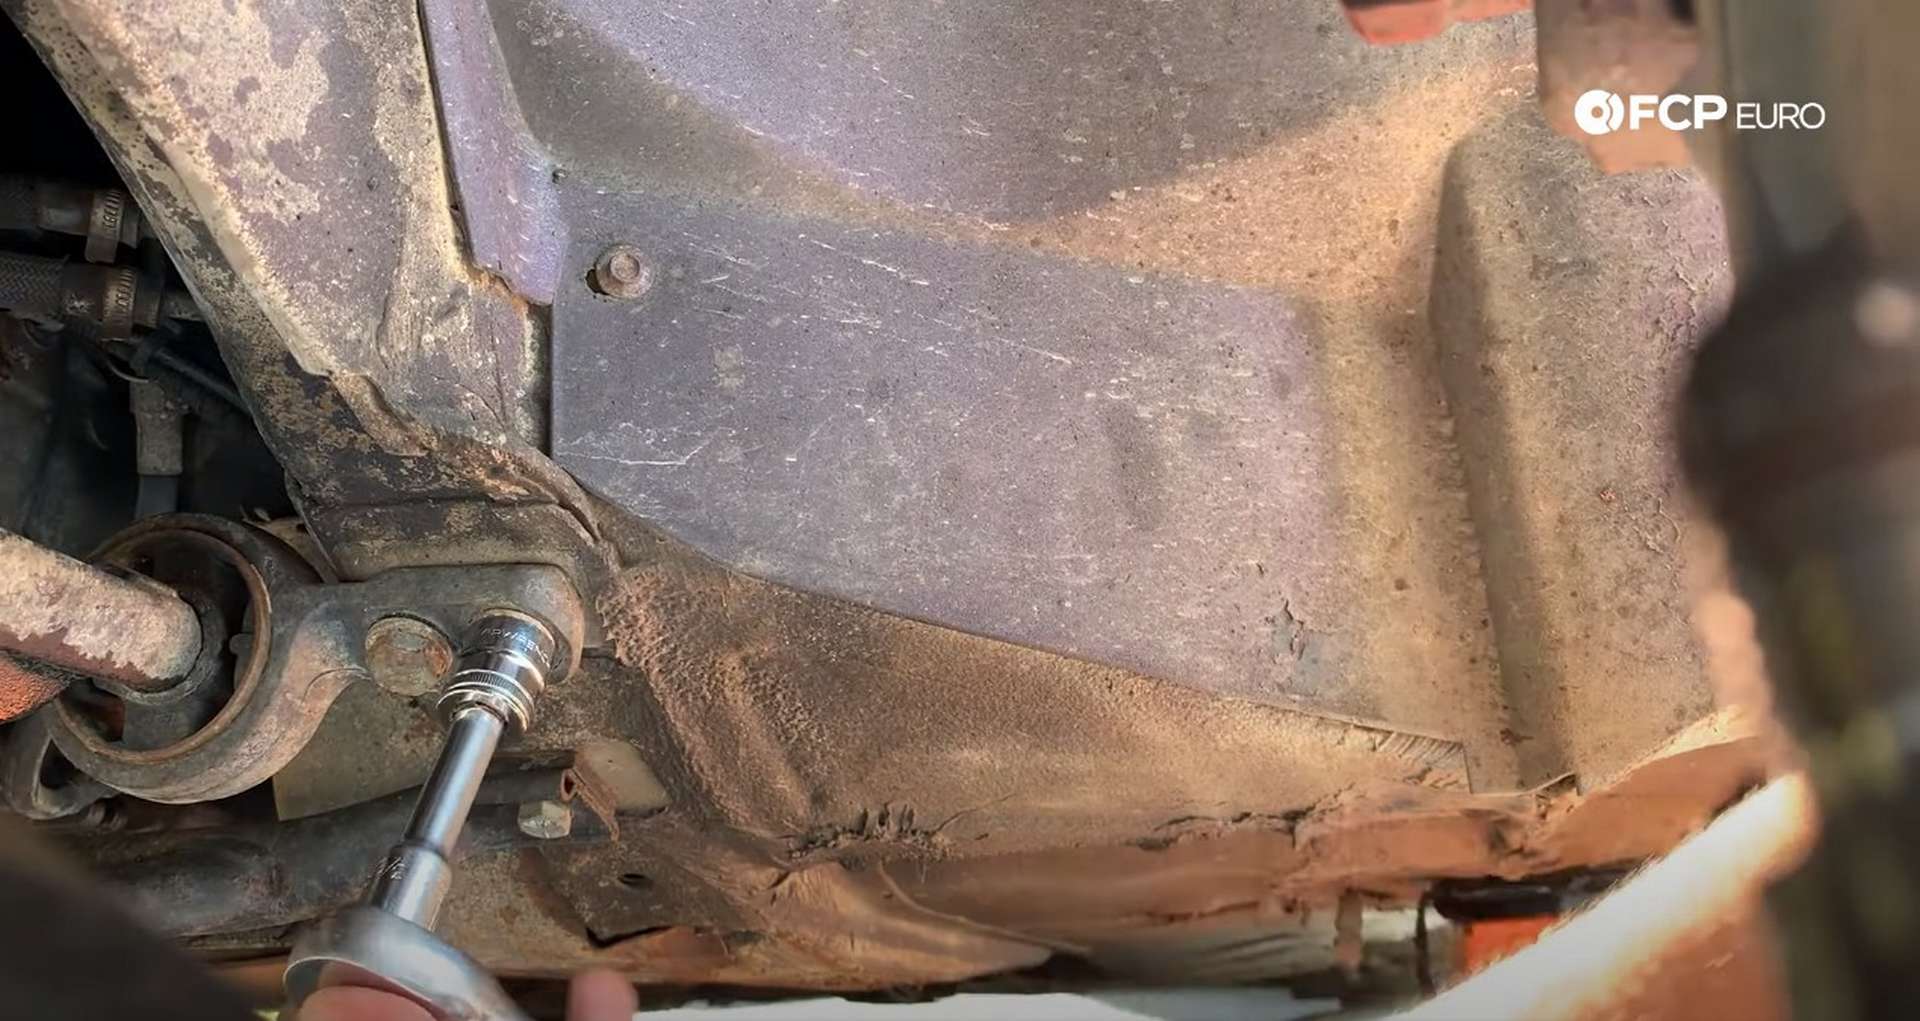
Now the arm is only secured to the car by the inner ball joint. Use a screwdriver to pry the bushing off of the chassis if it doesn’t free up once the bolts are removed.
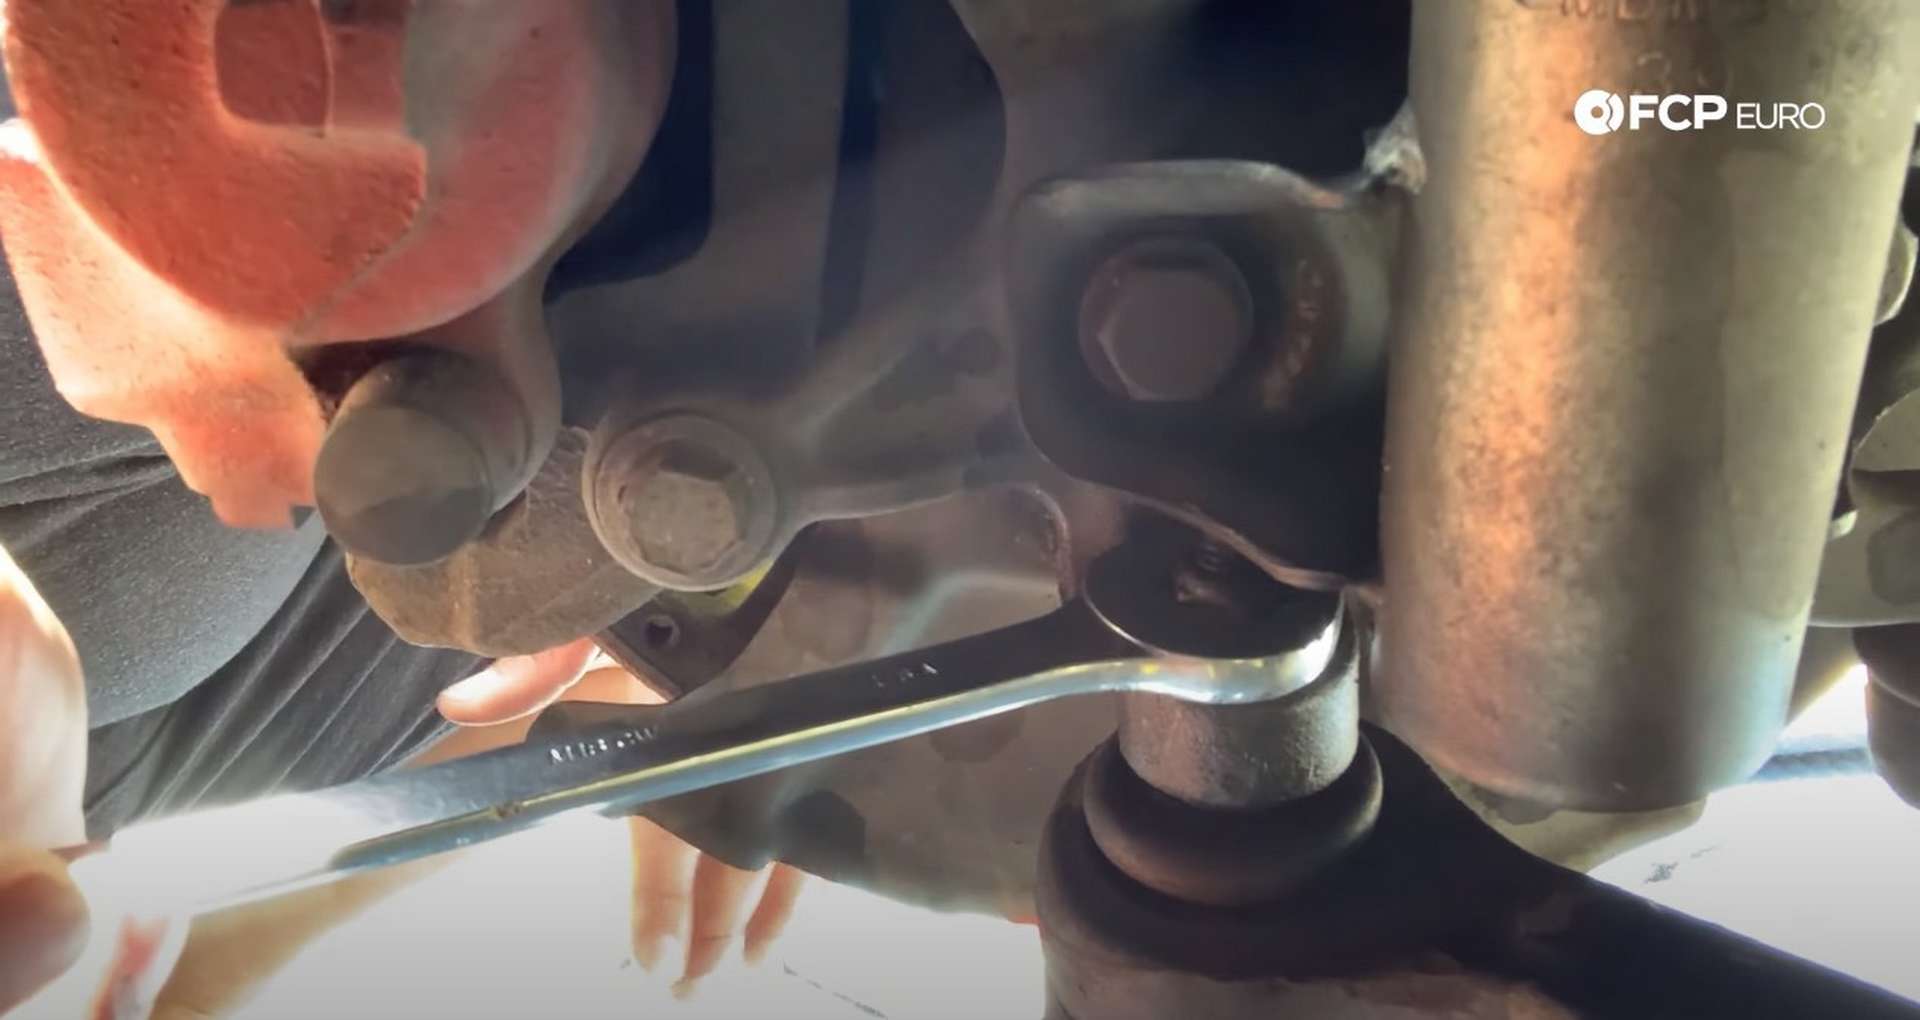
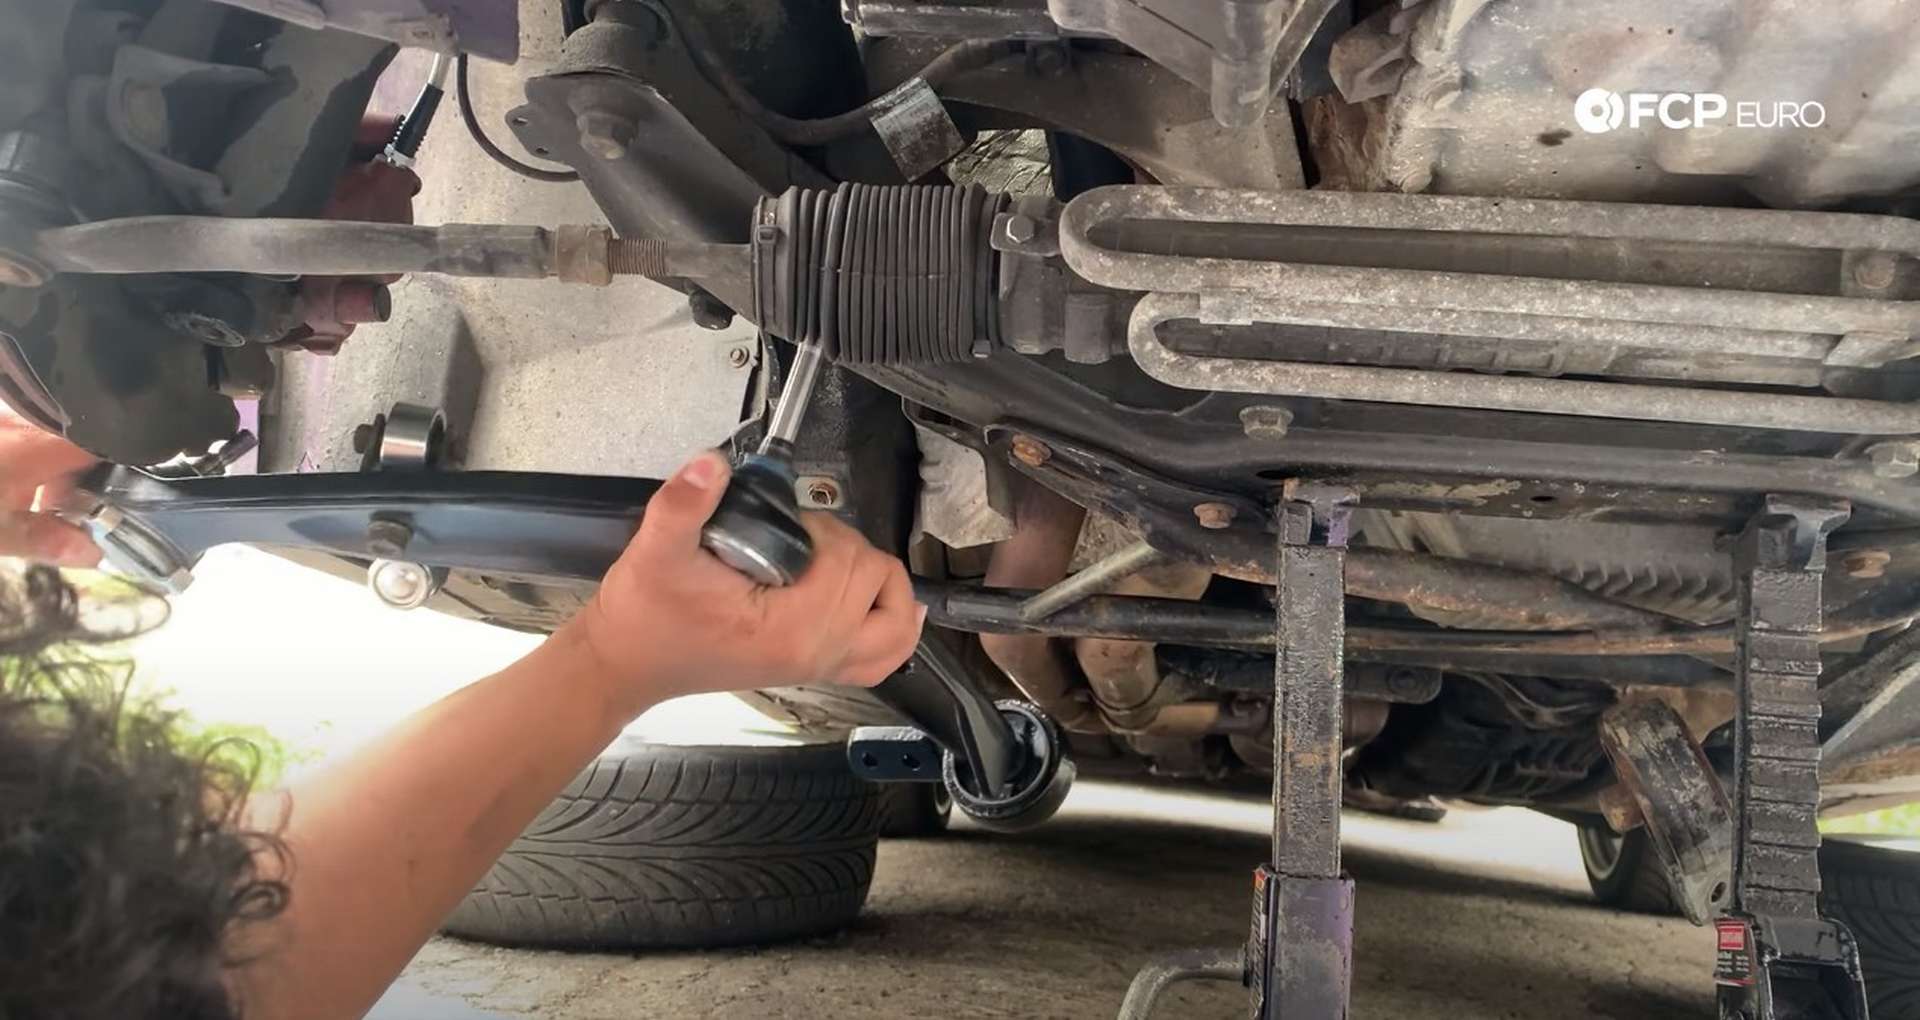
Step 5: Remove the inner ball joint
The inner nut is 21mm in size and is located in a crowded space. Use either a socket or wrench to remove the nut.
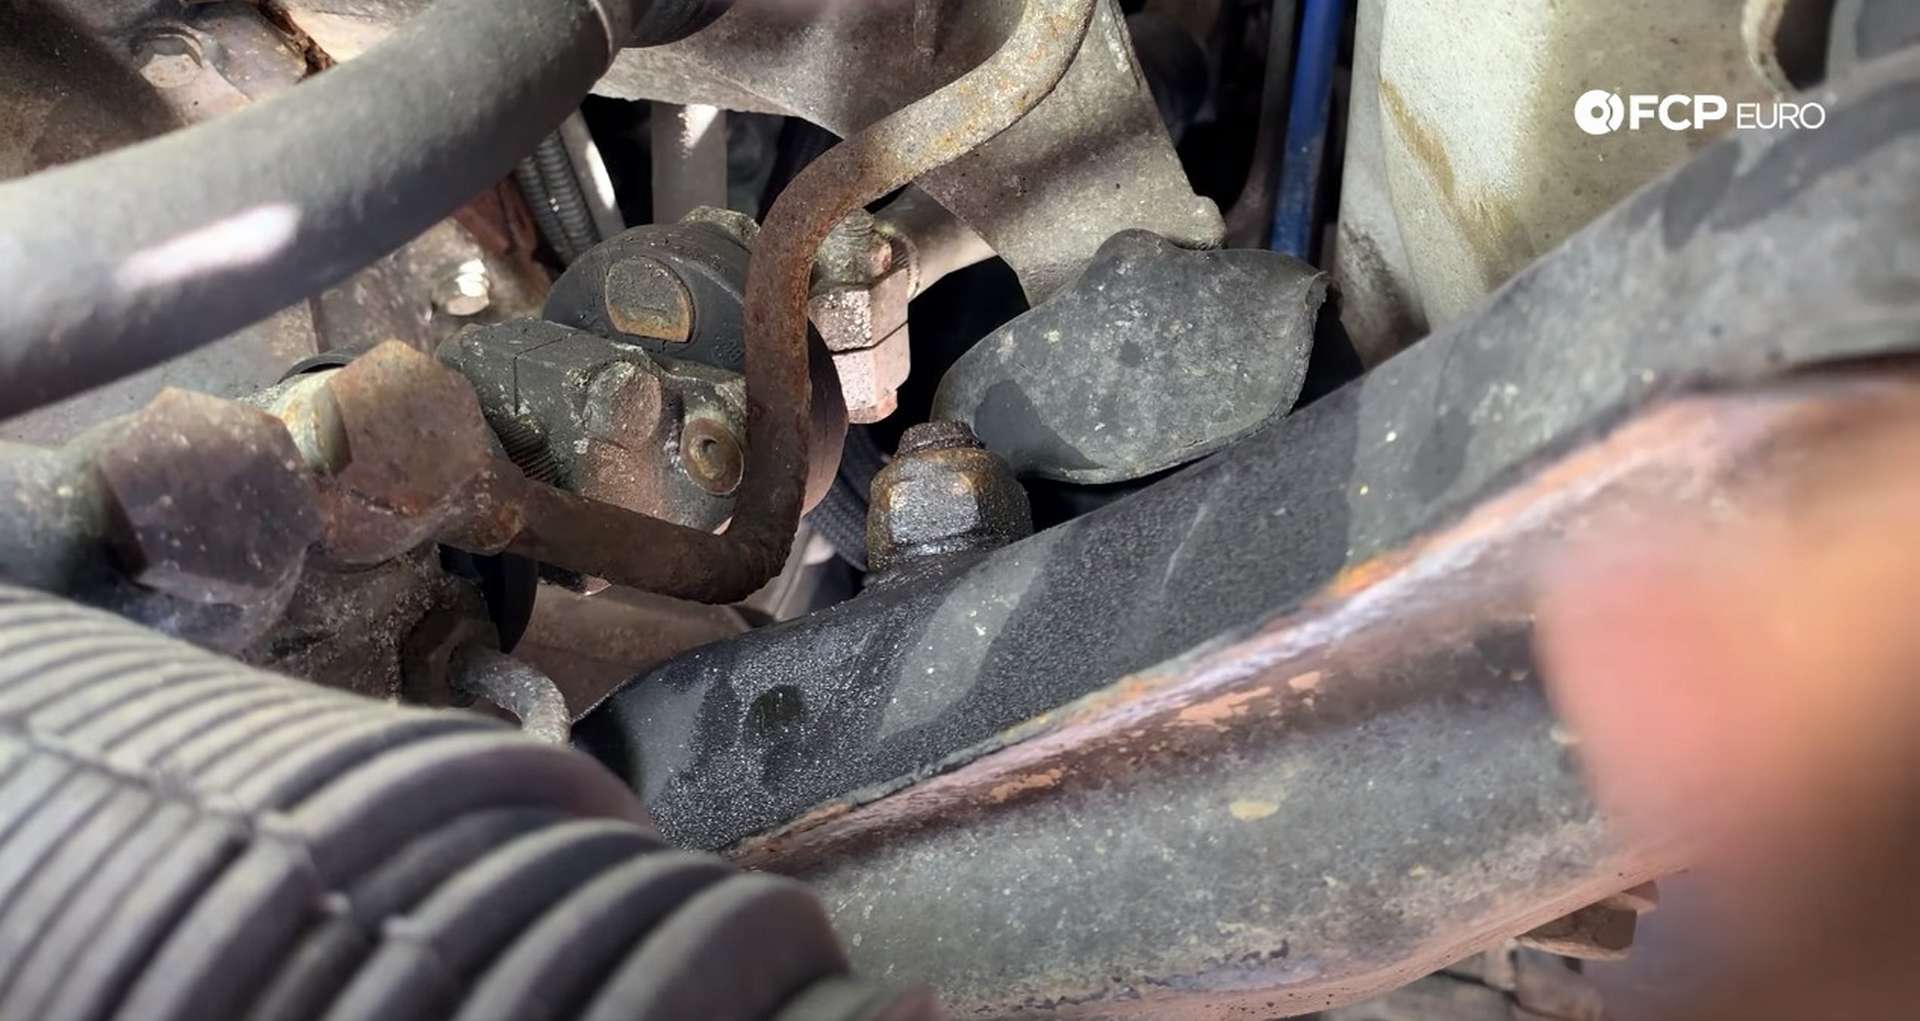
Soak these nuts in rust penetrant if the area you live in causes rust. The nuts will bind up and cause a huge headache with the lack of space to get any long tool in there. Use the ball joint separator on the inner ball joint to get it separated from the subframe.

You can remove the swaybar to give yourself more access to the 21mm nut. Since the endlinks are already disconnected, just remove the four 13mm nuts that secure the swaybar brackets to the car, and the bar will fall out of the car.
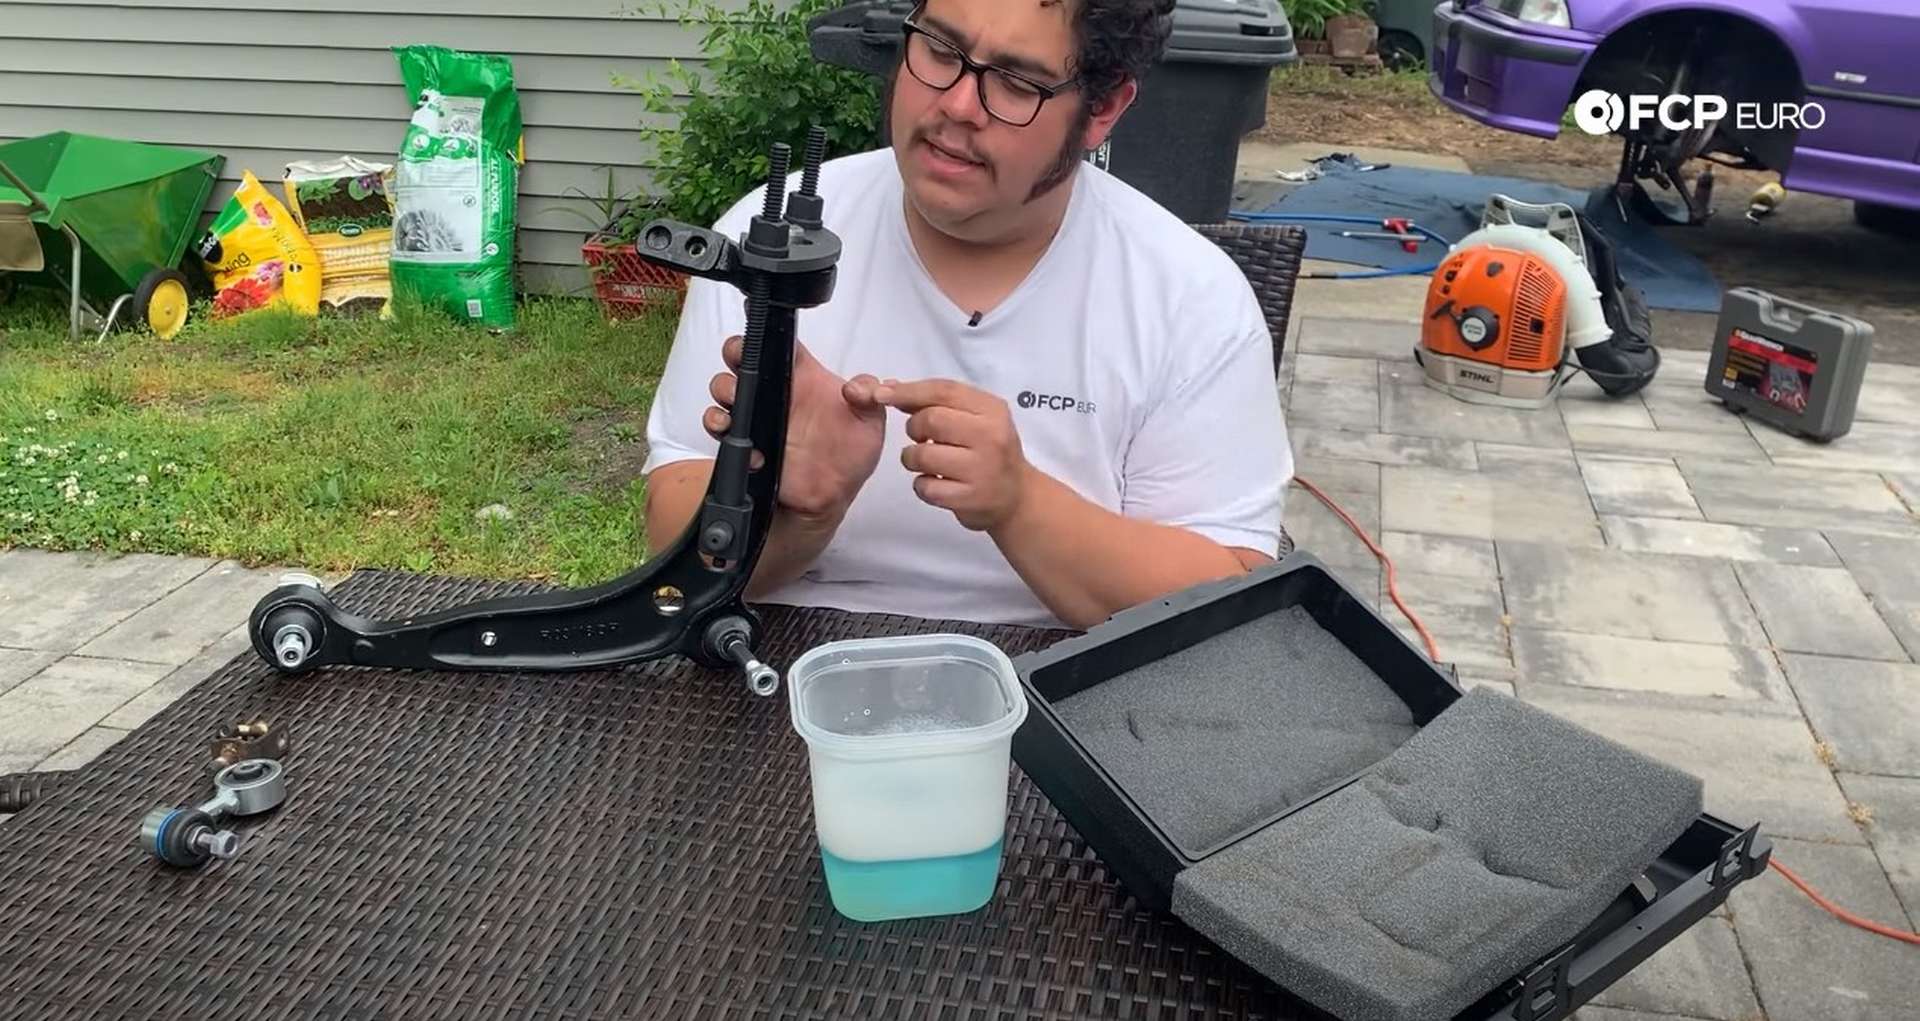
Step 6: Press the new rear bushing onto the control arm
The rear control arm bushing needs to be pressed onto the arm. Sit the bushing onto the arm as close to its proper orientation as you can get it and then start to assemble the bushing installation tool on the arm. Ensure the top plate is sitting flat on top of the bushing, and the bushing is canted on the arm, before pressing it down.
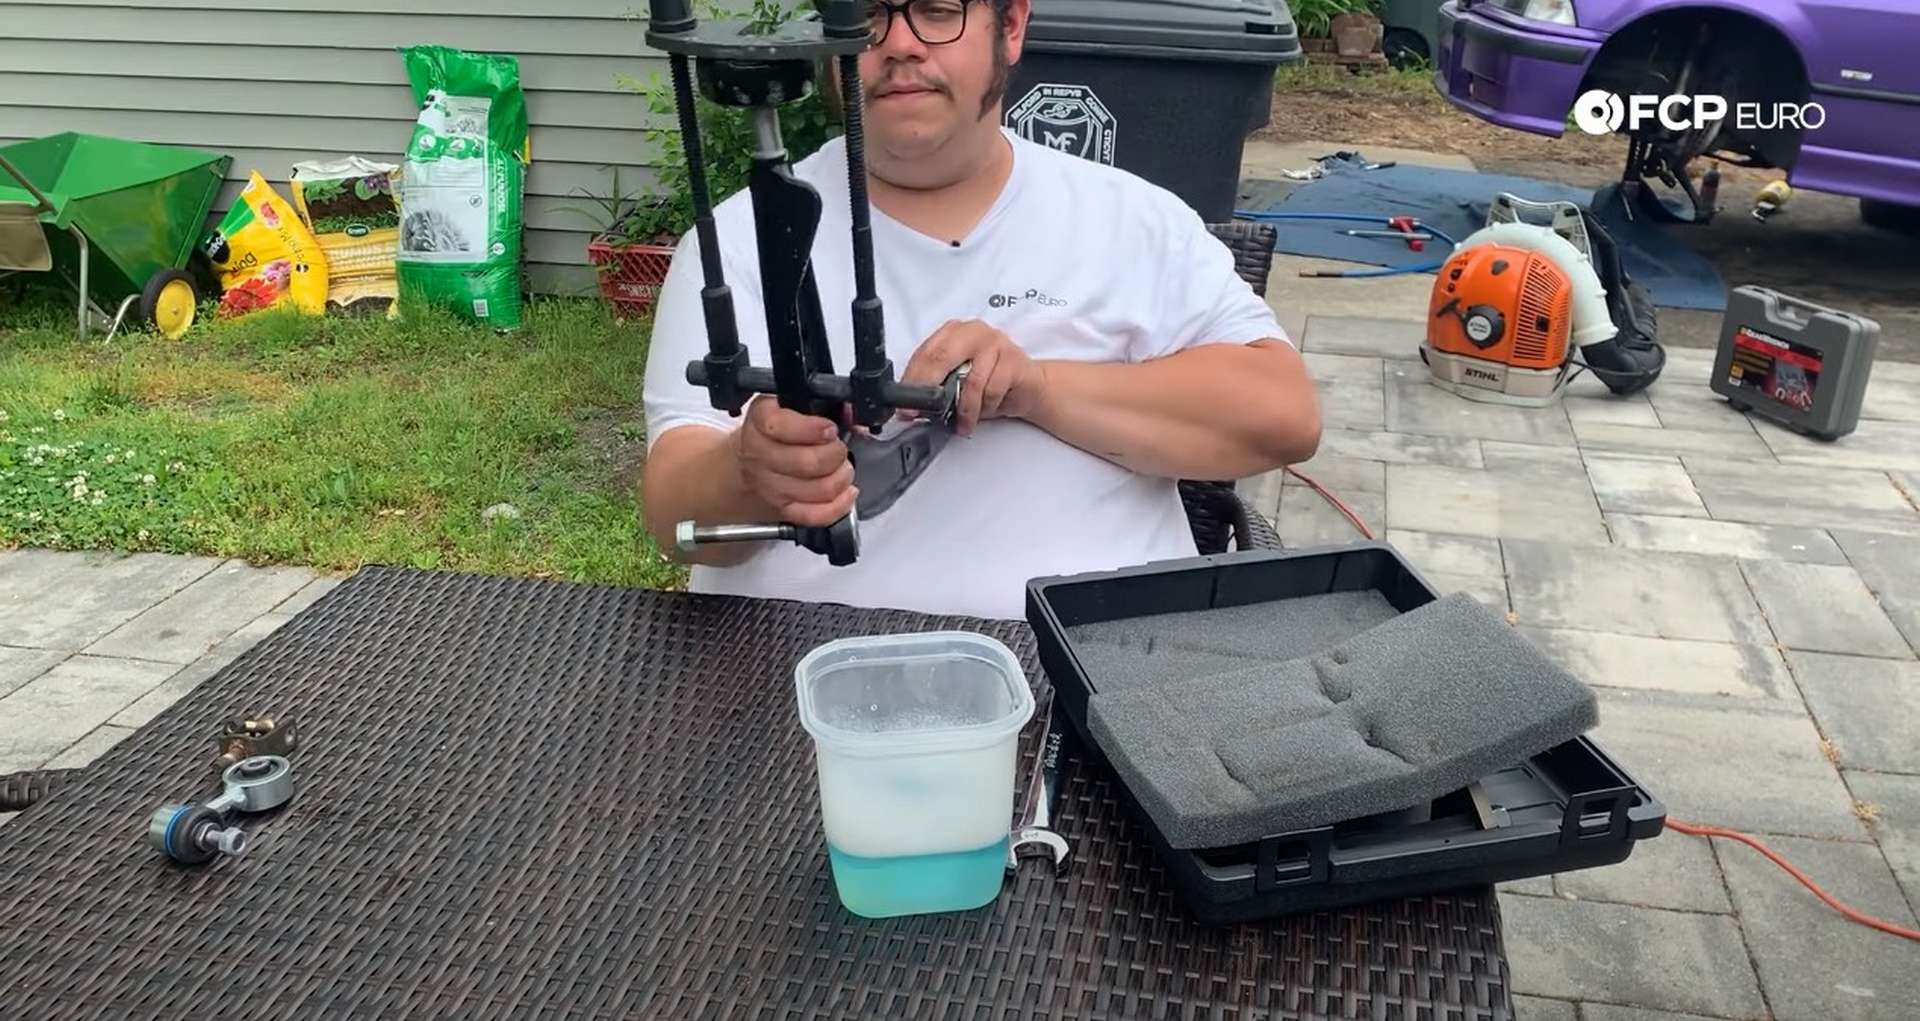
Use a 24mm wrench to tighten down the nuts on the bushing tool. Tighten each nut one turn at a time to keep the bushing from being pressed on at an angle. Repeat this process for the other bushing.
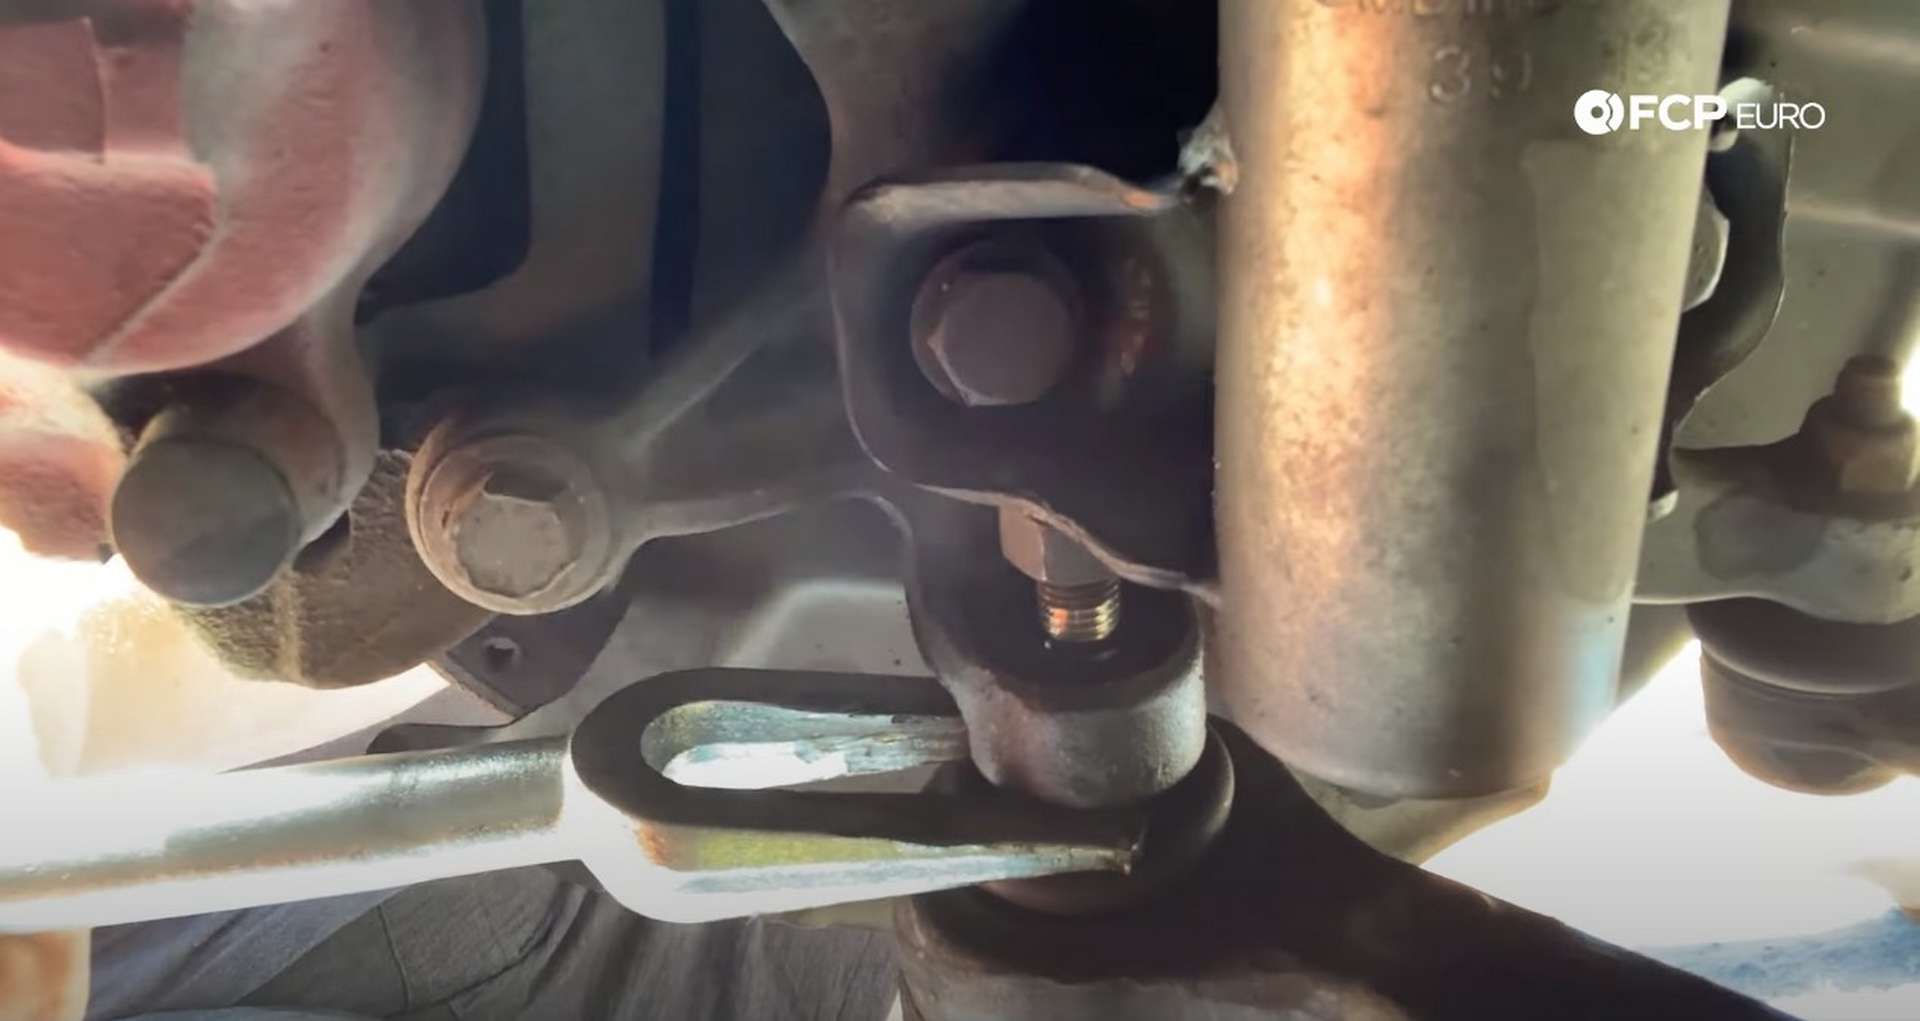
Step 7: Reinstall the control arms
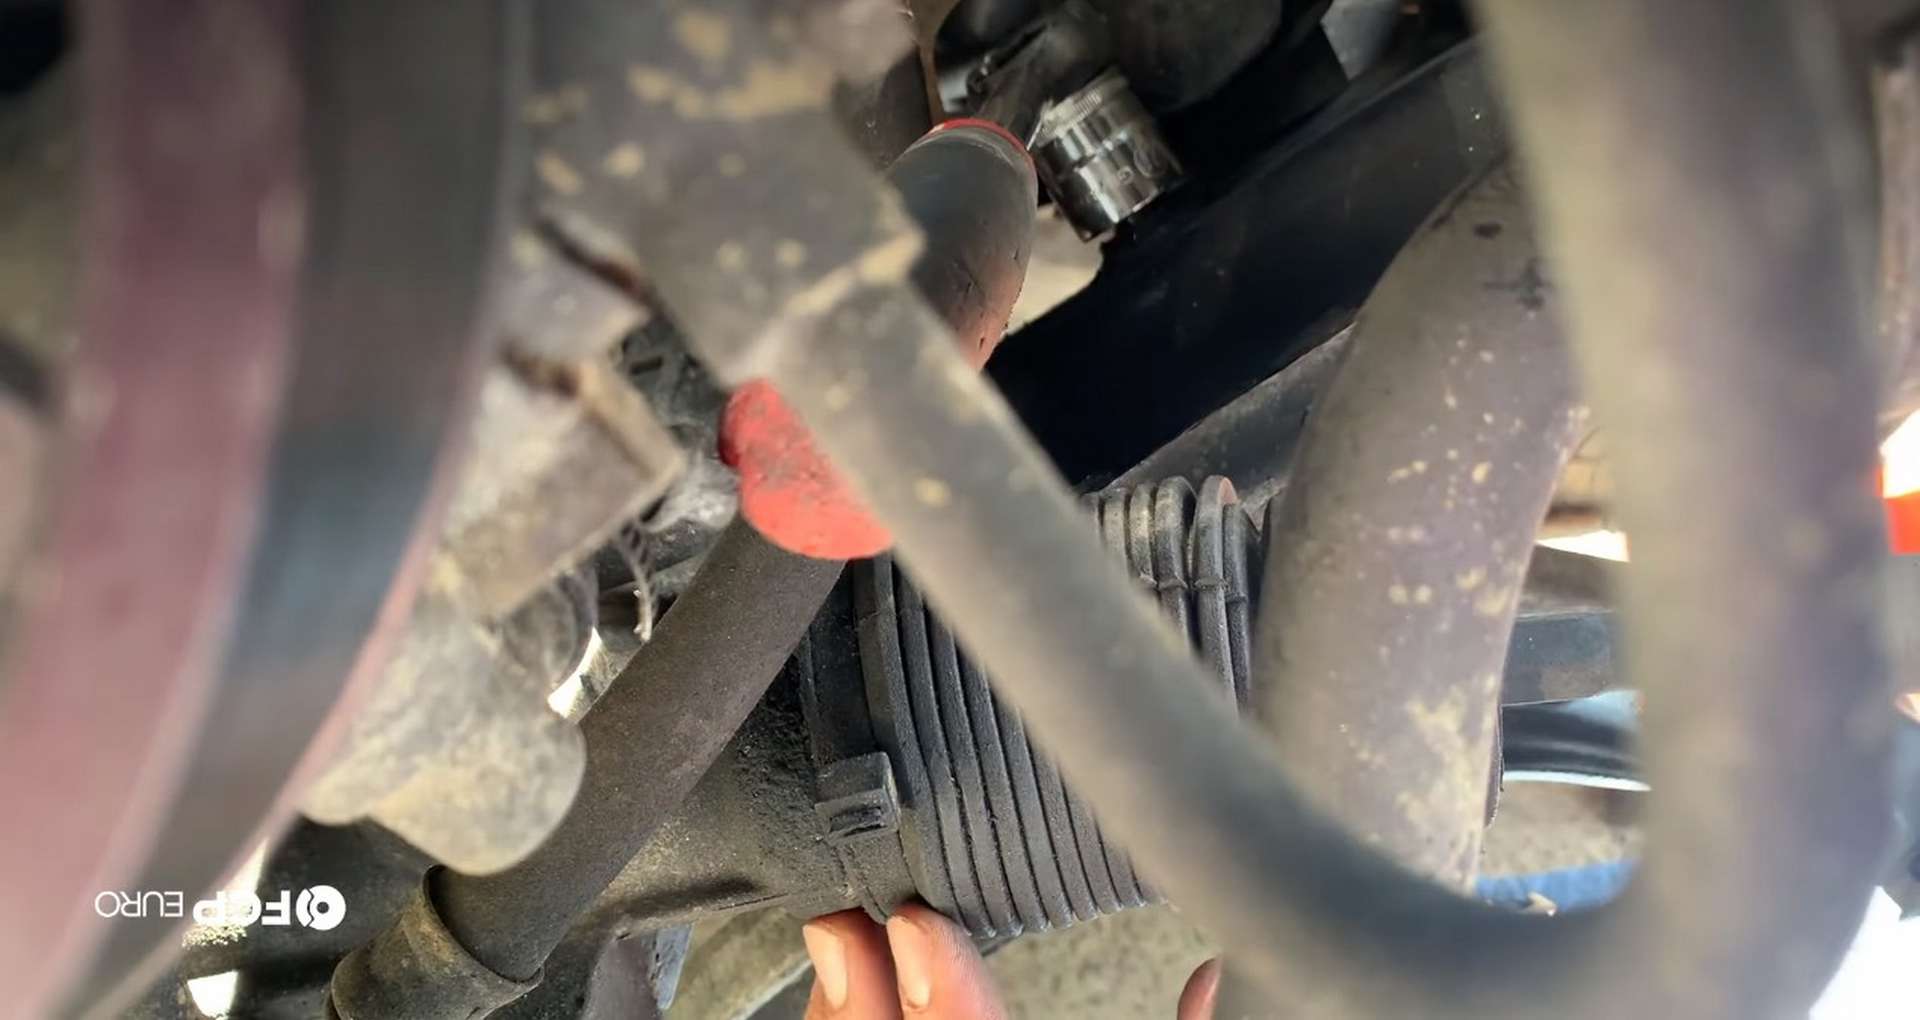
Start by putting the inner ball joint through the subframe and loosely threading on the nut. Then, fit the outer ball joint into the knuckle and loosely thread on the nut. Position the rear bushing’s bracket onto the locating pins on the chassis and then thread in the two 17mm bolts.
The ball joints will want to spin when tightening their nuts. To prevent this, use a floor jack to put pressure on them, pushing the tapered areas together, preventing any spinning.
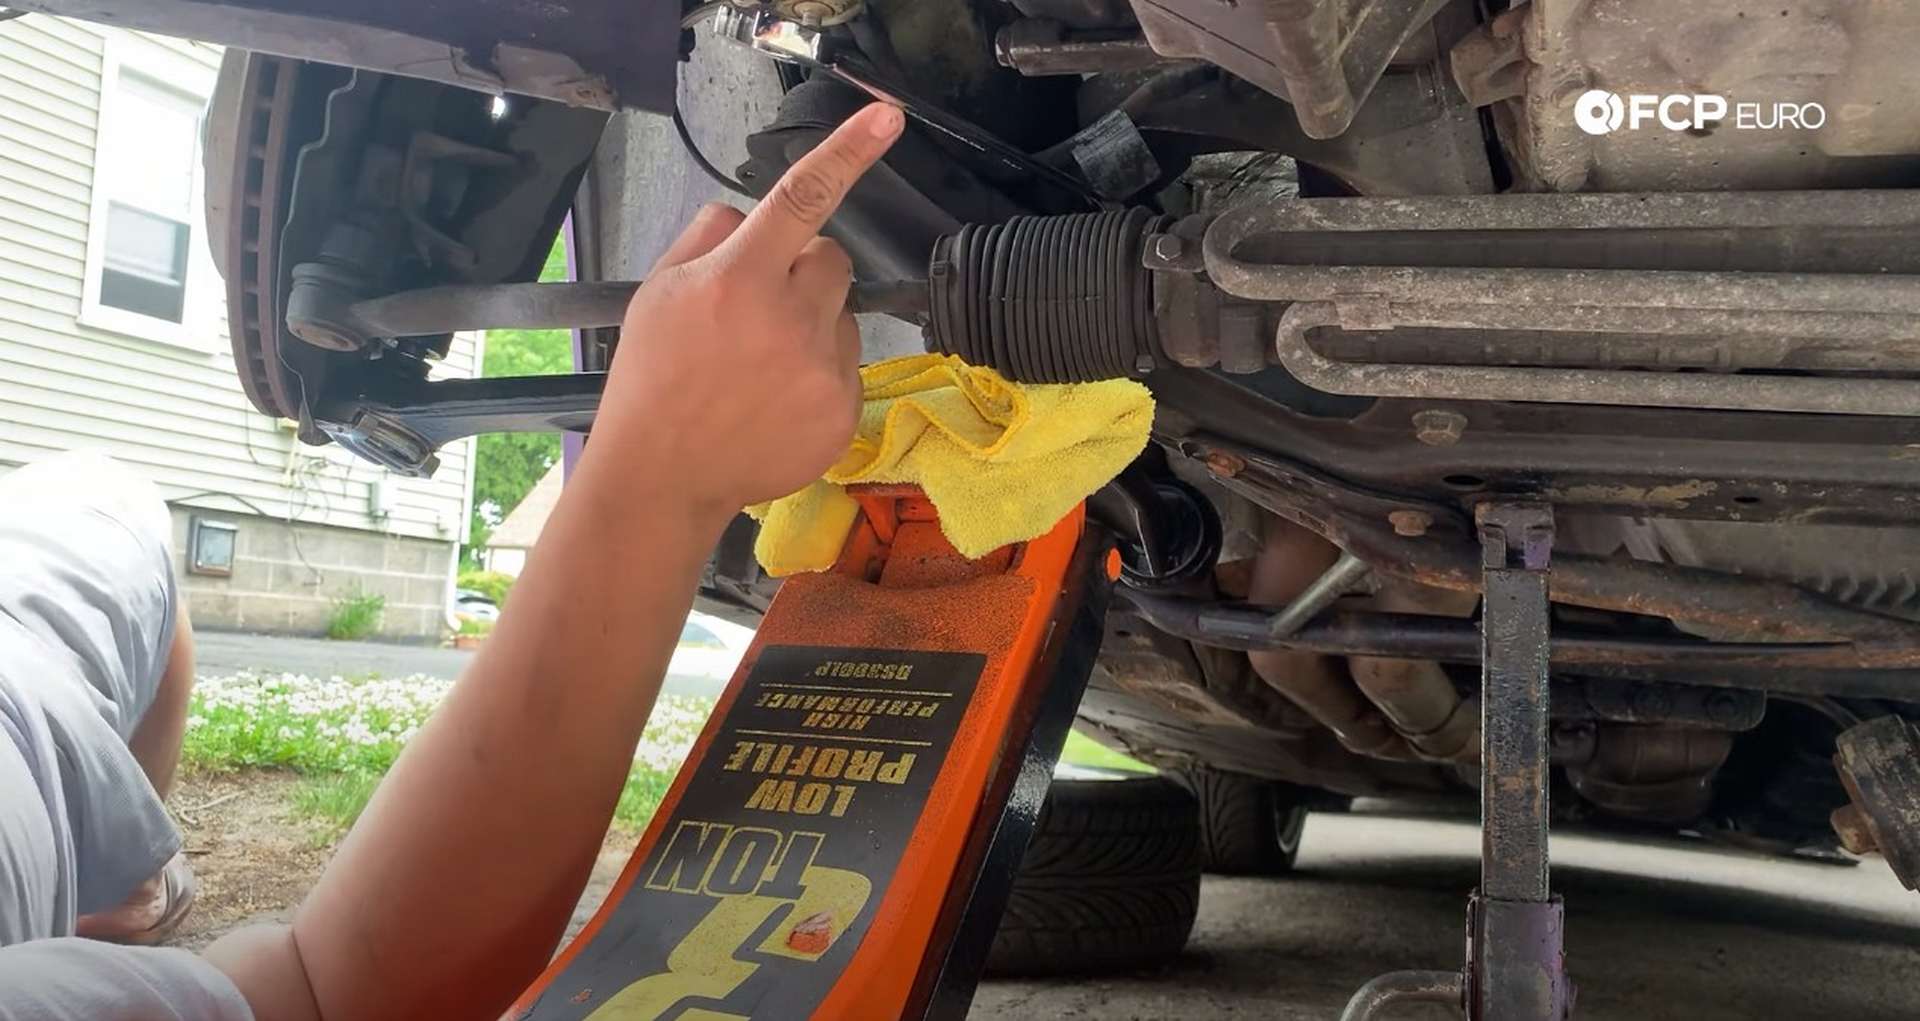
Use a 21mm wrench to tighten down the inner ball joint nut and use a 21mm socket to torque the nut to 64 ft-lbs. Next, use a 17mm socket to tighten the rear bushing bolts to 34 ft-lbs. Then, use a 19mm wrench to tighten the outer ball joint nut to 48 ft-lbs.
If you have both arms out at the same time, reinstall the other arm now.
Step 8: Reinstall the swaybar
If you dropped the swaybar to get extra access to the inner ball joint nut, fit it back into place and use a 13mm socket to tighten the bracket nuts to 22 ft-lbs.
Sit the endlink bracket into the control arm and loosely thread on the nut. Then, put the endlink into the bracket and loosely secure it. Put the top end of the endlink into the swaybar and tighten down the nut with a 16mm socket while counter holding the ball joint with a 16mm wrench.

Use a 13mm socket on the endlink-to-bracket nut while counter holding the bolt with a 13mm wrench.
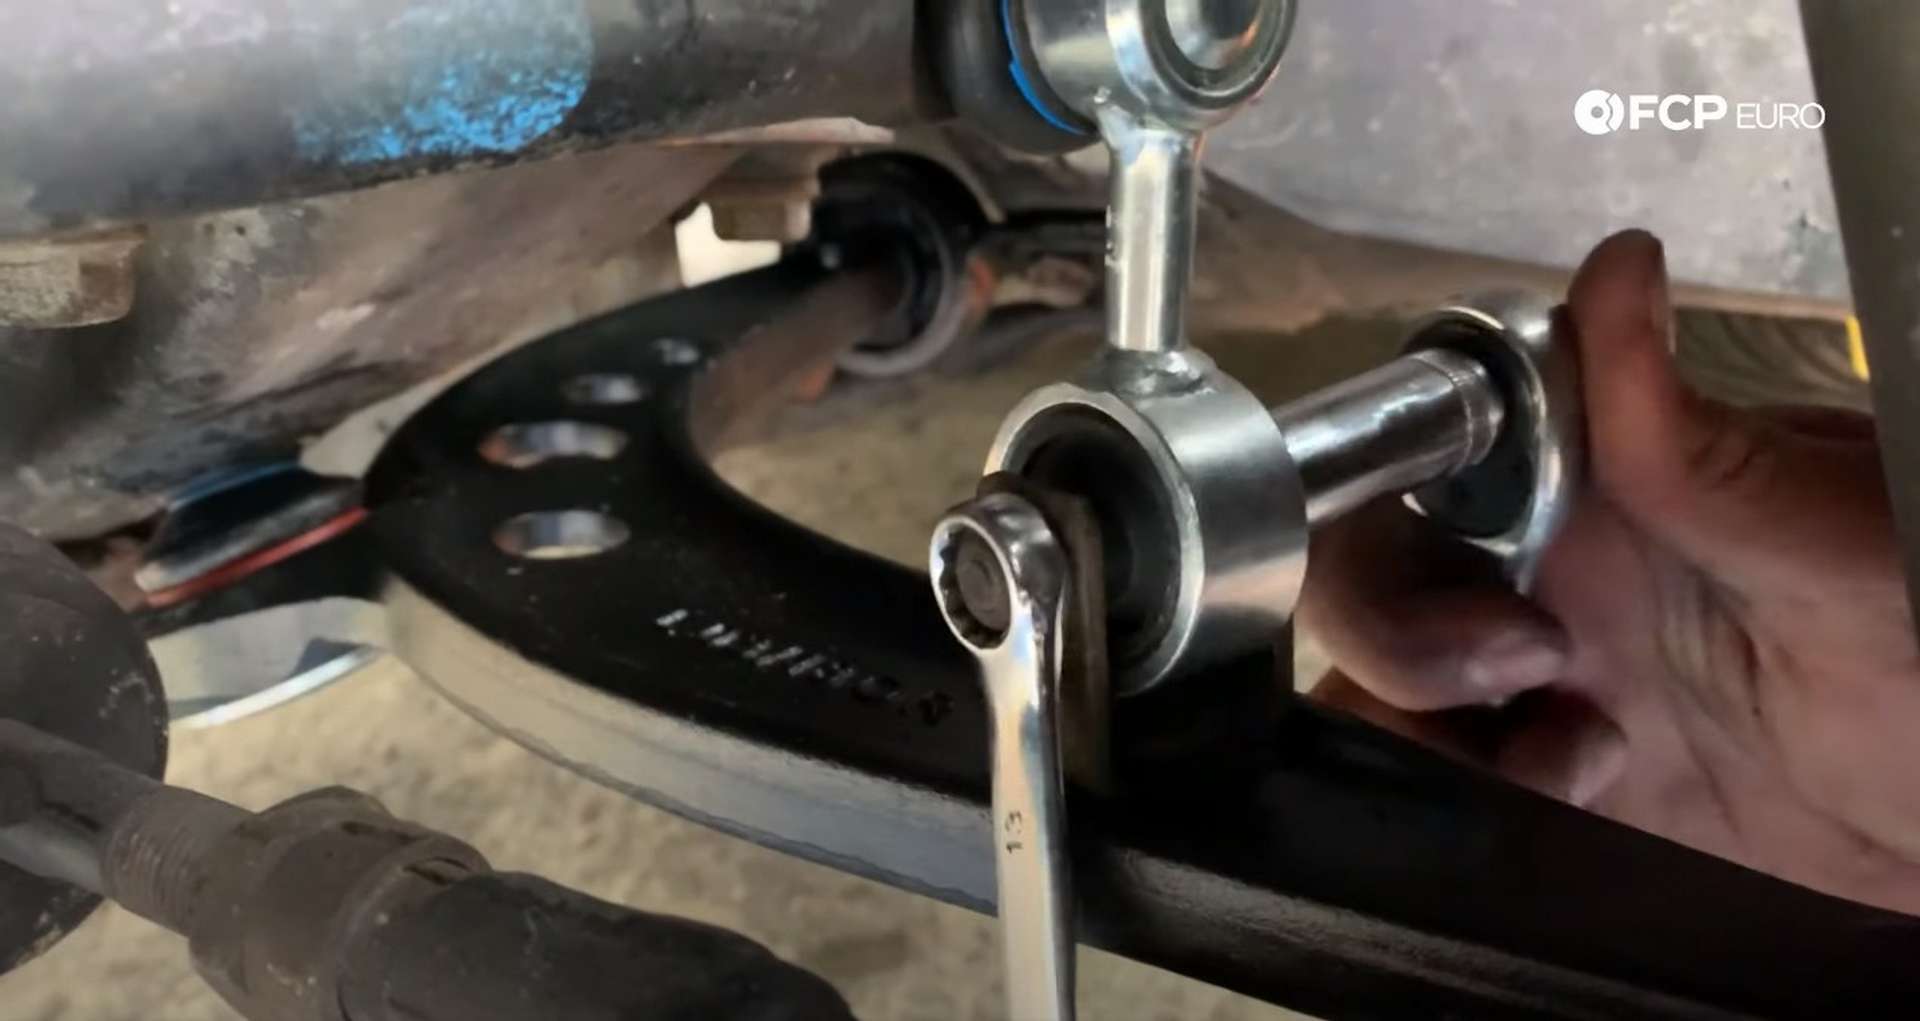
Finally, tighten the endlink bracket nut with a 16mm socket—torque the nut to 32 ft-lbs.
Step 9: Refit the wheels
Fit the wheels back onto the car and use a 17mm wrench to torque the wheels to 88 ft-lbs. Lift the car with the jack and remove the jack stands. Then set the car on the ground and go for a drive with your newly refreshed suspension.
BMW Torque Specs:
- BMW Lug Bolts = 120Nm or 88 ft-lbs of torque
- BMW Endlink Bracket Nut = 43Nm or 32 ft-lbs of torque
- BMW Swaybar Mounting Bracket Nuts = 30Nm or 22 ft-lbs of torque
- BMW Inner Ball Joint Nut = 87Nm or 64 ft-lbs of torque
- BMW Outer Ball Joint Nut = 65Nm or 48 ft-lbs of torque
- BMW Rear Control Arm Bushing Bolts = 46Nm or 34 ft-lbs of torque
If you're interested in more DIYs for your BMW, you can visit bmw.fcpeuro.com and subscribe to our YouTube channel. Or, if you have questions about this procedure, leave them in the comments below.


