- 04/28/2021
- 13 Min Read
- By: Christian Schaefer
How To Replace A BMW N20 Or N26 Valve Cover Gasket (BMW F30)

Regardless of the engine in your F30, the valve cover gasket is the largest physical seal preventing oil from leaking out the top of your engine. The valve cover used on BMW's N20 & N26 engines is made from plastic and uses a rubber gasket. Over time, as the gasket is subject to heating and cooling, the rubber will dry up, losing its sealing capabilities. When that happens, the engine's oil will leak past and out of the engine.
Replacing the valve cover gasket isn't a simple job. Quite a few systems need to be disconnected and removed to get to the valve cover, and the engine will be open to the elements after you remove the cover. However, with the right tools, some patience, and this guide, you shouldn't have any reservations about replacing the gasket yourself. No special tools or procedures are required during the replacement.
BMW models and years applicable:
|
|
|
|
|
|
|
|
How much will it cost to replace the valve cover gasket on a BMW N20 or N26 engine?
We offer a valve cover gasket kit for the N20/26 engines that will run you around $90. The kit includes the three valve-cover gaskets, a new vacuum pump seal, a new Valvetronig plug seal, and a new high-pressure fuel pump gasket.
While you have the valve cover off, check the condition of the timing chain and its components. The N20/26 engines are known for their failed timing components, and replacing them while you already have the valve cover off will save you time and money.
How long will it take to replace the valve cover gasket on a BMW N20 or N26 engine?
Set aside at least a full day as this isn't a quick process. You will have to disconnect all of the wiring from atop the cylinder head. Then, remove the fuel system. After that, you have to unbolt the valve cover and try not to break it as you remove it, replace the gaskets, and reinstall it. Taking your time is vital. Removing the valve cover will expose the inside of the engine. Be careful to ensure that no foreign contaminants or objects end up in the valvetrain.
Parts required to replace the valve cover gasket on a BMW N20 or N26 engine:
Tools required to replace the valve cover gasket on a BMW N20 or N26 engine:
- 8mm Socket
- 10mm Socket
- 12mm Socket
- 14mm Socket
- 17mm Socket
- T30 Torx Bit Socket
- E6 Socket
- E8 Socket
- E10 Socket
- E18 Socket
- CTA Stubby Torx Set
- Ratchets
- Ratchet Extensions
- Torque Wrench
- Flathead Screwdriver
Steps required to replace the valve cover gasket on a BMW N20 or N26 engine:
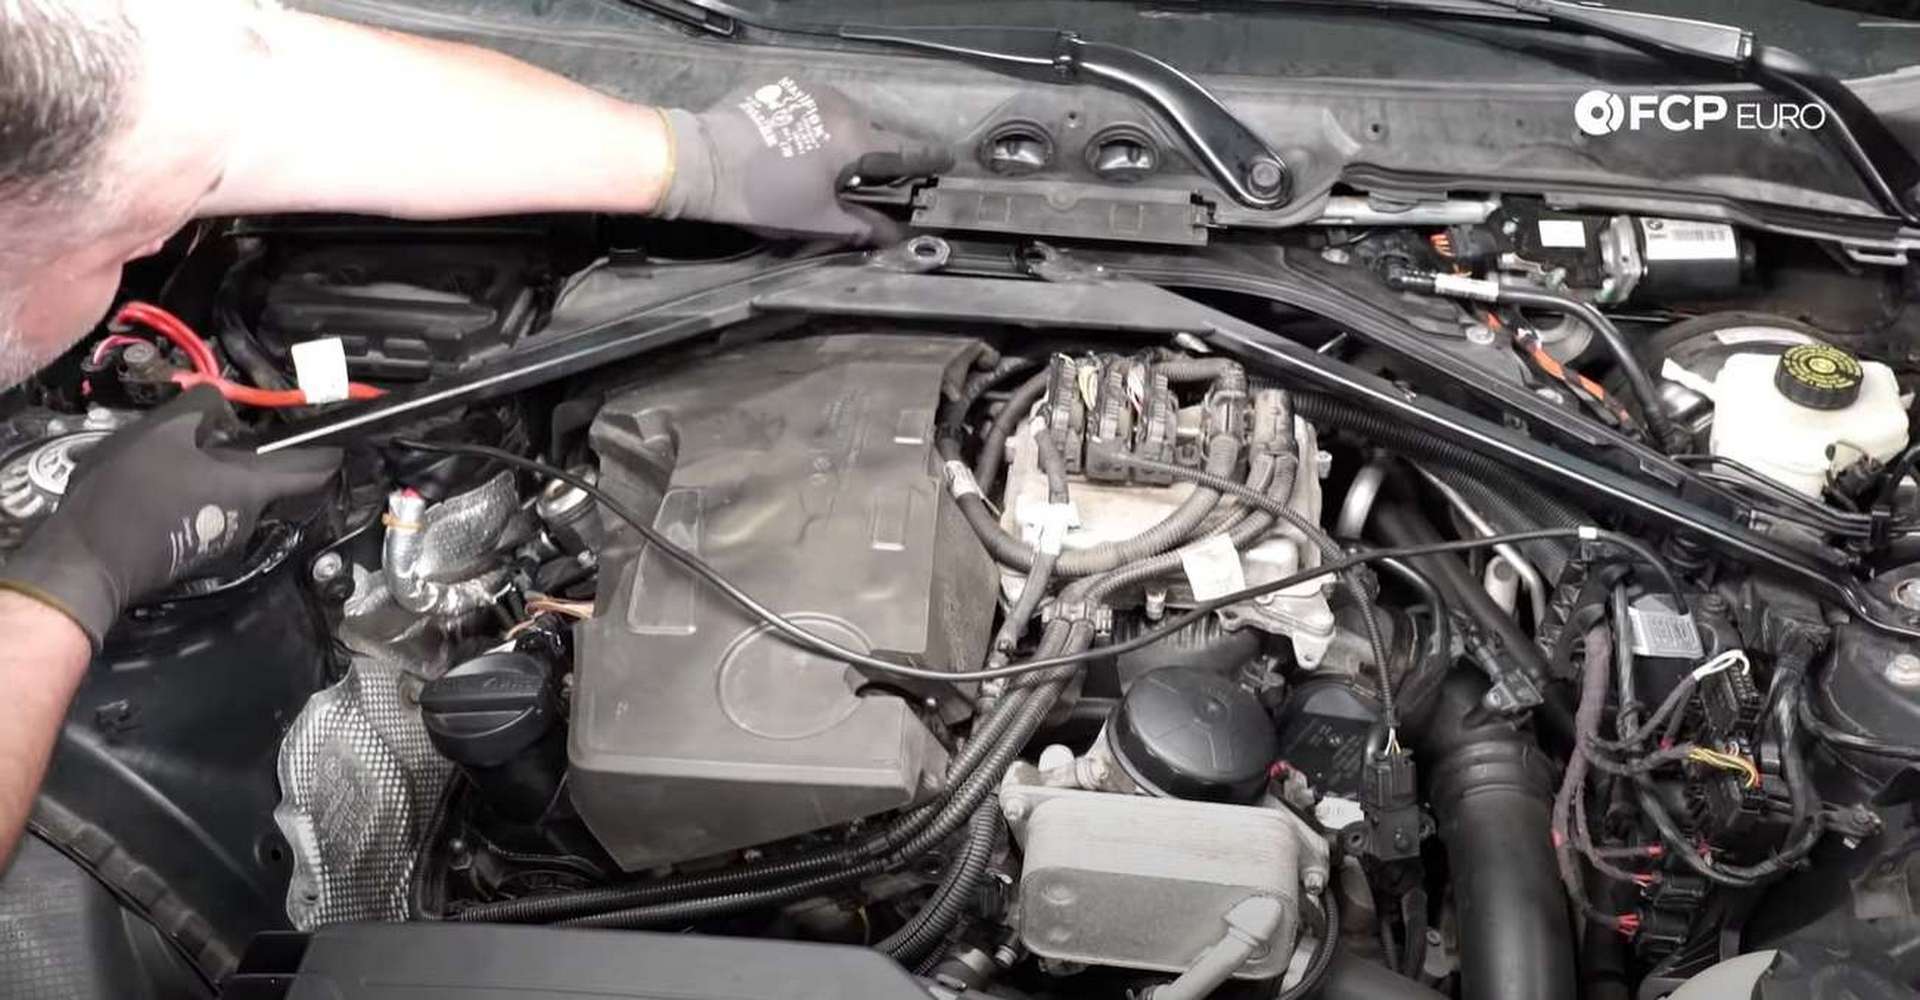
Step 1: Expose the valve cover
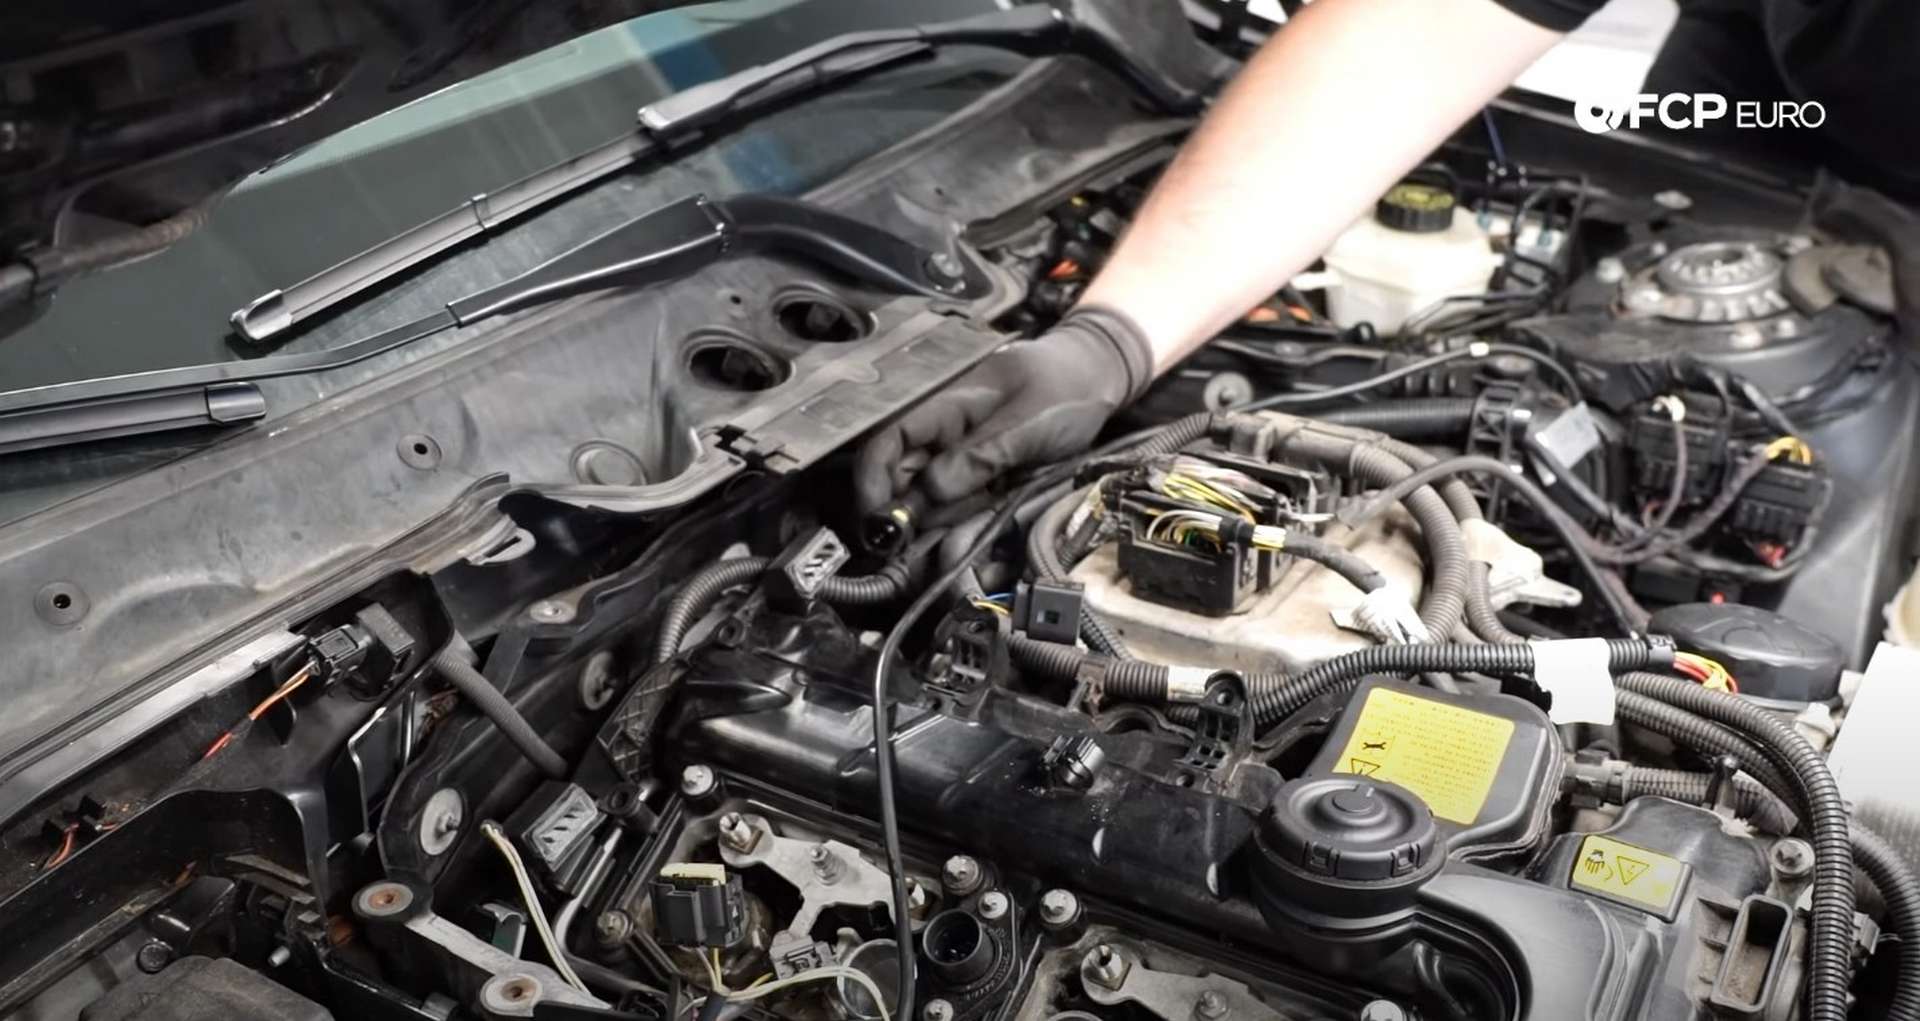
Grip the front of the engine cover and pull up to pop it off of the front locating pins. Then grab it by the right side and pull up to pop it off of the last pin. The pre-2013 engines also have two vacuum lines on the passenger's side of the cover that need to be disconnected before you can remove the cover.
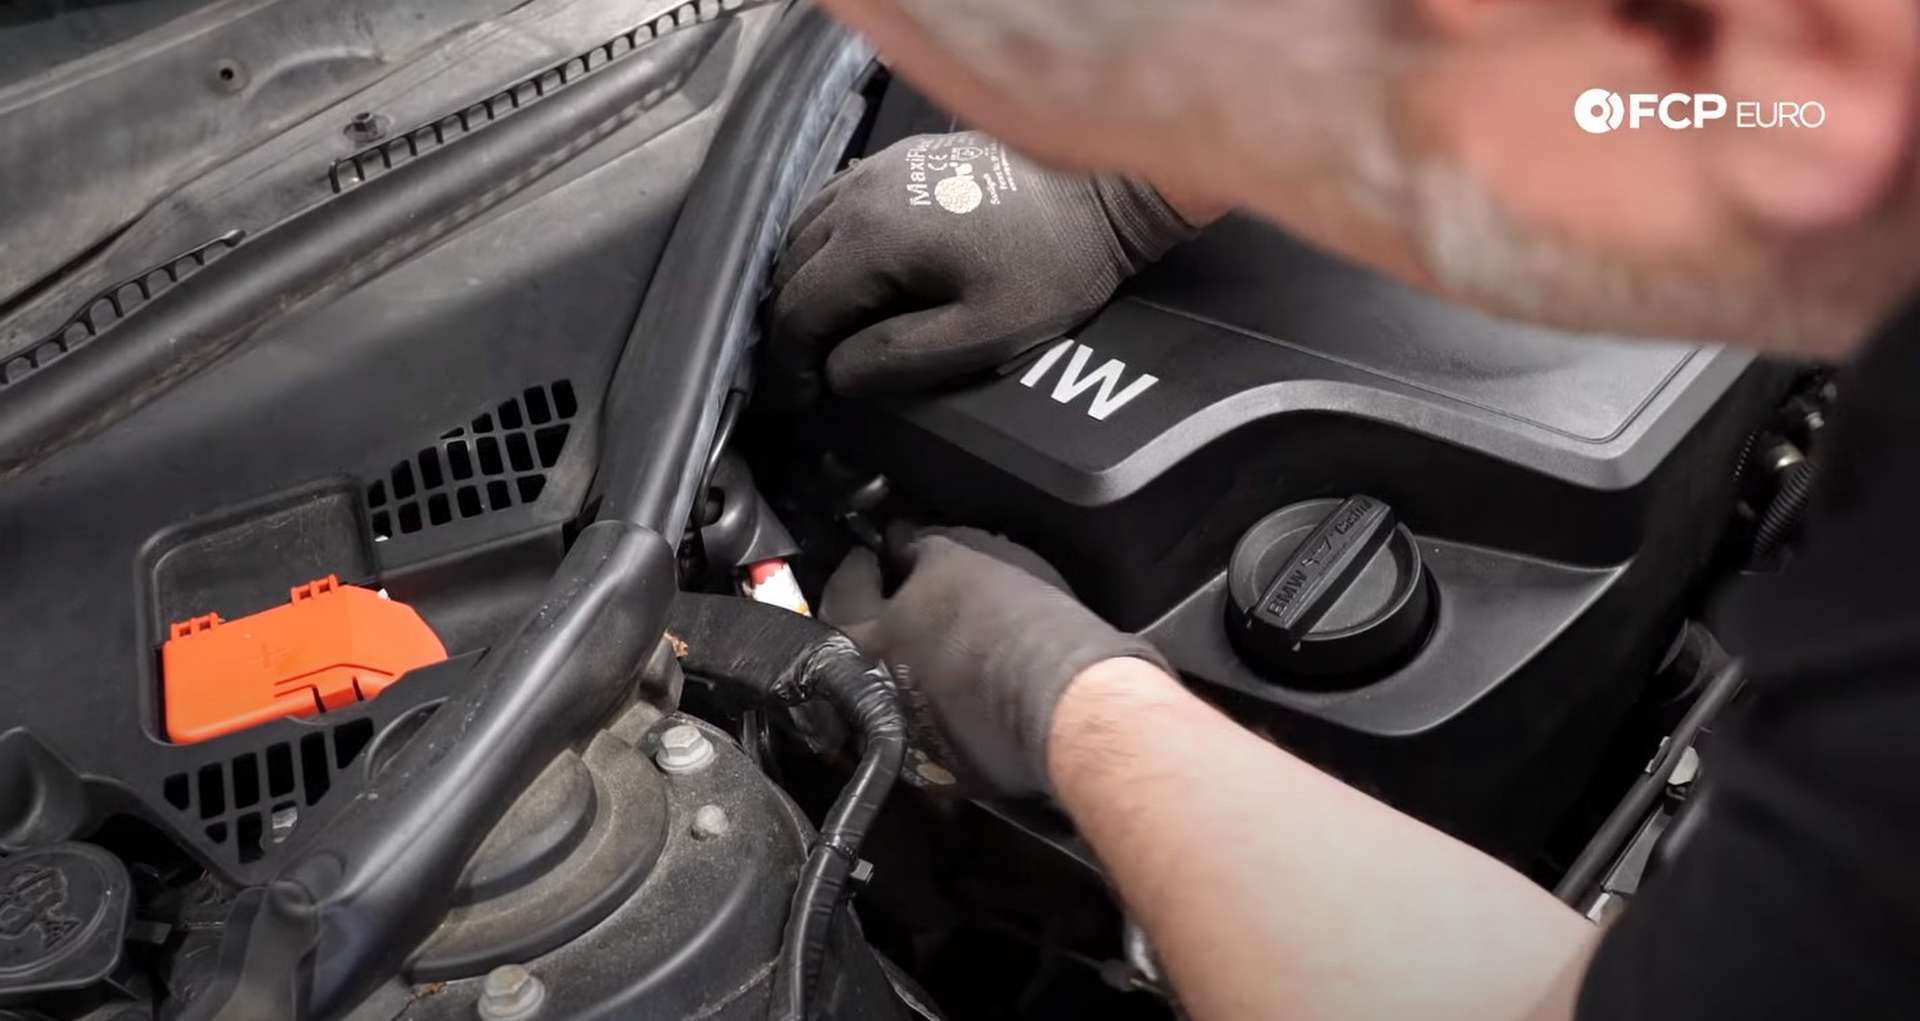
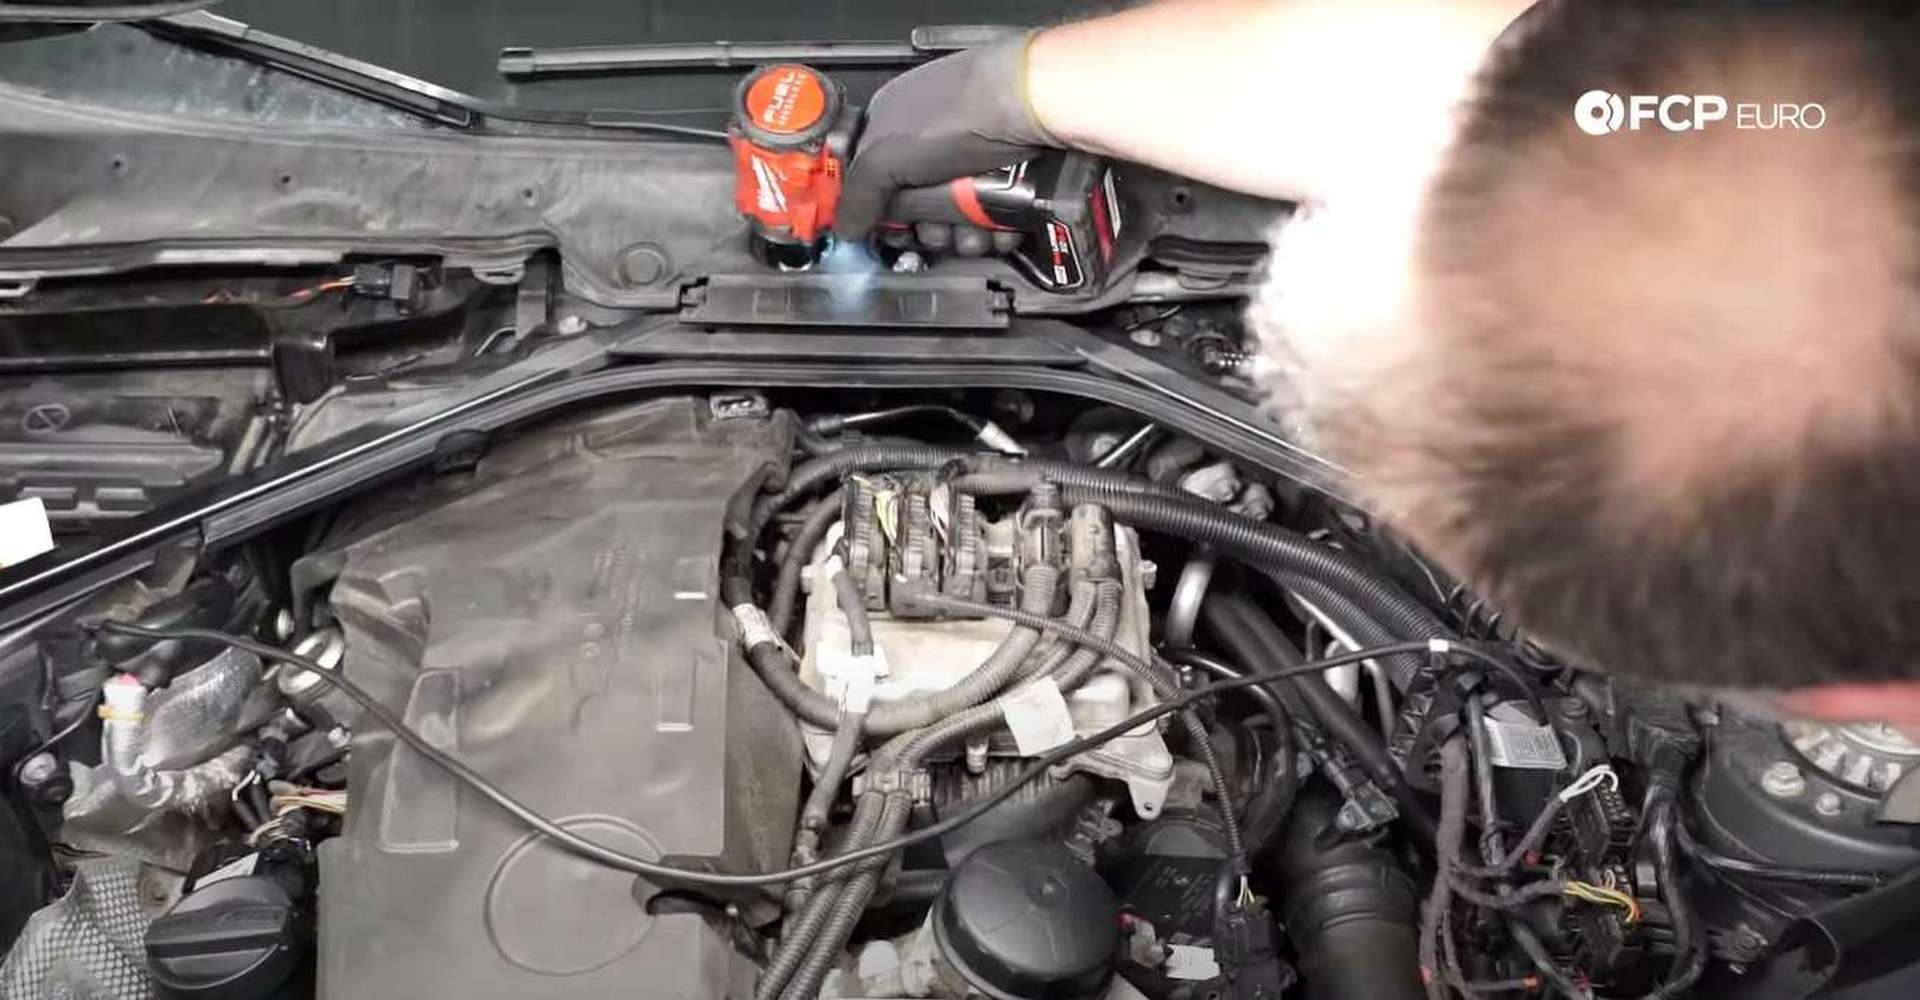
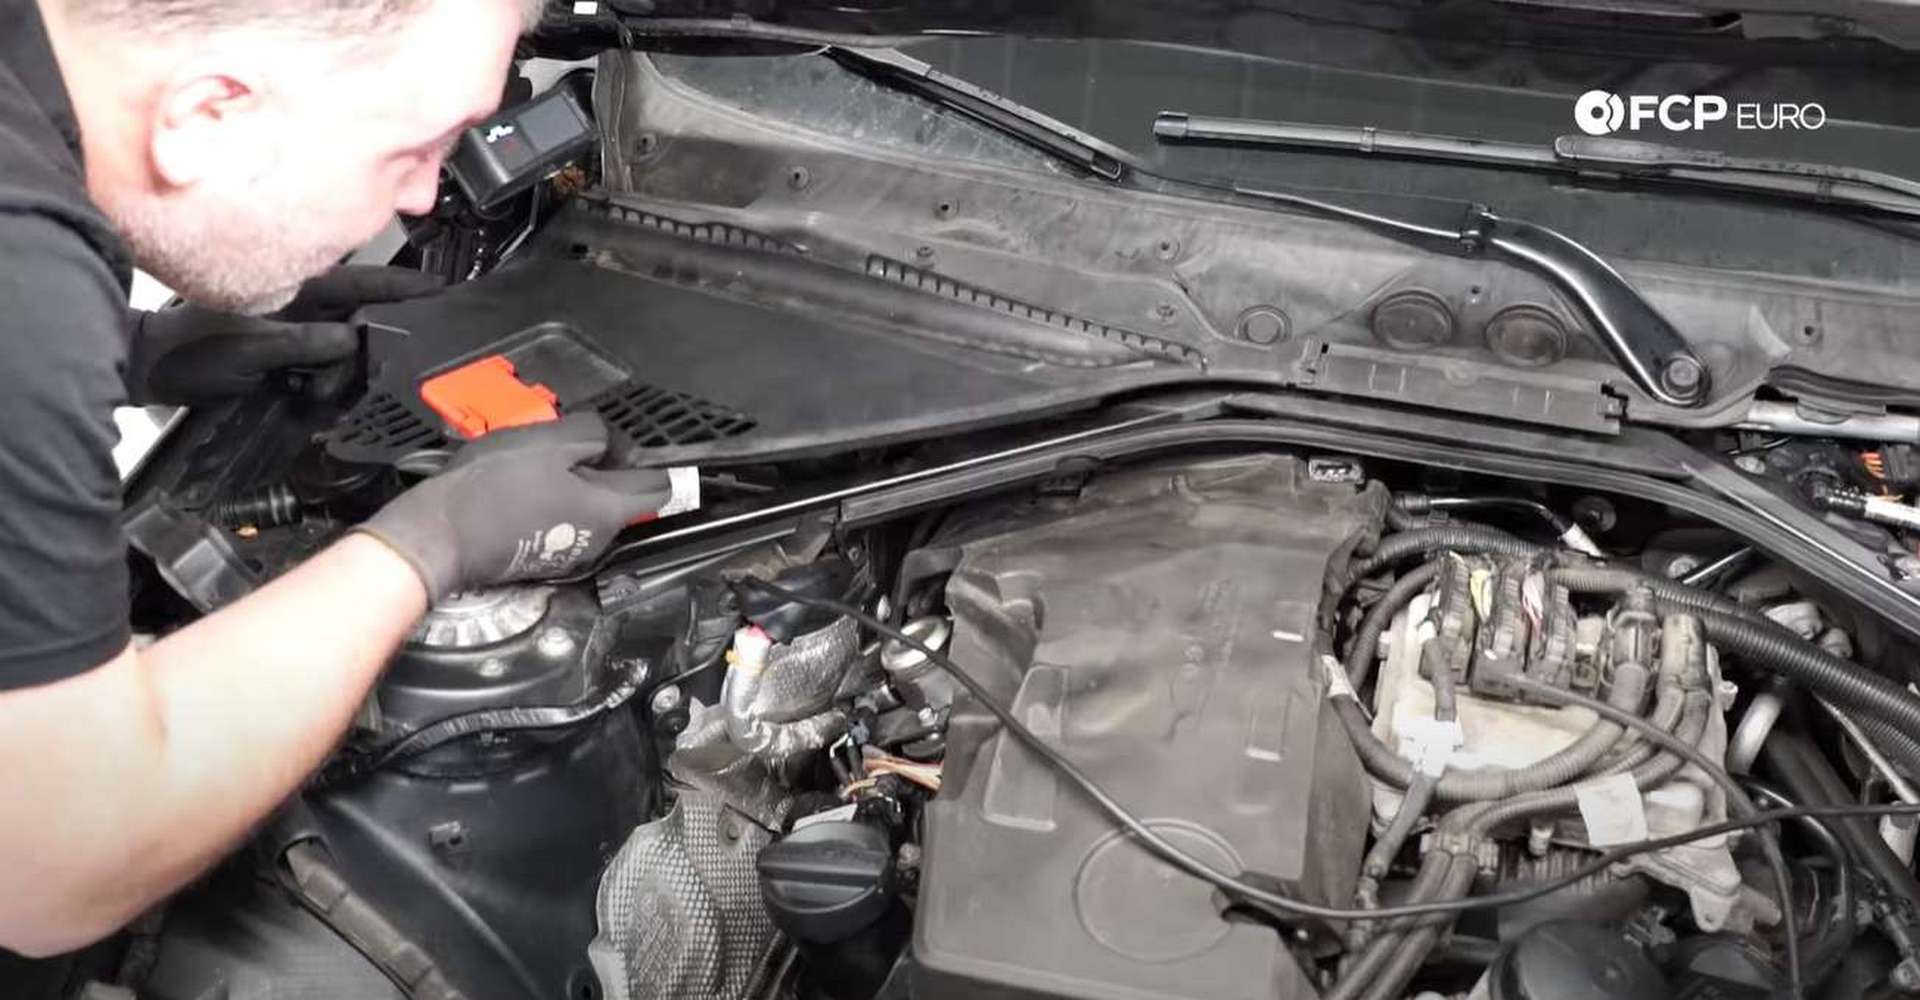
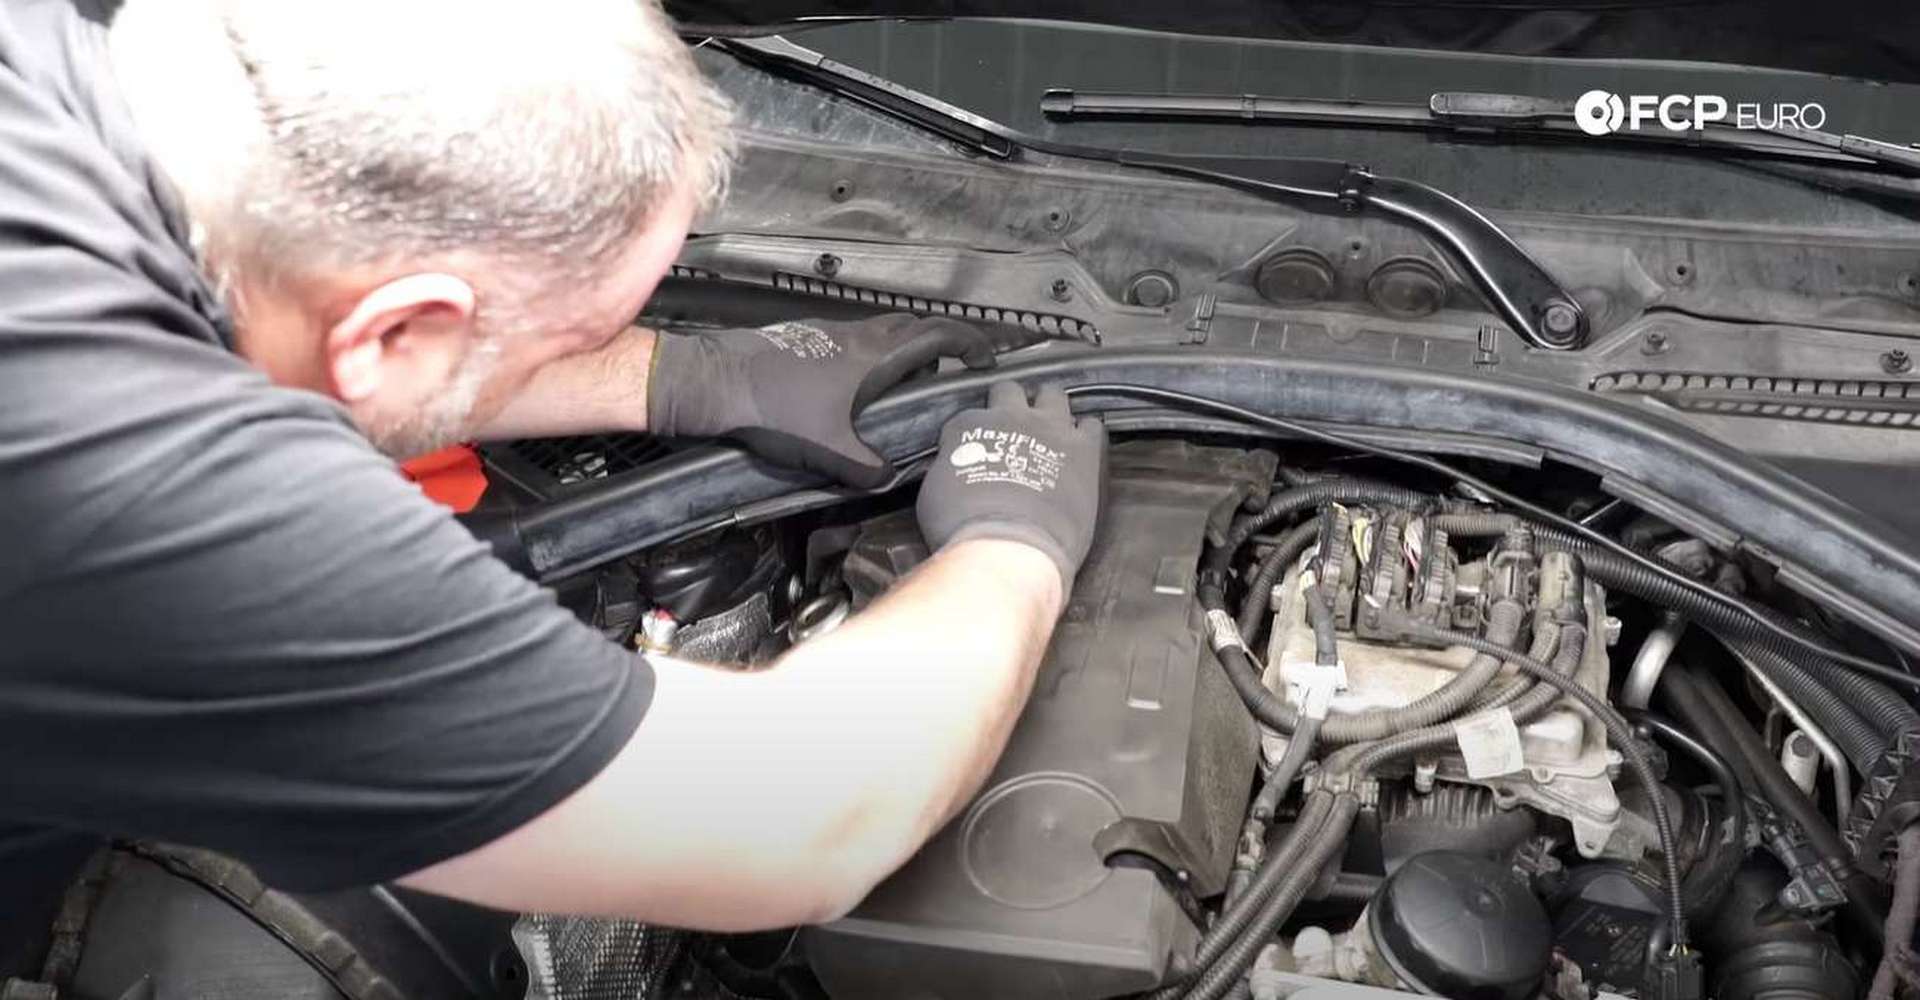
Underneath the plastic engine cover is a foam noise-reduction pad. Pull up on it to remove it from the engine. Then move to the engine cowl. Use a 10mm socket to rotate the fasteners at the back of the cowl, a quarter turn. Then, remove the plastic rivets, securing them near the fenders.
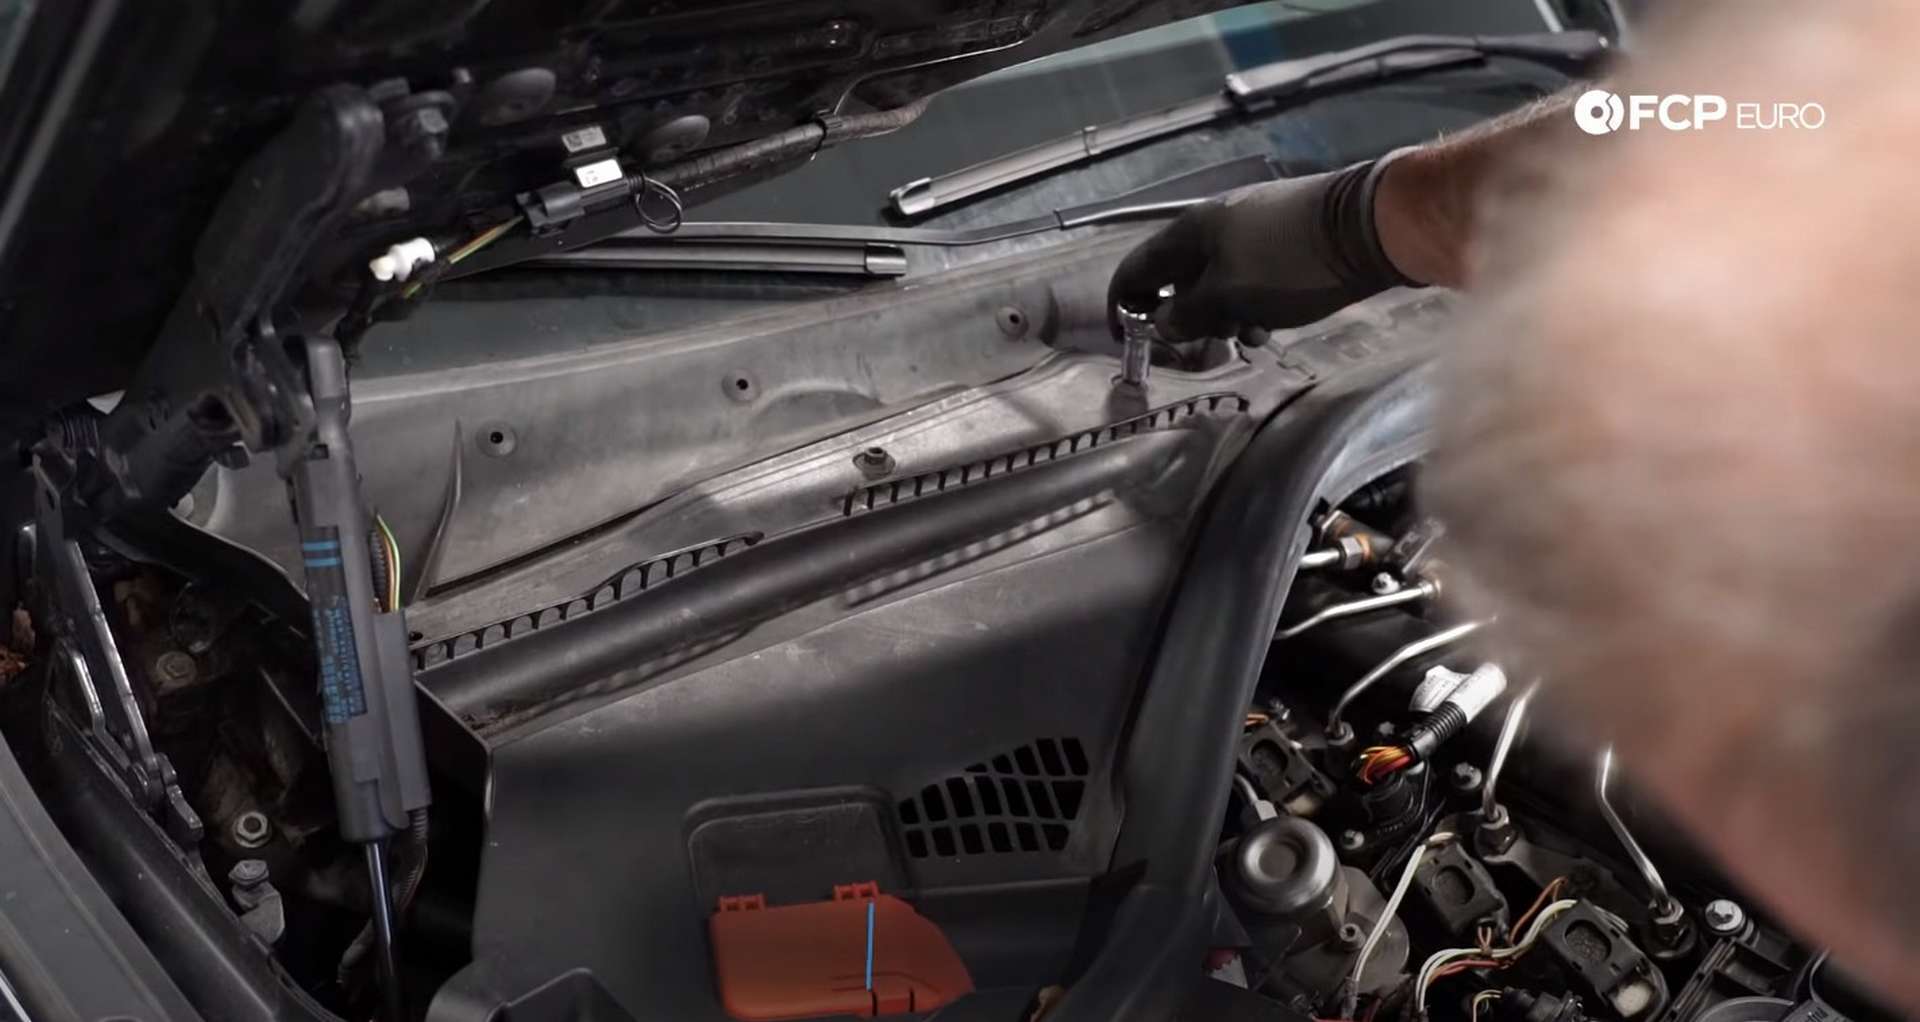
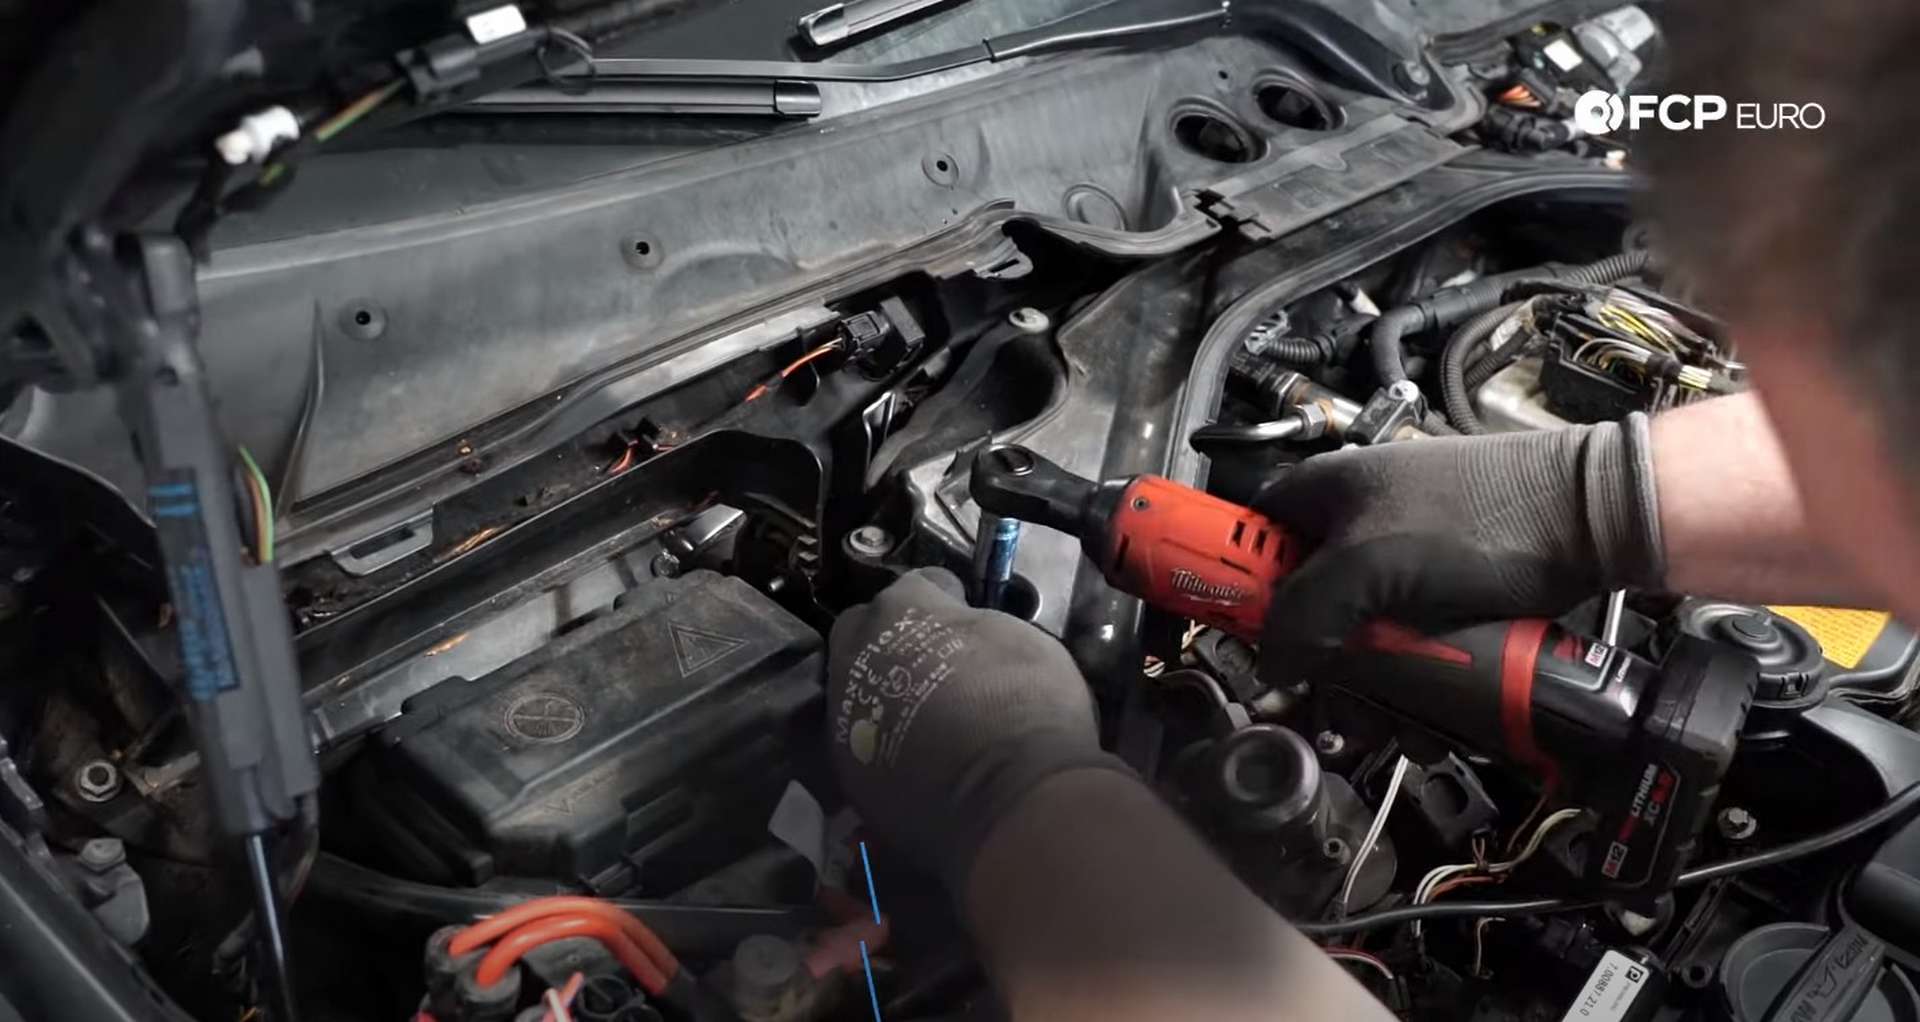
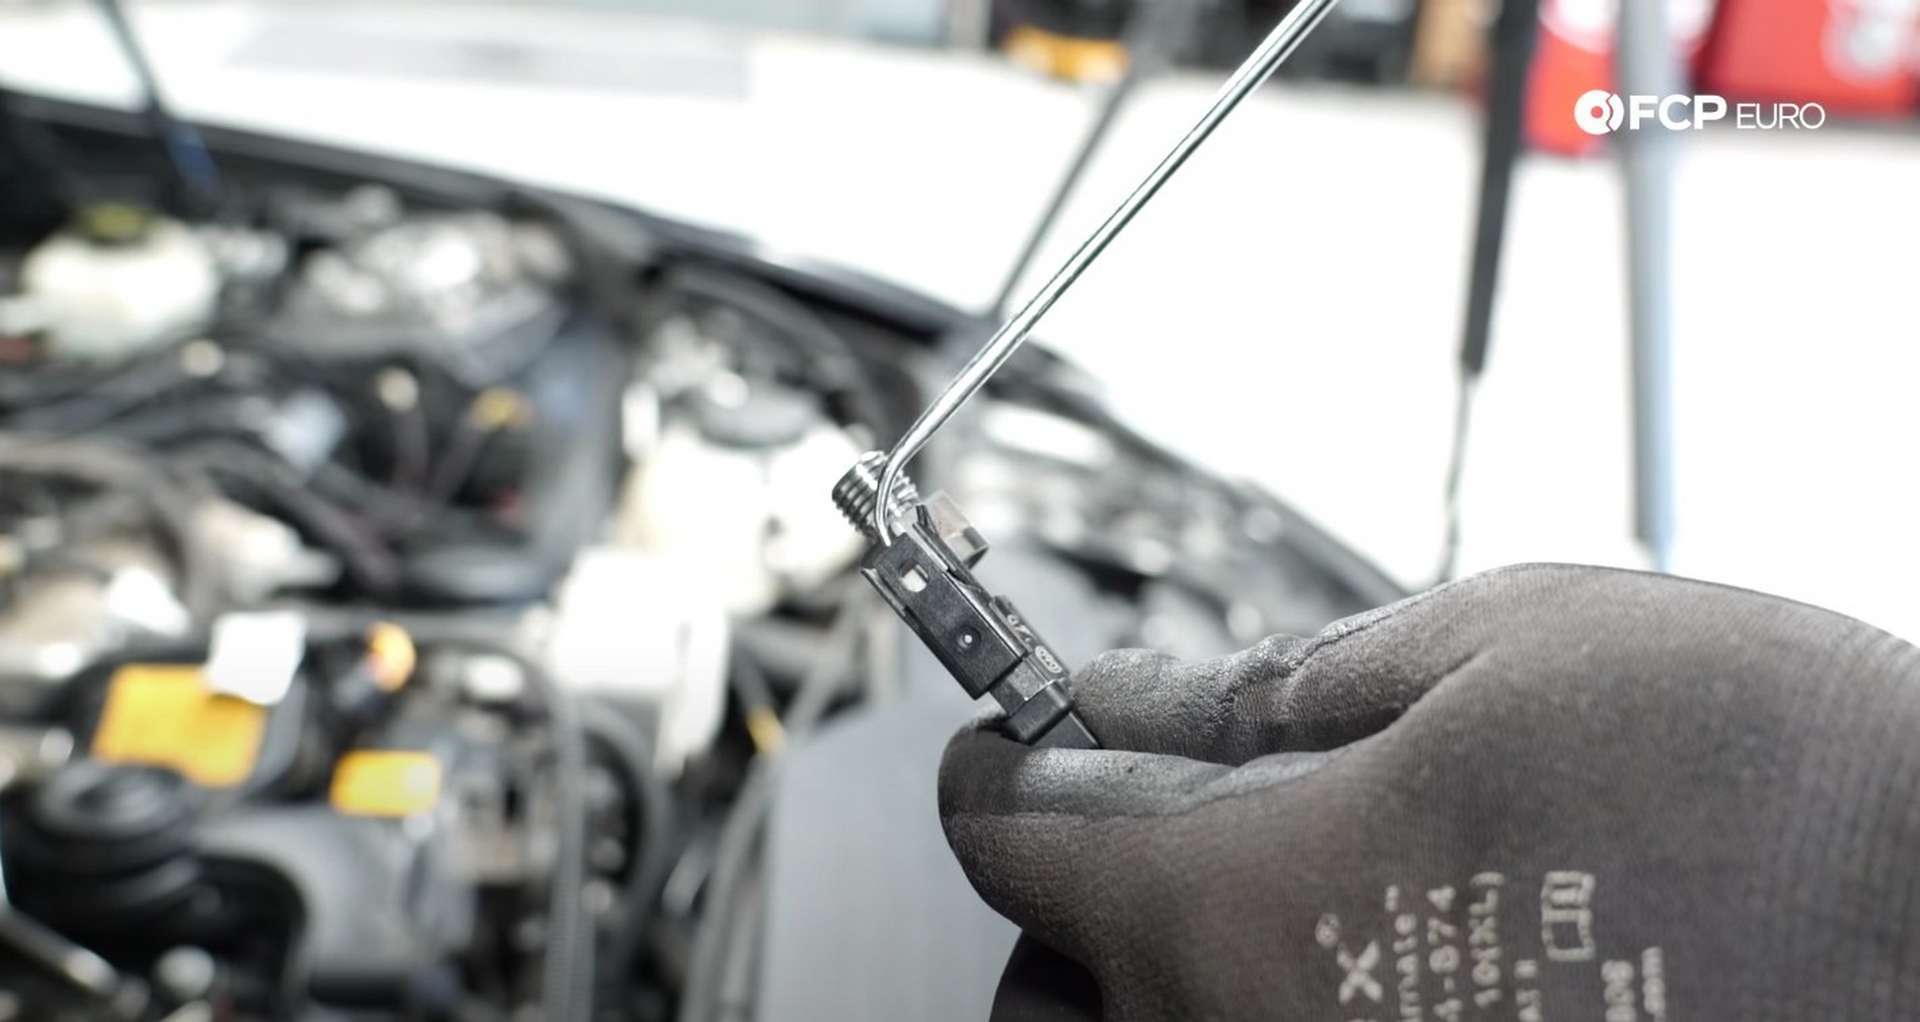
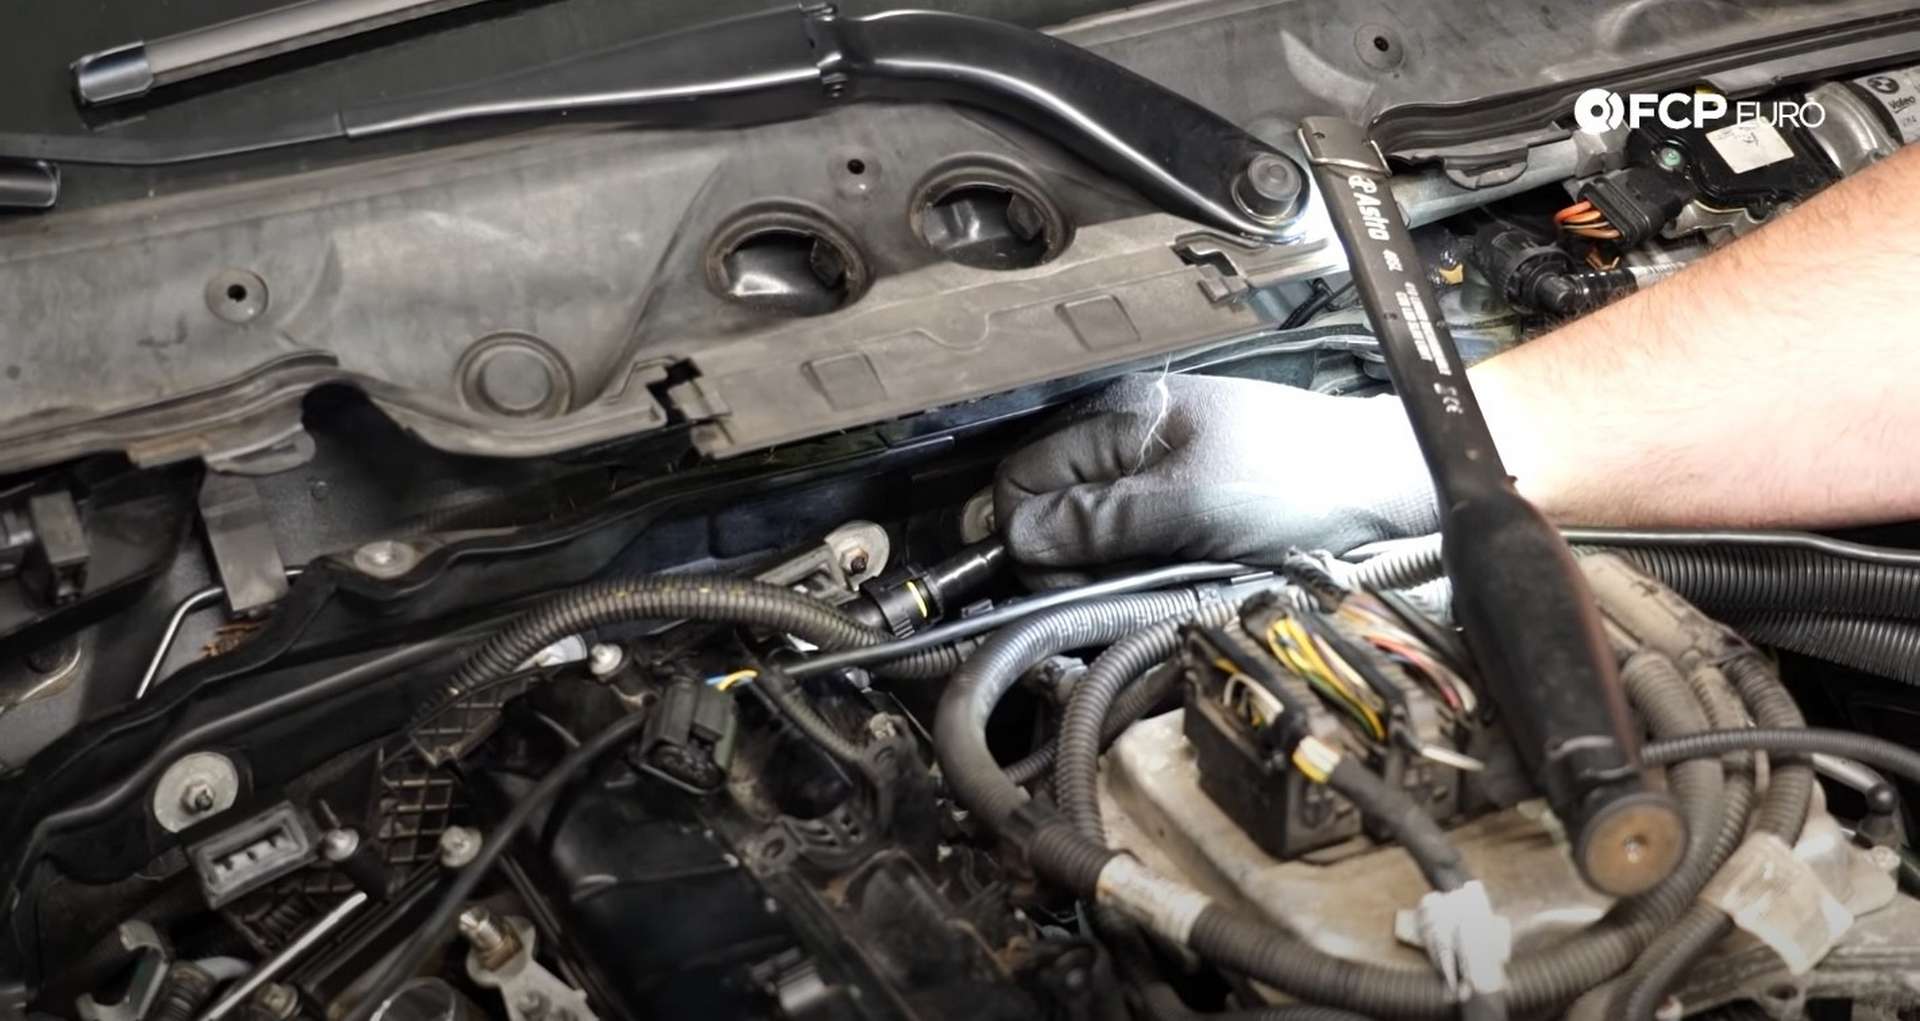
Removing those forward cowl pieces exposes the strut brace. Remove the two plugs from the rear cowl's center to reveal the strut brace's firewall mounting bolts. Then, pull the rubber strut covers off and remove the bolts with an E18 socket and pull the brace out. You need to remove a plastic rivet to remove each strut cover.


After that, remove the cover that sits below the brace. Use a 10mm socket to remove its seven bolts.
Step 2: Disconnect the wiring from the cylinder head
Each cylinder has an ignition coil, a fuel injector, and a ground wire. Lift the locks on the ignition coils and unplug the harness from each of them. Then, pull up on the coils to remove them from the cylinder head.
Use an 8mm socket to remove the nuts that secure the two ground wires to the valve cover.
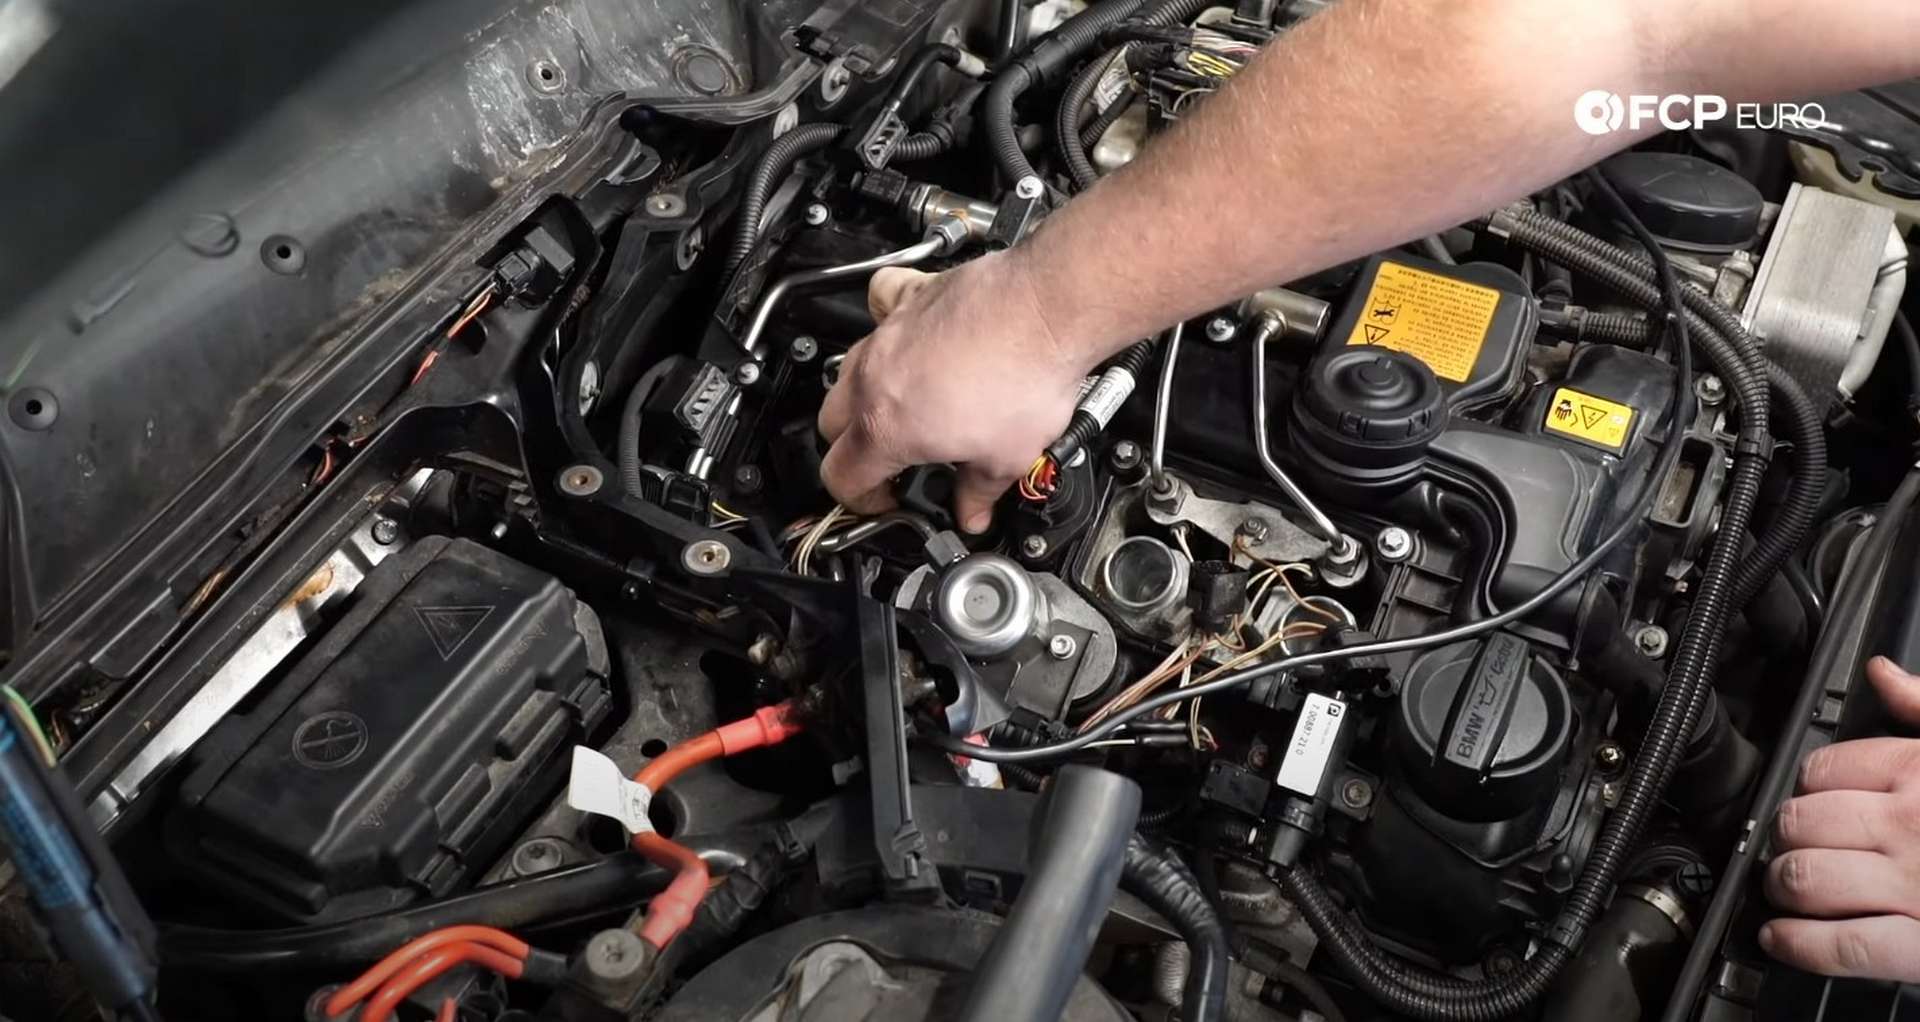
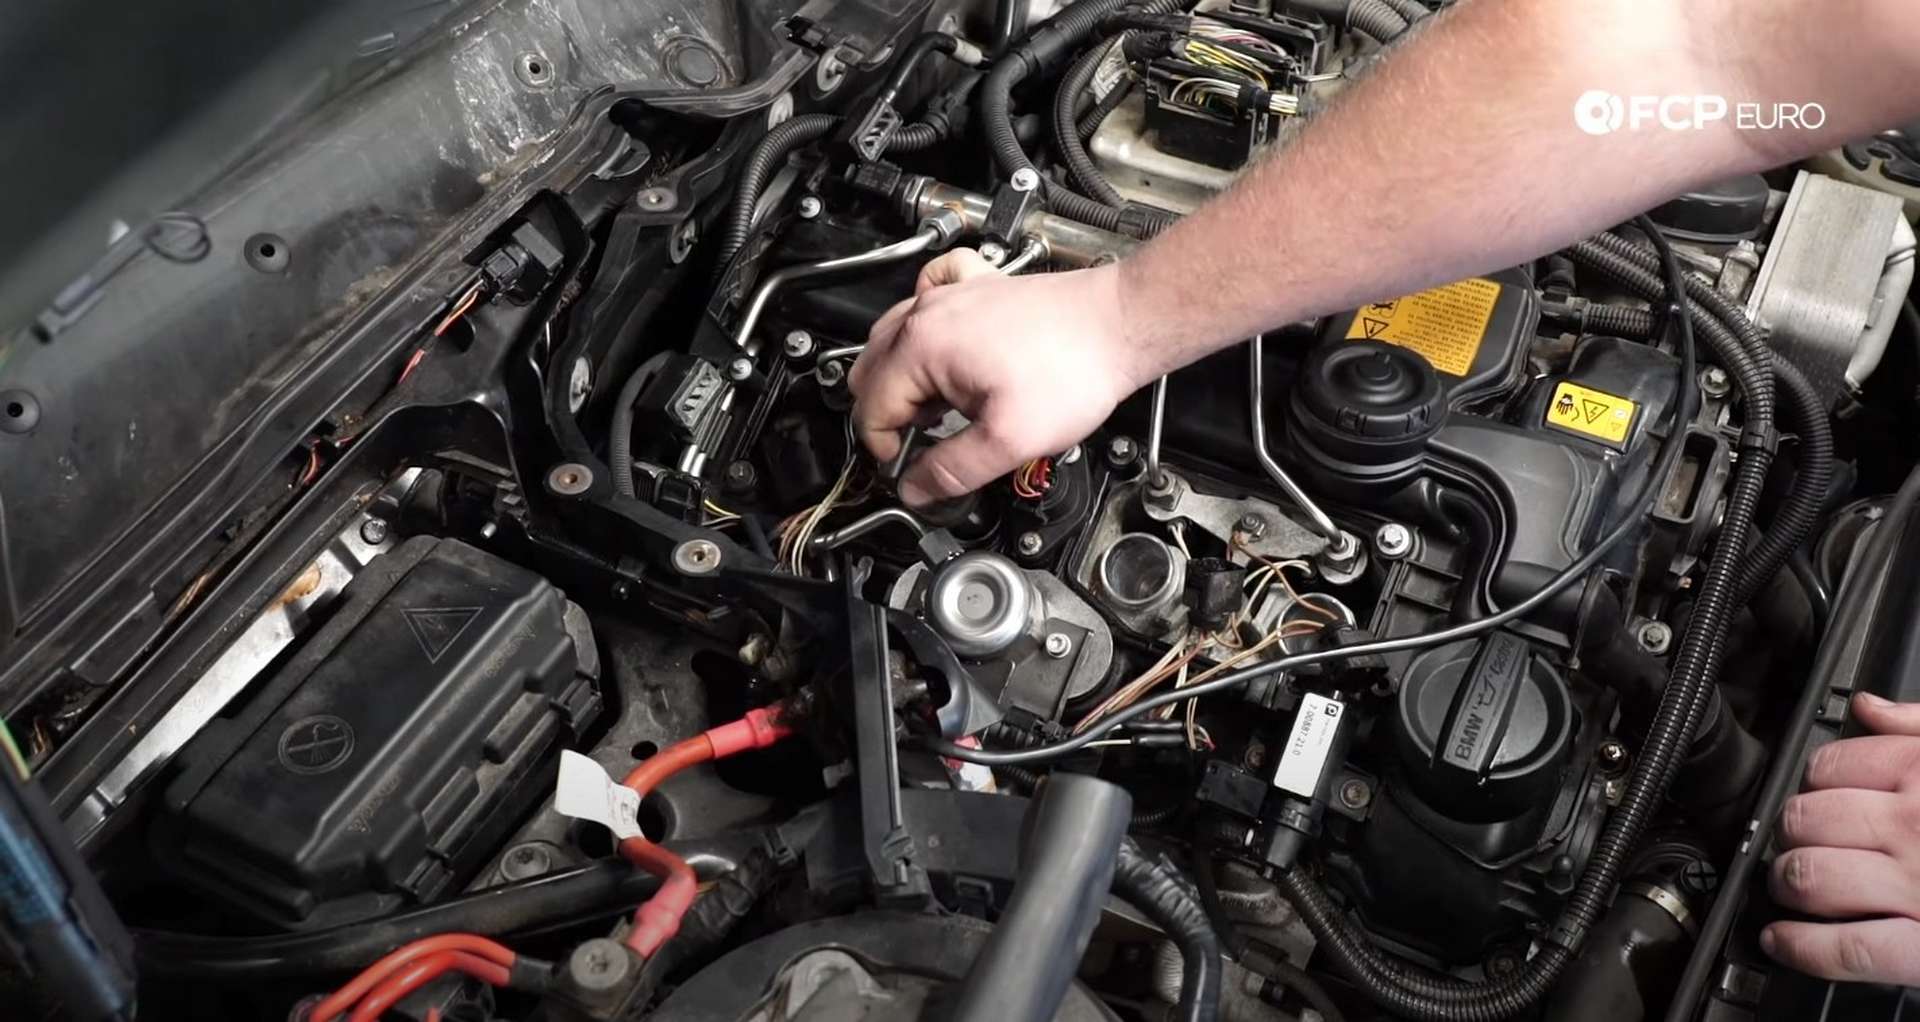
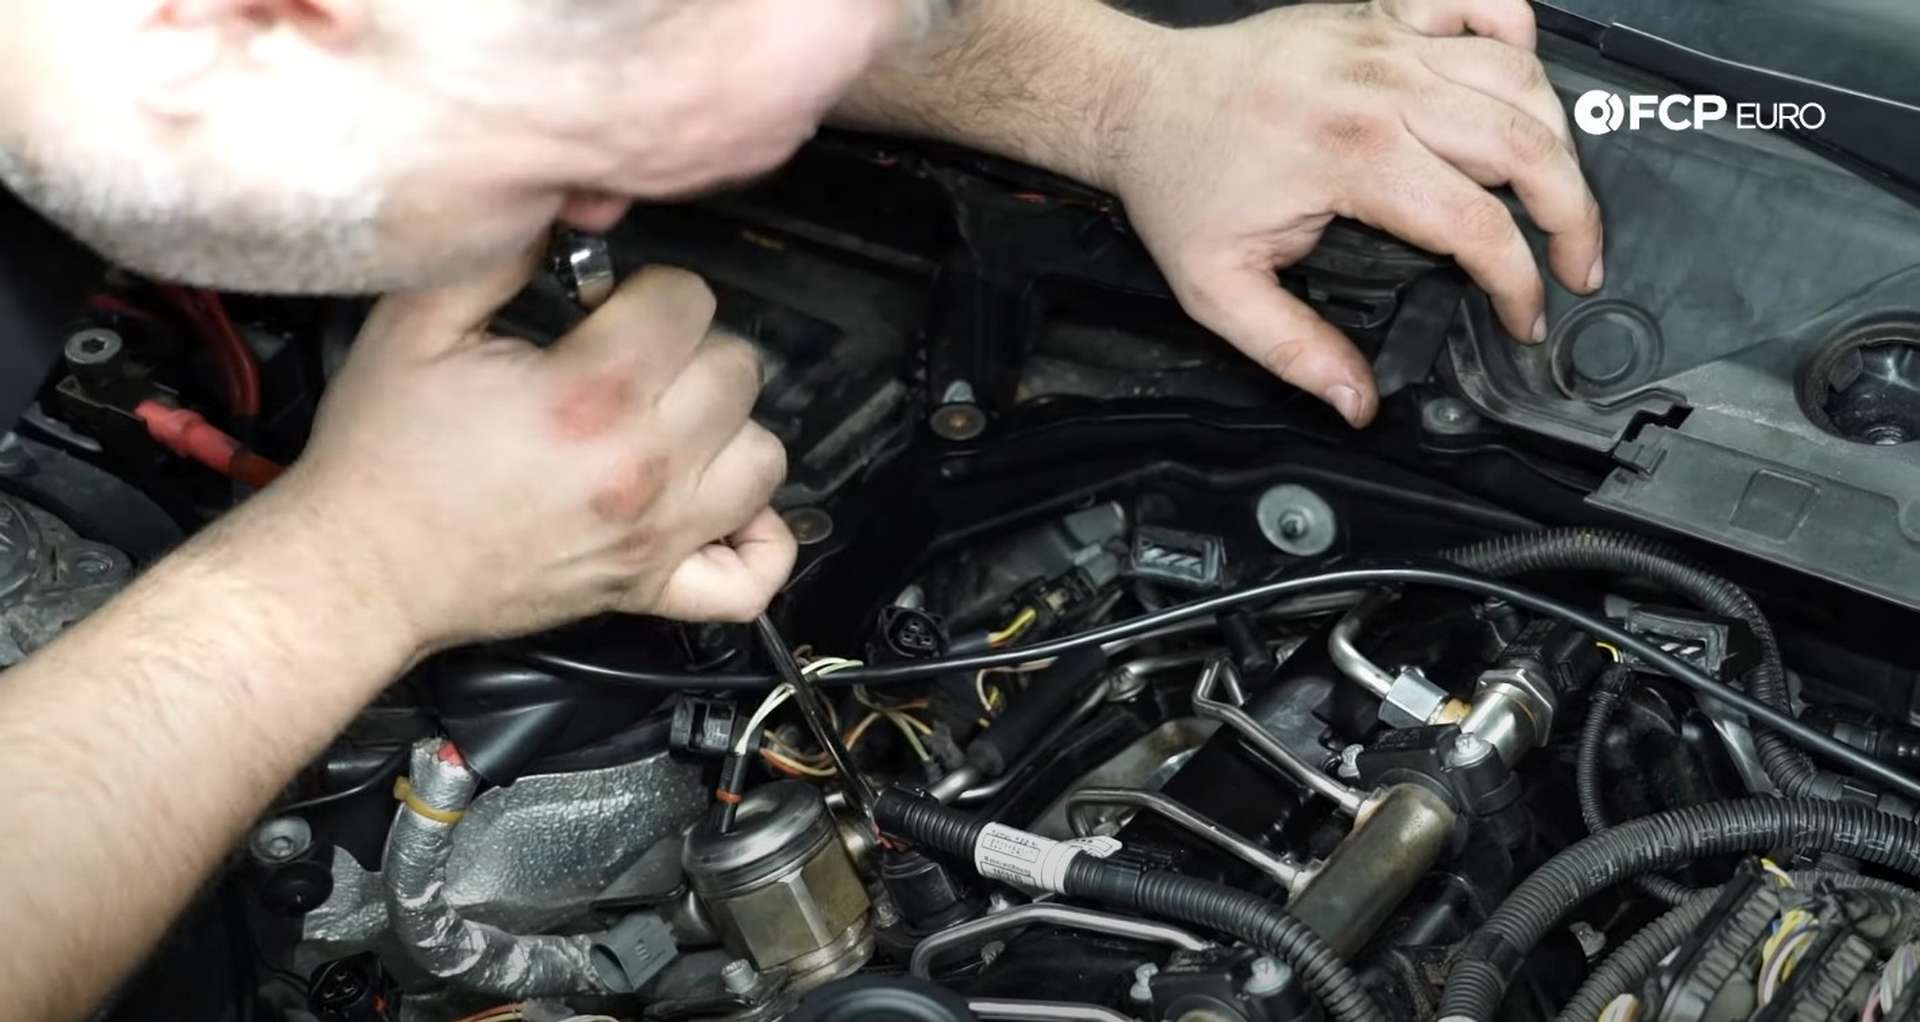
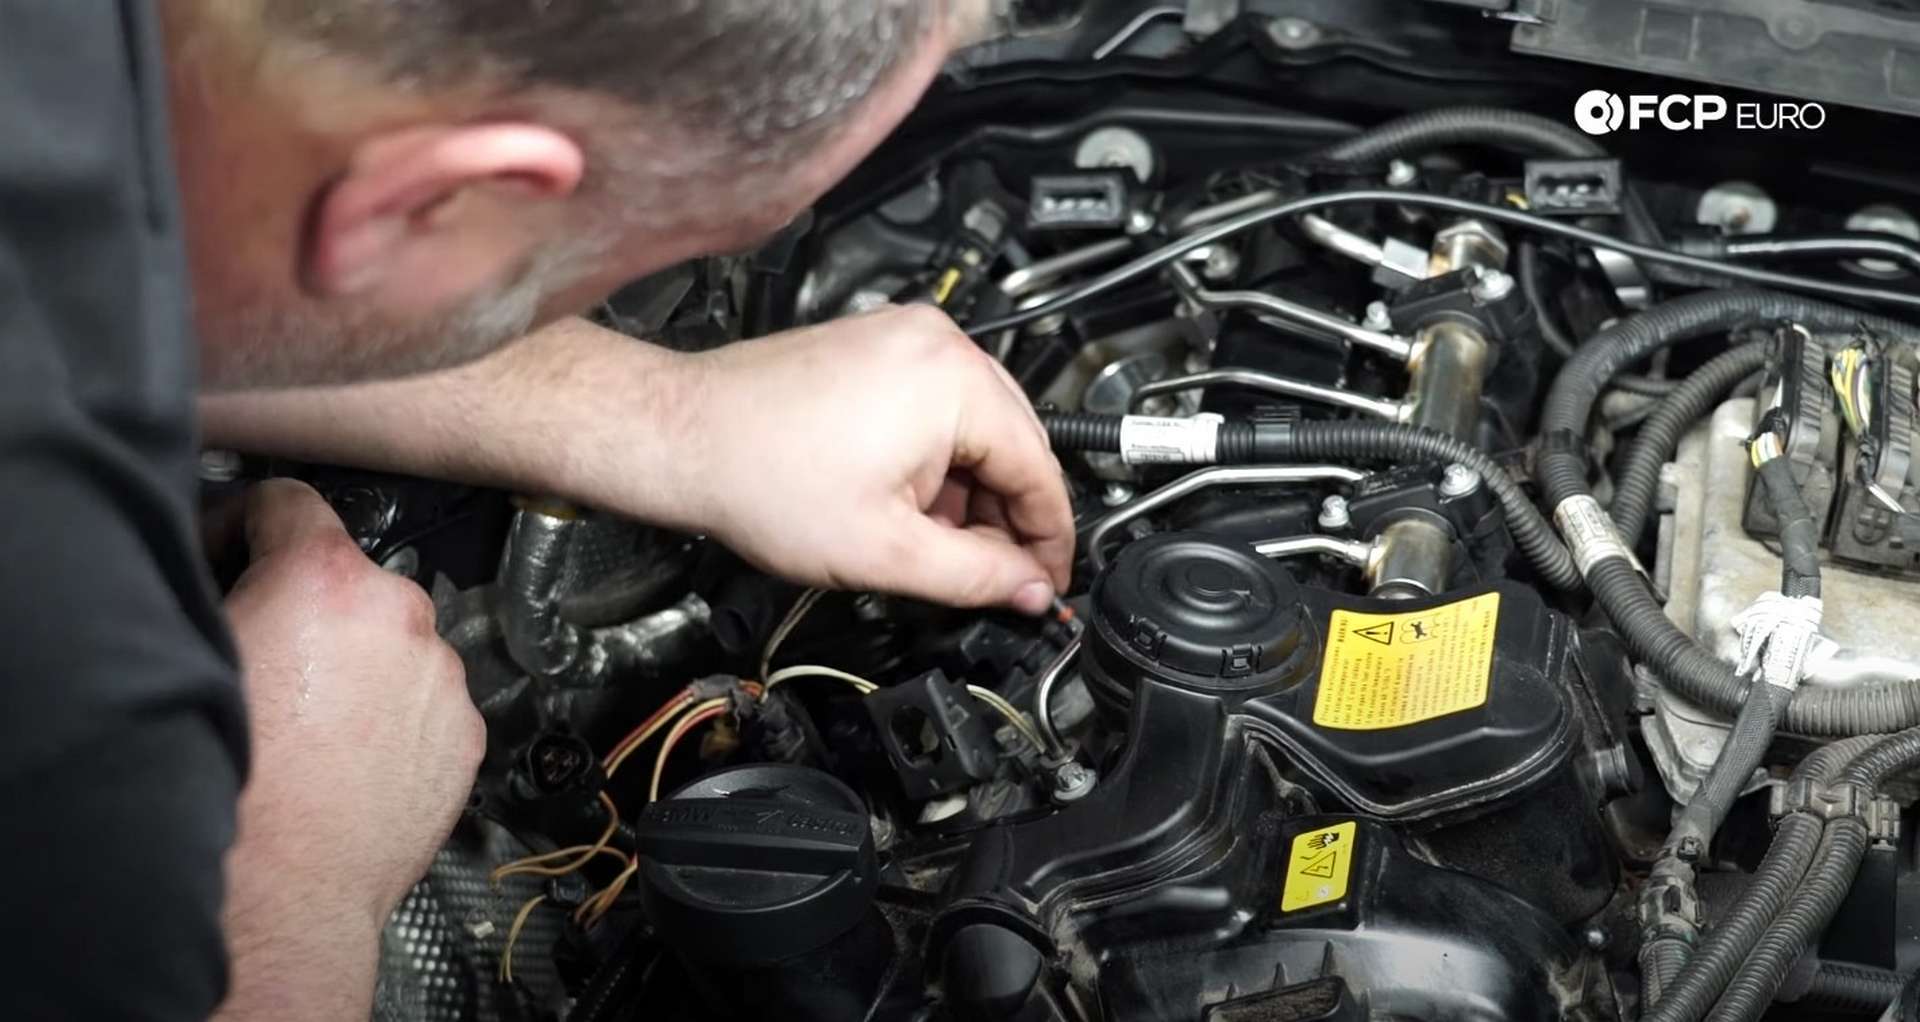
After that, disconnect the Vanos plug, the large round connector in the middle of the valve cover. Push in on its two tabs and pull up. Then, use a flat-blade screwdriver to open the clip securing its wiring to the valve cover, and fold the plug and harness away from the engine.
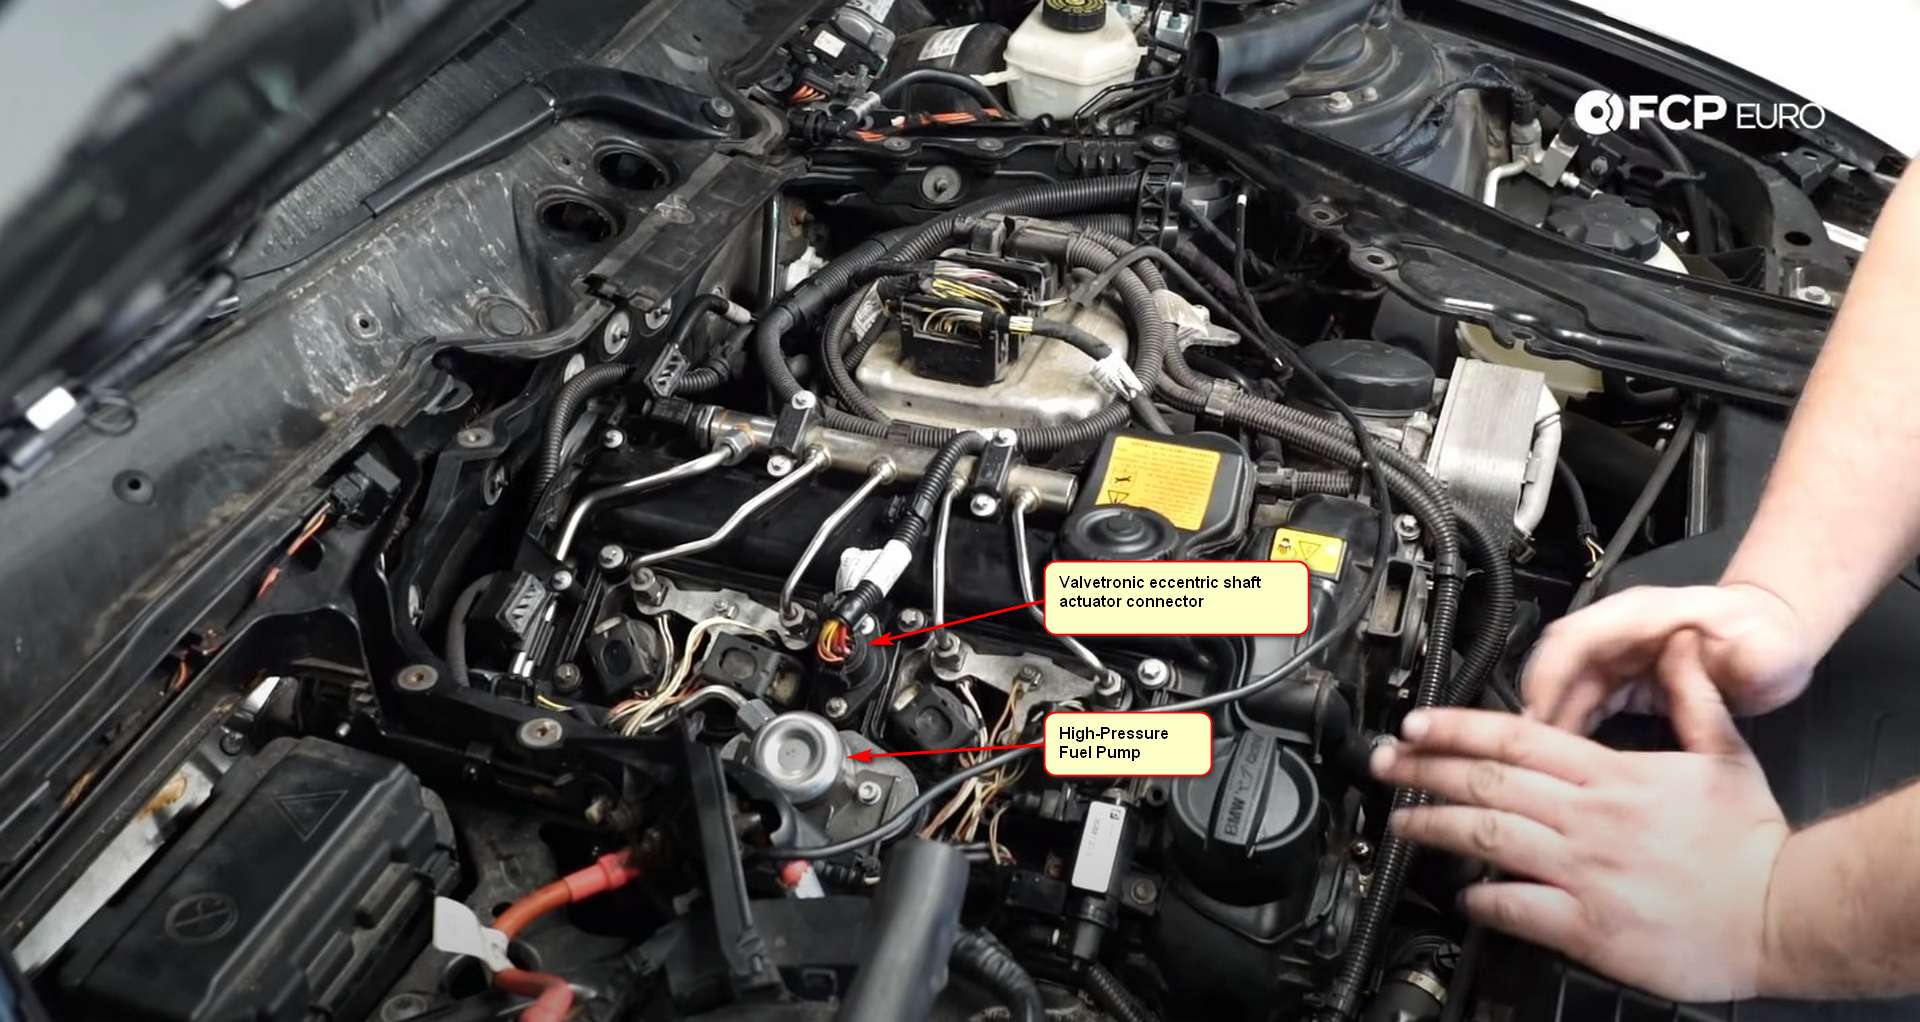
Just beneath the Vanos plug is the high-pressure fuel pump and boost control solenoid. Disconnect the wiring harness from both of them too. Then, use a T30 Torx bit socket to remove the boost control solenoid from the valve cover.
Lastly, disconnect the fuel injectors. Space is tight here, so it's difficult to show exactly how to do it. You need to get a pick or a flathead screwdriver and pry back on the injector where the wiring harness plug connects.
Prying on the injector will release the locking tab on the harness connector and allow you to pull it out.
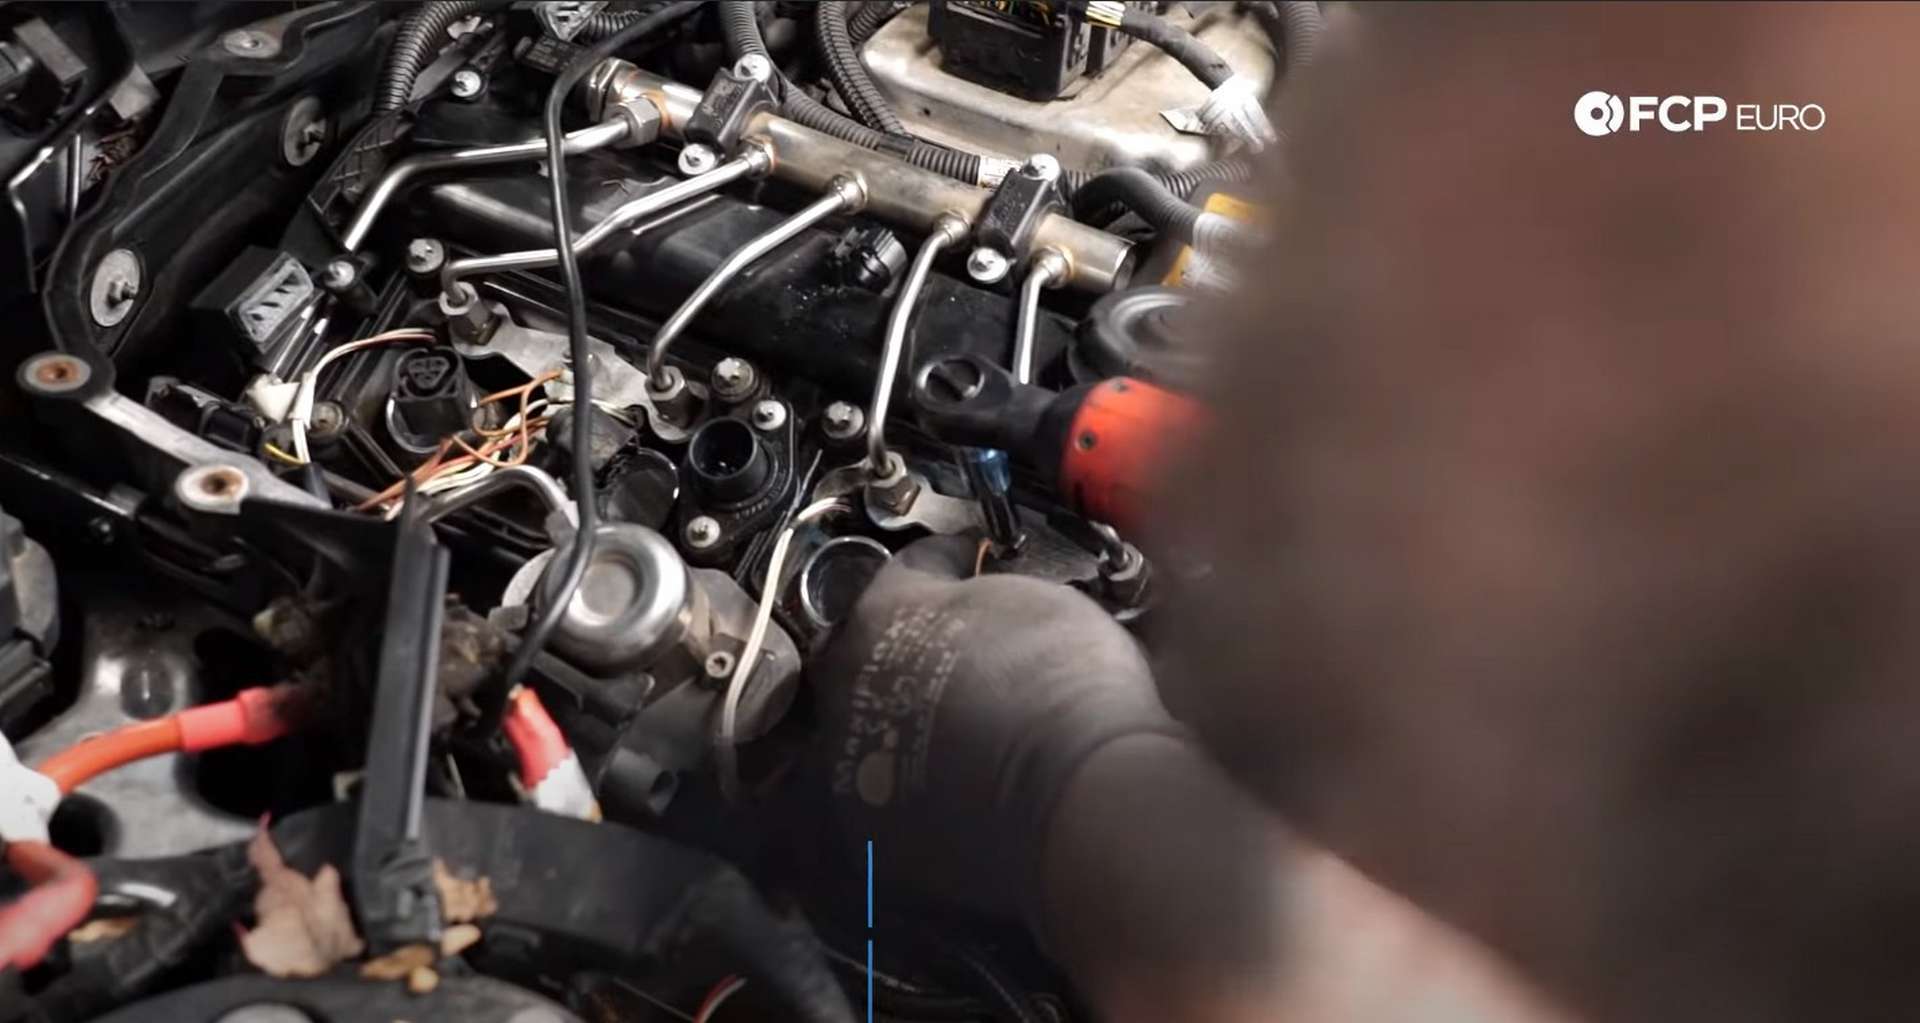
Before disconnecting the fuel lines, you have to move a bracket off the back of the valve cover. Use an E6 socket to remove the bolts before pushing the bracket back and out of the way.
Step 3: Remove the fuel system
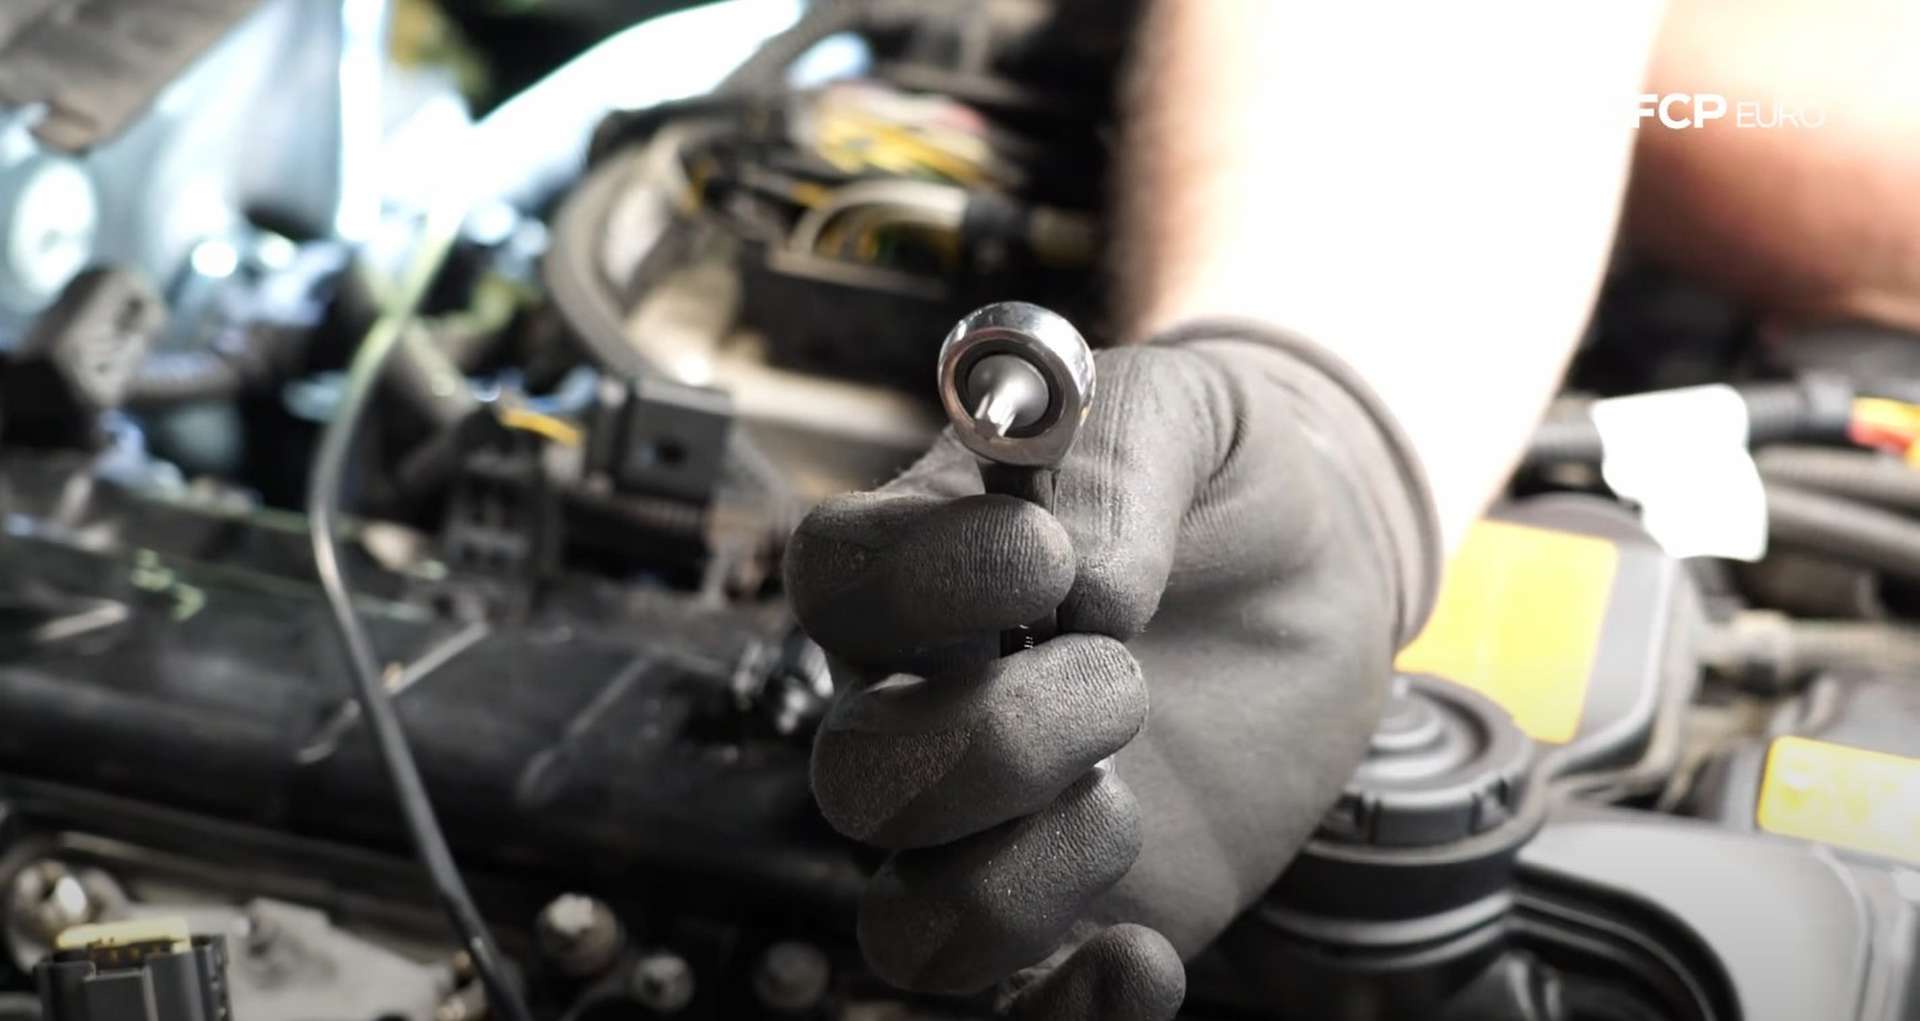
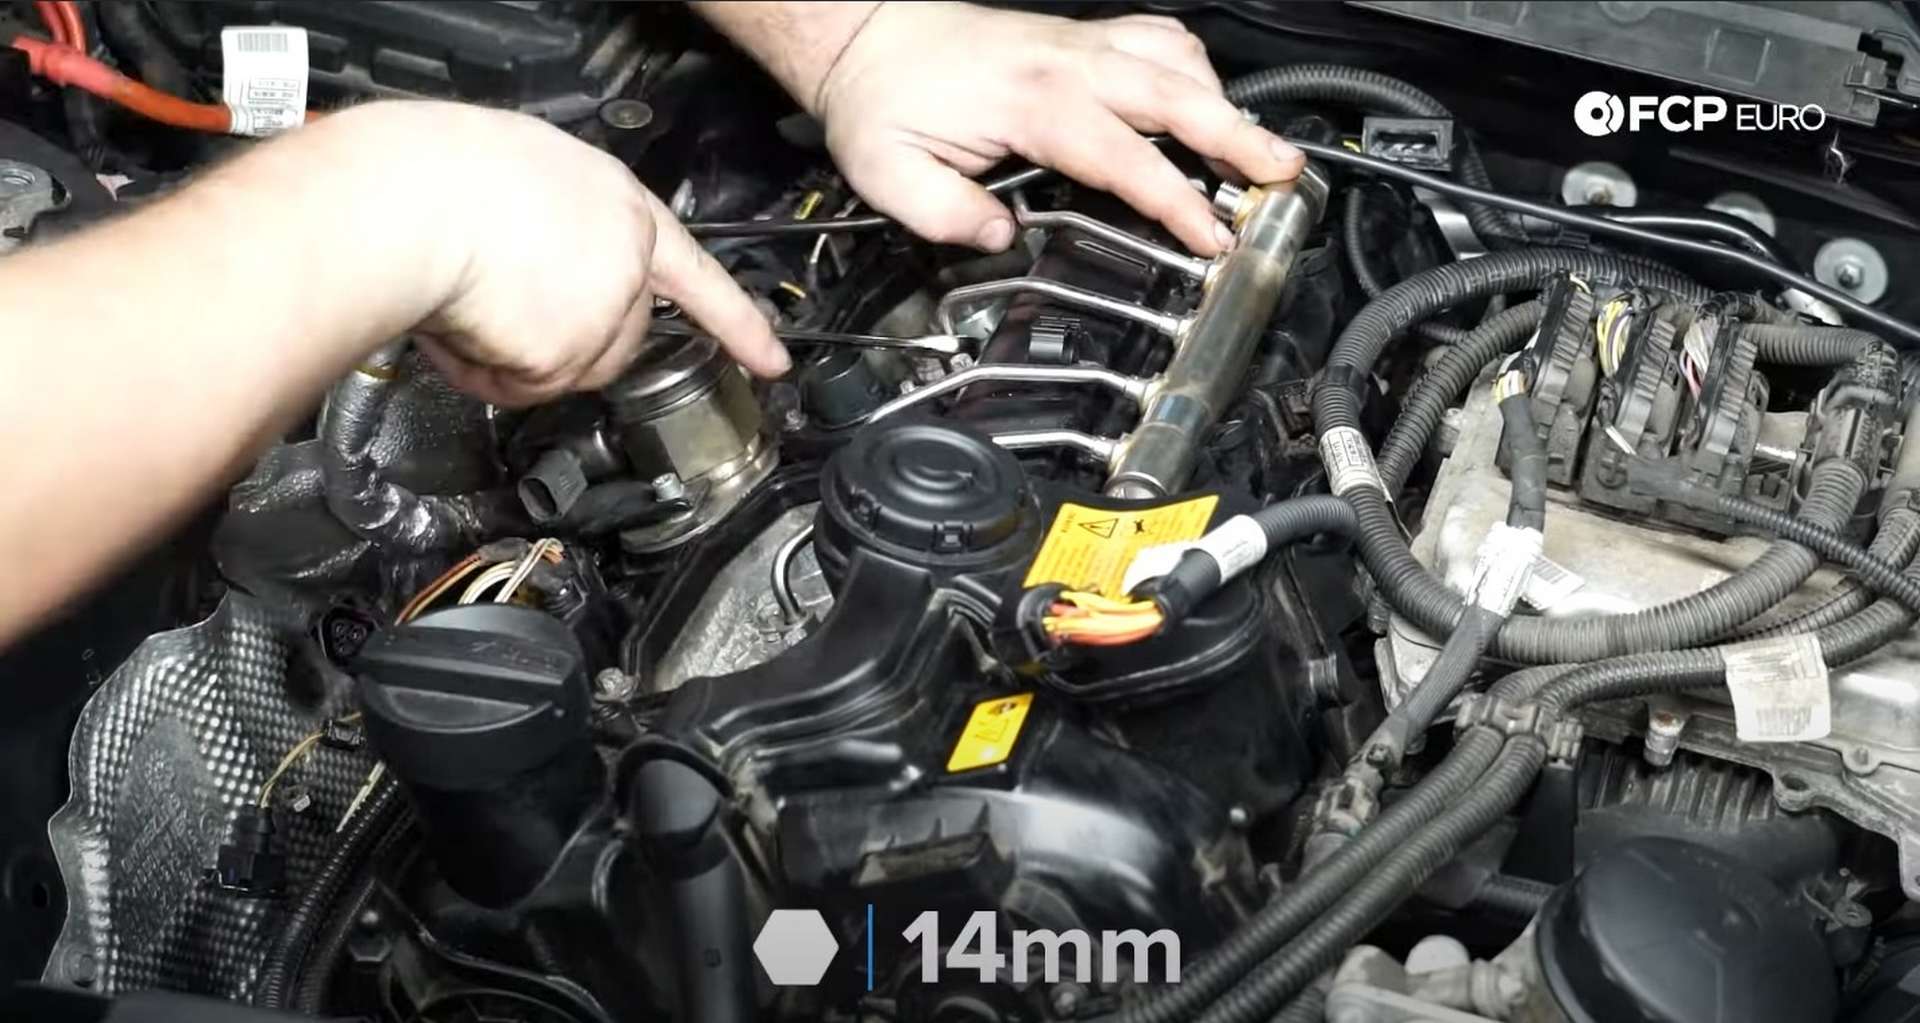
Use a 17mm wrench, disconnect the high-pressure feed line from the pump to the rail. Grab a rag or six as there is fuel in these lines, and it is under pressure. Then follow that line back to the rail and disconnect it there, too, using the same 17mm wrench.
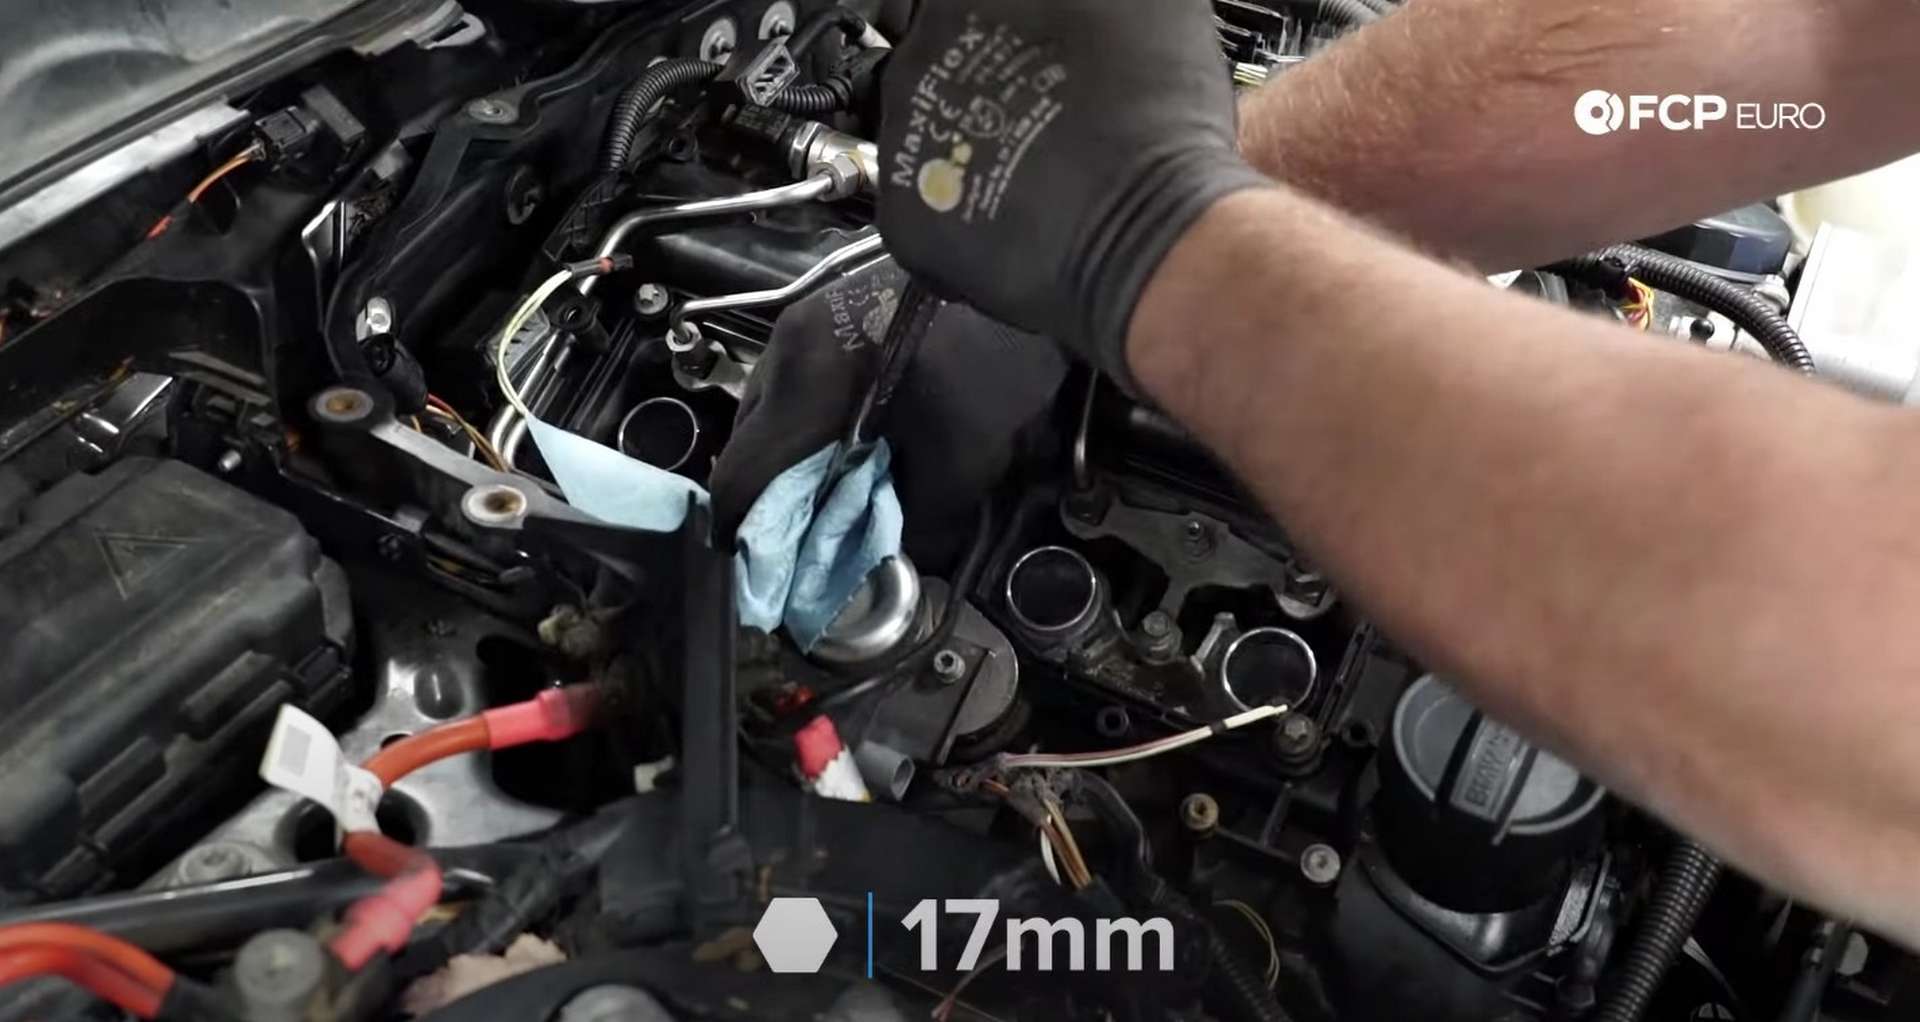
Remove the high-pressure line from the engine. After that, disconnect the low-pressure line that sits below the high-pressure line with a 17mm wrench.
Next, use a T30 socket to remove the fuel pump's mounting bolts. Go back and forth, walking the bolts out slowly so that the pump doesn't get pushed out crooked by the cam follower underneath it.
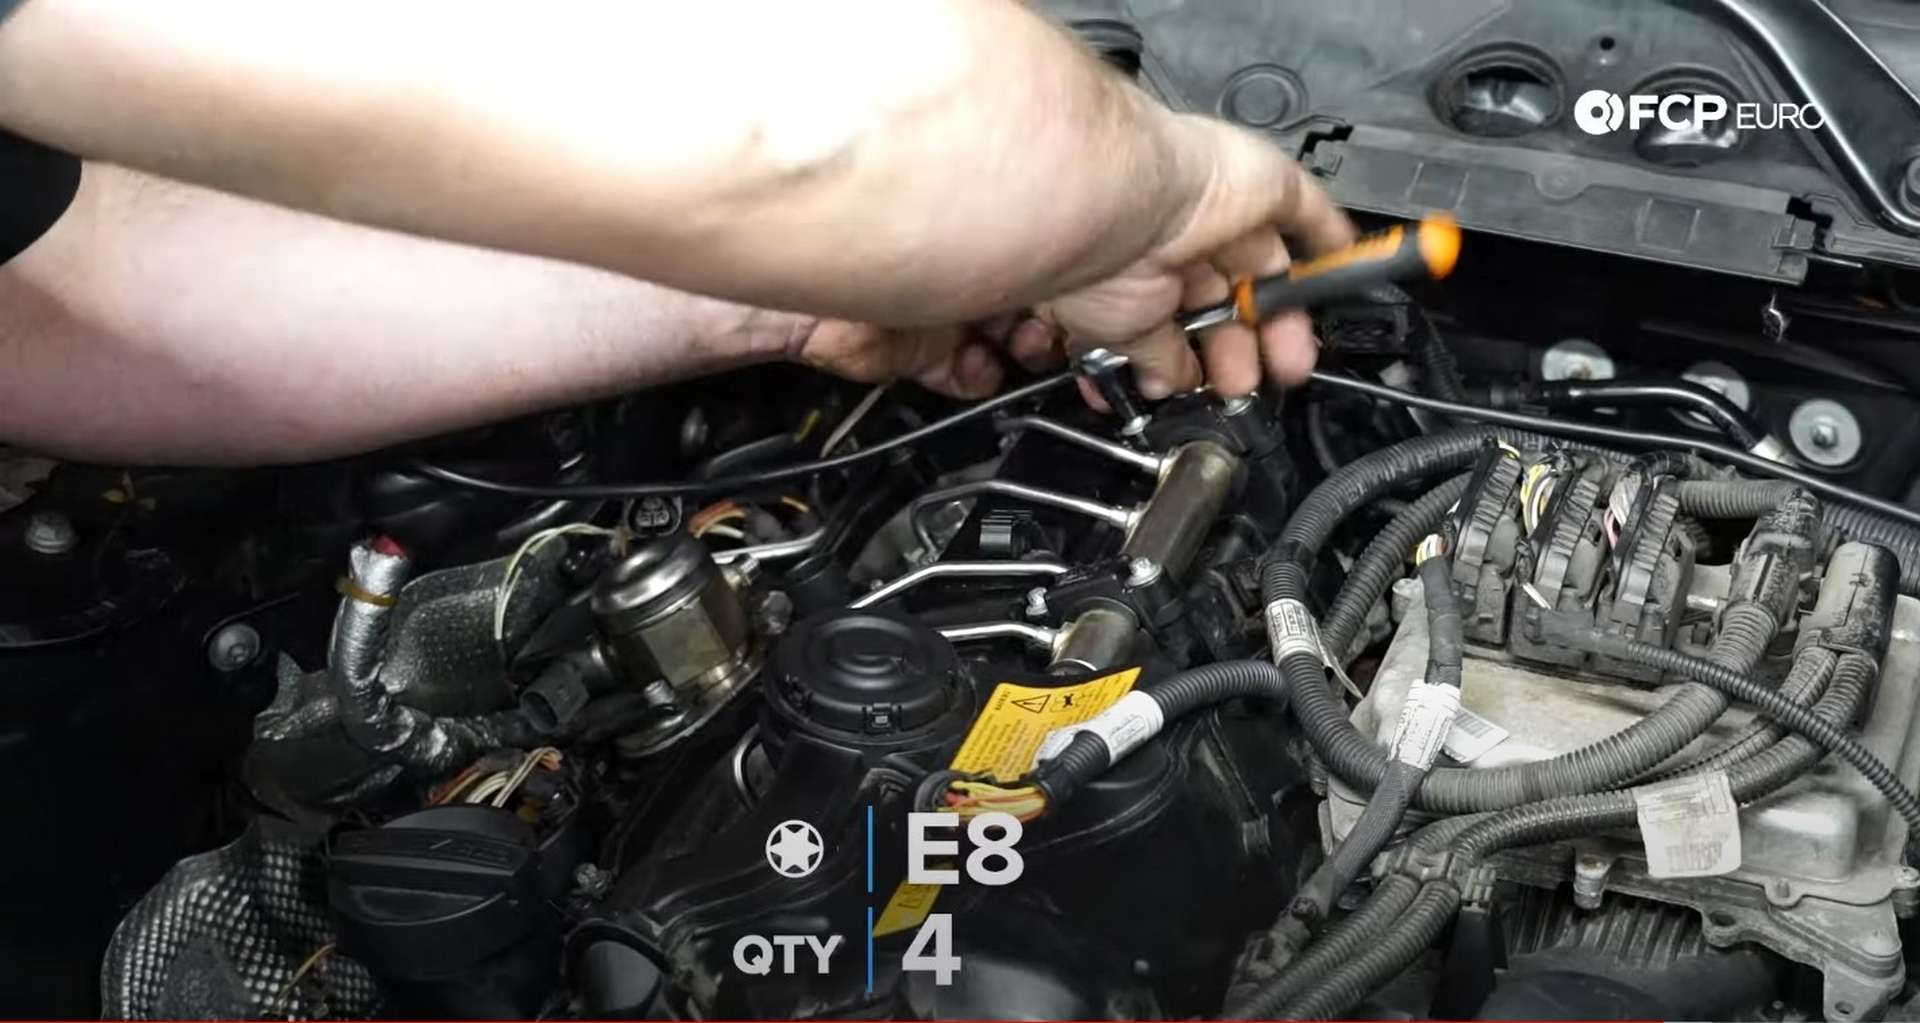
After that, loosen the fuel lines from the injectors with a 14mm wrench. Have even more rags ready for the fuel that will come out of the lines. The fuel rail mounts to the valve cover via four fasteners. Use an E8 socket to remove the four fasteners and then move the rail off the valve cover.
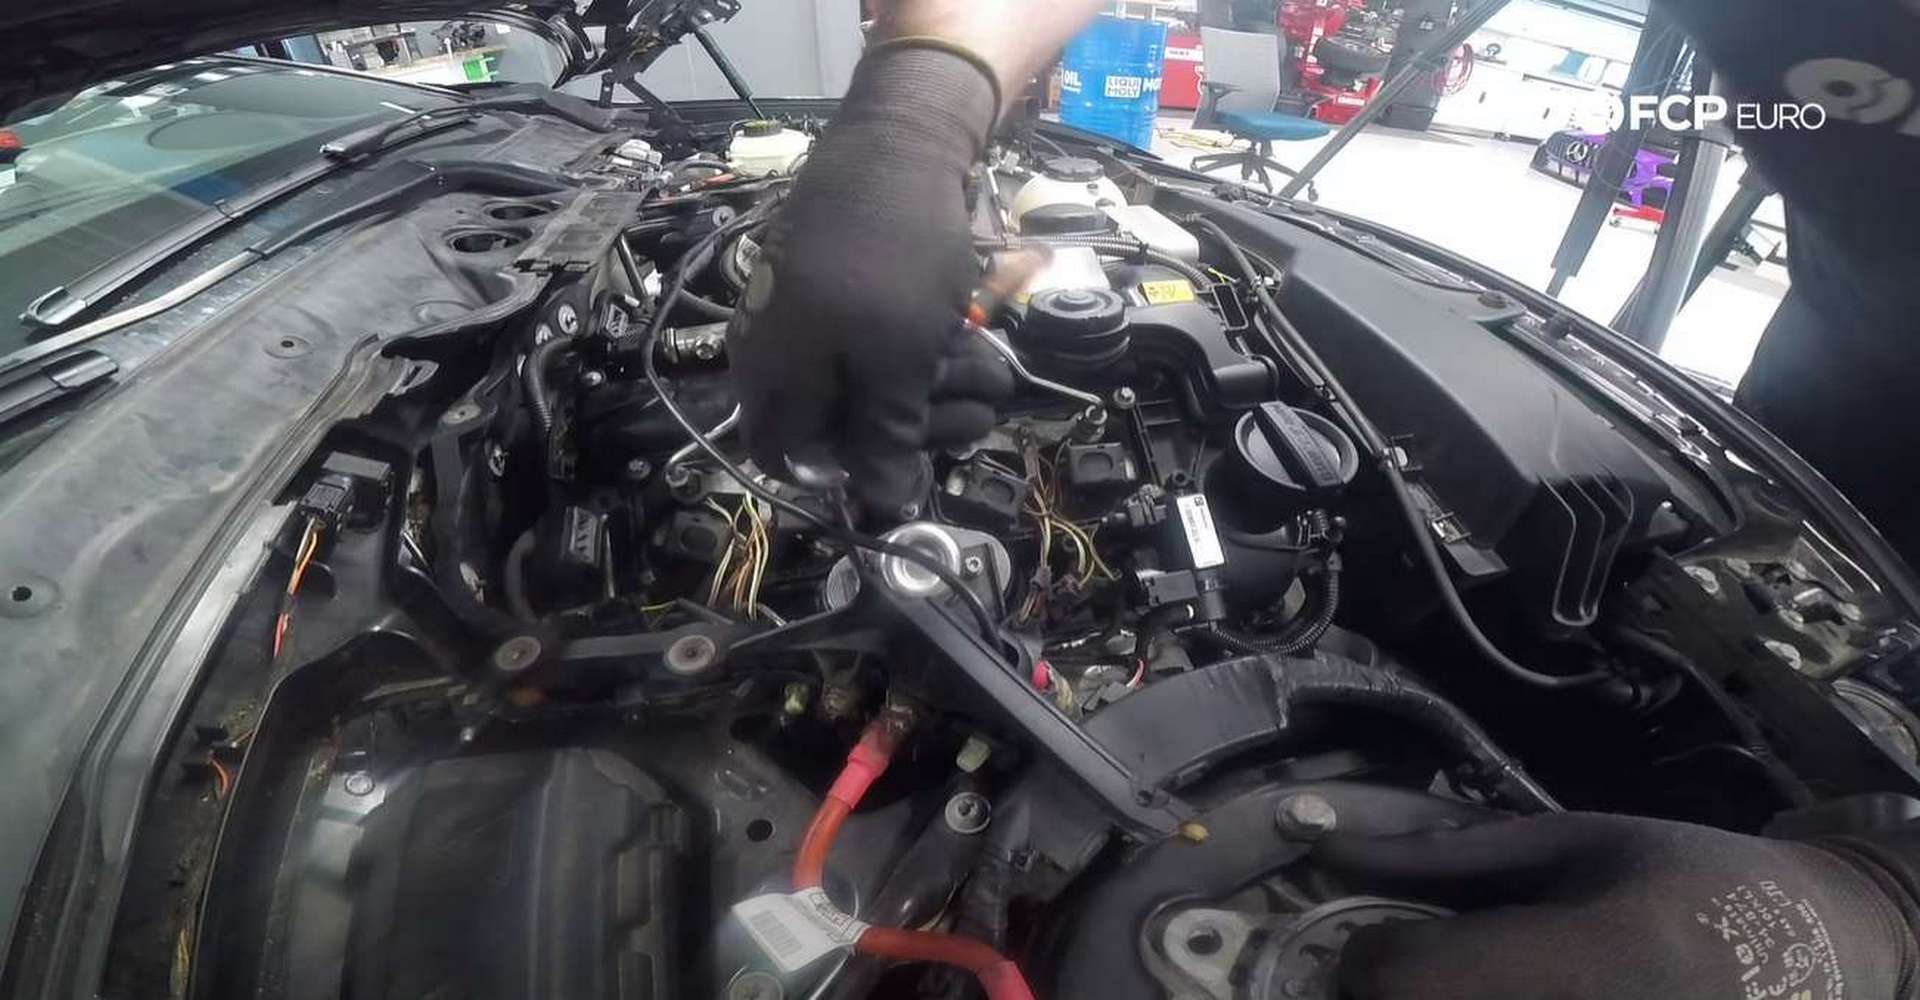
Step 4: Remove the vacuum pump and camshaft timing adjusters
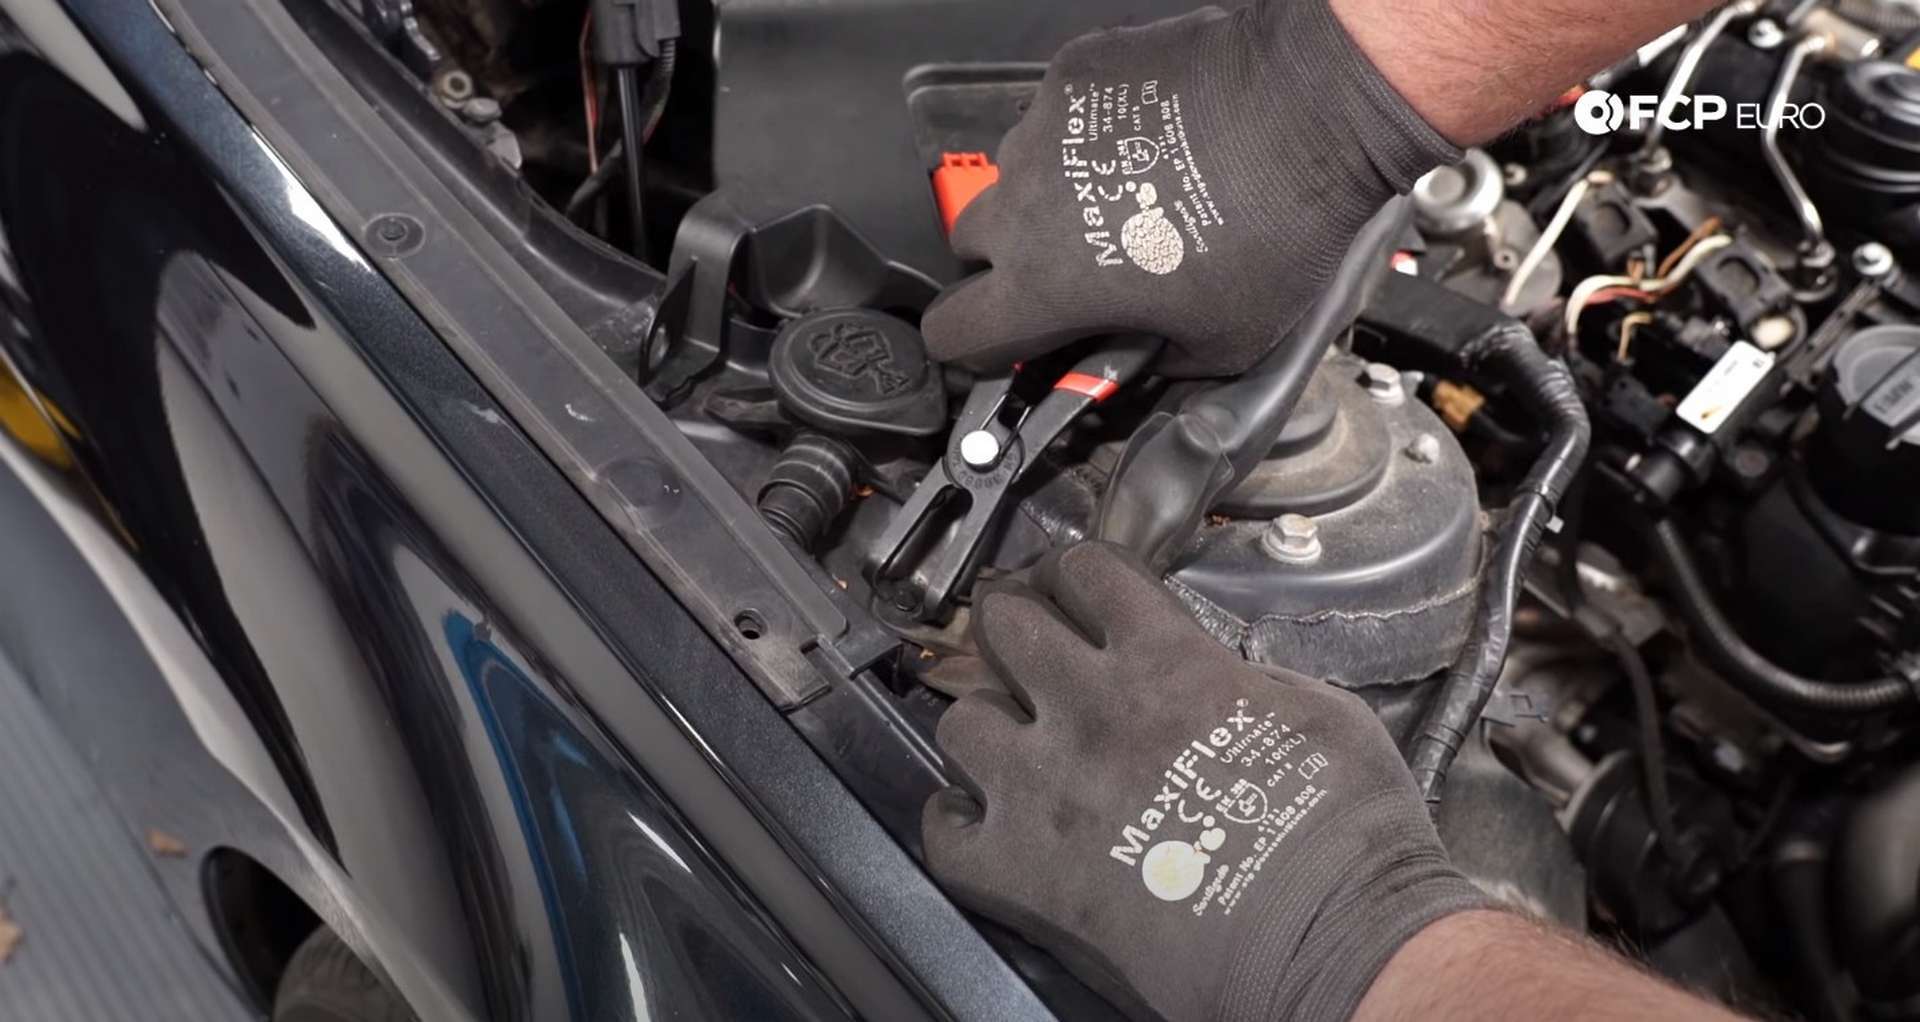
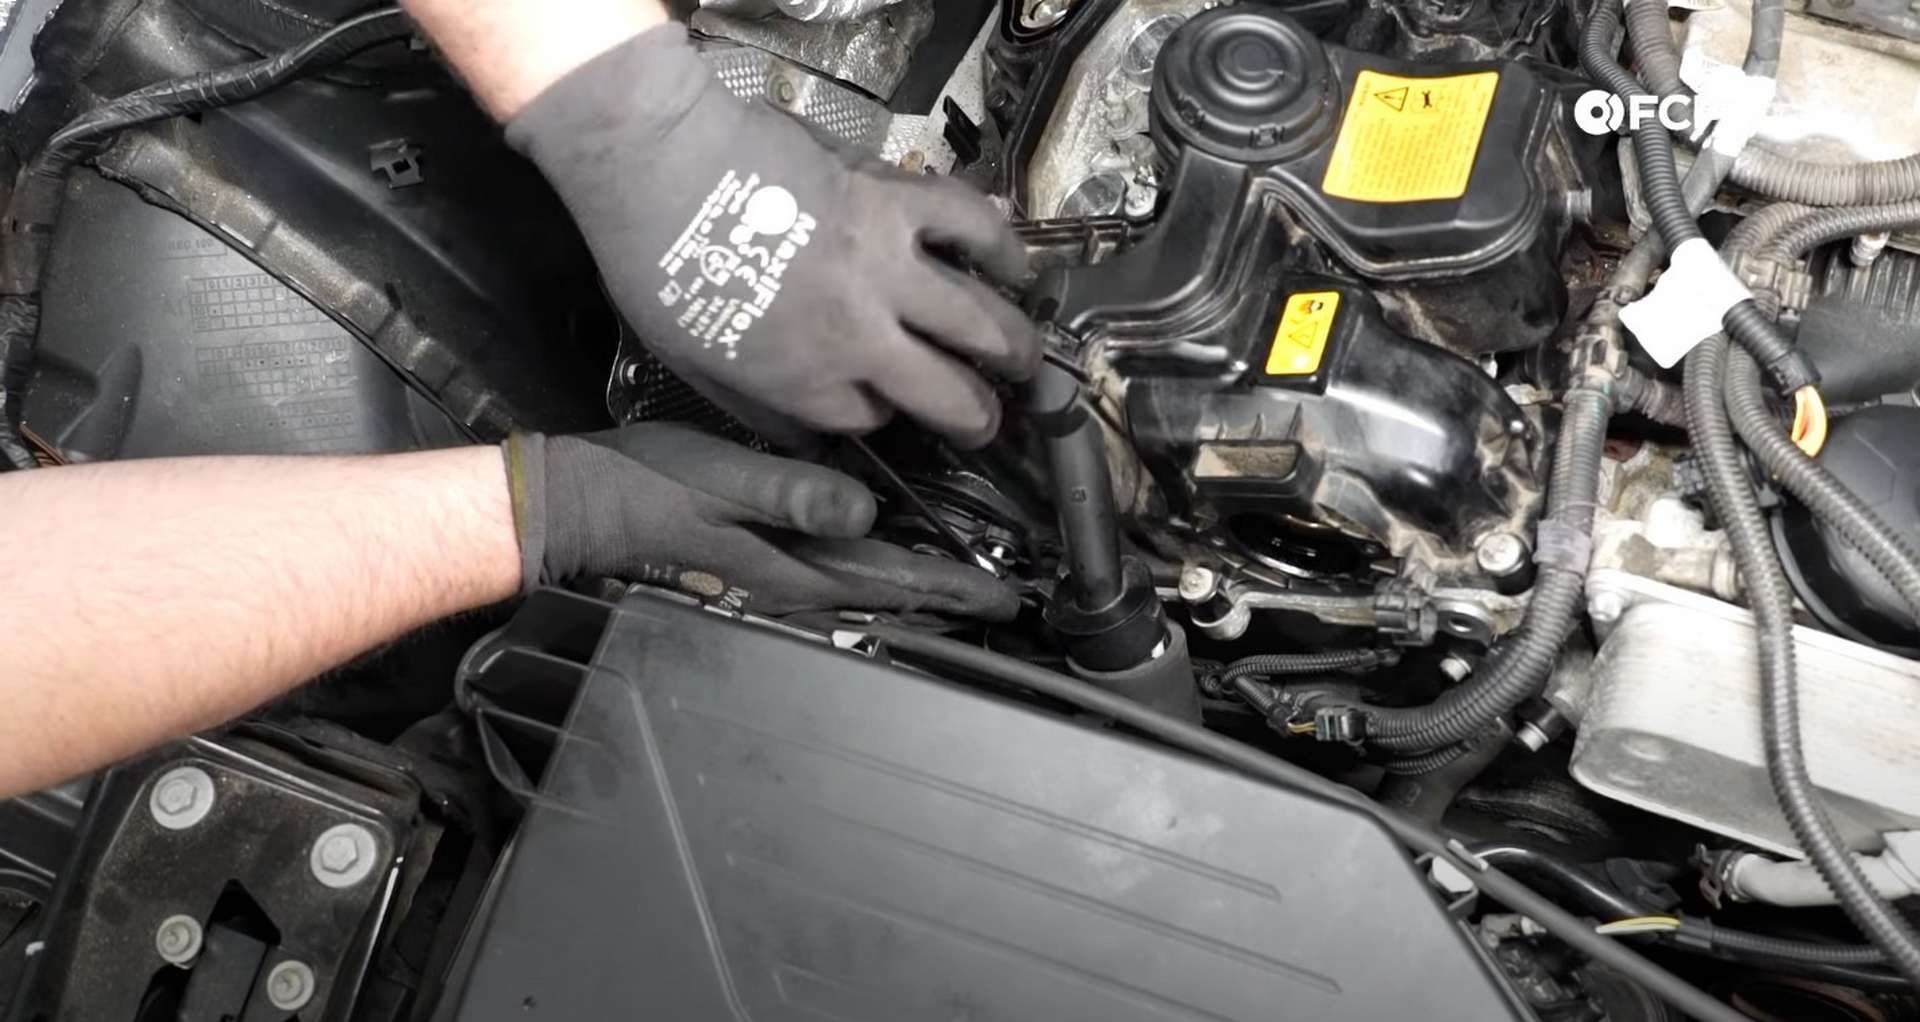
The vacuum pump used to keep a constant vacuum to the brake booster mounts to the back of the cylinder head. First, disconnect the brake hose running to the pump. Press the two tabs on the end of the hose while pulling the hose away from the pump.
After that, remove the vacuum pump from the cylinder head. You need to use the stubby T40 Torx bit from the CTA set to get to the bolts. If you need a better look at how to do this, click here.
Place the stubby T40 bit into a 12mm wrench to get between the back of the cylinder head and the firewall to remove the vacuum pump's three bolts. Pull the vacuum pump off of the cylinder head once the bolts are out.
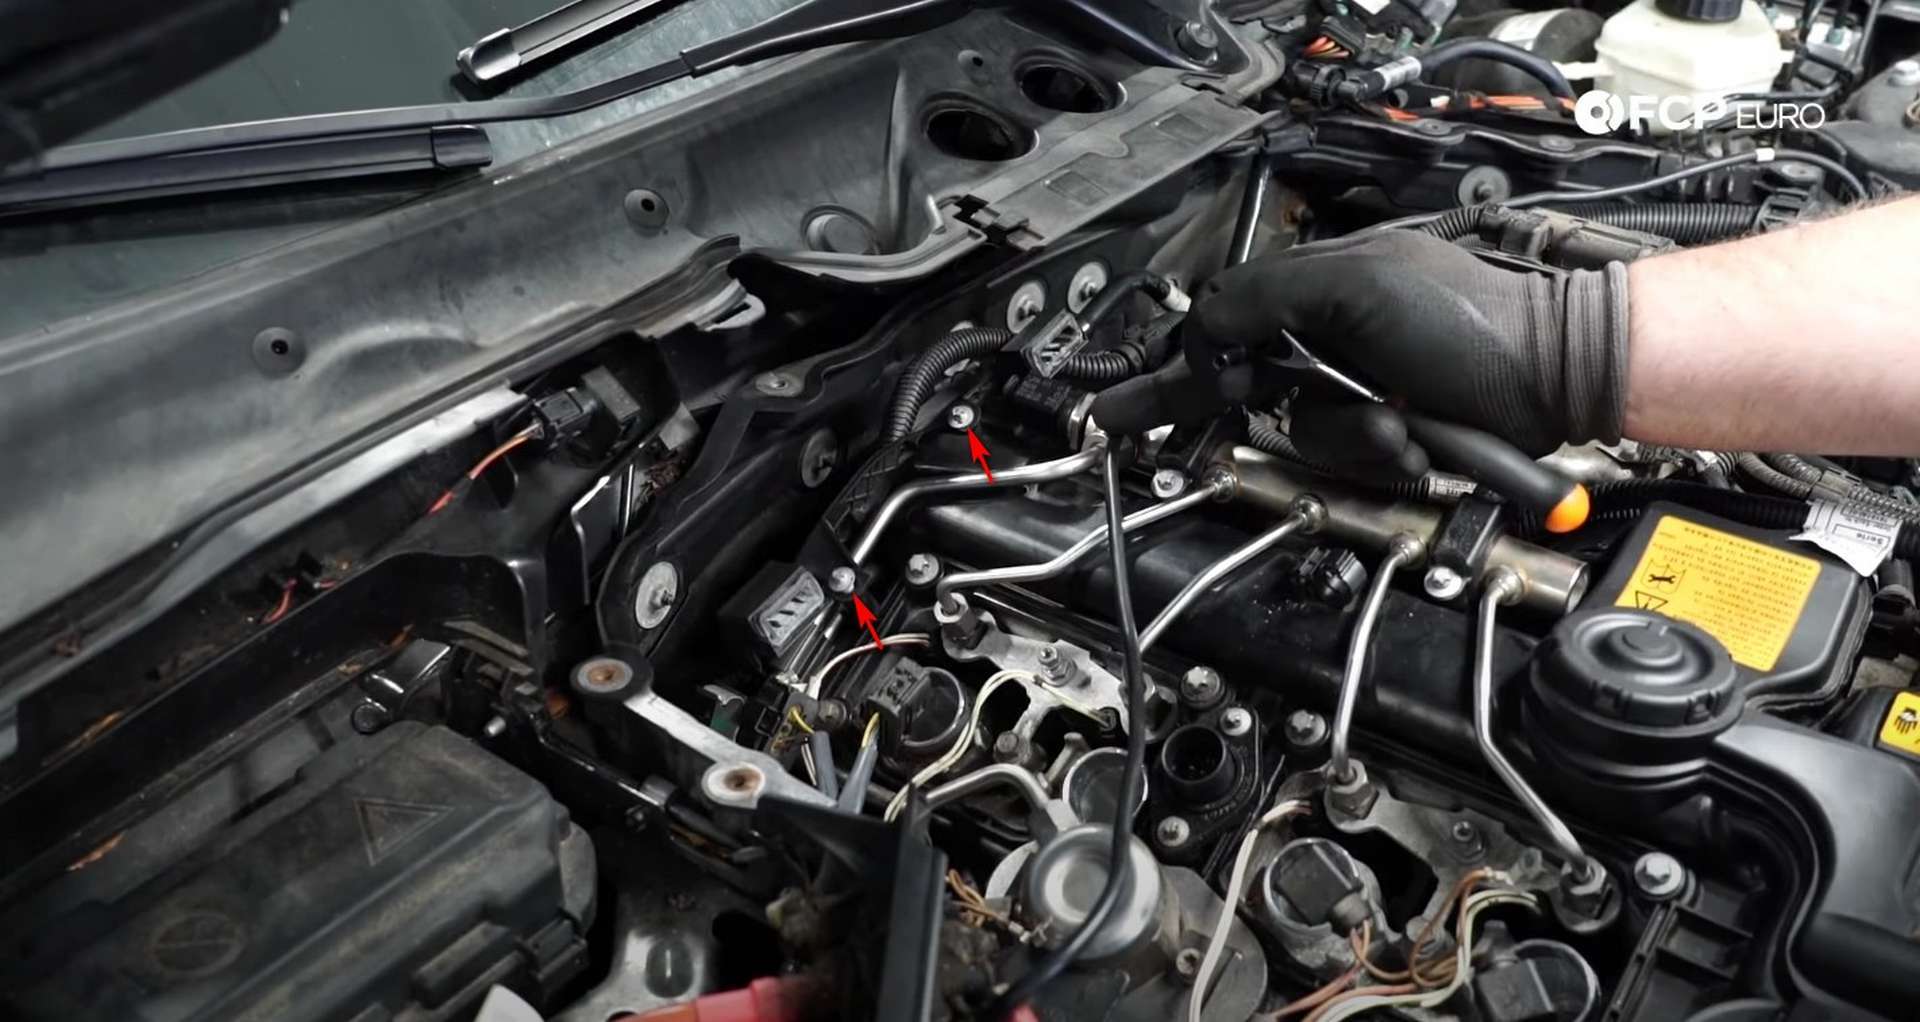
With the pump out of the way, you can access one more bolt you need to remove. Use an E6 socket to remove it. That'll allow you to remove a bracket and wiring harness from the back of the valve cover.
Next, use an E6 socket to remove the fasteners from the cam adjusters on the front of the valve cover. There are two of them, one for each camshaft. Disconnect the wiring harness from them and then pop them off of the valve cover.
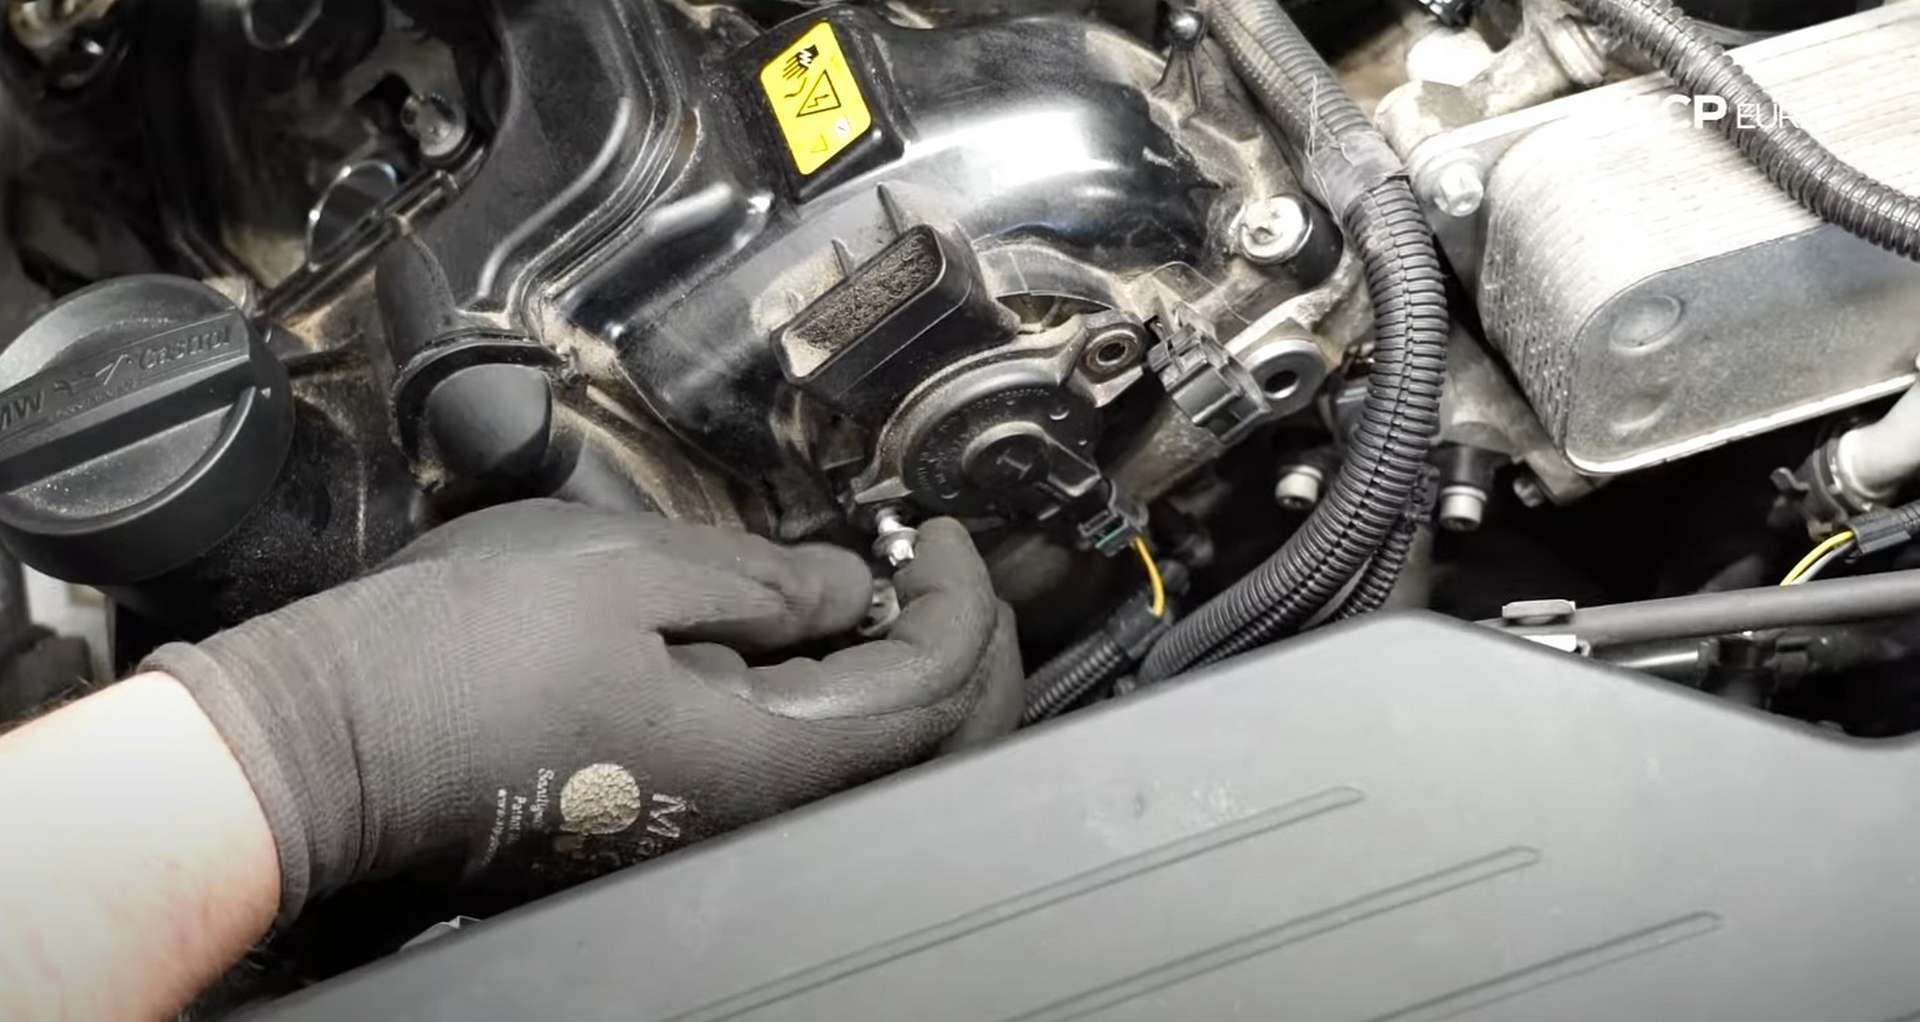
Lastly, disconnect the vacuum hose between the cam actuators. Press on the two tabs and wiggle the hose off the valve cover.
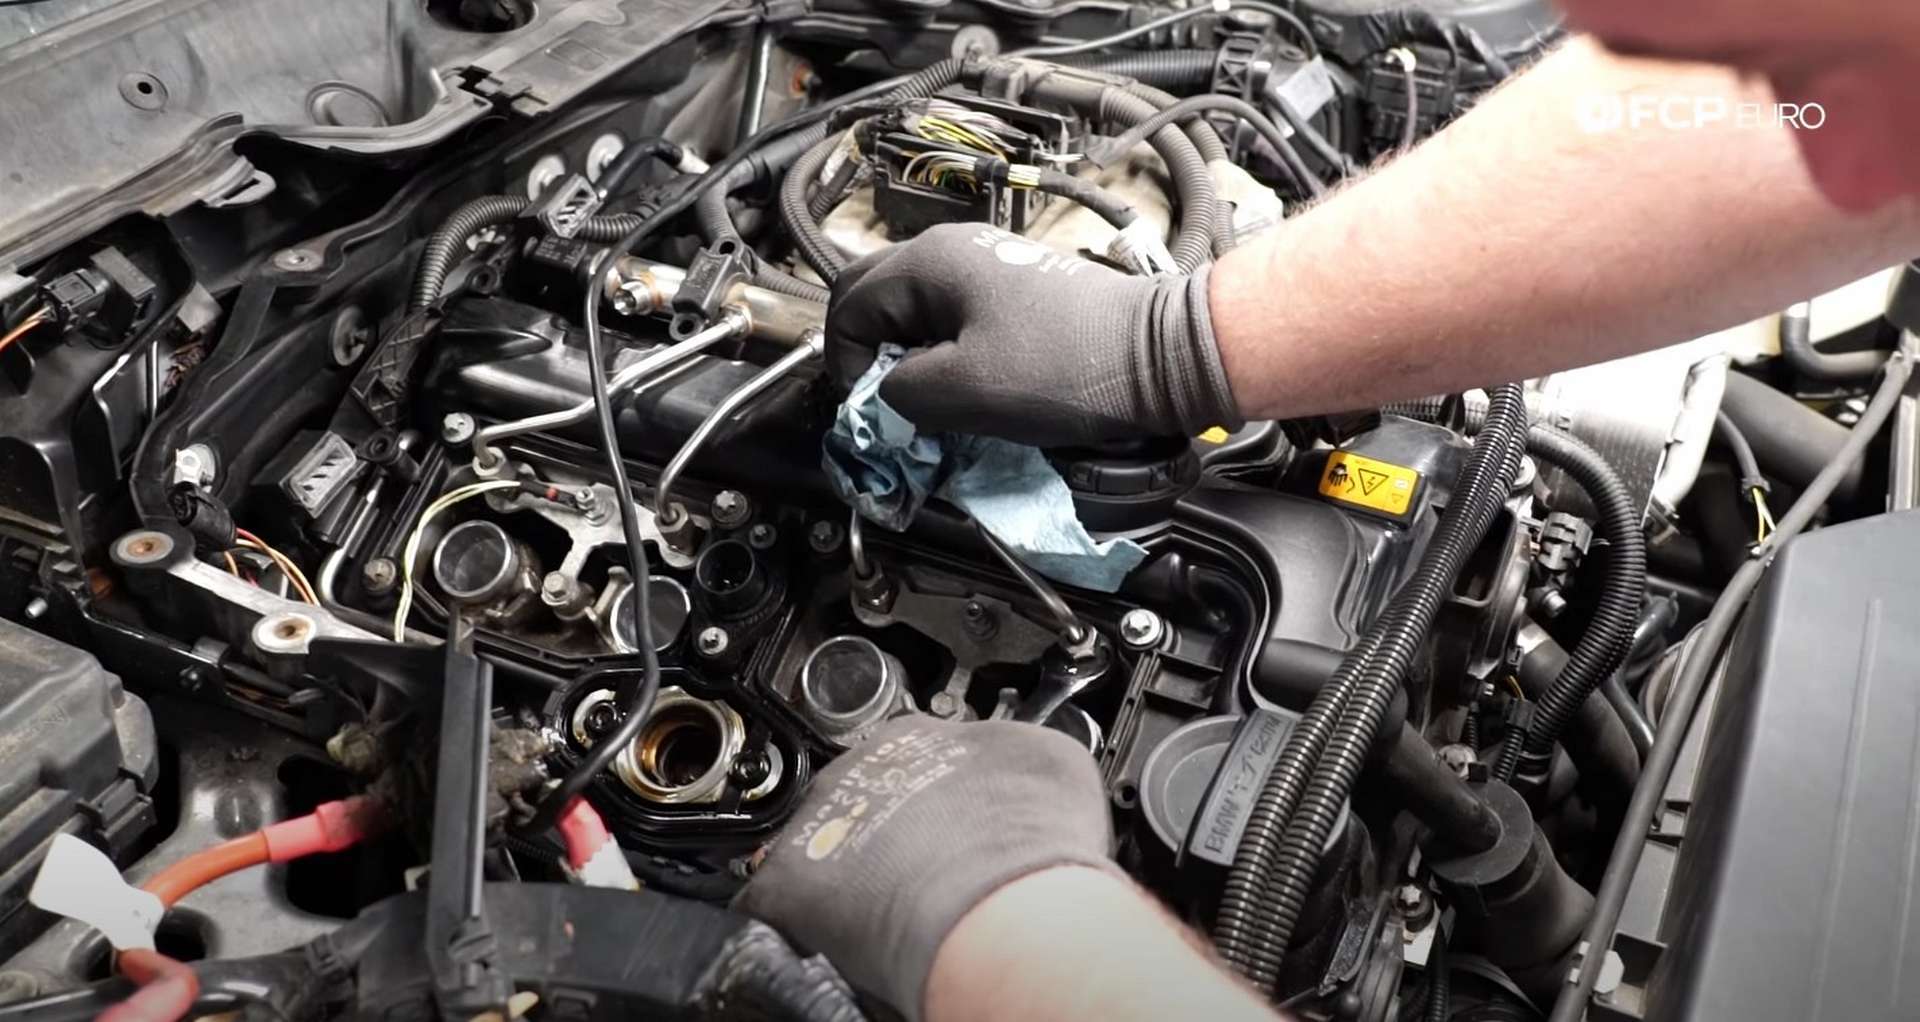
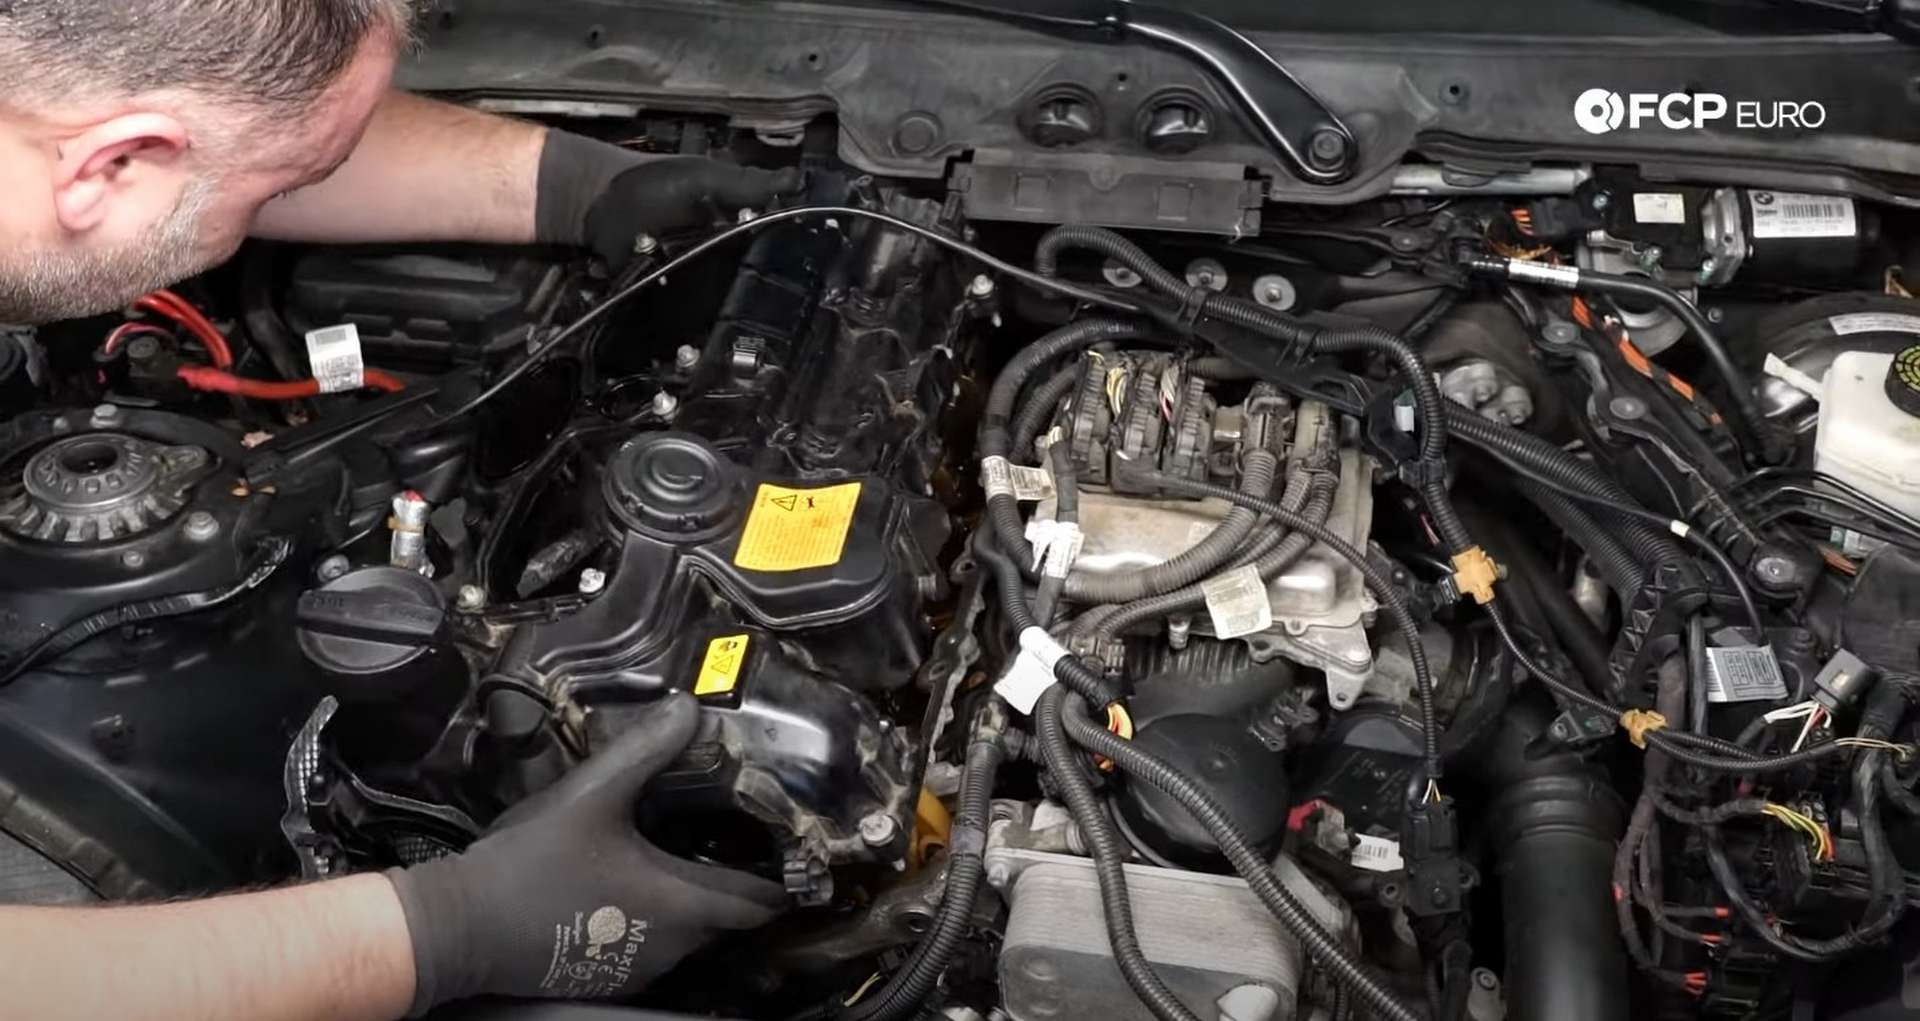
Step 5: Replace the valve cover gasket
The valve cover is secured to the cylinder head via twenty E10 fasteners. Starting at the exhaust side front corner, remove the bolts in a counter-clockwise spiral pattern, removing the outermost bolts before moving to the inner bolts.
Grab the valve cover by one of the camshaft solenoid holes and by where the vacuum pump sits at the back, and rock the cover back and forth until it is free of the head. You can use a plastic trim removal tool to pry the valve cover off the cylinder head. You can use a flat-head screwdriver, but you run the risk of scoring the aluminum head. Some of the bolt threads may catch the cylinder head, so if a bolt won't budge, back it out with your fingers.
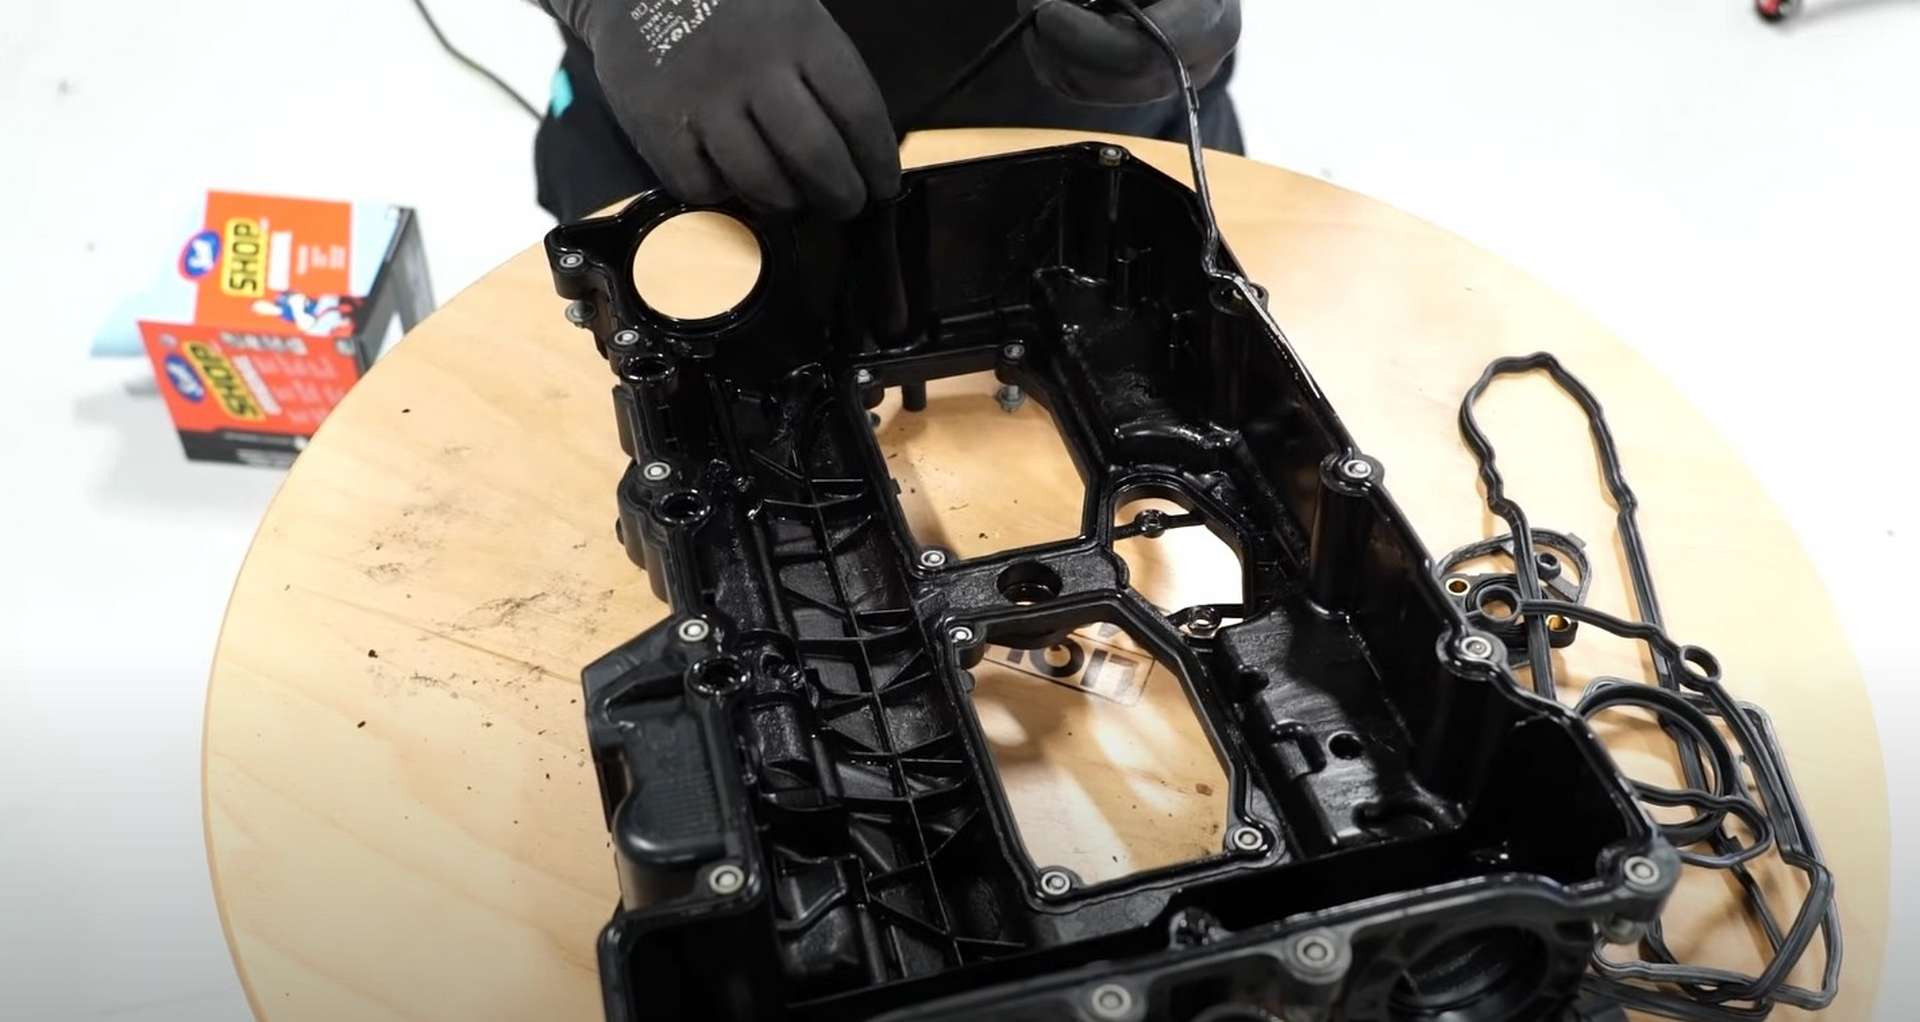
Use soMe rags and brake clean to clean the cylinder head where the valve cover gasket sits. A clean surface will ensure a good seal. Then, peel the old gasket out of the valve cover. Remove the main gasket and the two inner gaskets that seal around the fuel injectors.
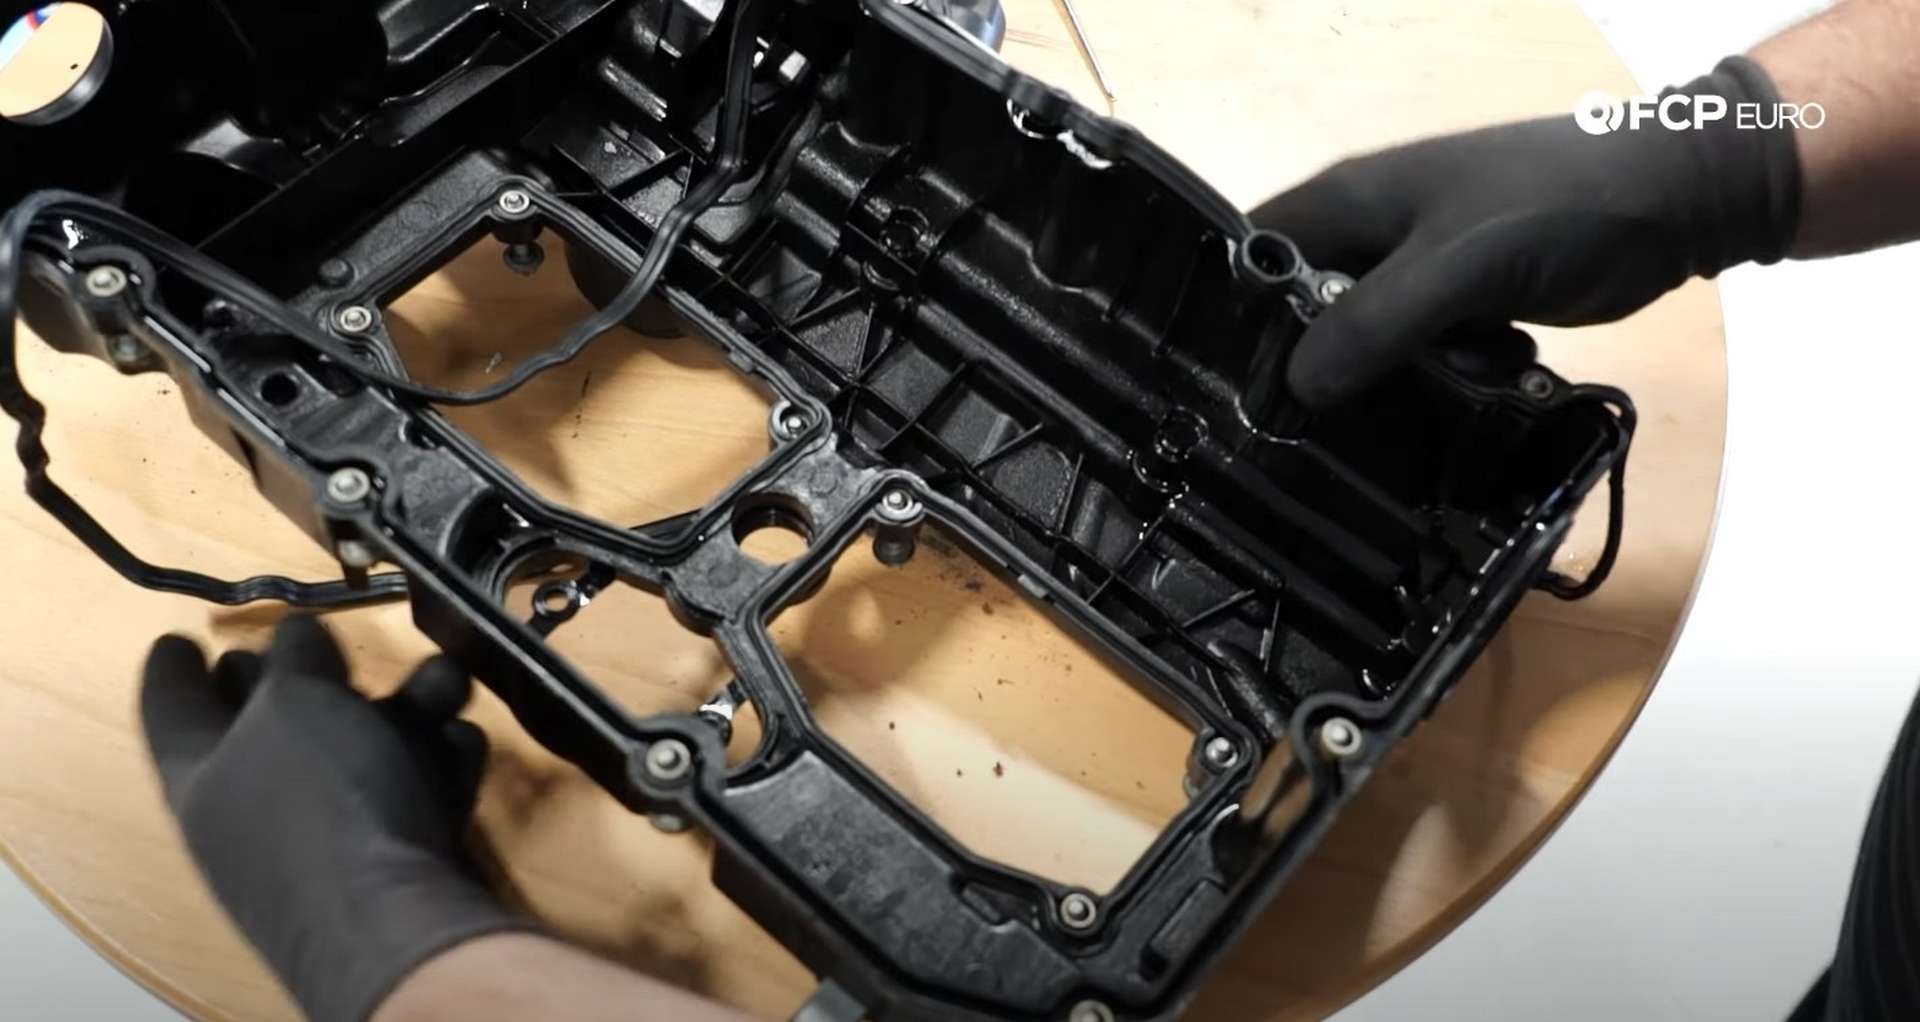
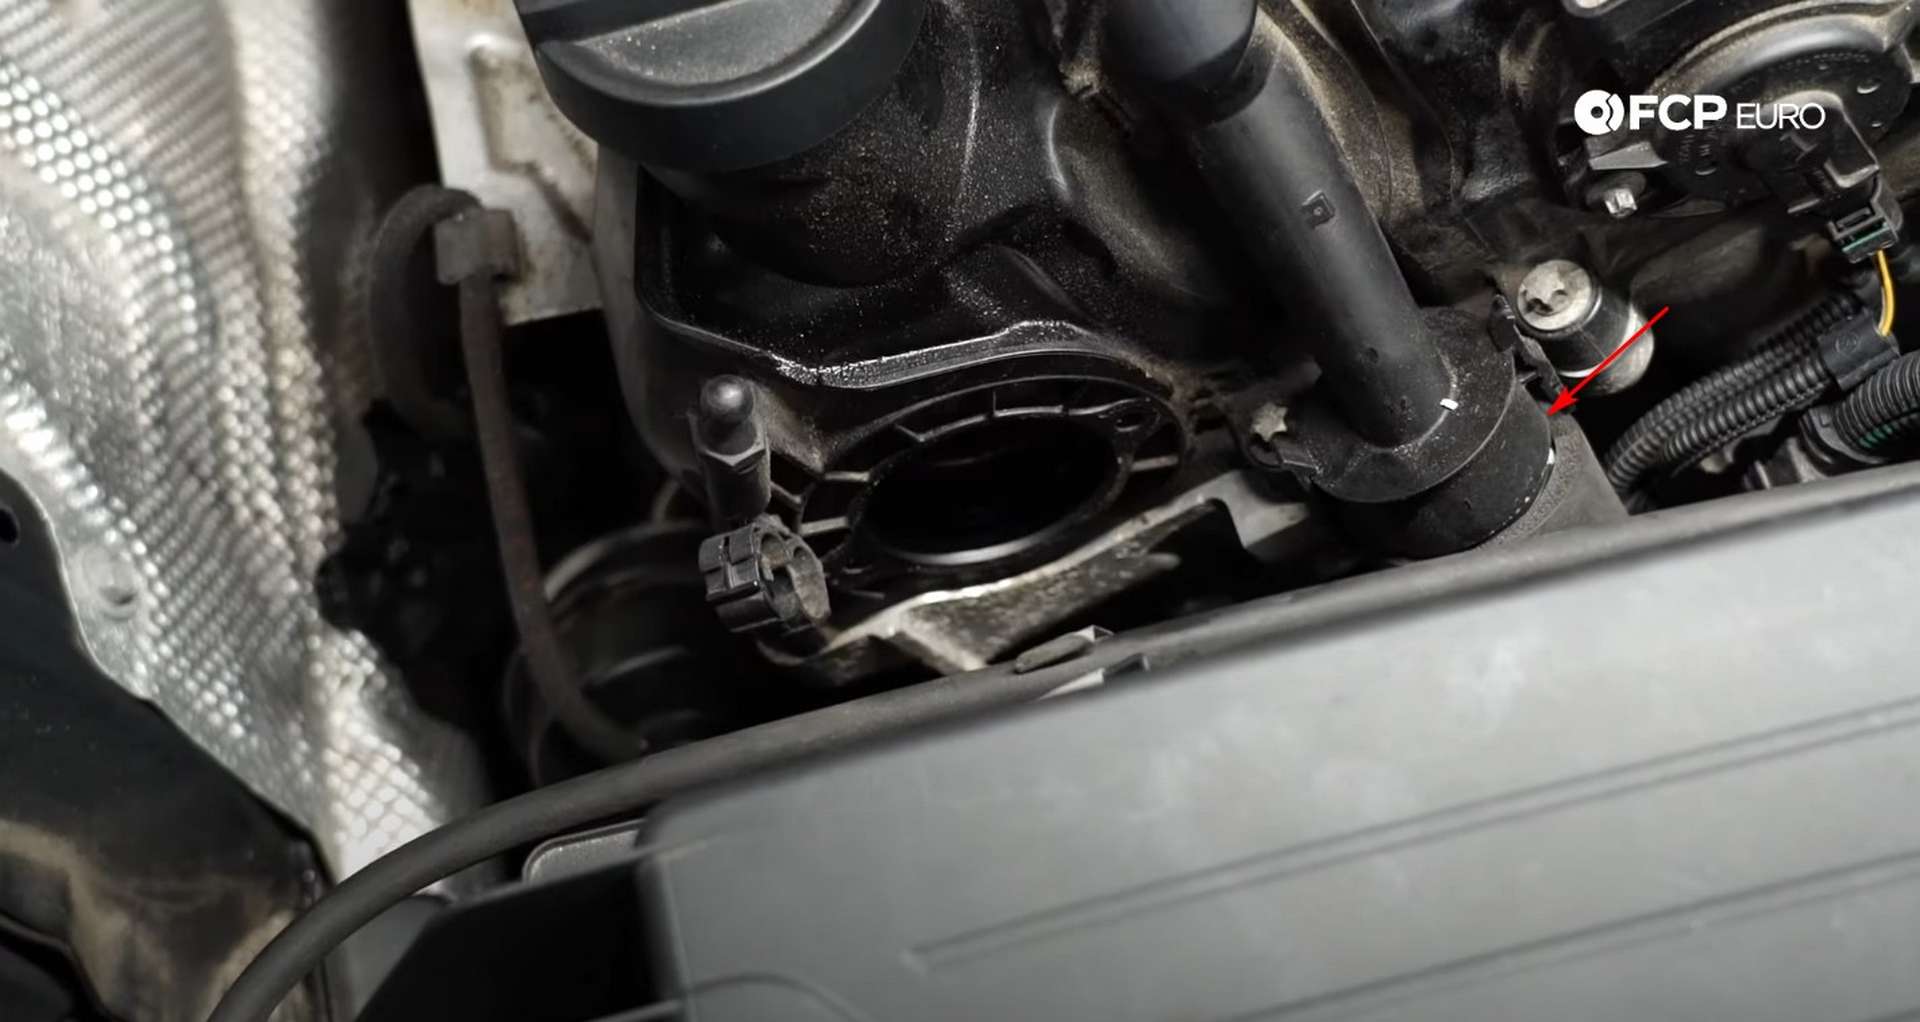
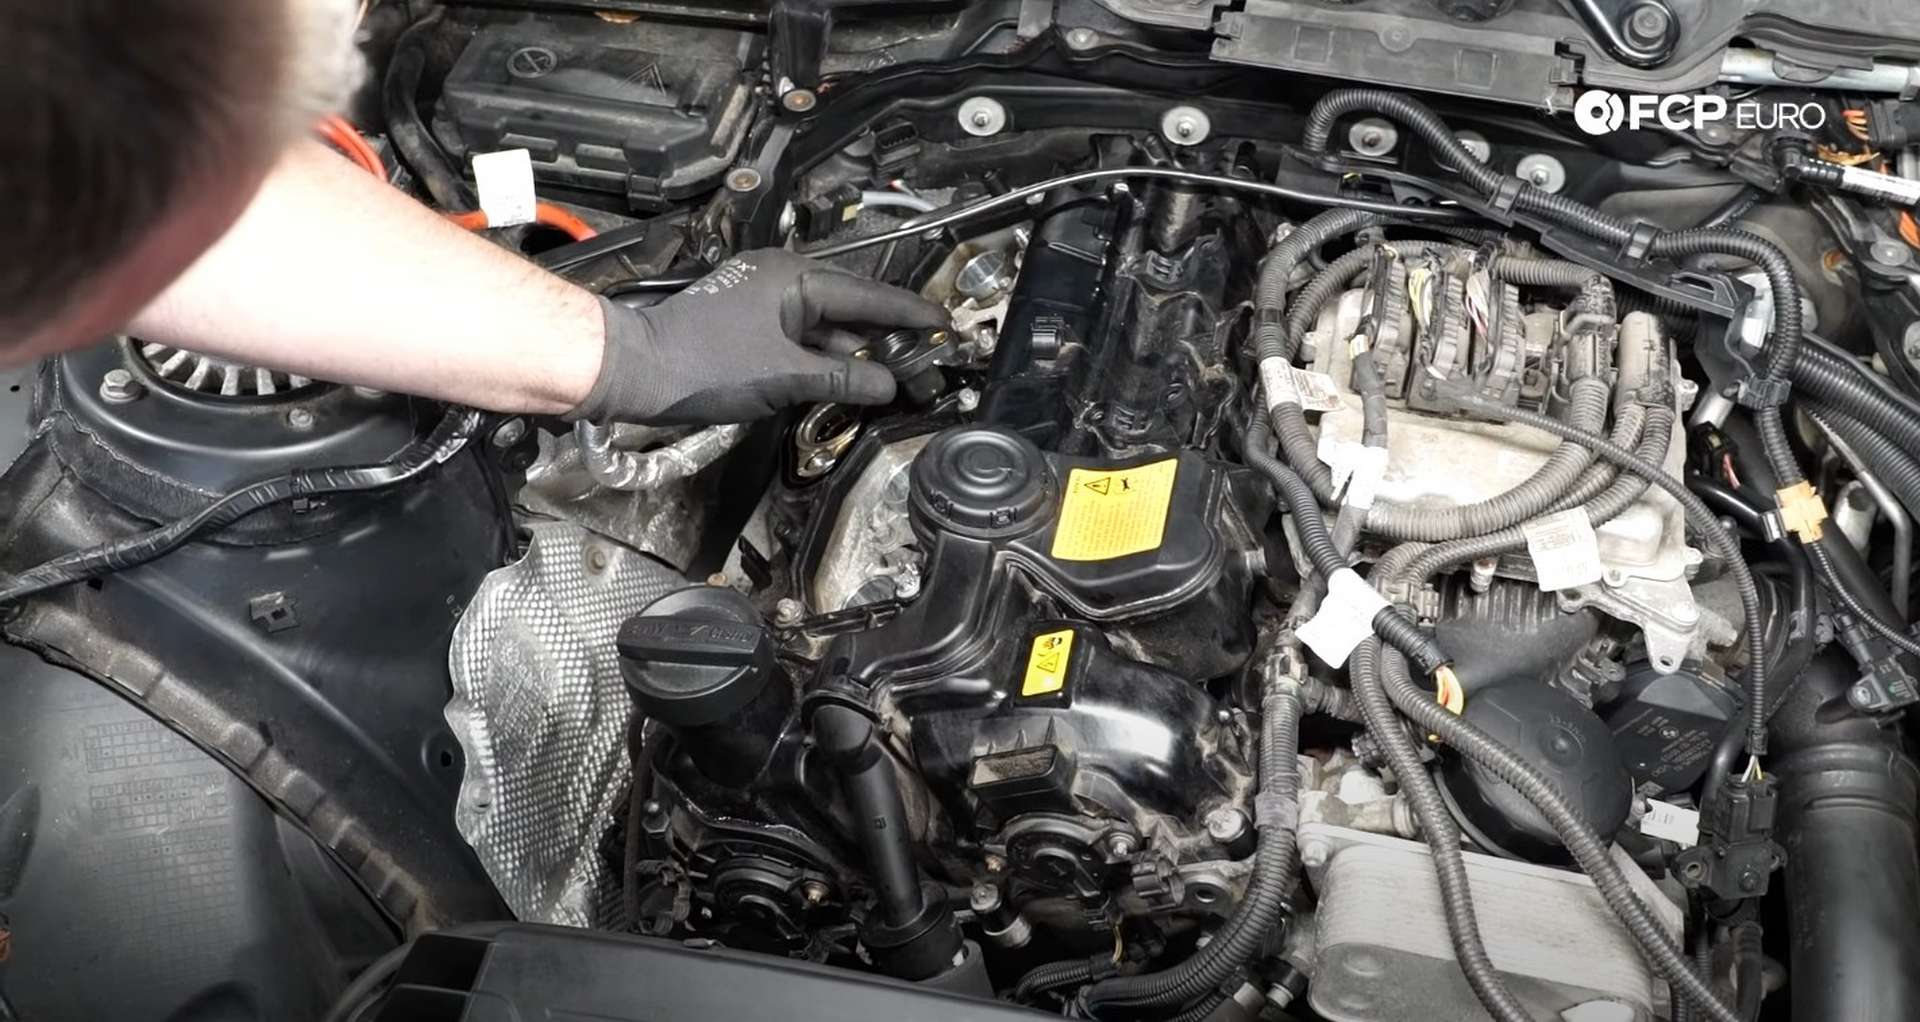
The new gaskets will only seat properly in one orientation. Once you have those installed, use a flathead screwdriver to pry out the old vacuum pump seal carefully. Once it's out, press in the new one.
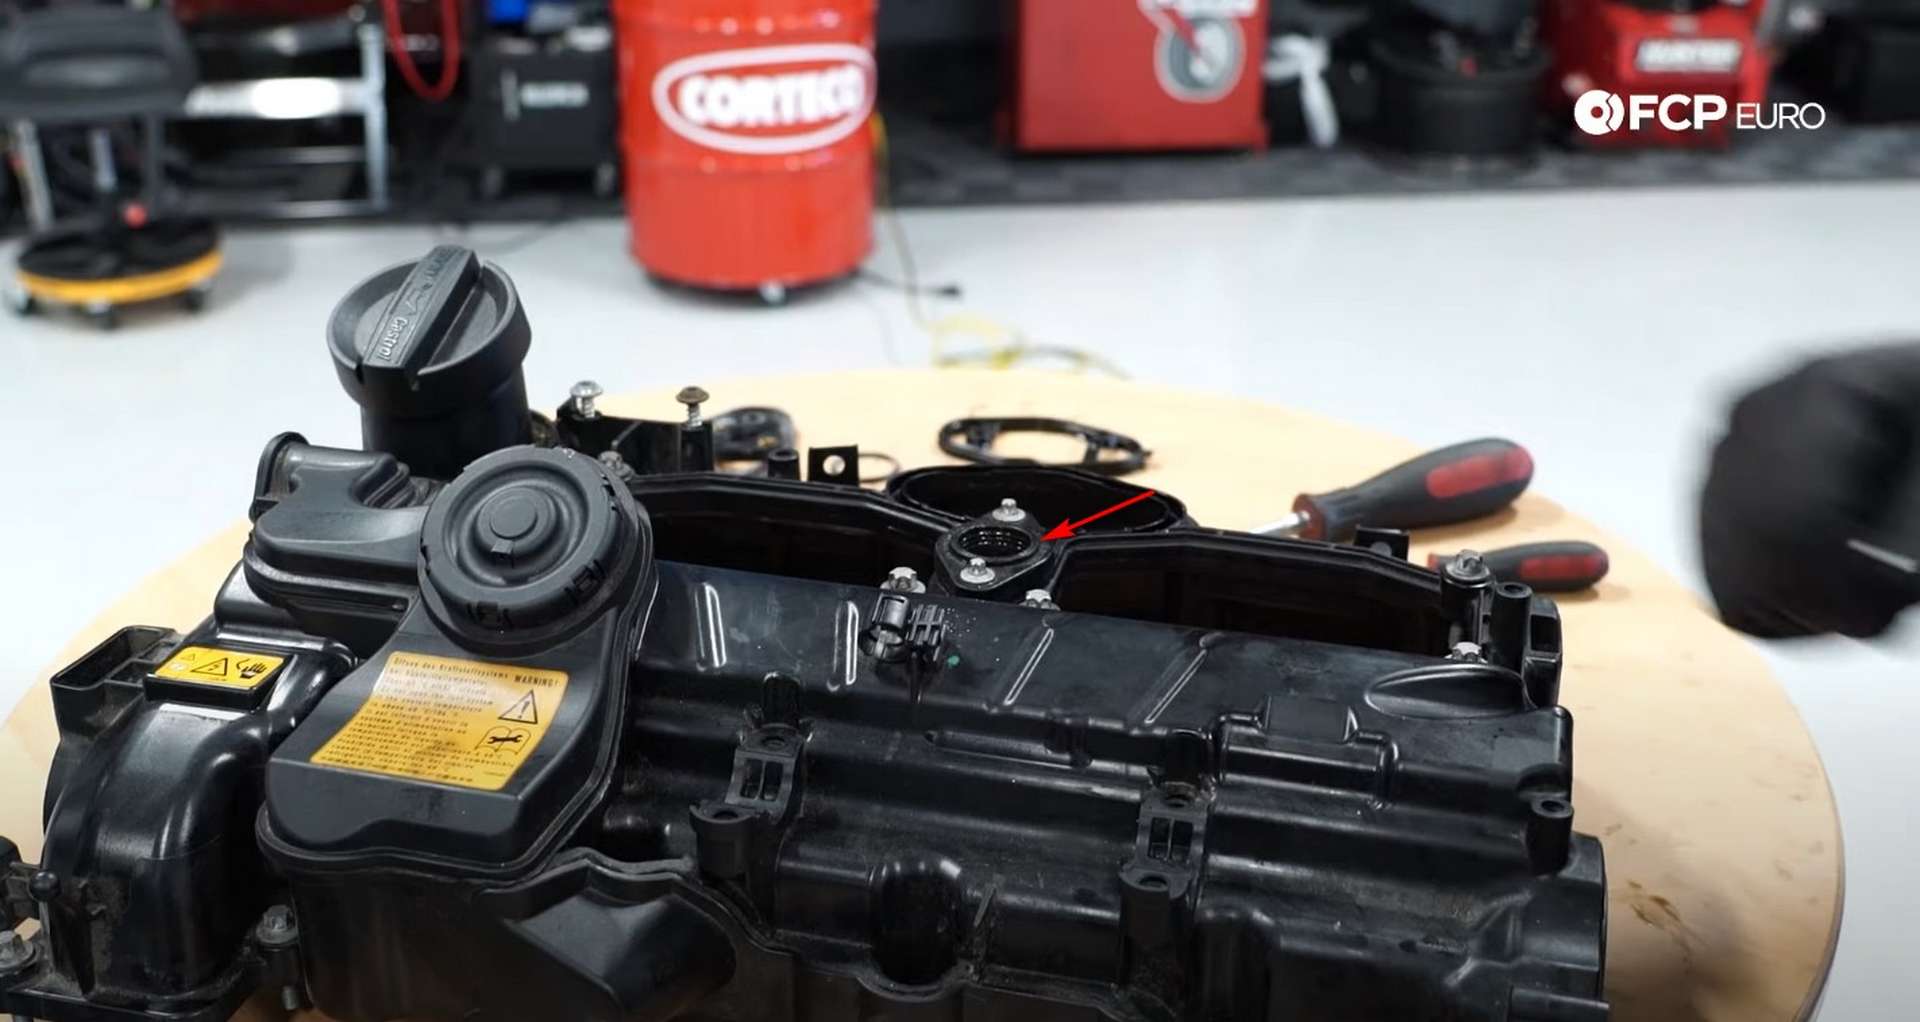
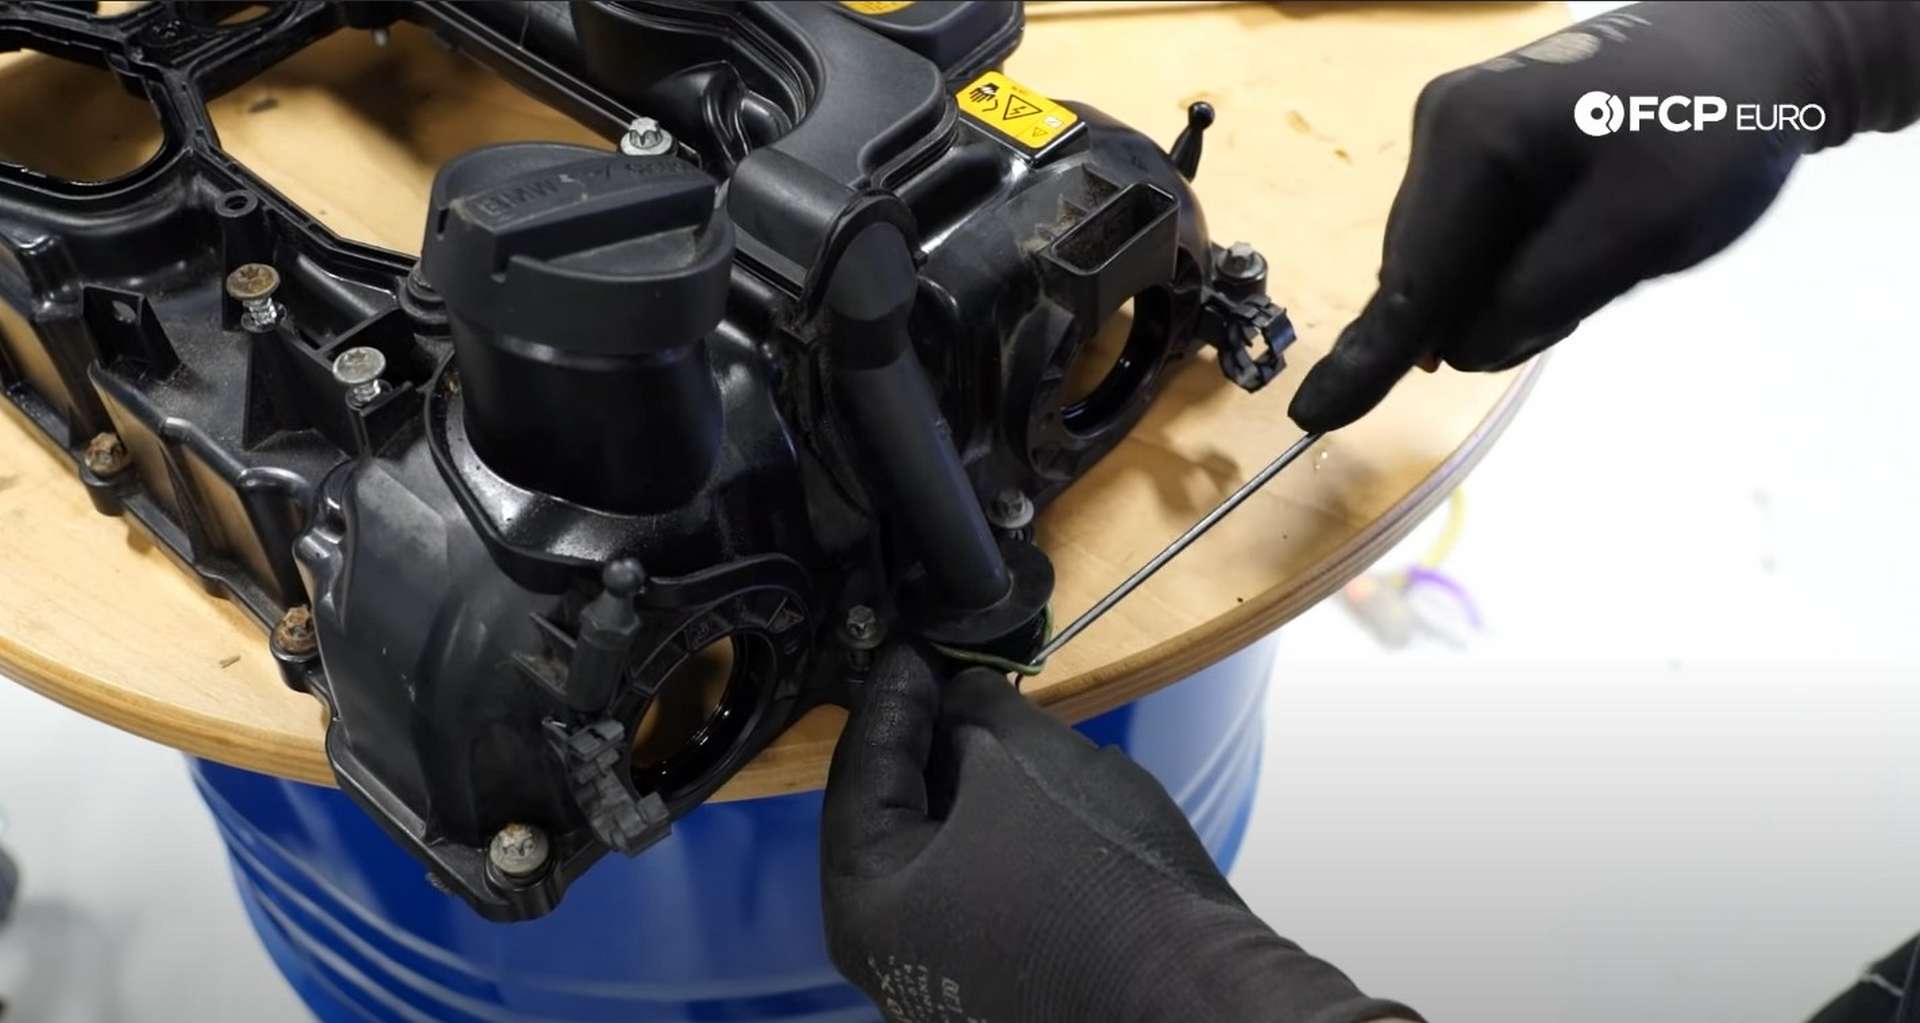
Next, flip the valve cover over to look at the outside and peel off the old high-pressure fuel pump gasket. Then, remove the Valvetronic plug seal. Use an E6 socket to remove its mounting bolts and then pry it off with a screwdriver. You'll install the new one after you refit the valve cover to the cylinder head.
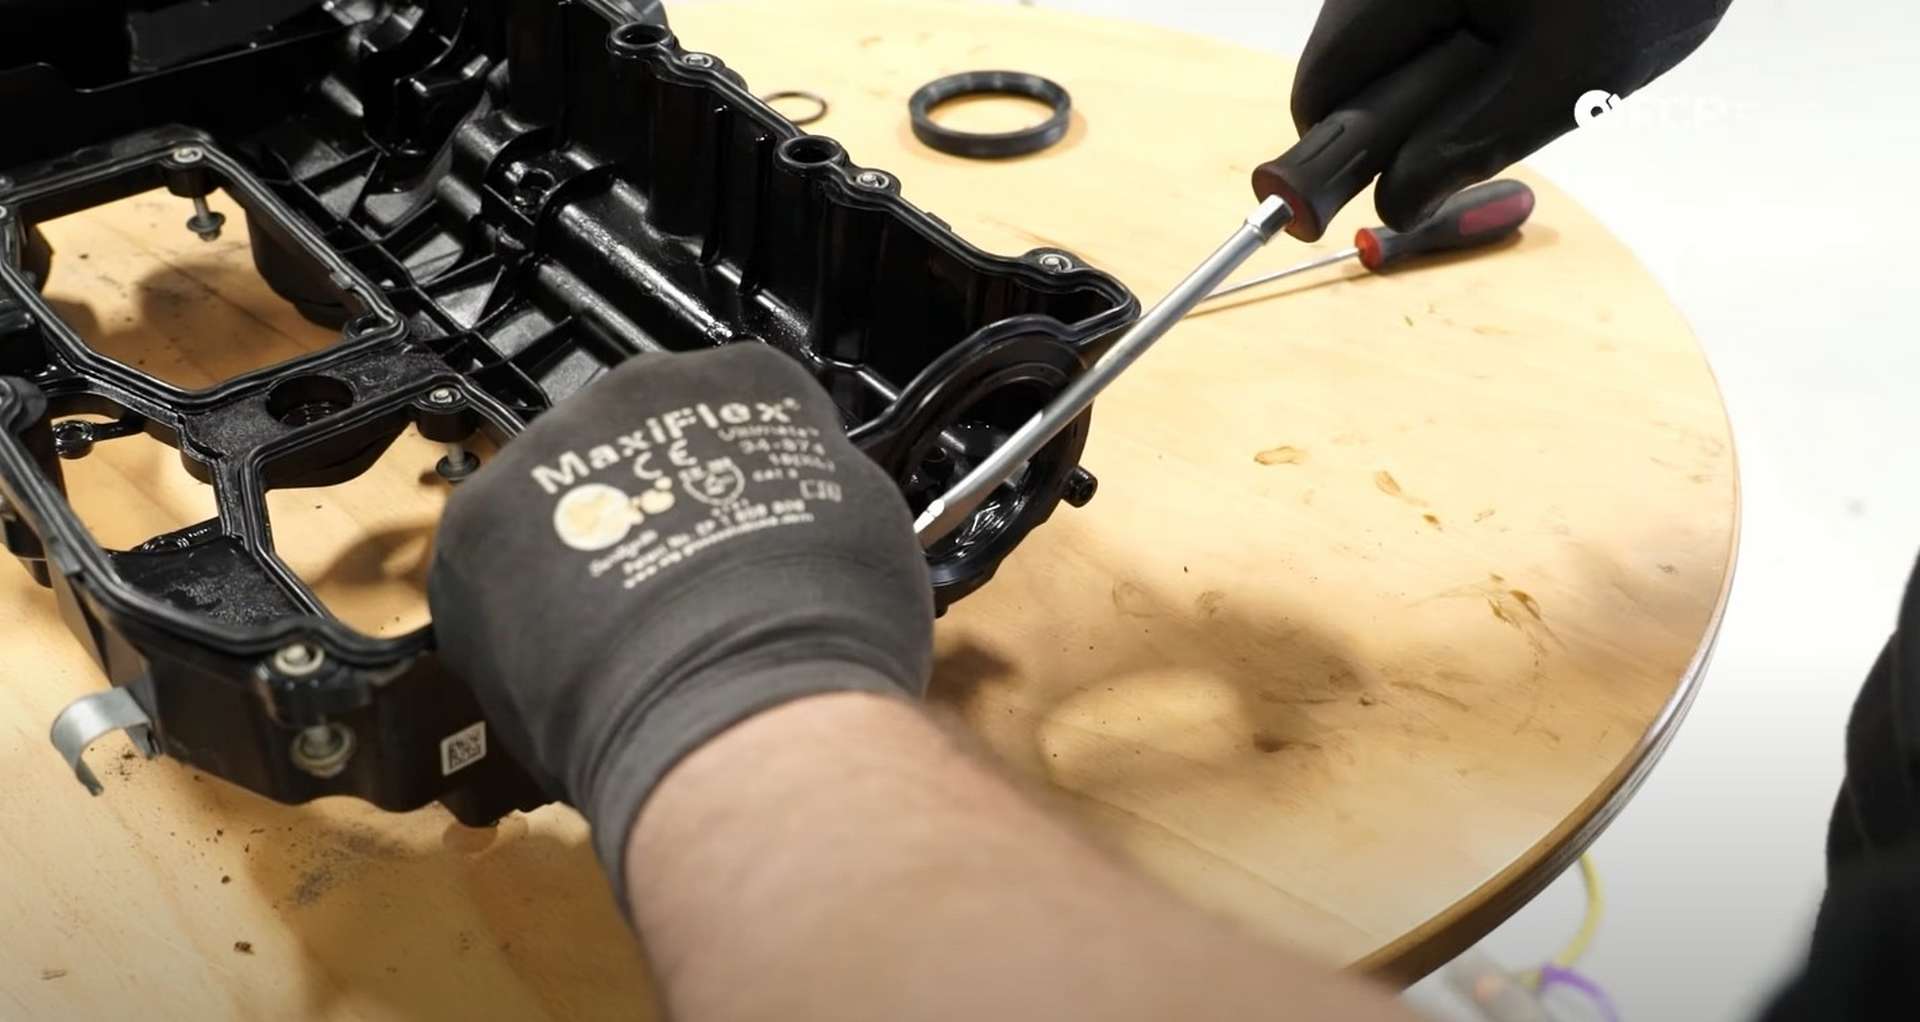
Lastly, replace the o-ring that seals the vacuum hose on the front of the cover. Remove the old one with a pick and then fit the new one.
When you install the valve cover, be very careful not to crack it. A new cover will cost you around $450. Ensure all of the wiring and fuel lines are out of the way before dropping the cover on. Rub some oil on the Valvetronic plug on the cylinder head, as this is the first thing the cover comes in contact with, and it needs to slide over it. Lightly thread in some of the bolts to help align the cover into place. Once the valve cover is seated, connect the vent line at the front of the cover.
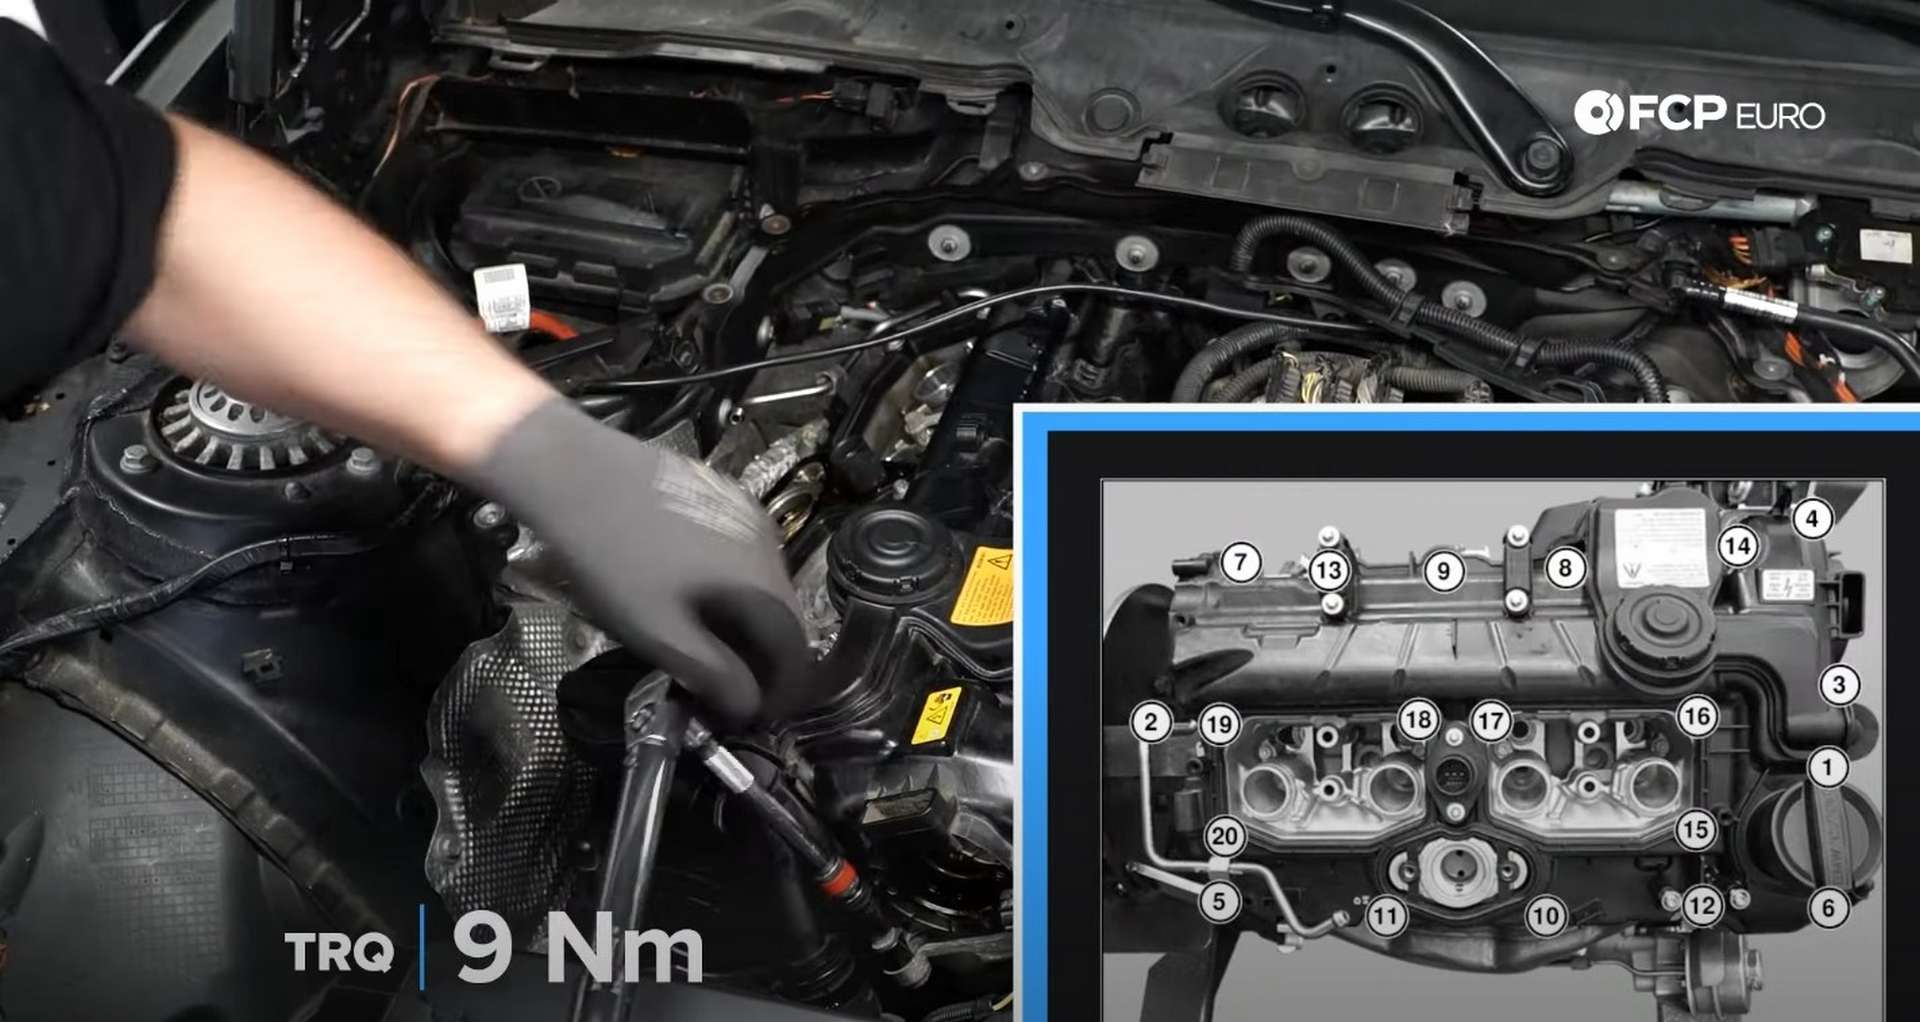
Snug the valve cover bolts against the cover, but don't tighten them down fully. Follow the specific BMW pattern shown below when tightening and torquing down the valve cover bolts. Use an E12 socket to torque them to 9Nm. Be extra careful; tighten them all halfway before repeating the pattern and setting the final torque value.
Step 6: Refit the camshaft timing adjusters and vacuum pump
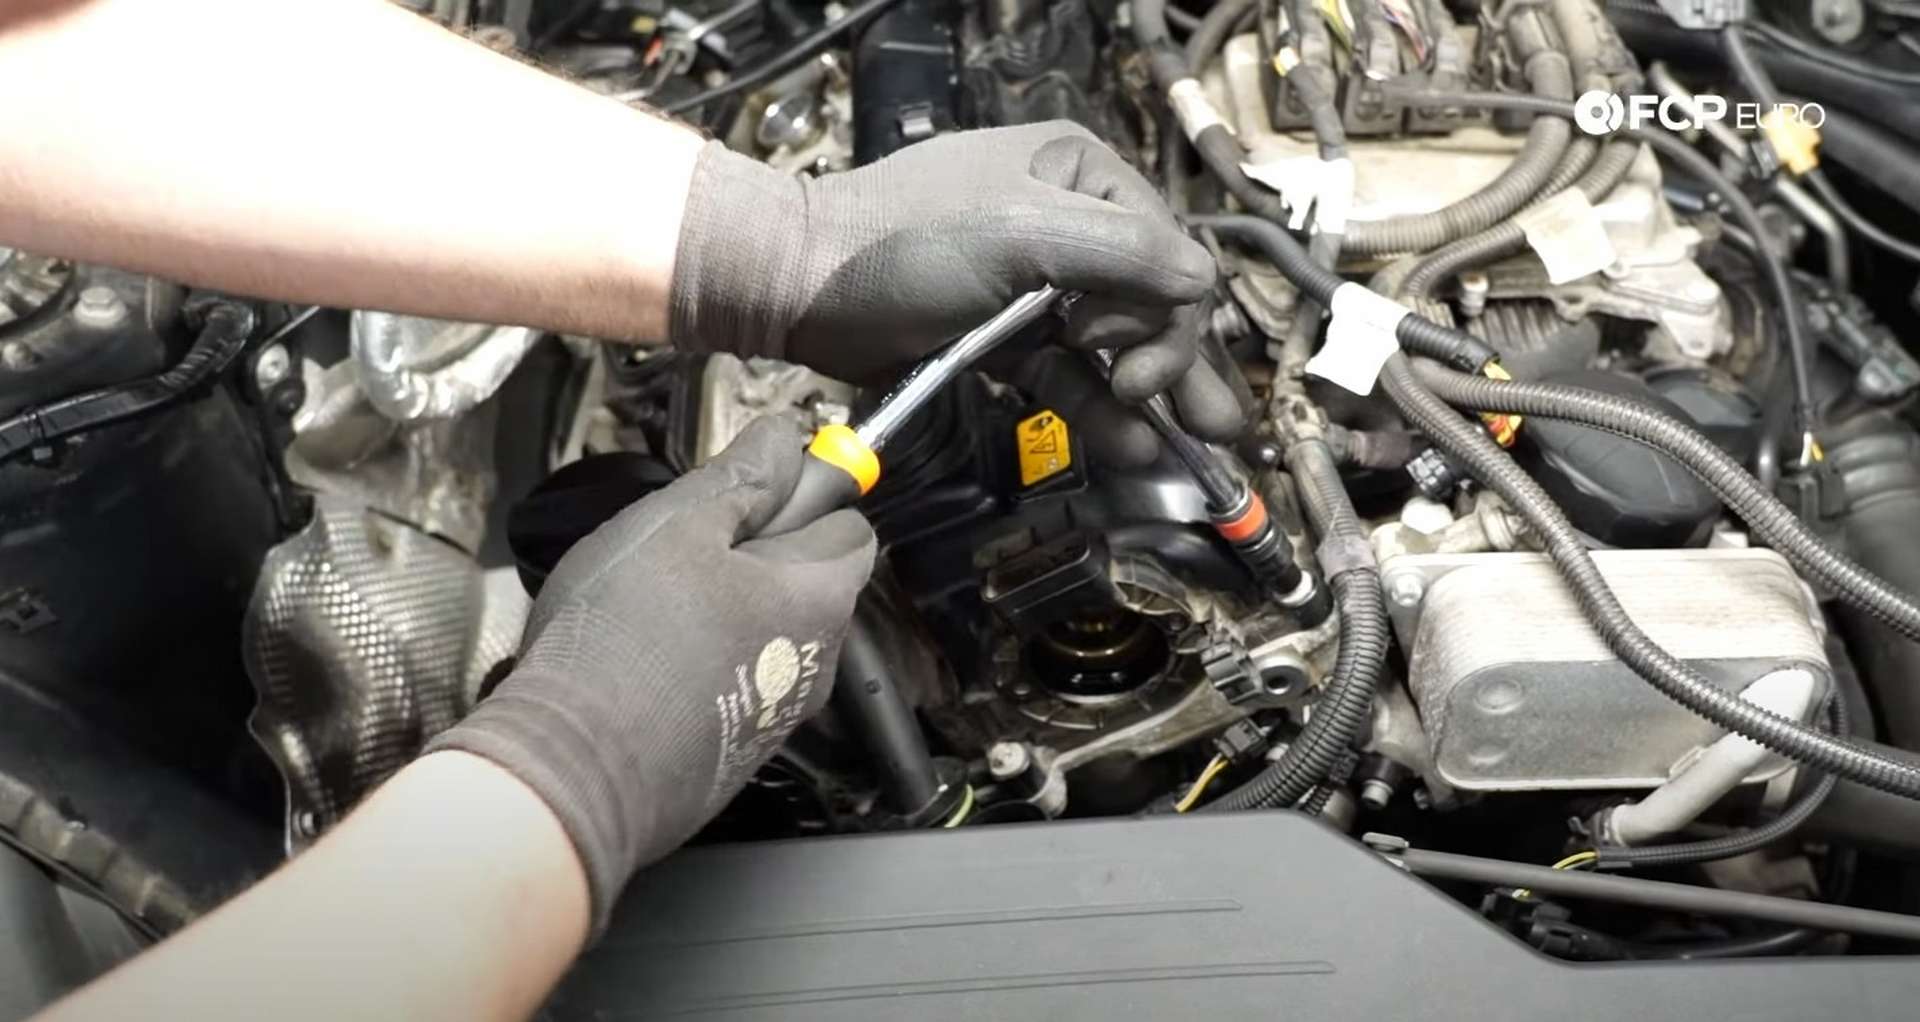
Before fitting the camshaft timing adjuster to the valve cover, wipe some fresh oil around their o-rings. Next, seat them into their respective holes and drive in their fasteners with an E7 socket. Tighten them to 5.5 N m. Plug the adjusters in once they are torqued down.
Next, install the new Valvetronic plug seal. Lubricate the new seal with some oil before sliding it on, then thread in the bolts that secure it to the valve cover. Use an E6 socket to snug them.
After that, fit the new high-pressure fuel pump gasket to the valve cover. Next, take the high-pressure fuel feed line and lay it into position. Then, fit the bracket and wiring harness over the fuel line. Thread in the bracket's three mounting bolts by hand before tightening them with an E6 socket.

Slide the pump in between the cowl and valve cover, with the larger round vacuum line connection facing the driver's side of the engine bay. Feel around on the back of the camshaft to get an idea of where the flats are positioned, and spin the pump's drive to match. Slip the drive onto the camshaft and then feel around with the bolts until you locate the threaded holes and can secure the pump to the cylinder head. Use a T40 bit socket to tighten down the bolts.
Lastly, reconnect the brake booster hose to the vacuum pump.
Step 7: Refit the fuel system
A lobe on the exhaust camshaft interacts with the high-pressure fuel pump to send fuel into the engine. The lobe must be at its bottom-most point when installing the fuel pump to prevent any damage from being caused. Like finding top dead center with a screwdriver, turn the engine over with something like a sharpie marker in the hole and watch for when it bottoms out. When it reaches that point, install the fuel pump.
Hold the fuel pump in place while you thread in both mounting bolts by hand. Use a T30 socket to walk the bolts into the head evenly until they are tight. Then, use a T30 socket to torque the fuel pump bolts to 12Nm.

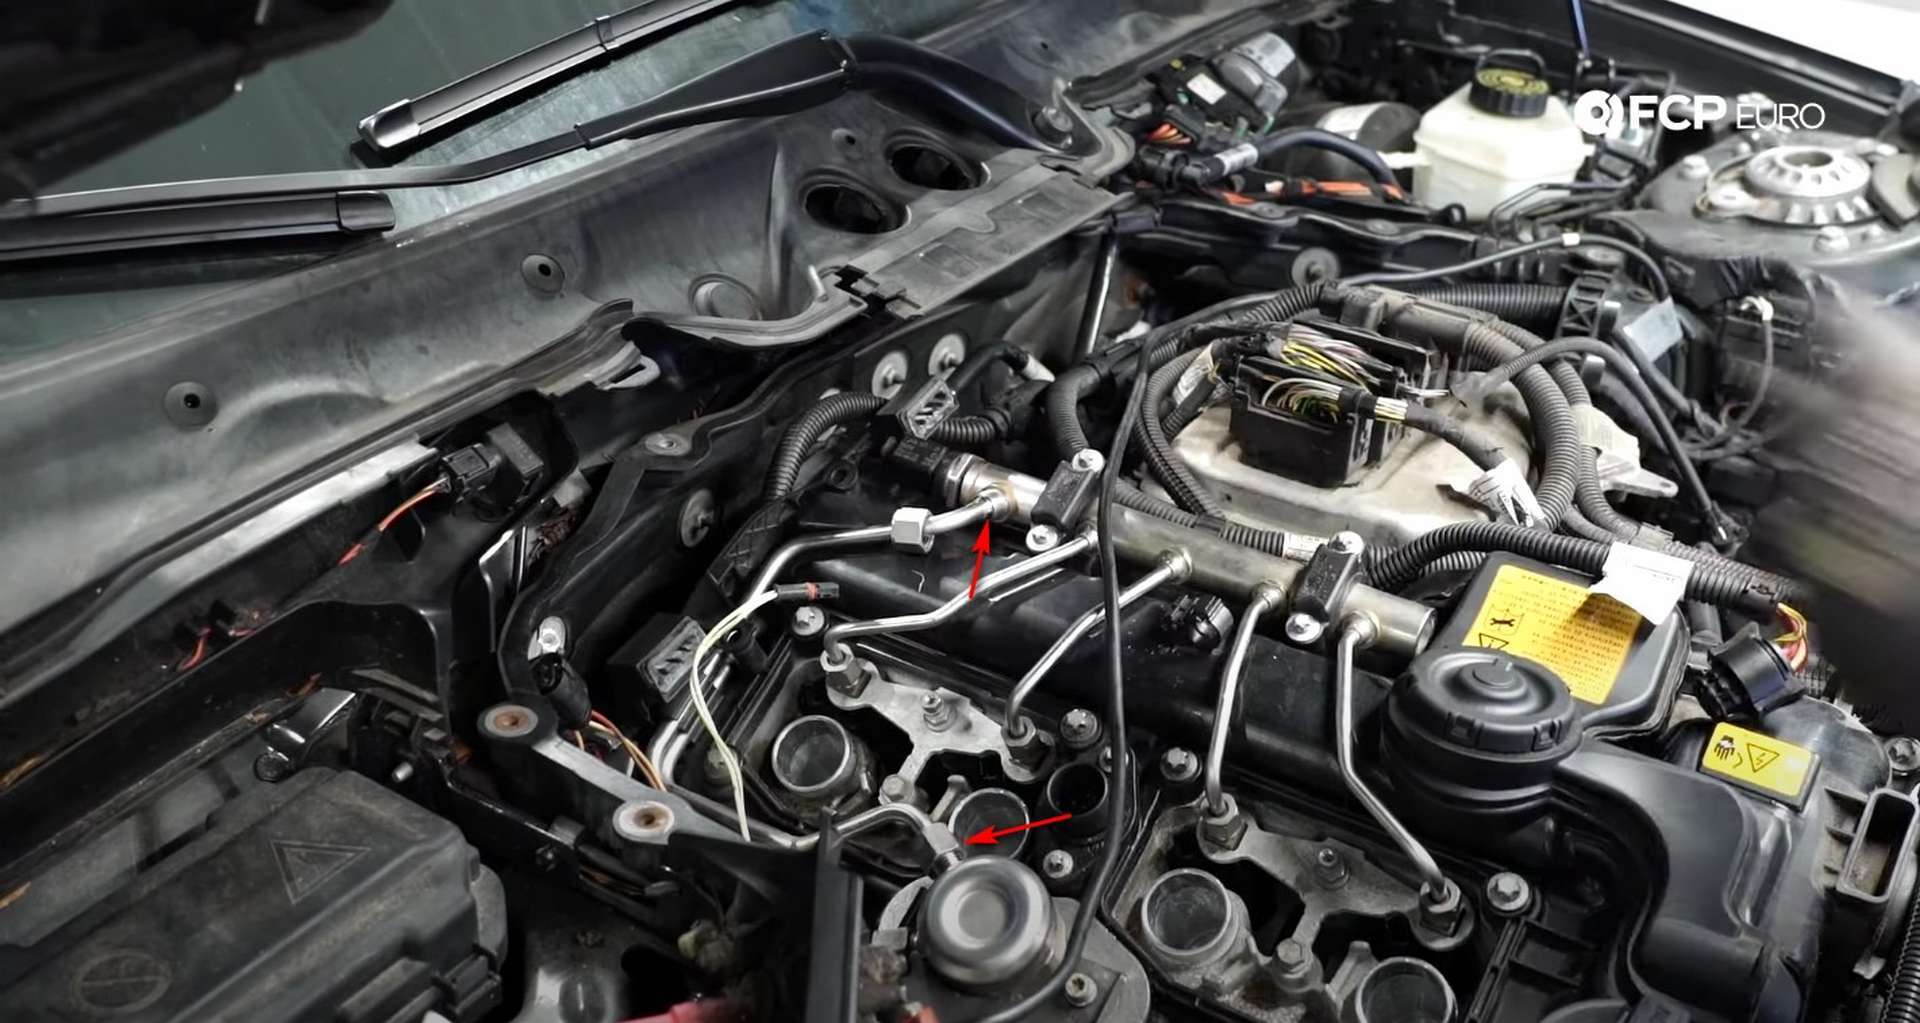
Next, reconnect the fuel lines to the pump. Thread on the low-pressure line before bringing the new high-pressure line onto the engine. Use a 17mm wrench to snug the fittings on the lines.
After that, take the fuel rail and situate it on the valve cover. Before threading the rail's mounting bolts in, get all of the fuel lines started on their injector's threads. Use your fingers to thread them on so you don't cross-thread them. Use a 14mm wrench to tighten the lines to the injectors. Gently snug the lines and then thread in the bolts for the rail's clamps. Then thread on the high-pressure fuel line. Use a 17mm wrench to tighten that fitting.
Step 8: Reconnect the wiring
First up, flop the Vanos plug back over the valve cover, and plug it in. Then, follow that up by plugin in the injectors and the high-pressure fuel pump.
Next, refit the ignition coils to the spark plug tubes and plug them in. Slide the ground wires over their studs and thread on the nut used to secure them. Use an 8mm socket to tighten the nuts. Then, plug in the ignition coils and lock them into place.
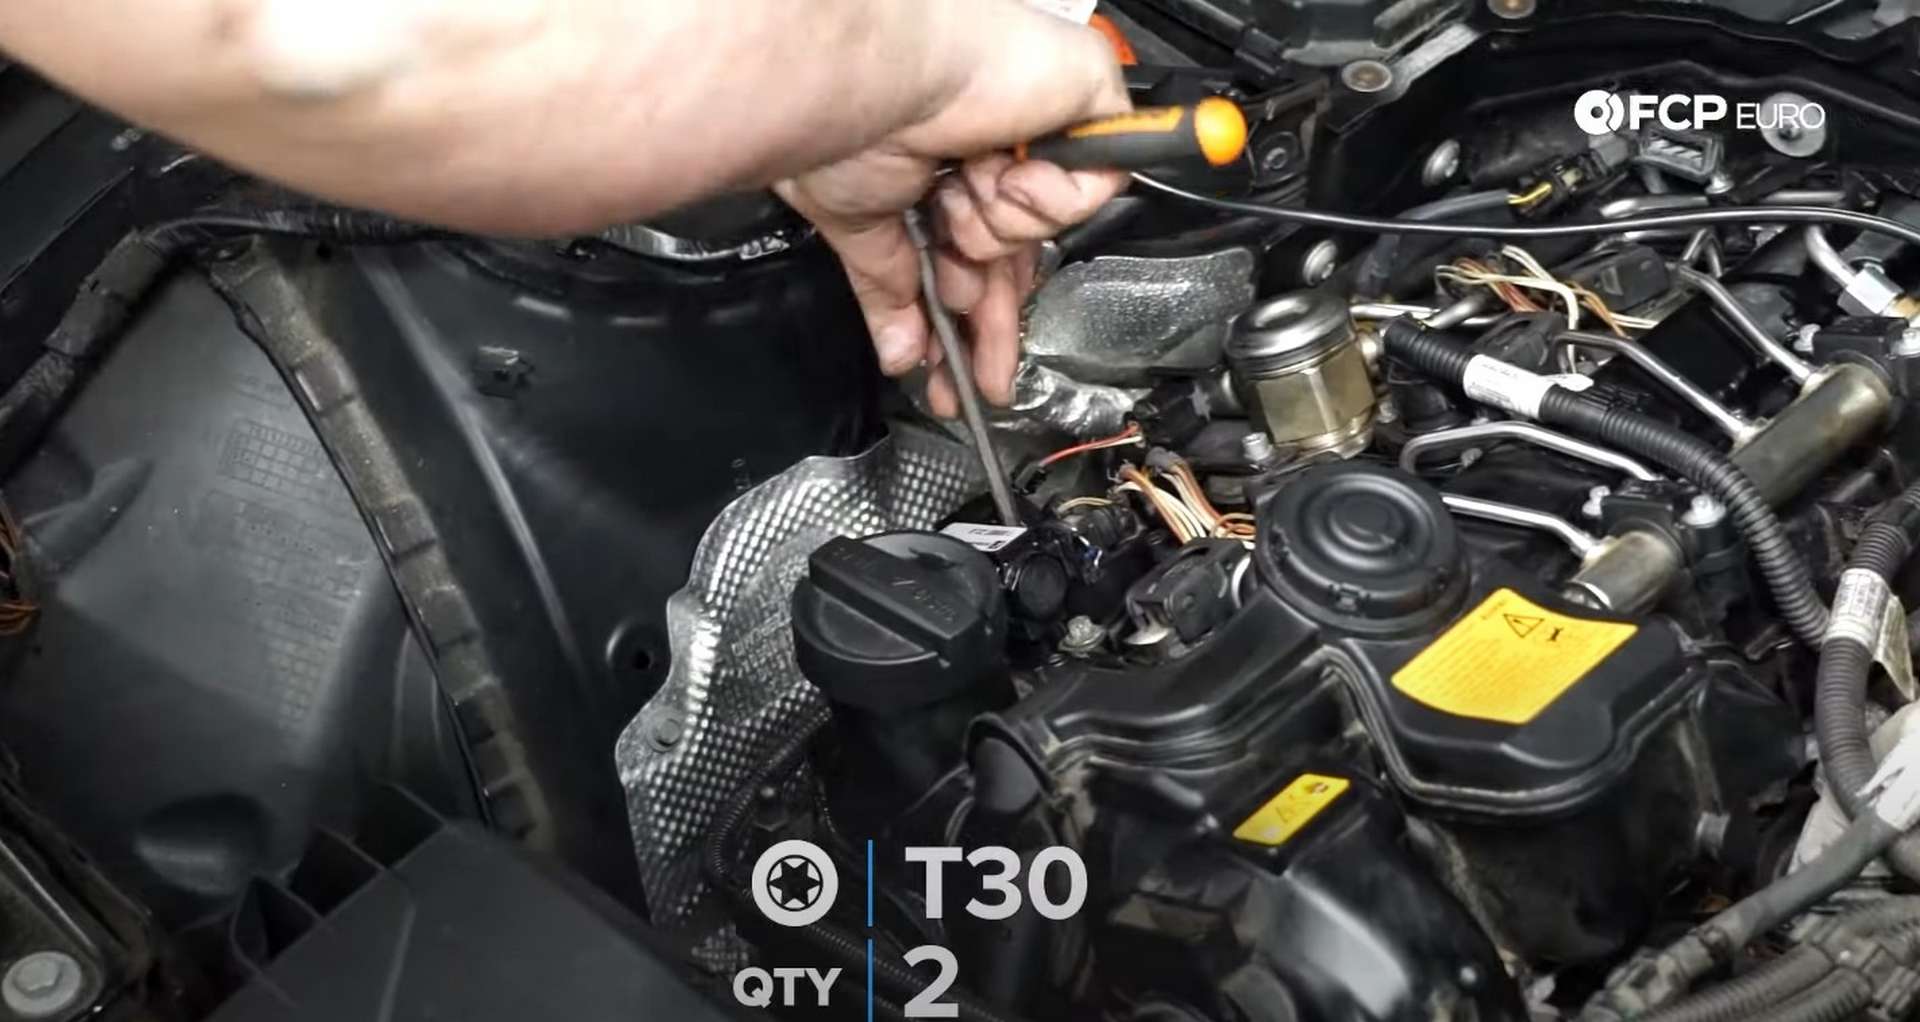
After that, refit the boost control solenoid to the valve cover. Thread in its mounting bolts by hand before tightening them down with a T30 Torx bit socket.
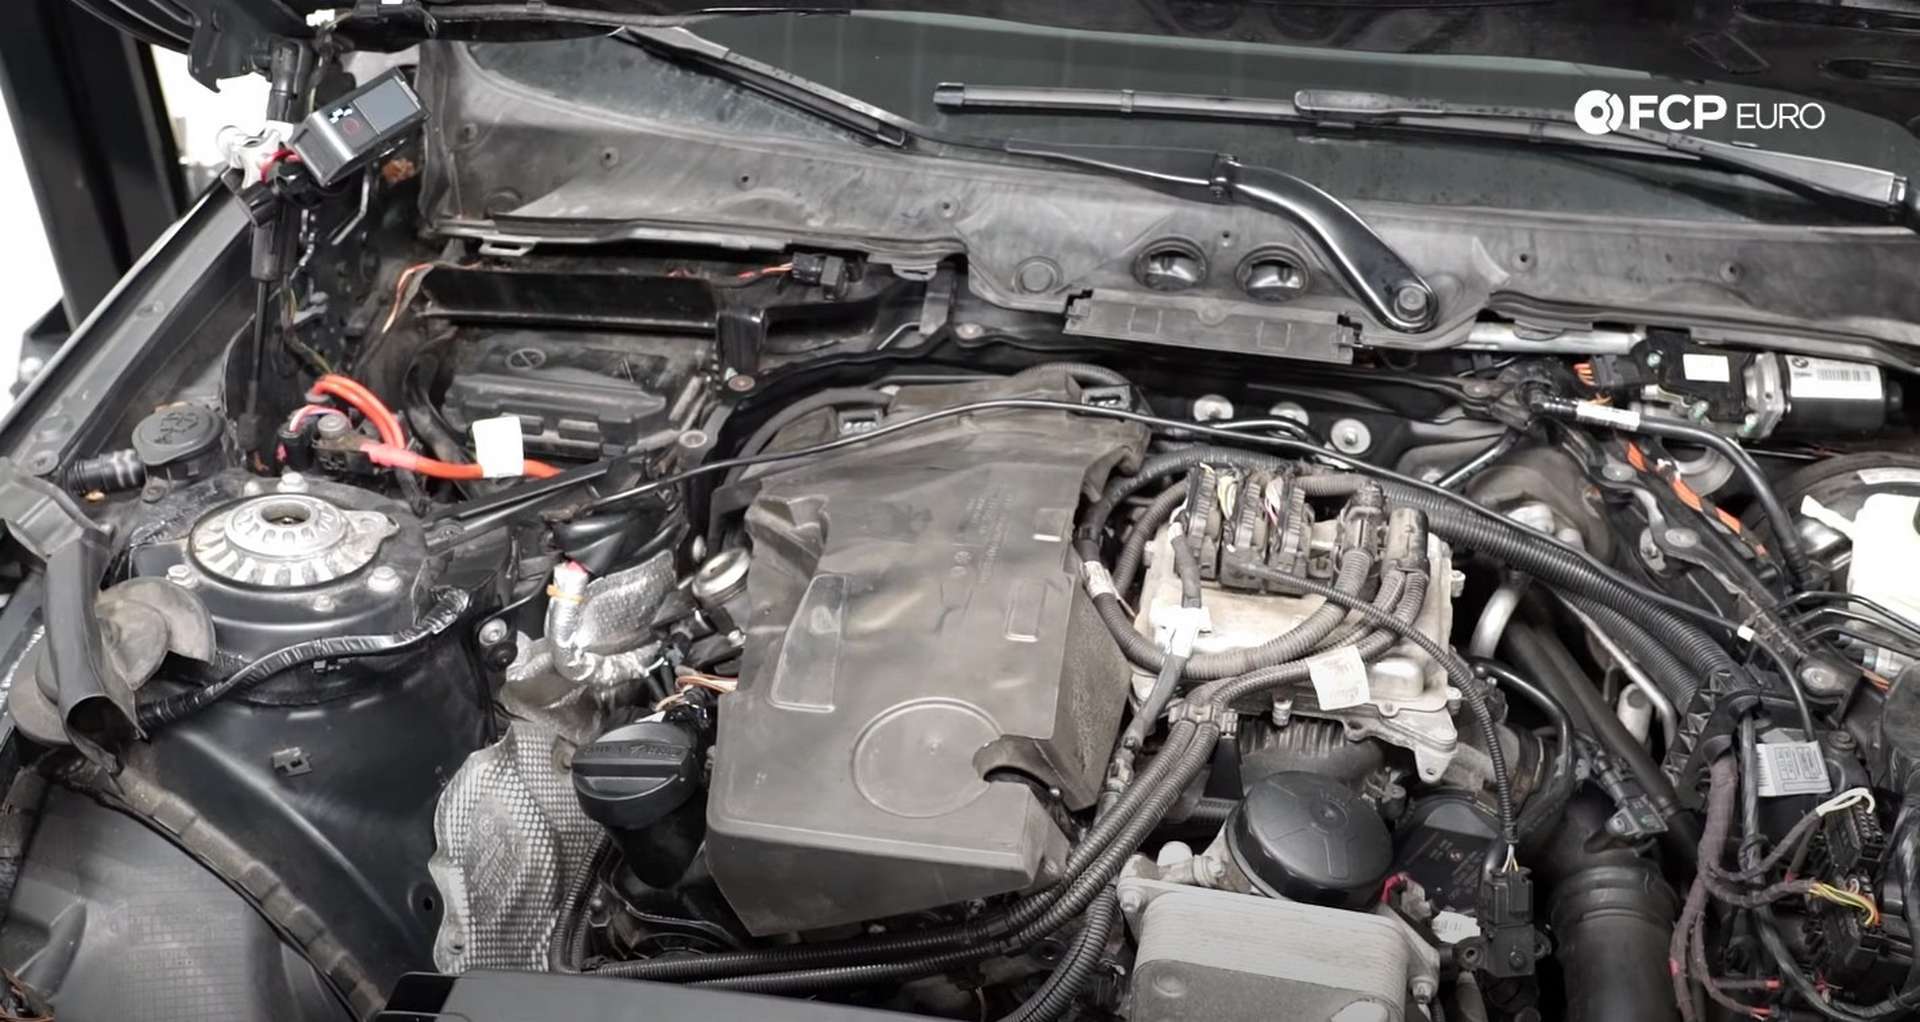
Now everything concerning the engine should be reconnected unless your vehicle is pre-2013, where the two vacuum lines that run to the engine cover are still disconnected. Place the engine cover over the engines just to reconnect the lines if your car requires it. Head into the driver's seat and start the vehicle.
Quickly get to the engine bay to check for any possible fuel leaks from all of the fittings. Shut the car down and fix any leaks that are present. If there aren't any leaks, shut the car down and continue to reassemble the engine bay.
Step 9: Refit the engine bay plastics
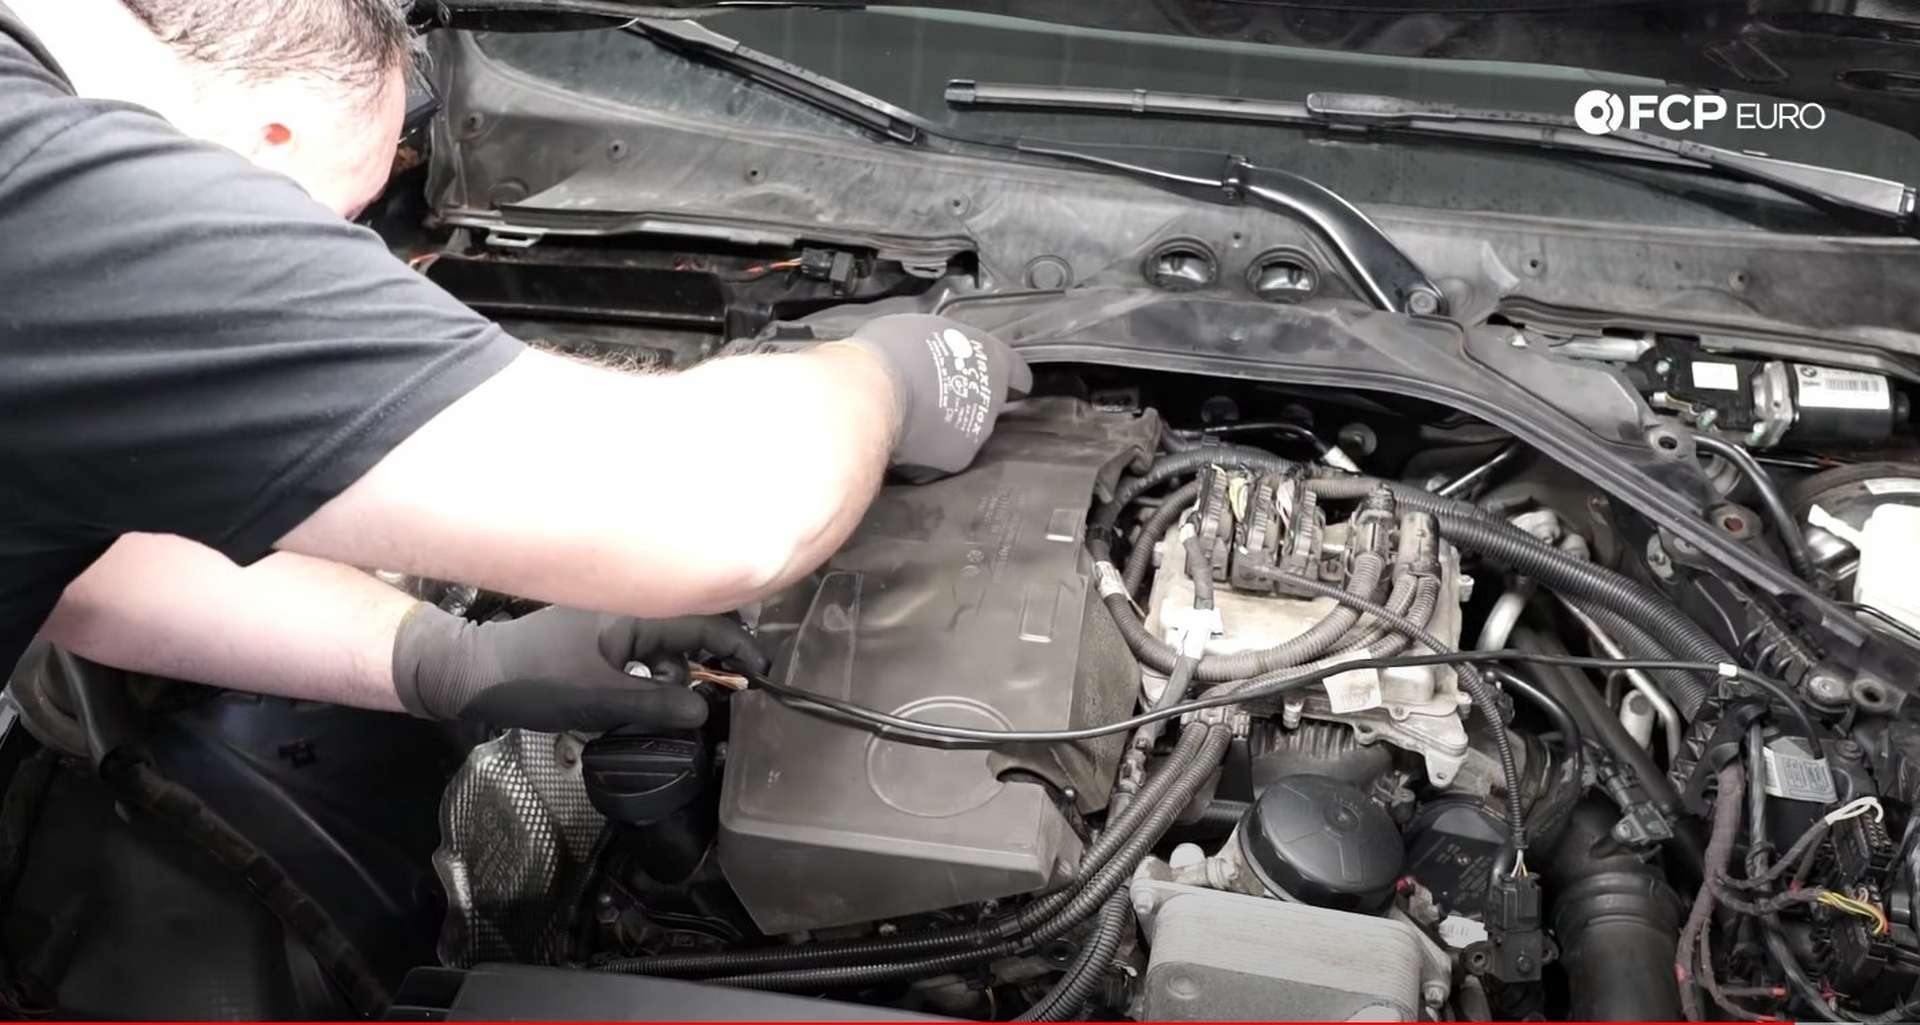
First up, refit the noise insulation pad back to the valve cover. Slide it under the two tabs at the back for the engine cover, and then press the rest into place.
Then, refit the lower cowl piece. Thread in its seven fasteners by hand before using a 10mm socket to tighten them.
After that, install the strut tower brace. Line it up and loosely thread in all of the bolts by hand to ensure you've lined it up properly. Then, use an E18 socket to drive in and torque the bolts to 56Nm, plus 90° of rotation.
Next, reinstall the two upper cowl pieces. Slide them into place and use a 10mm socket to turn the three locks and secure the pieces to the car. Then refit the plastic rivets on their outer edges.
Now you can refit the hood seal to the strut brace and run the cable through it. Then, refit the rubber strut covers and secure them with their plastic rivets.
Lastly, refit the engine cover. Reconnect the vacuum lines to the cover if your engine requires it.
BMW N20 & N26 Valve Cover Gasket Torque Specs:
- BMW High-Pressure Fuel Pump Bolts = 12Nm or 8.6 ft-lbs, of torque
- BMW Fuel Injector Line Fittings = 13Nm or 9.5 ft-lbs, of torque
- BMW Strut Brace Bolts = 56Nm or 41.3 ft-lbs, of torque
- BMW Valve Cover Bolts = 9Nm or 6.6 ft-lbs, of torque
- BMW Camshaft Adjuster Fasteners = 5.5Nm or 4 ft-lbs, of torque
That should take care of any leaks coming from the valve cover gasket. If you're interested in more DIYs for your BMW, you can visit bmw.fcpeuro.com and subscribe to our YouTube channel.


