- 07/15/2021
- 8 Min Read
- By: Christian Schaefer
How To Replace A BMW F30 Radiator (BMW N20 & N26 Engine)

BMWs and overheating aren’t an uncommon pair. Coolant leaks often get overlooked, and cooling systems occasionally get blocked from the inside. No matter what caused it, overheating is detrimental to your engine’s health. Finding a leaking radiator, while potentially scary, isn’t a major issue. The radiator is relatively affordable, and replacing it, while fiddly, can be accomplished in your driveway.
A couple of hours should be all you need to swap out that leaky radiator. A coolant flush is also part of BMW’s maintenance plan and will be performed during the replacement process. Special tools aren’t required to replace the radiator, making it a no-brainer DIY. Follow the steps below to ensure you replace your radiator right the first time.
BMW models and years applicable:
|
|
|
|
|
|
|
|
Symptoms of a failing radiator:
- Vehicle overheating under usual driving conditions
- Coolant leaking from the front of the vehicle
There isn’t much to look out for with a failing radiator. Once radiators start to go, they make themselves apparent. Leaking coolant will often be your earliest sign that something needs to be replaced. Keeping the coolant inside the cooling system is critical to keep the engine at its standard operating temperature.
Overheating an engine can be disastrous for the health of an engine. Extended periods at too hot a temperature will damage the head gasket and warp the cylinder head. Fixing both of those issues requires a significant engine teardown, costing you lots of time and money. The best way to avoid that is to get your vehicle checked immediately upon discovering a coolant leak.
How much will it cost to replace my BMW F30 radiator?
The cost of the job is entirely dependent on which radiator you need. N20 equipped cars can use the Nissens radiator linked below. It’s built to OE specs and will cost you a little over $100. N26 equipped vehicles use the same radiator with a sensor mounted in the lower portion of the radiator. Because of this sensor, the radiator will run you around $340.
Other than the radiator, you’ll need some coolant. Around $25 gets you a gallon of BMW genuine coolant. It isn’t pre-mixed, so you’ll have to cut it 50/50 with water. That one gallon should be all you need to refill your cooling system.
How long will it take to replace my BMW F30 radiator?
Replacing the radiator on your N20-powered BMW F30 isn’t too crazy of a job. You’ll have to remove only a few things to get the radiator out; however, they can be quite fiddly to remove. With some patience and the right tools, you can replace your radiator in a few hours.
Parts required to replace my BMW F30 radiator:
- Nissens Radiator (N20 Only)
- BMW Radiator (N26 SULEV Models)
- BMW Coolant
Tools required to replace my BMW F30 radiator:
- 8mm Socket
- T25 Torx Bit Socket
- 6mm Nut Driver or Socket
- 7mm Nut Driver or Socket
- Ratchet
- Flathead Screwdriver
- Hose Pick
- Standard Pick
- Drain Pan
Steps required to replace my BMW F30 radiator:
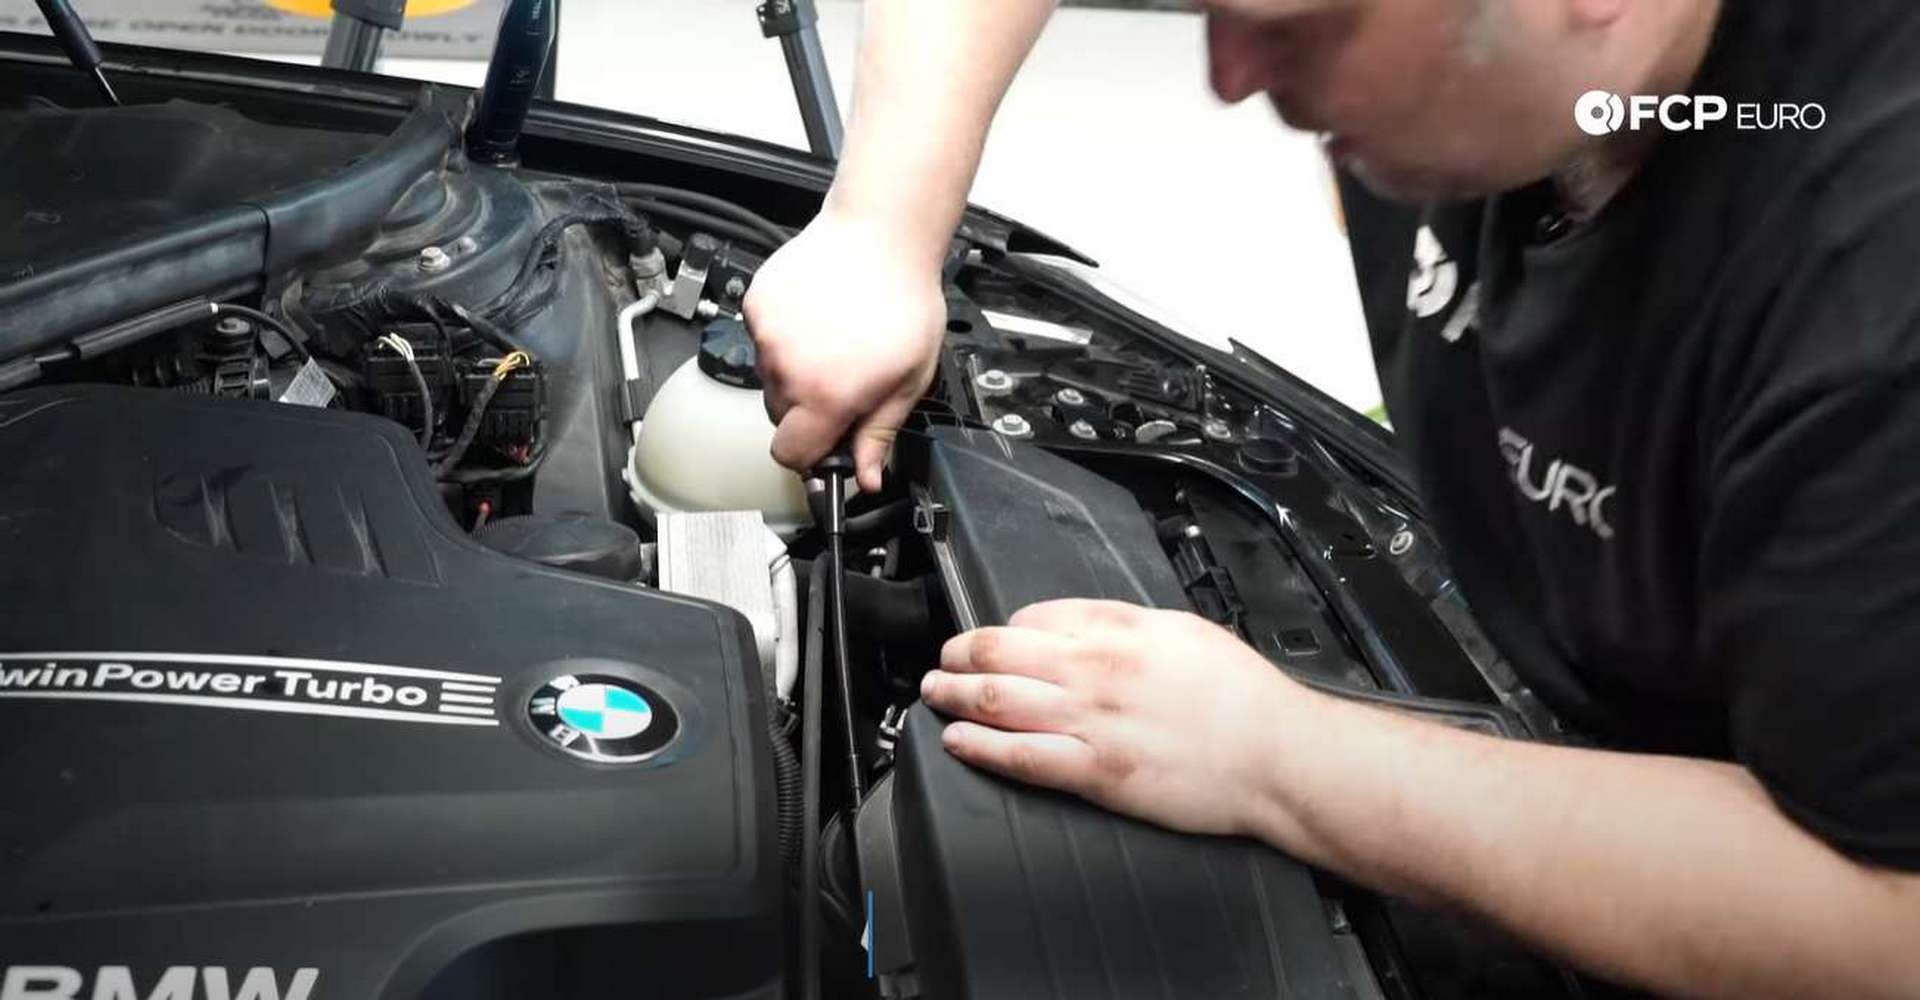
Step 1: Remove the intake
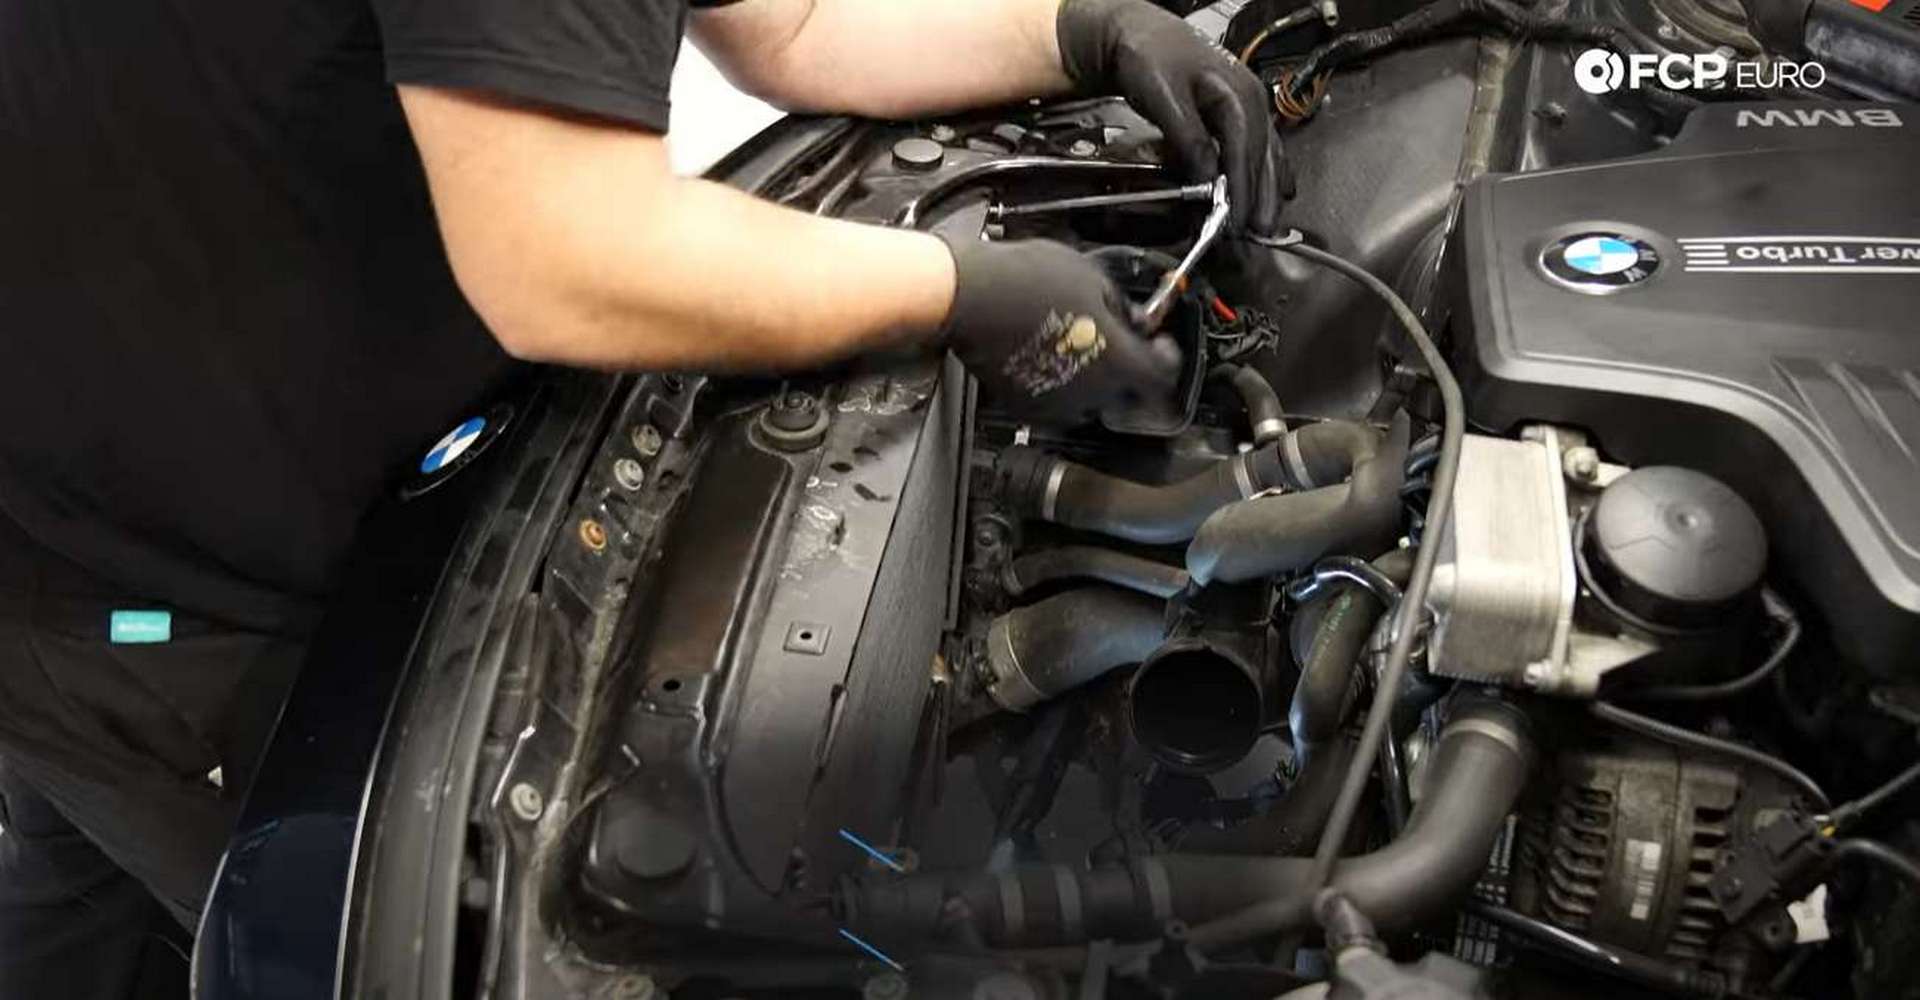
Open the hood and examine the intake airbox. Locate the hood cable secured to the rear of the airbox cover and remove it from its clips.
Next, unplug the mass airflow sensor’s electrical connection. Then, use a 6mm nut driver to loosen the hose clamp that secures the airbox to the intake tube.
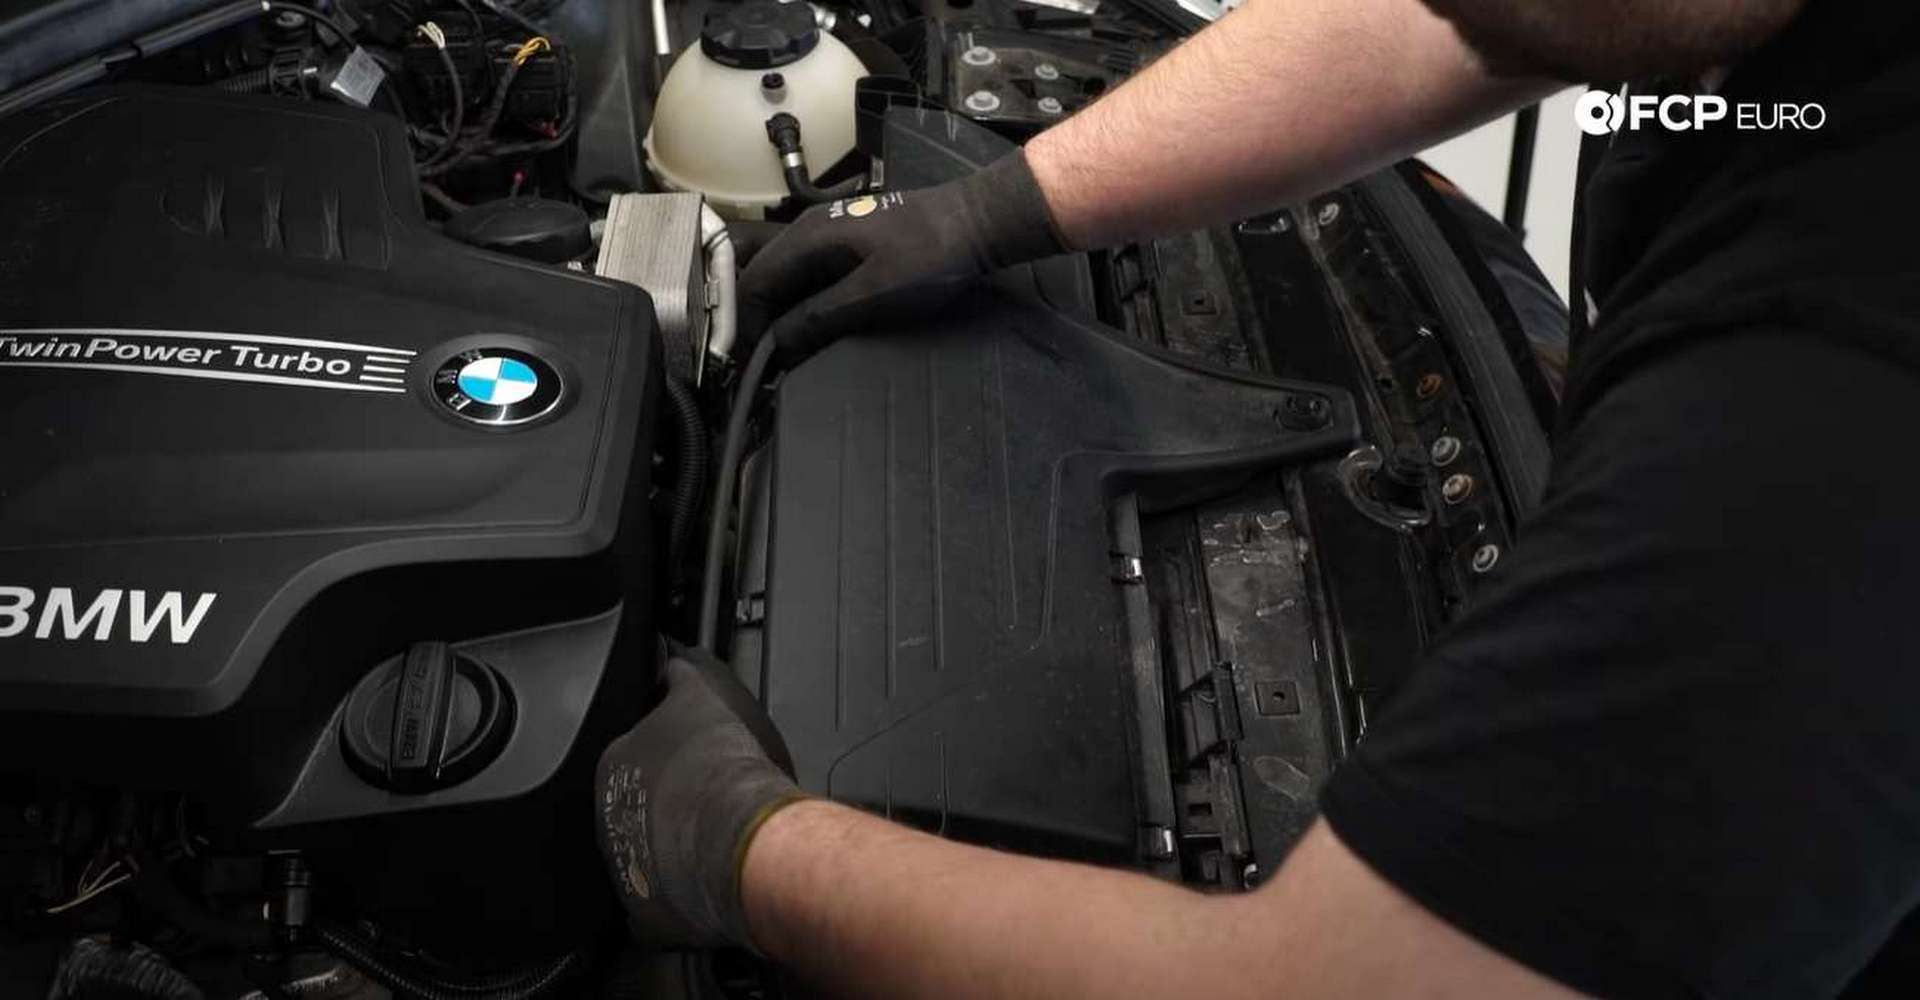
After that, pull up on the airbox to remove it from the engine bay. It mounts to the car by three rubber grommets. Pop it out of the three grommets, and you can lift it out.
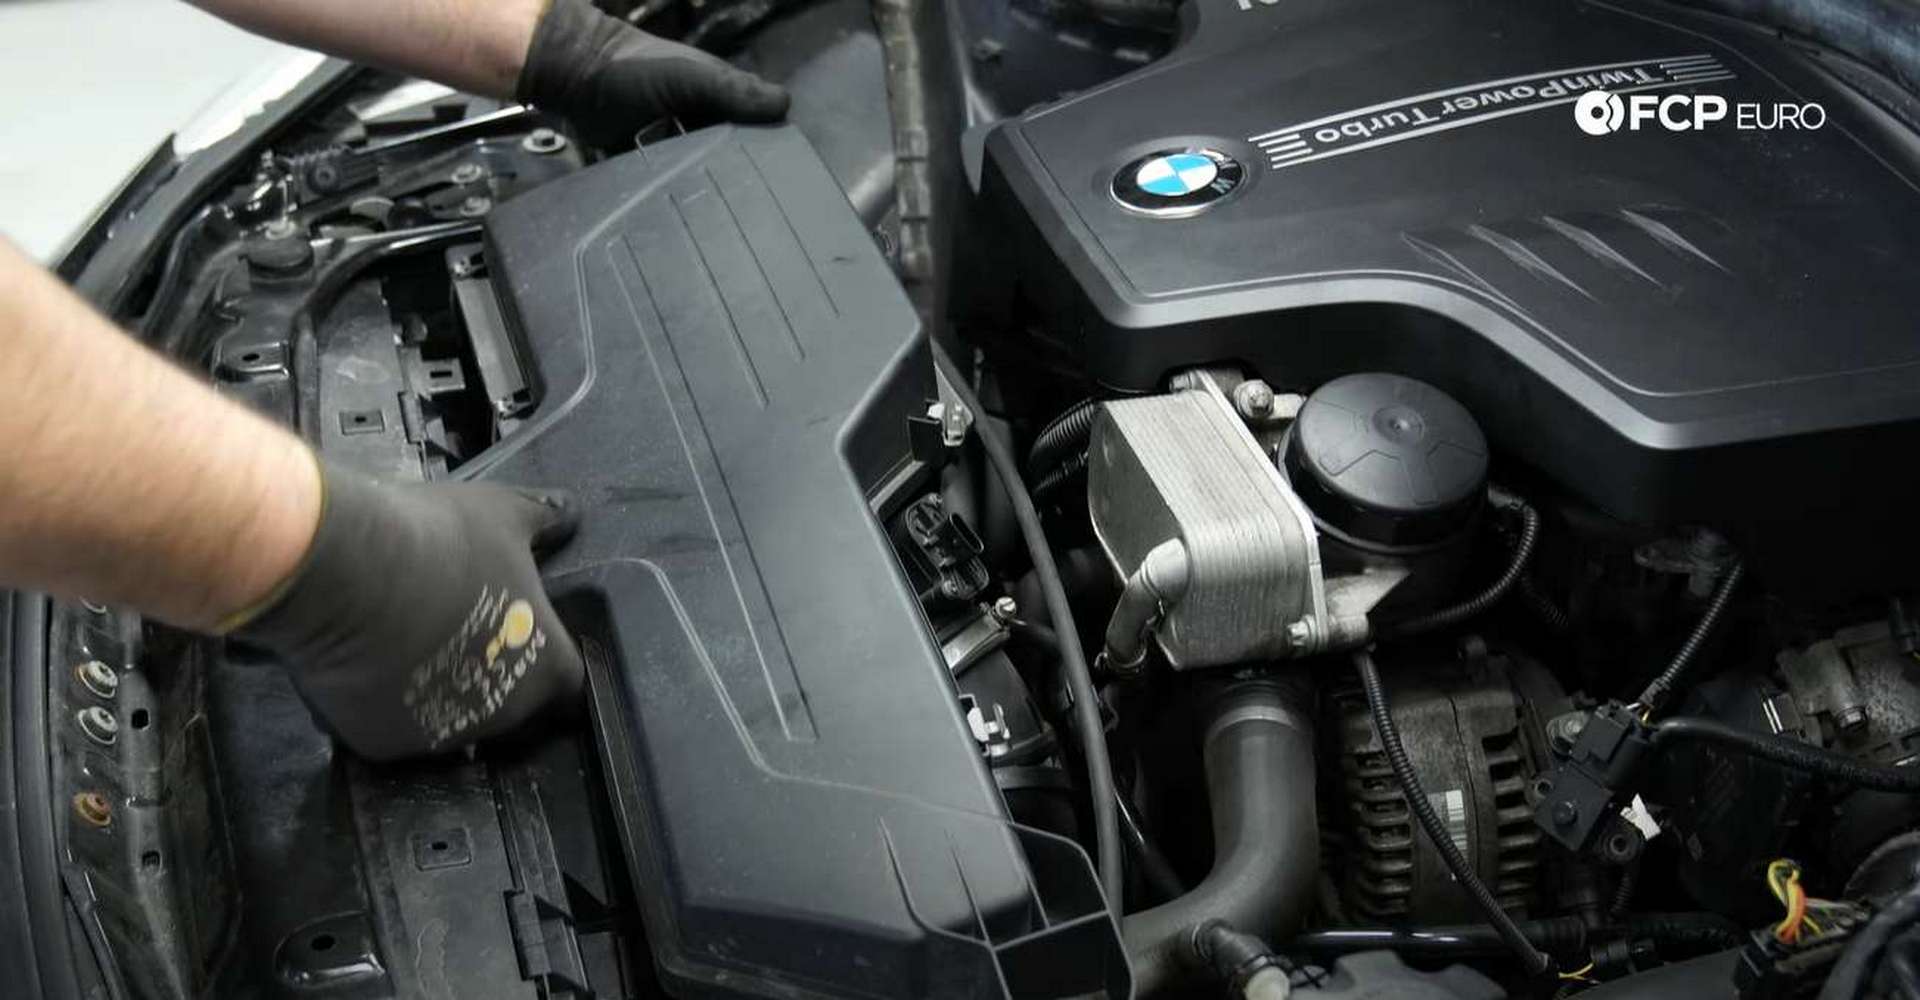
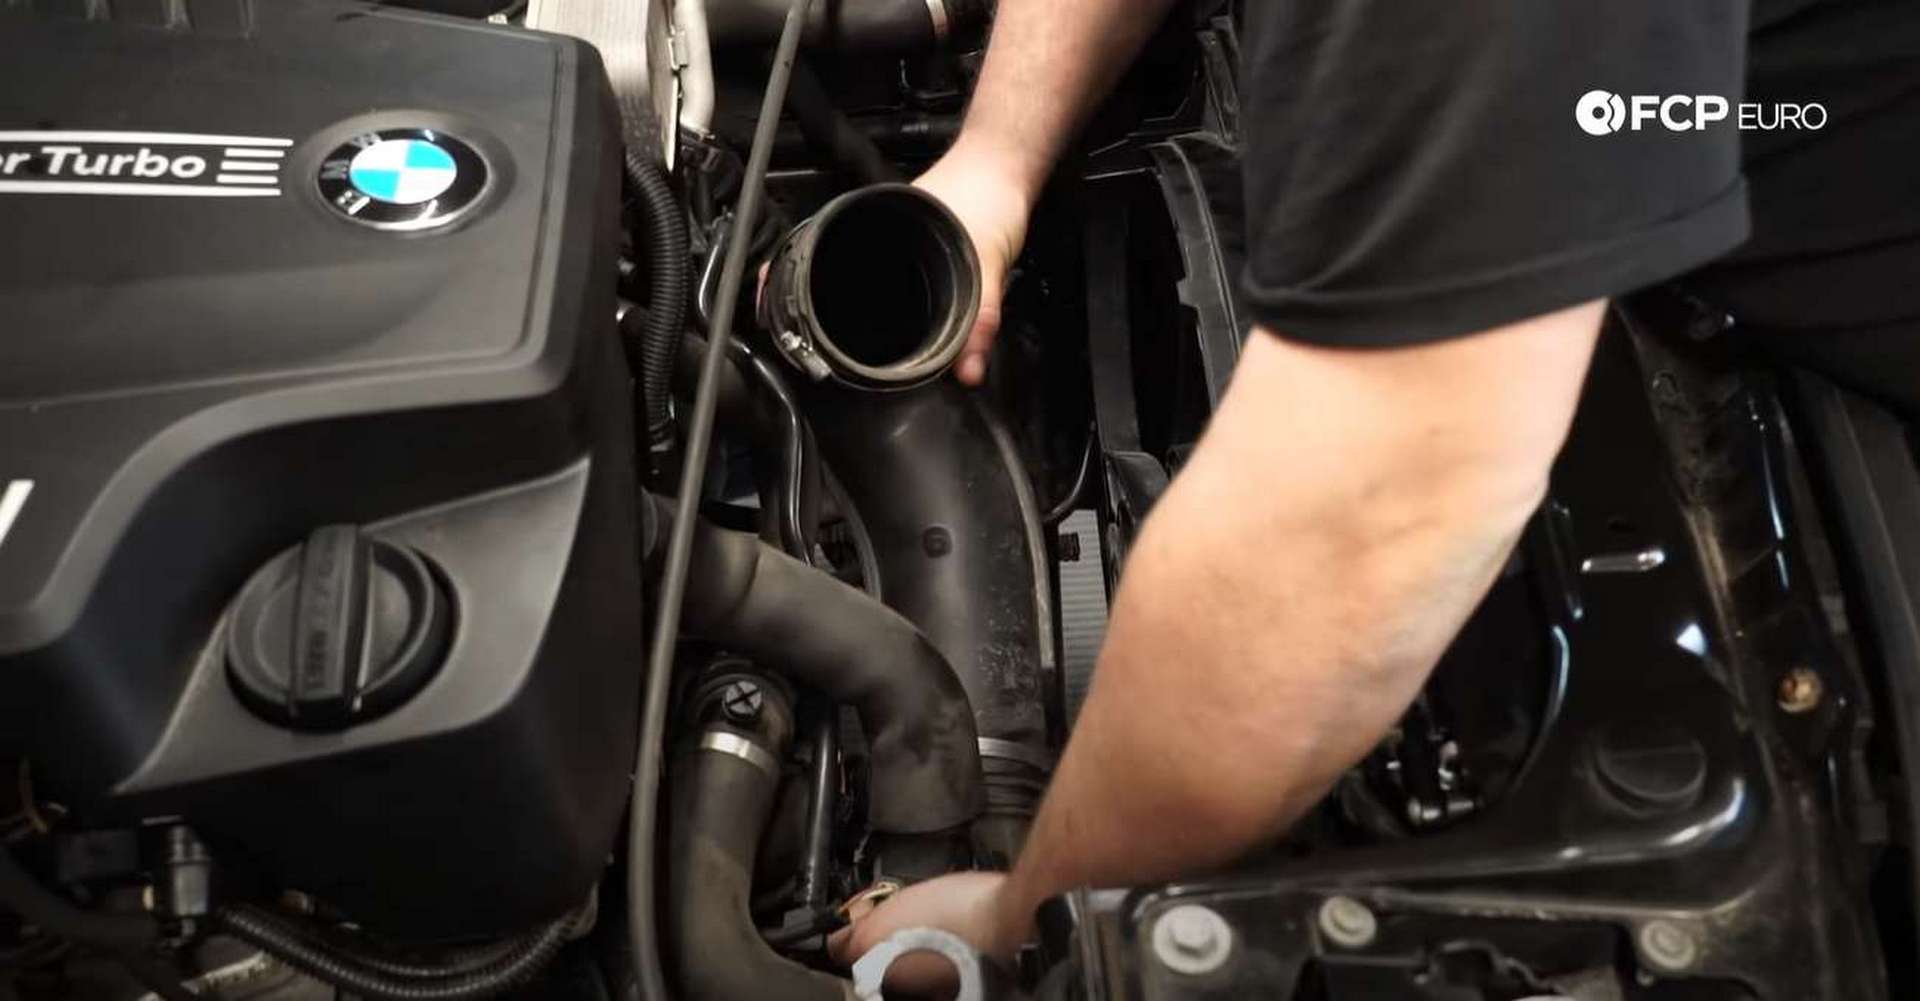
At this point, you will have good access to the filter housing; however, removing the lower intake tube will give you more space. To do so, use a 7mm socket or nut driver to loosen the tube’s hose clamp. Pull the tube out when the clamp is loose enough.
Next, remove the engine cover. If you’re BMW is pre-2013, disconnect the vacuum lines on the passenger’s side of the engine cover before pulling it off. Then, pop the trunk, remove the panel on the passenger’s side and disconnect the negative cable from the battery.
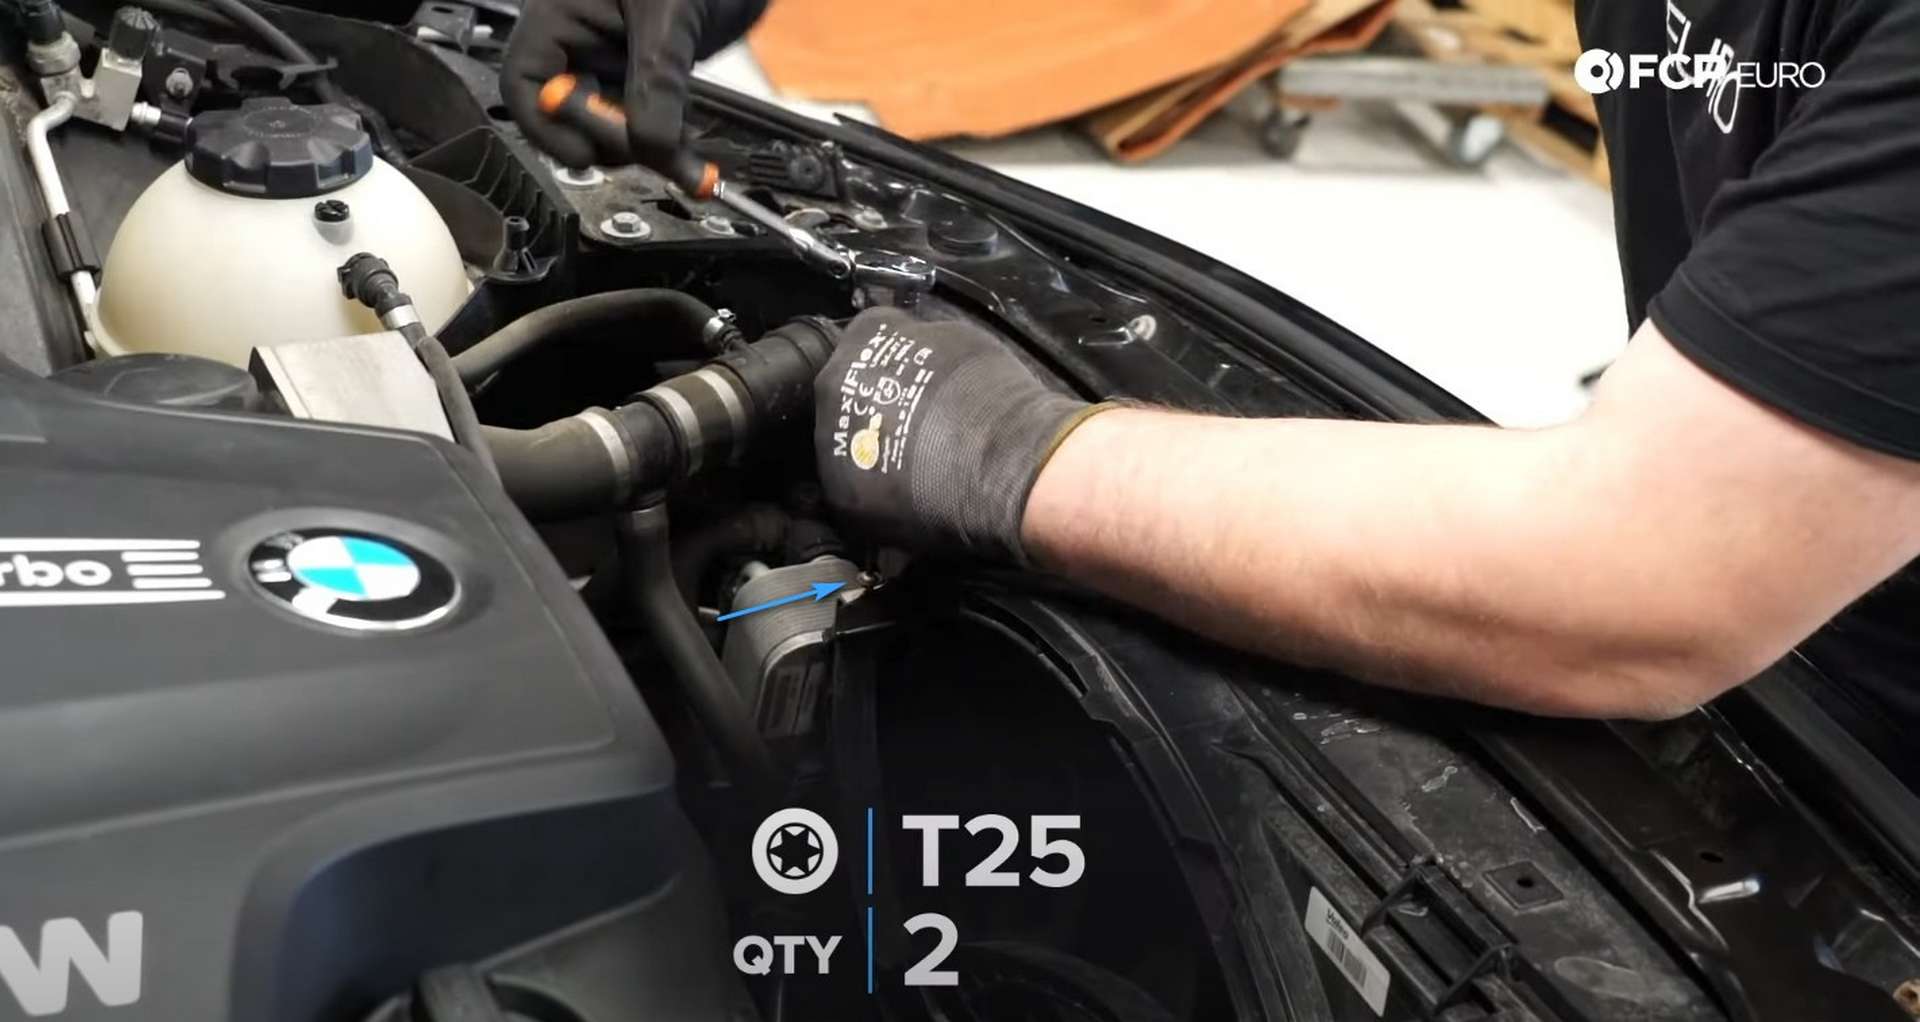
Step 2: Remove the fan
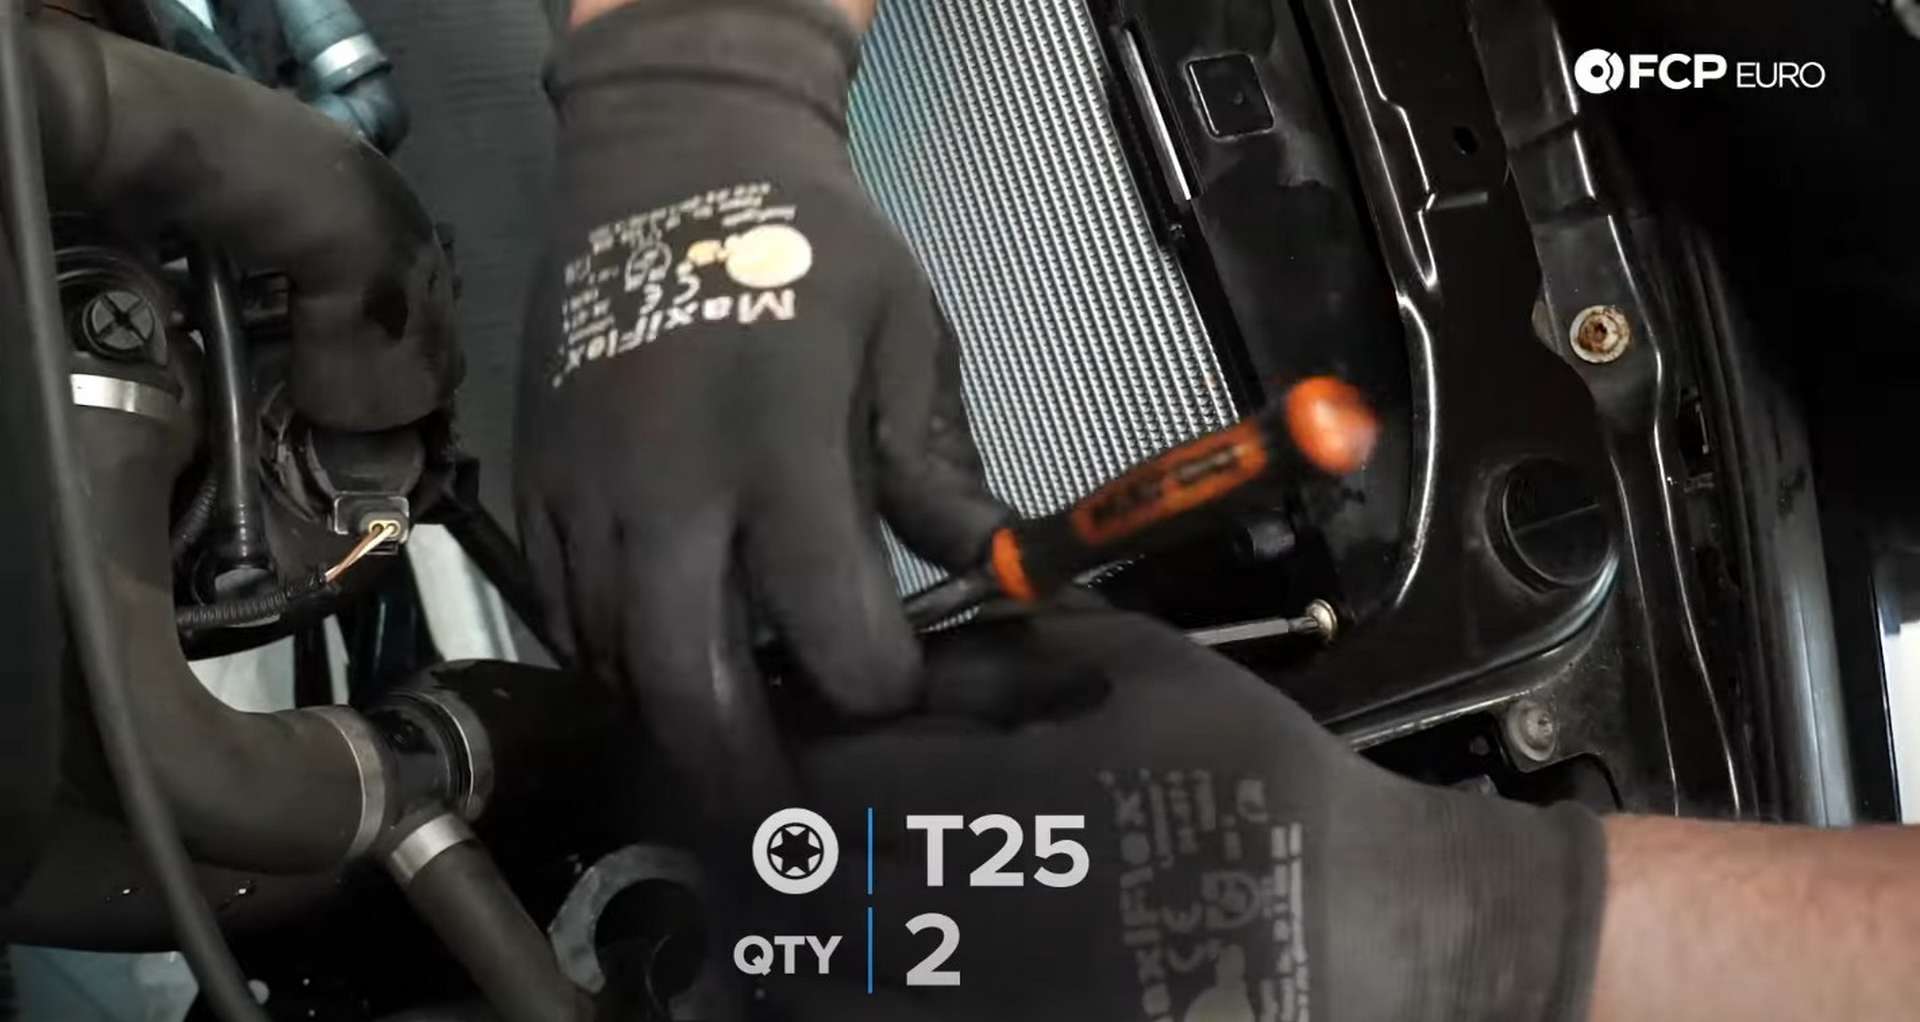
Start by removing the two T25 fasteners at the top of the radiator. One fastener secures the transmission oil cooler to the fan on the driver’s side of the fan. The other attaches the fan to the radiator, on the passenger’s side.
Below the fastener on the passenger’s side is the fan’s electrical connection. Use a flathead screwdriver to remove the wiring’s retaining clip from the fan shroud. Then depress the two tabs on the connection and pull it apart. After that, jack up the front of the car.
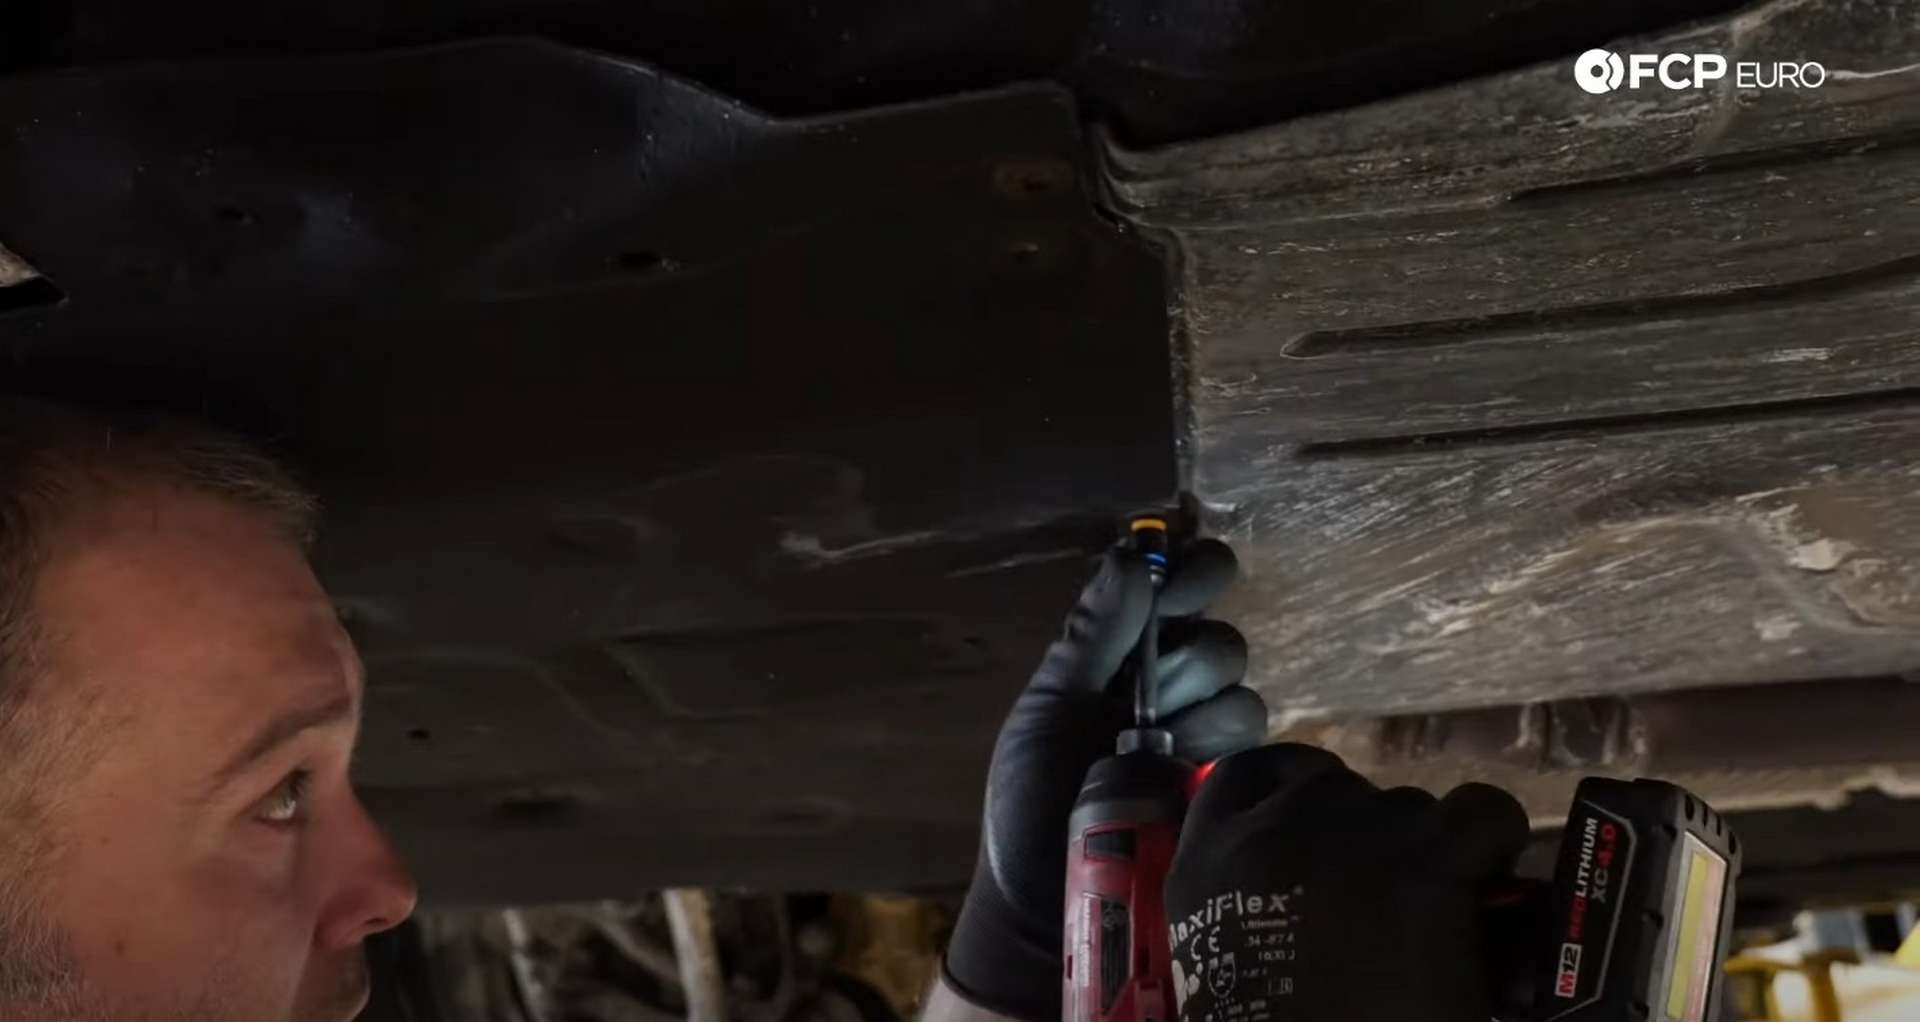
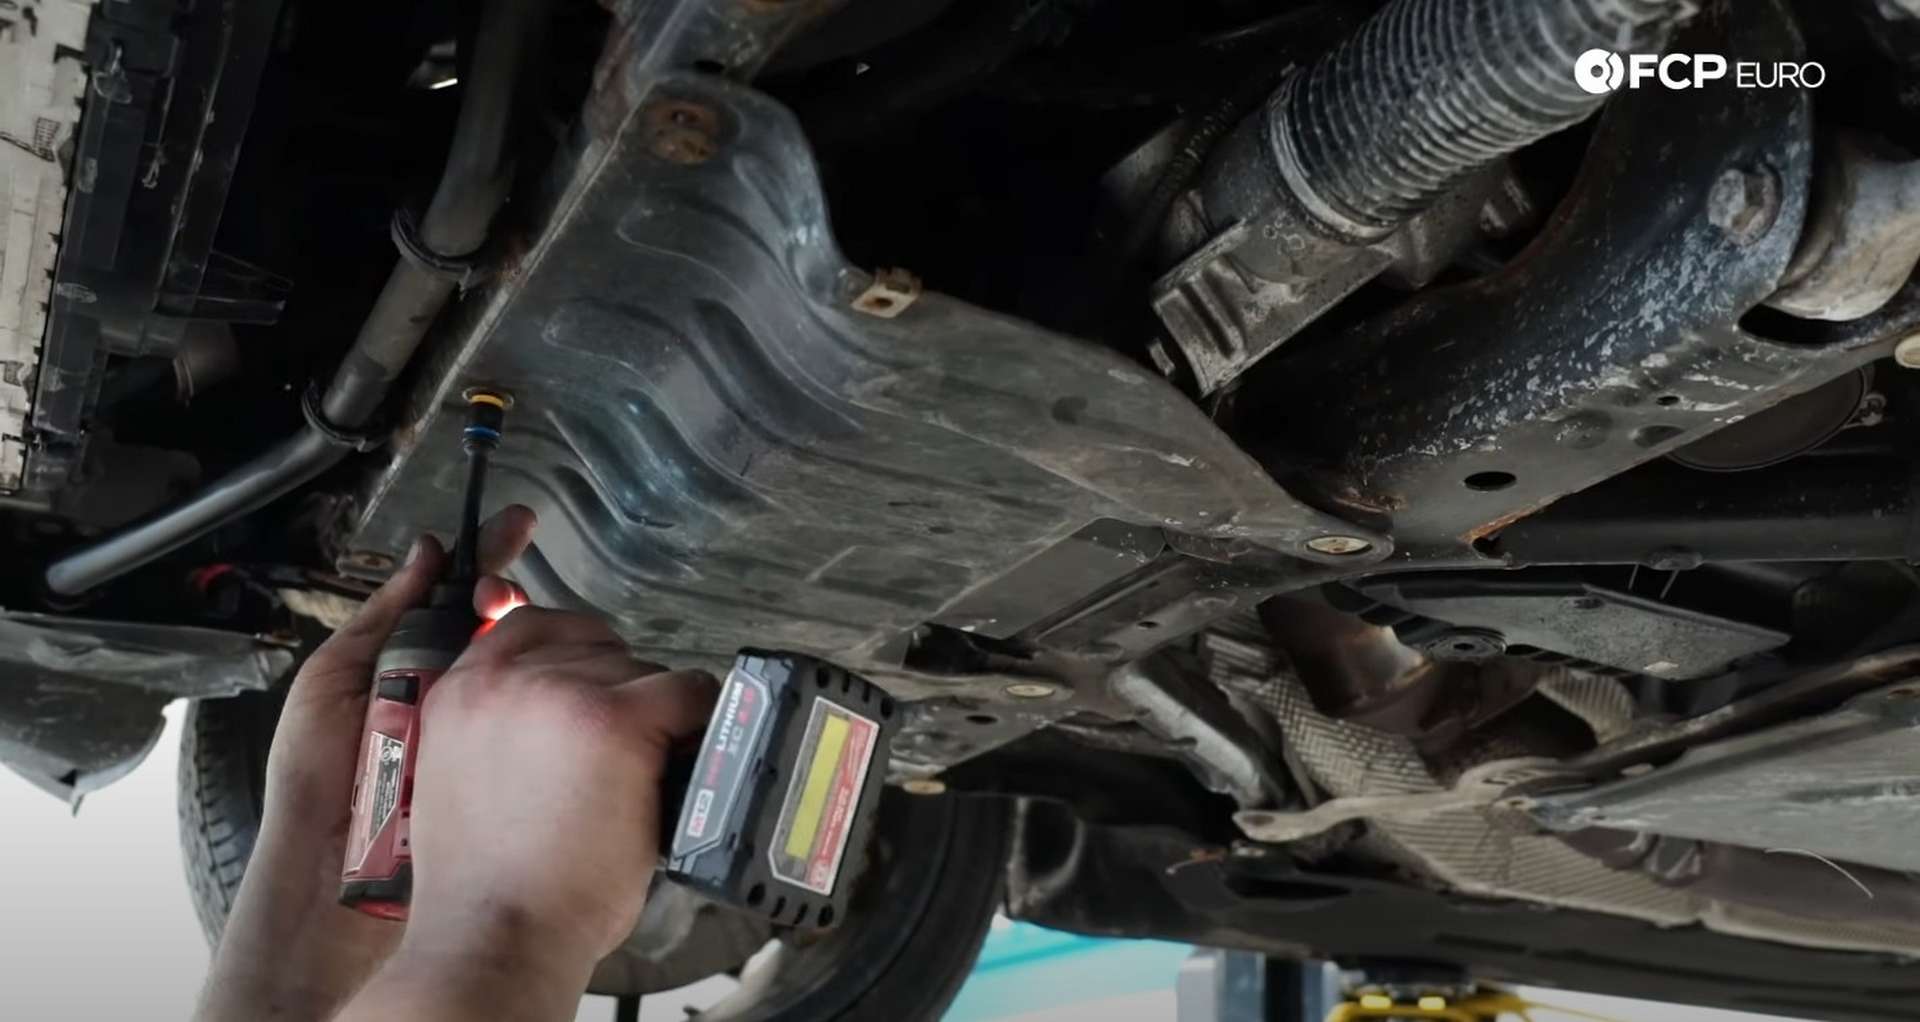
You need to remove the splash shields to access the bottom of the fan and the water pump. Use an 8mm socket to remove all twenty-three fasteners securing the shield to the car. Be cautious as you pull the shield down, and dirt and debris will likely fall out of it.
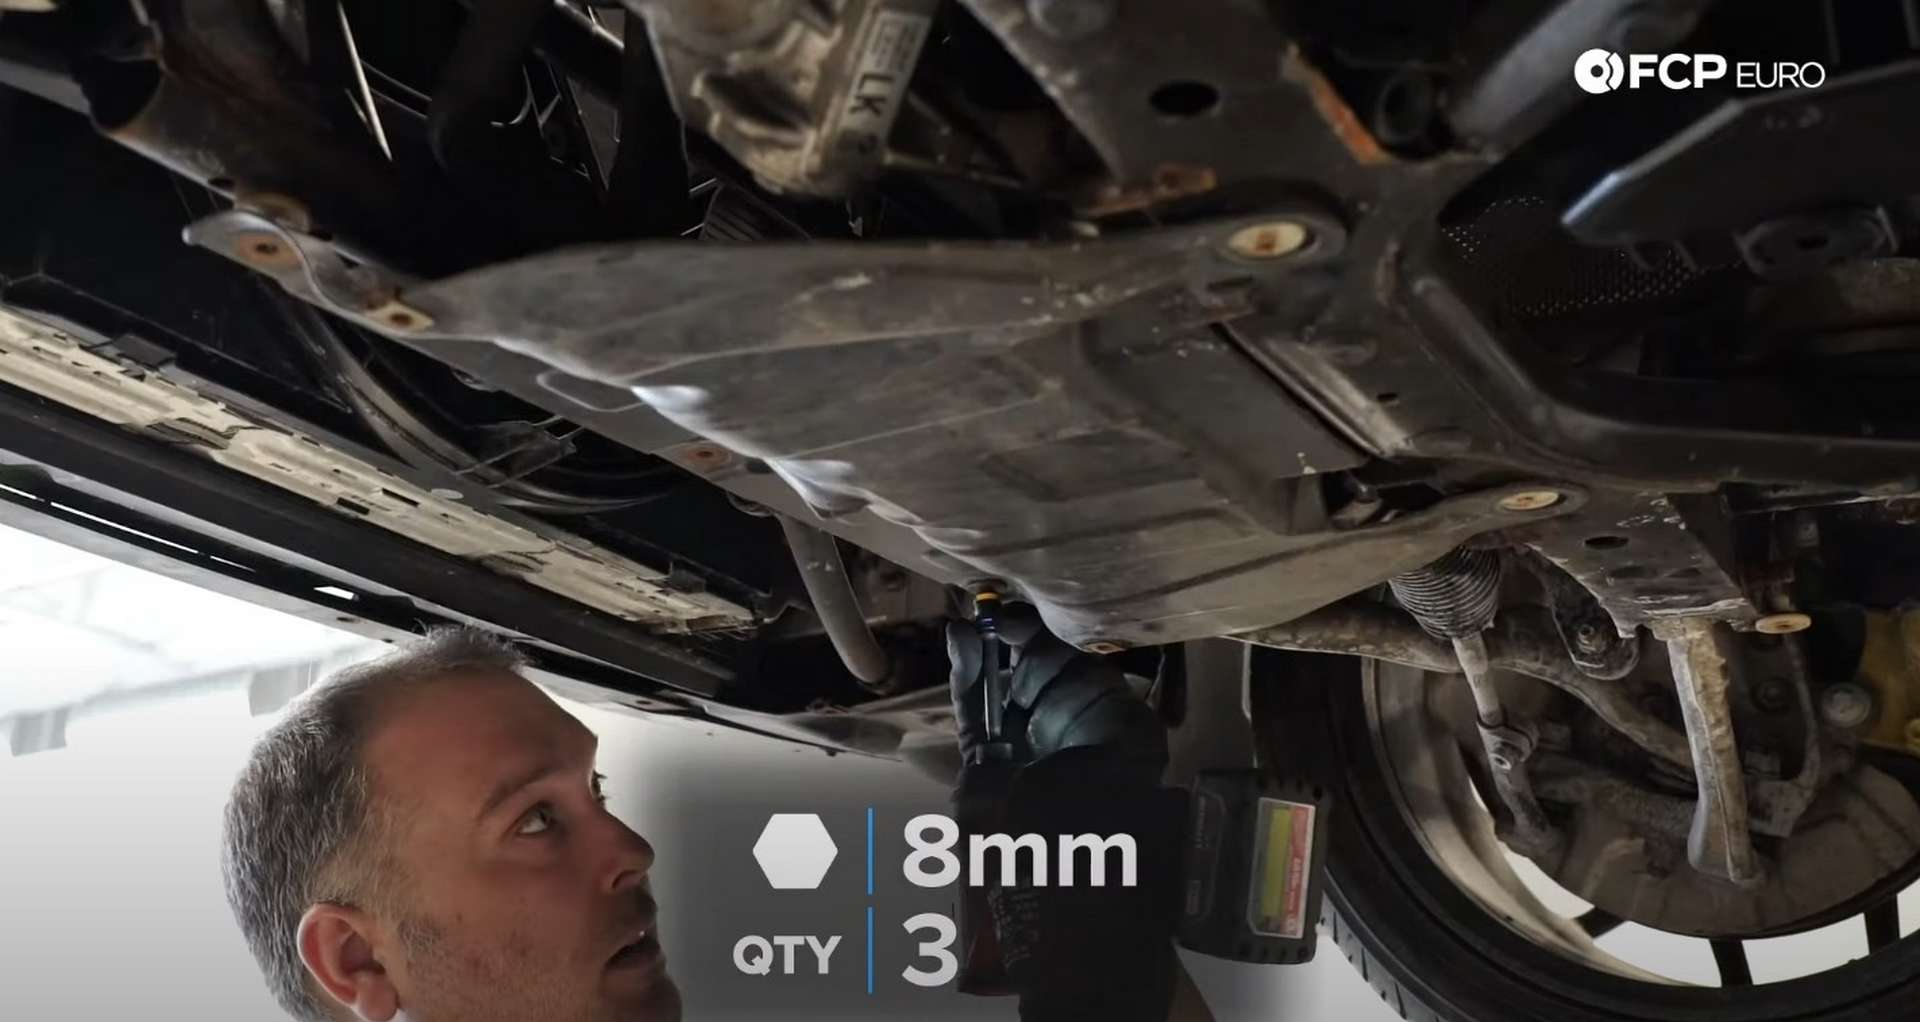
Then, use the same socket to remove the three bolts used to secure the steering rack shield to the bottom of the car. Pull the shield forward to remove it after you’ve removed the bolts.
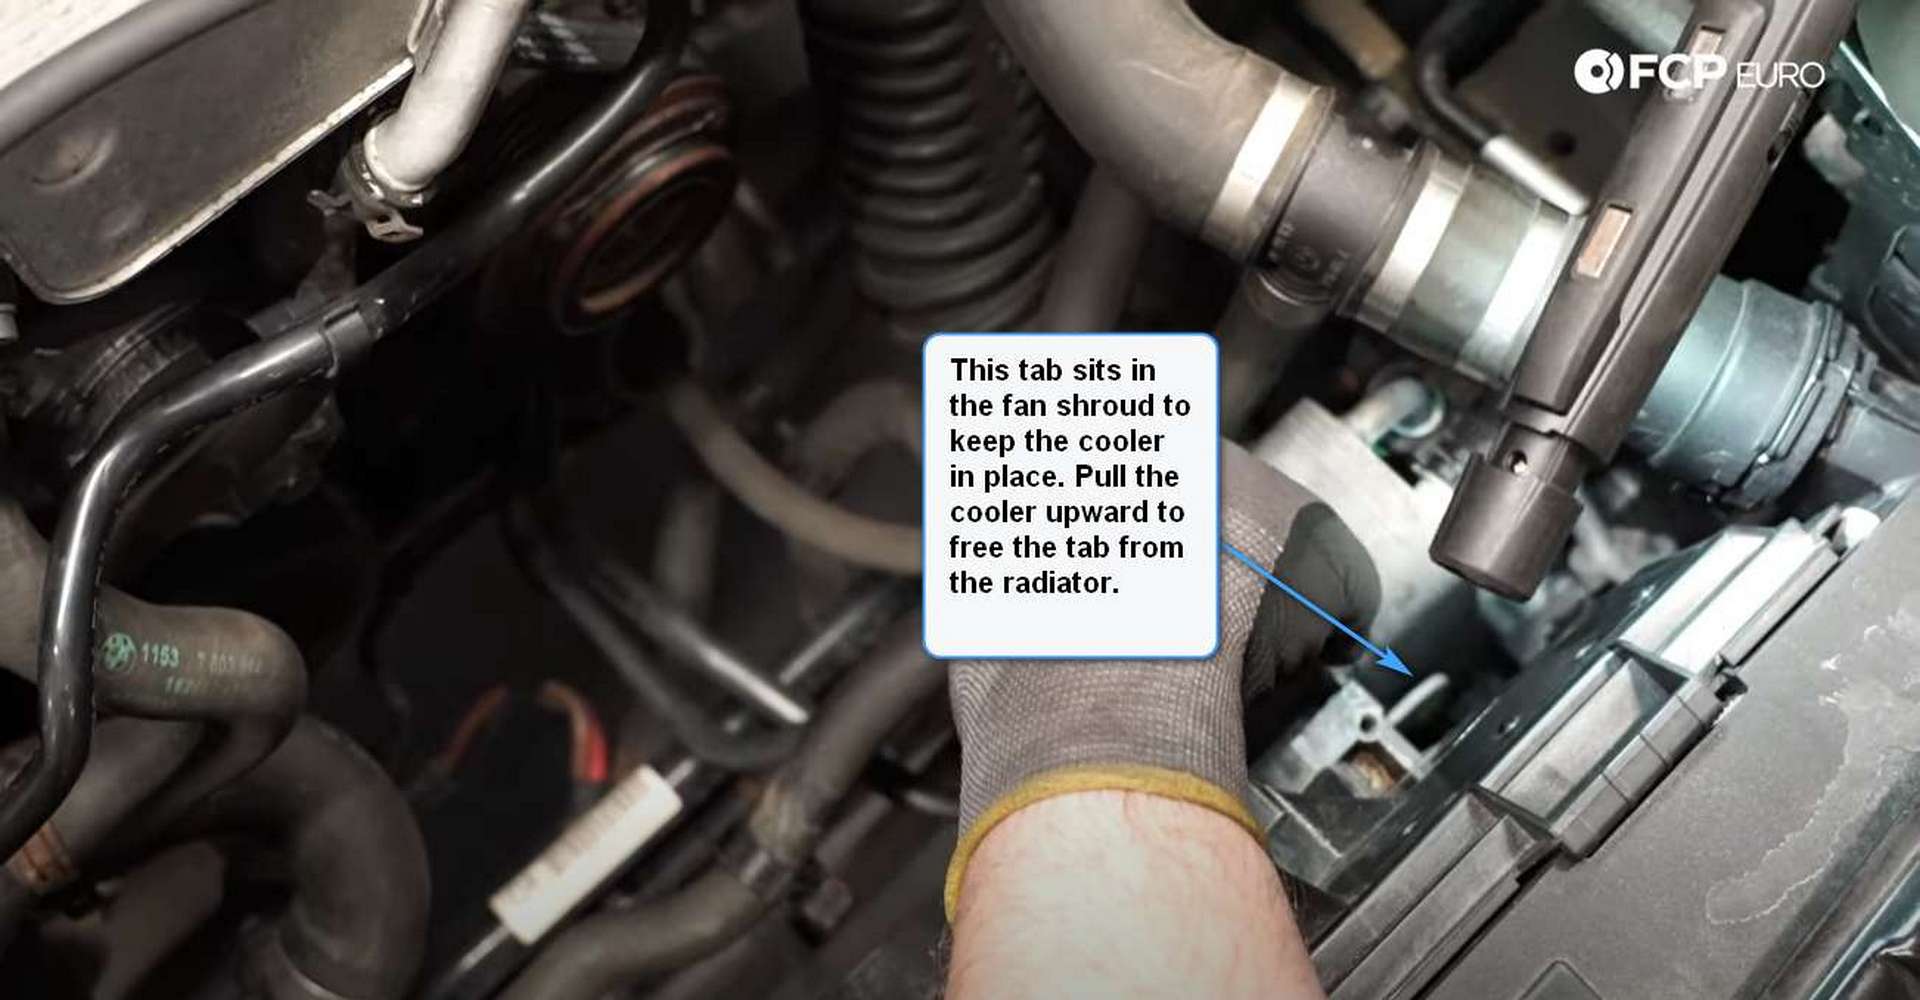
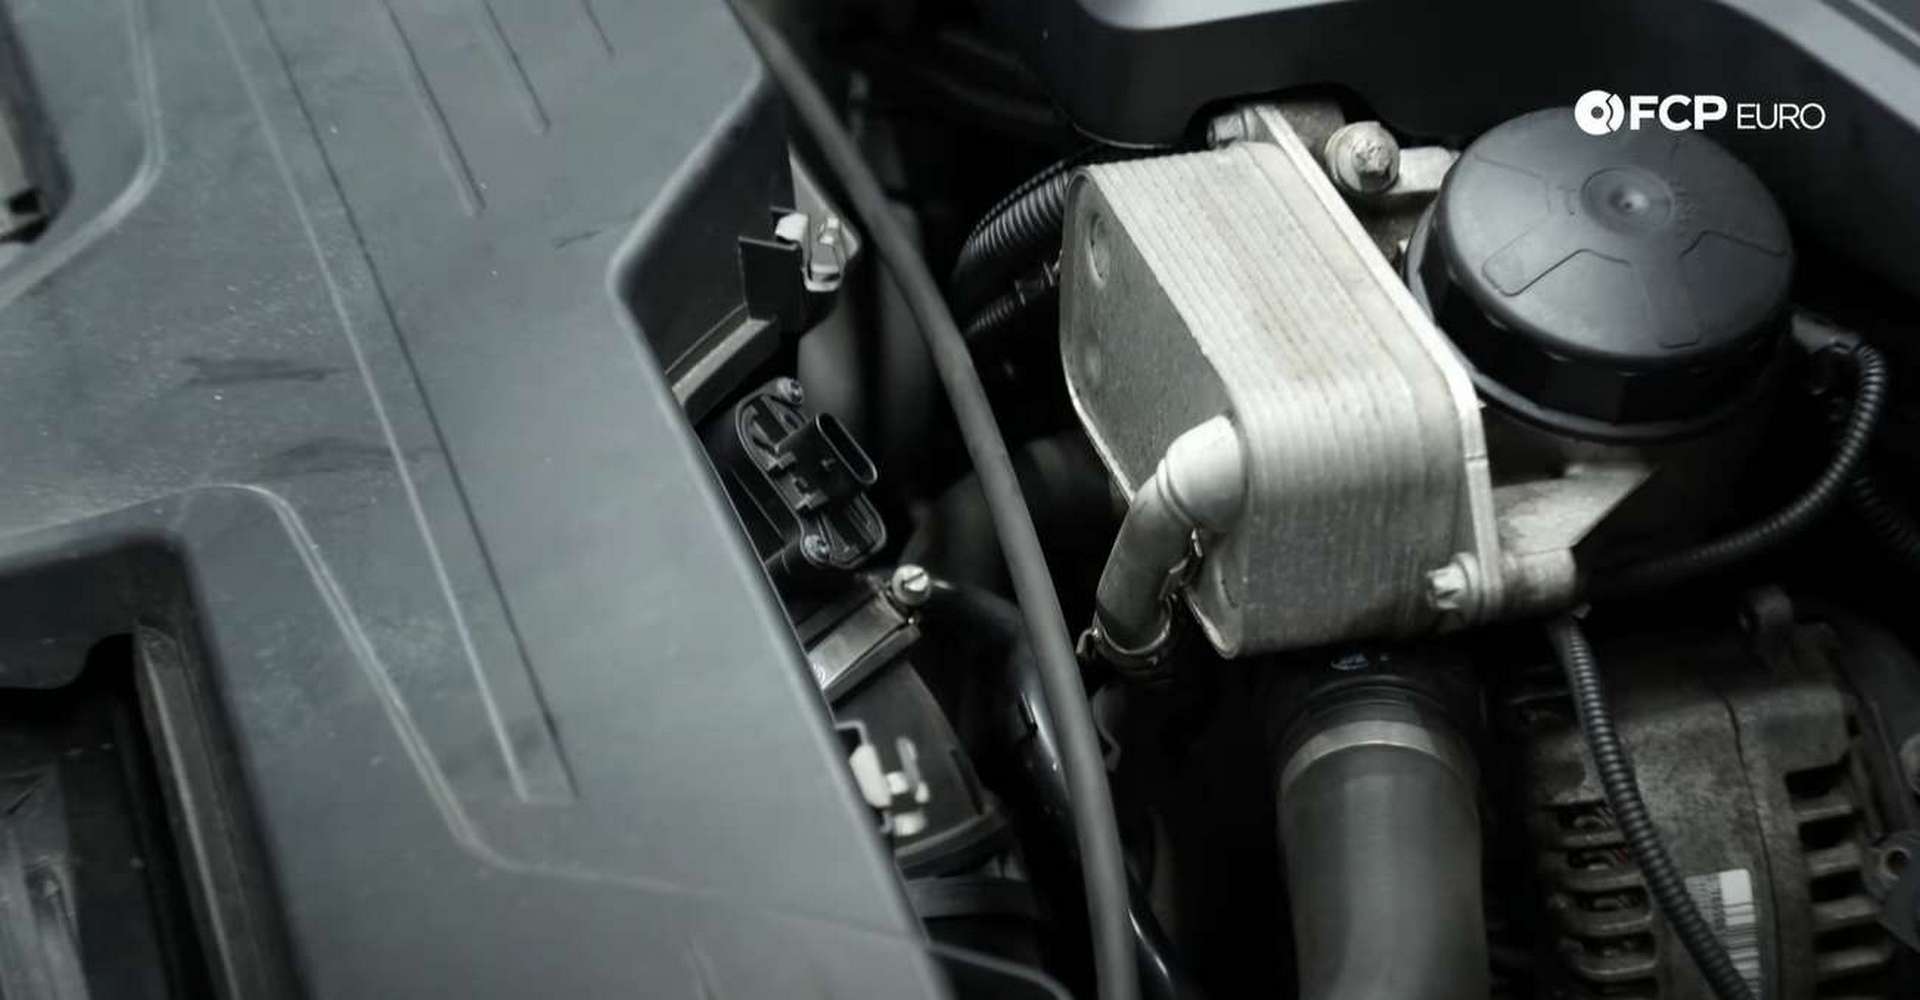
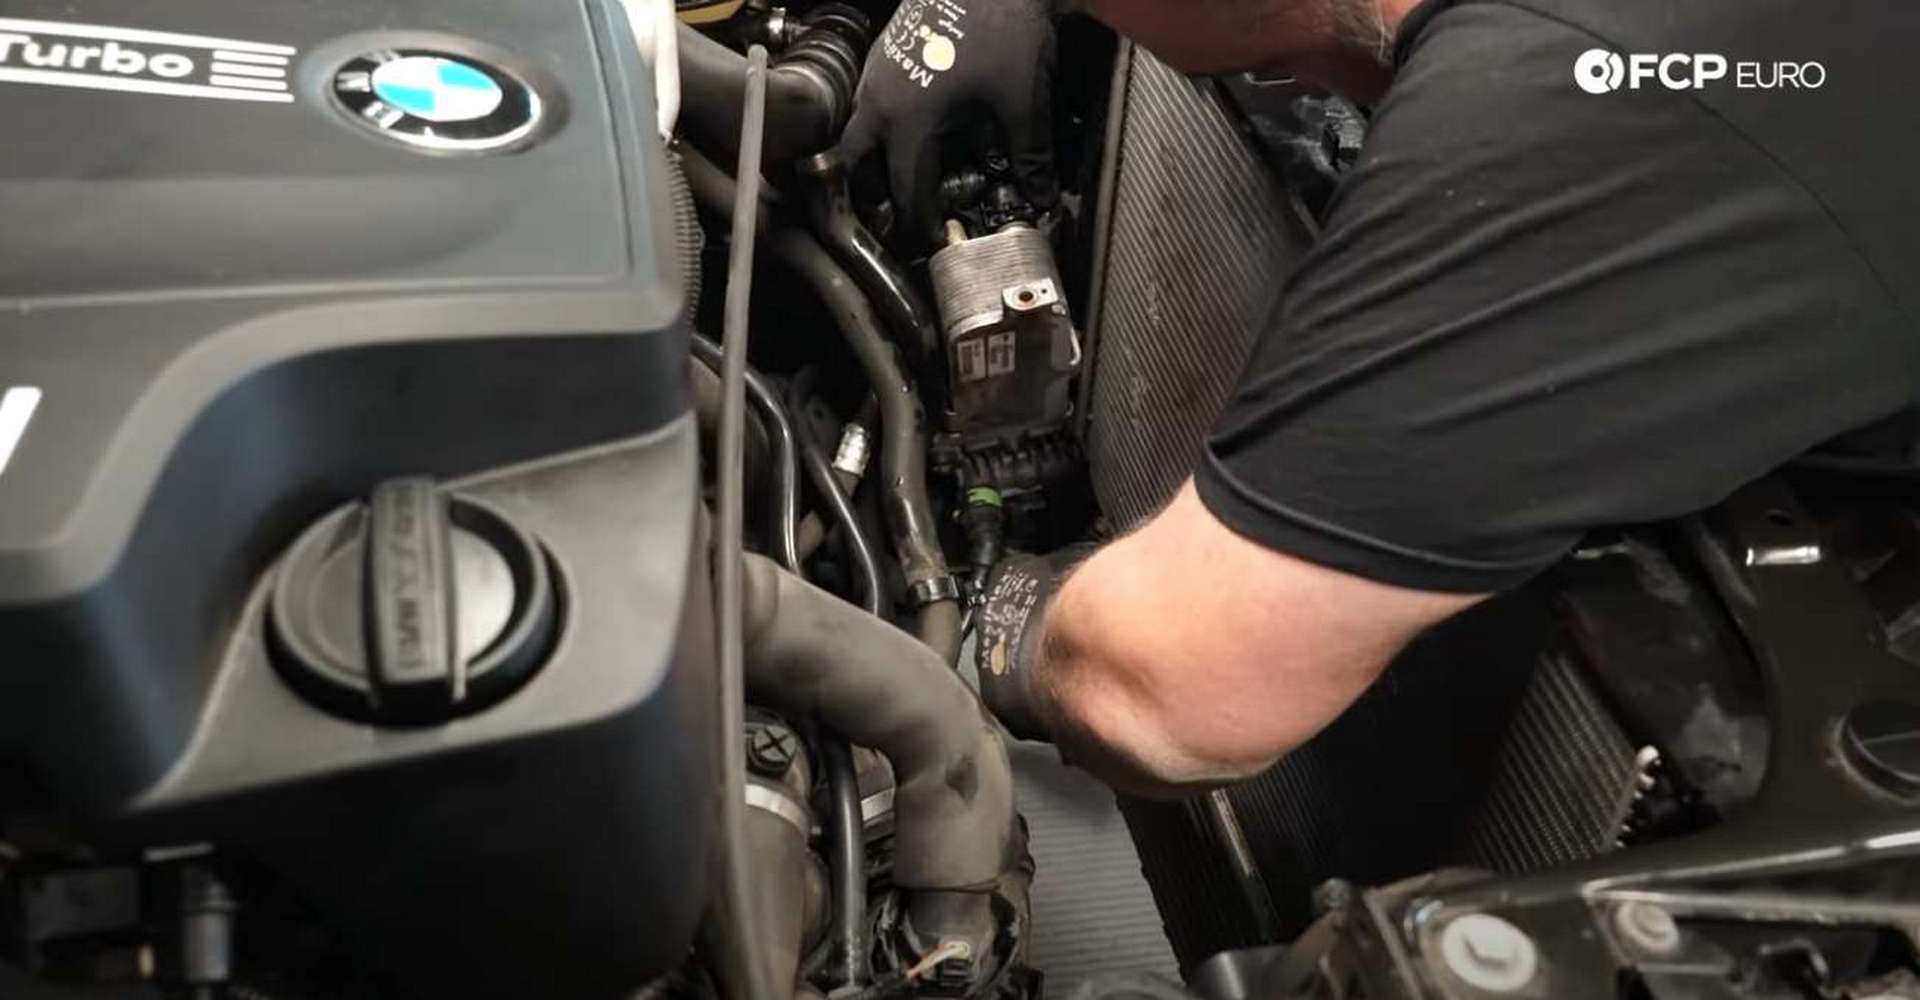
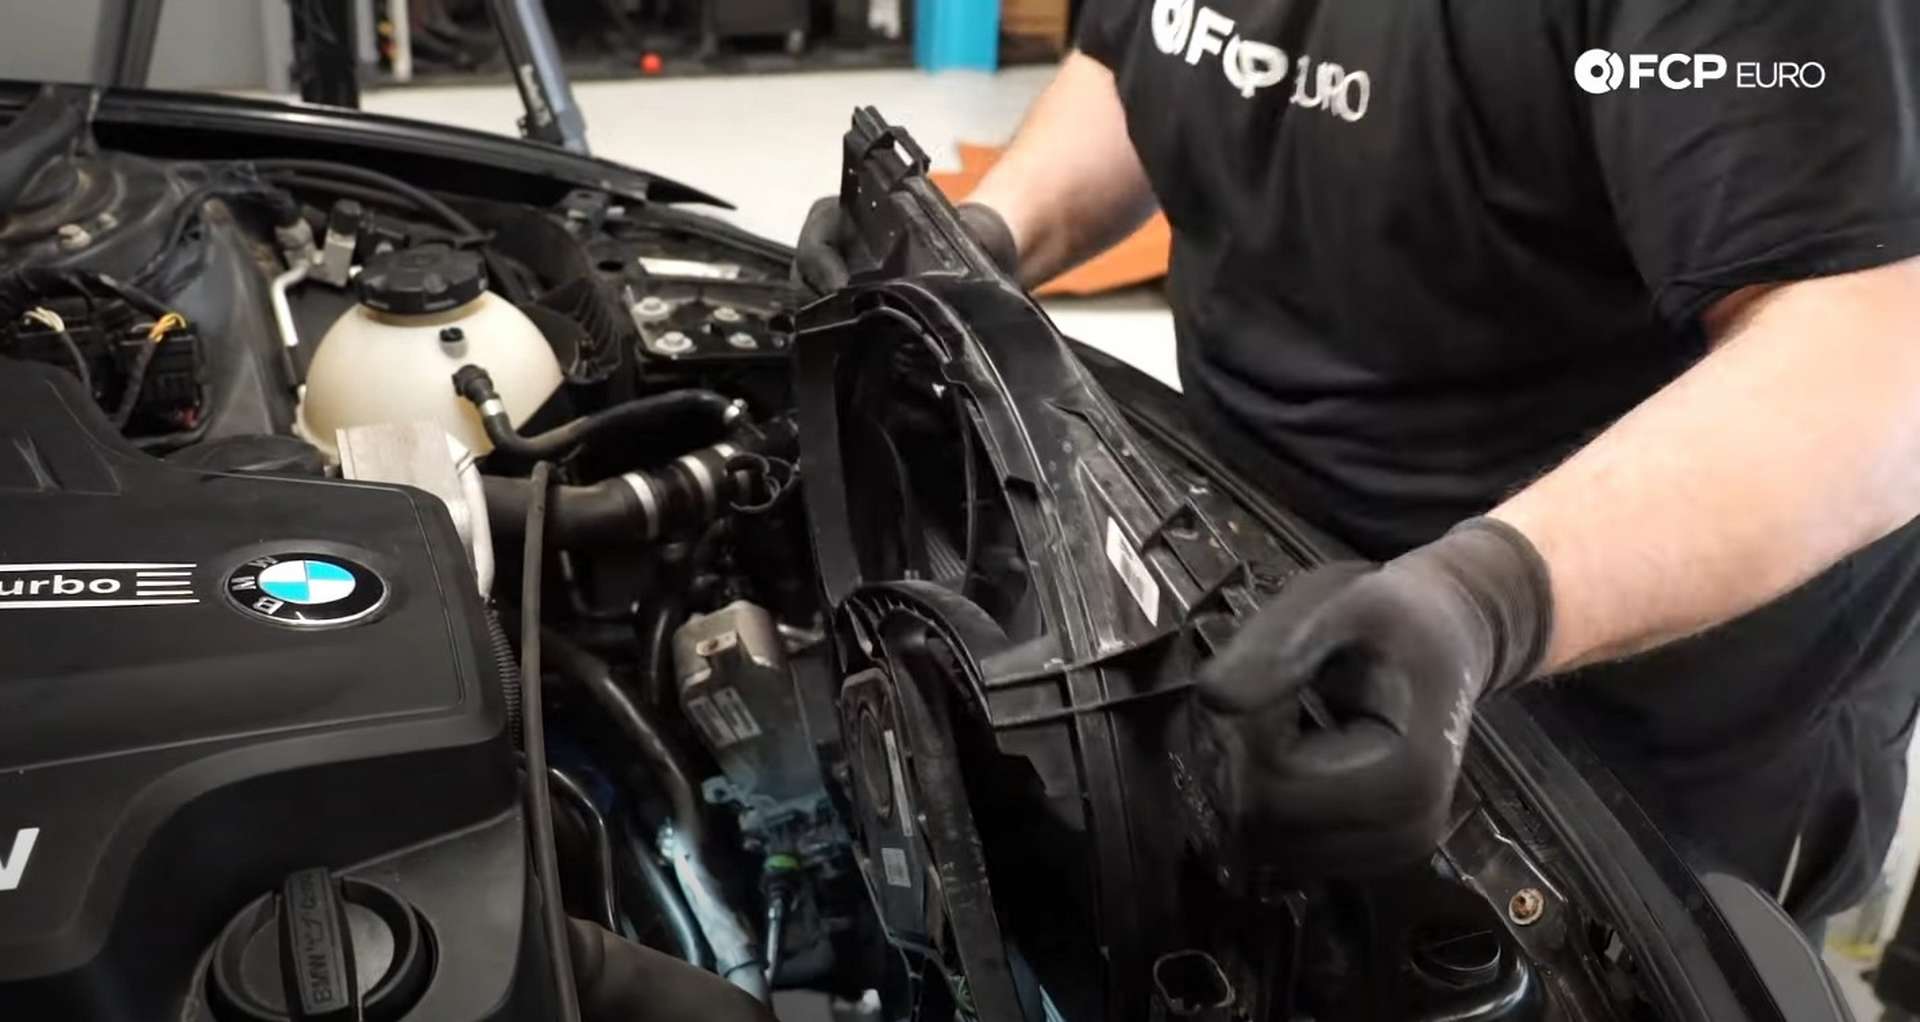
Next, head back into the engine bay. The transmission oil cooler is now only secured in the fan shroud by gravity. Pull up on the cooler until its locating tab clears the shroud, then move it aside. Part of the upper radiator hose comes down behind the oil cooler. Remove it from its retaining clip if it’s in your way.
Once the cooler is free of the shroud, pull the fan assembly up and out of the engine bay. It’s big and cumbersome, so go slowly to prevent yourself from damaging any wires or hoses in the surrounding area.
Step 3: Drain the coolant
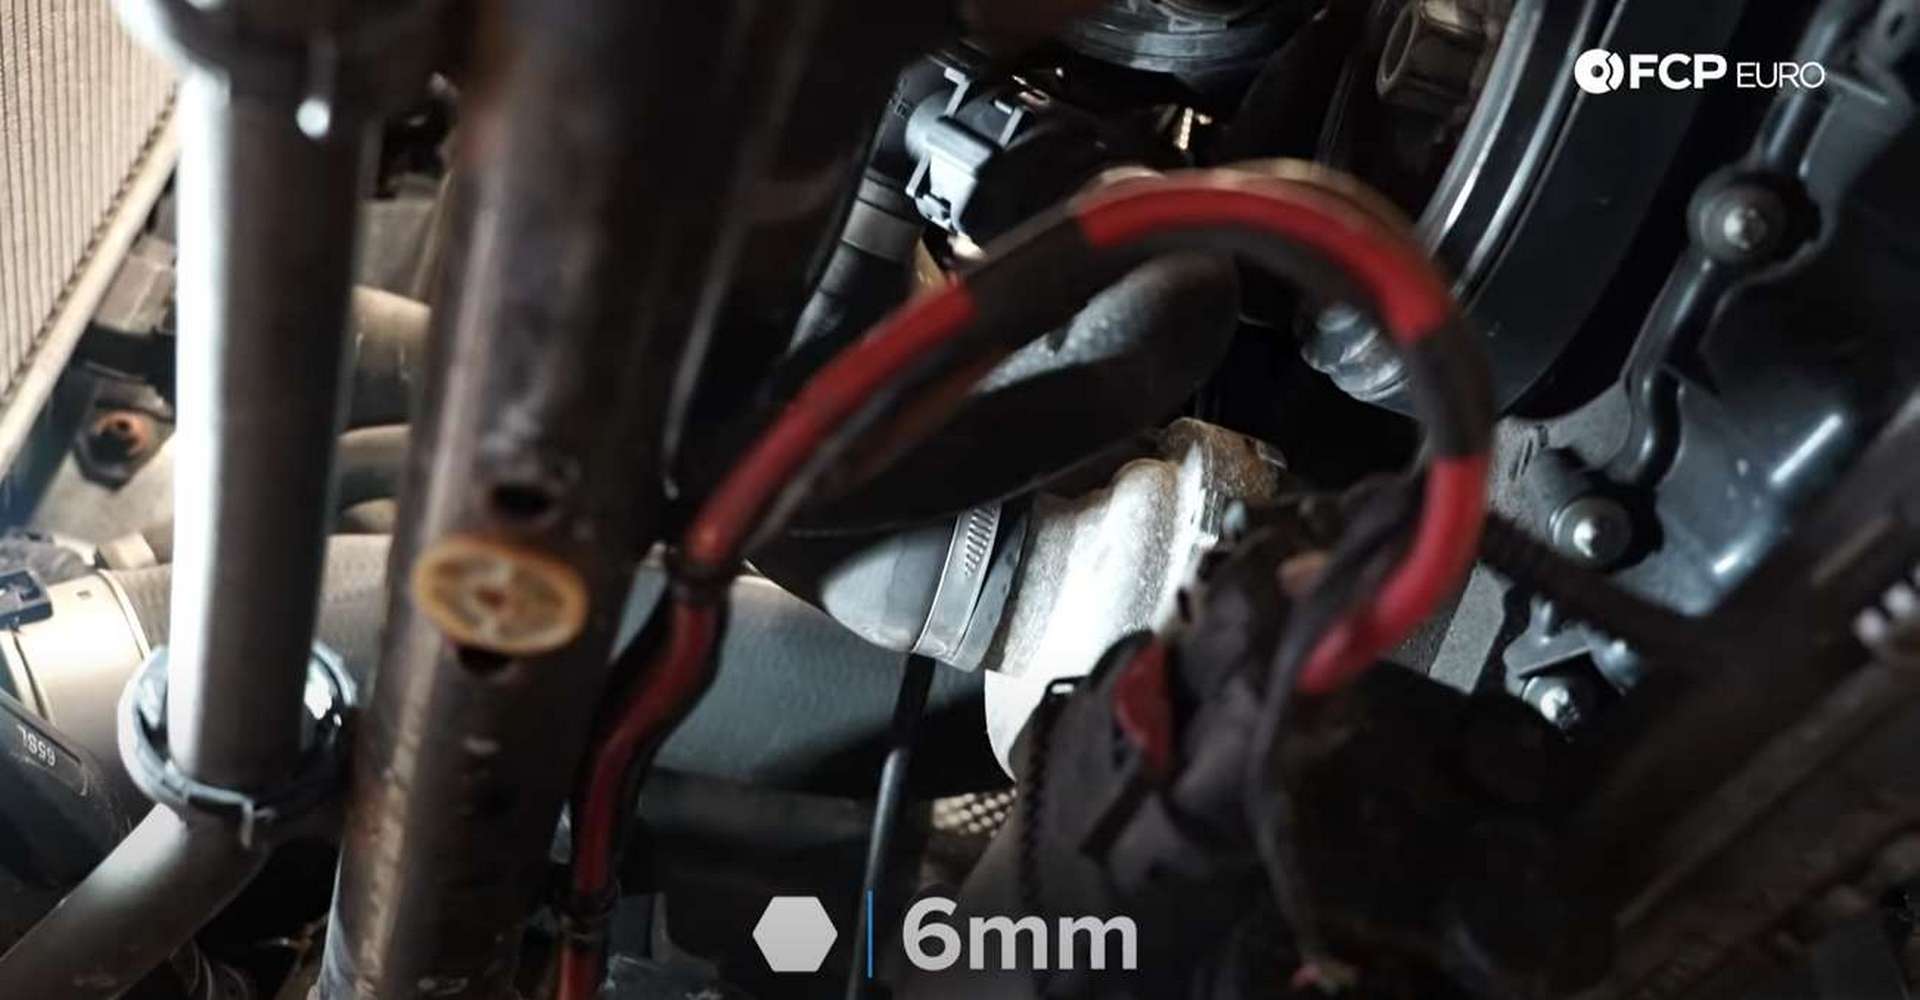
The lowest point in the cooling system is the electric water pump. Access it from underneath the car, on the passenger’s side of the engine. Place a large drain pan underneath the pump and then use a 6mm socket to loosen the hose clamp on the hose running out of the front of it.
Then, use a hose pick to remove the hose from the water pump. Allow the coolant to drain, and refit the hose to the pump. Use the 6mm socket to retighten the clamp.
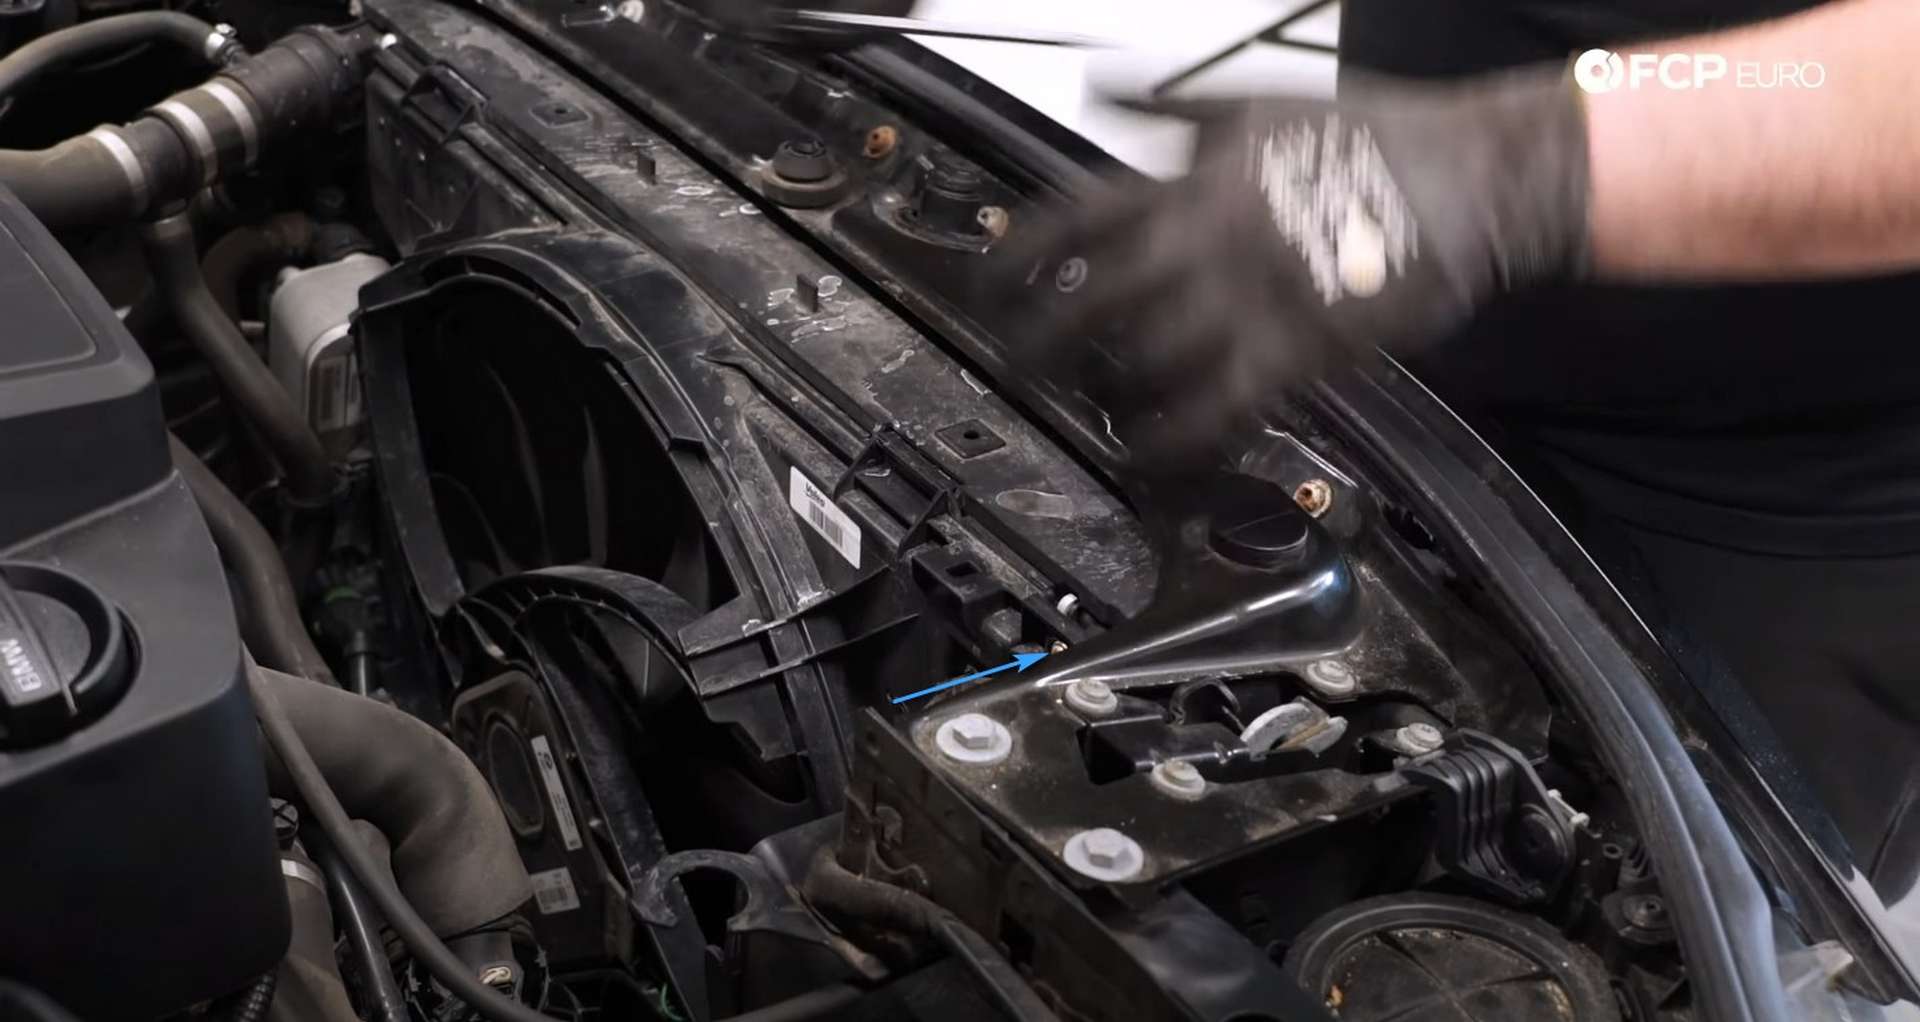
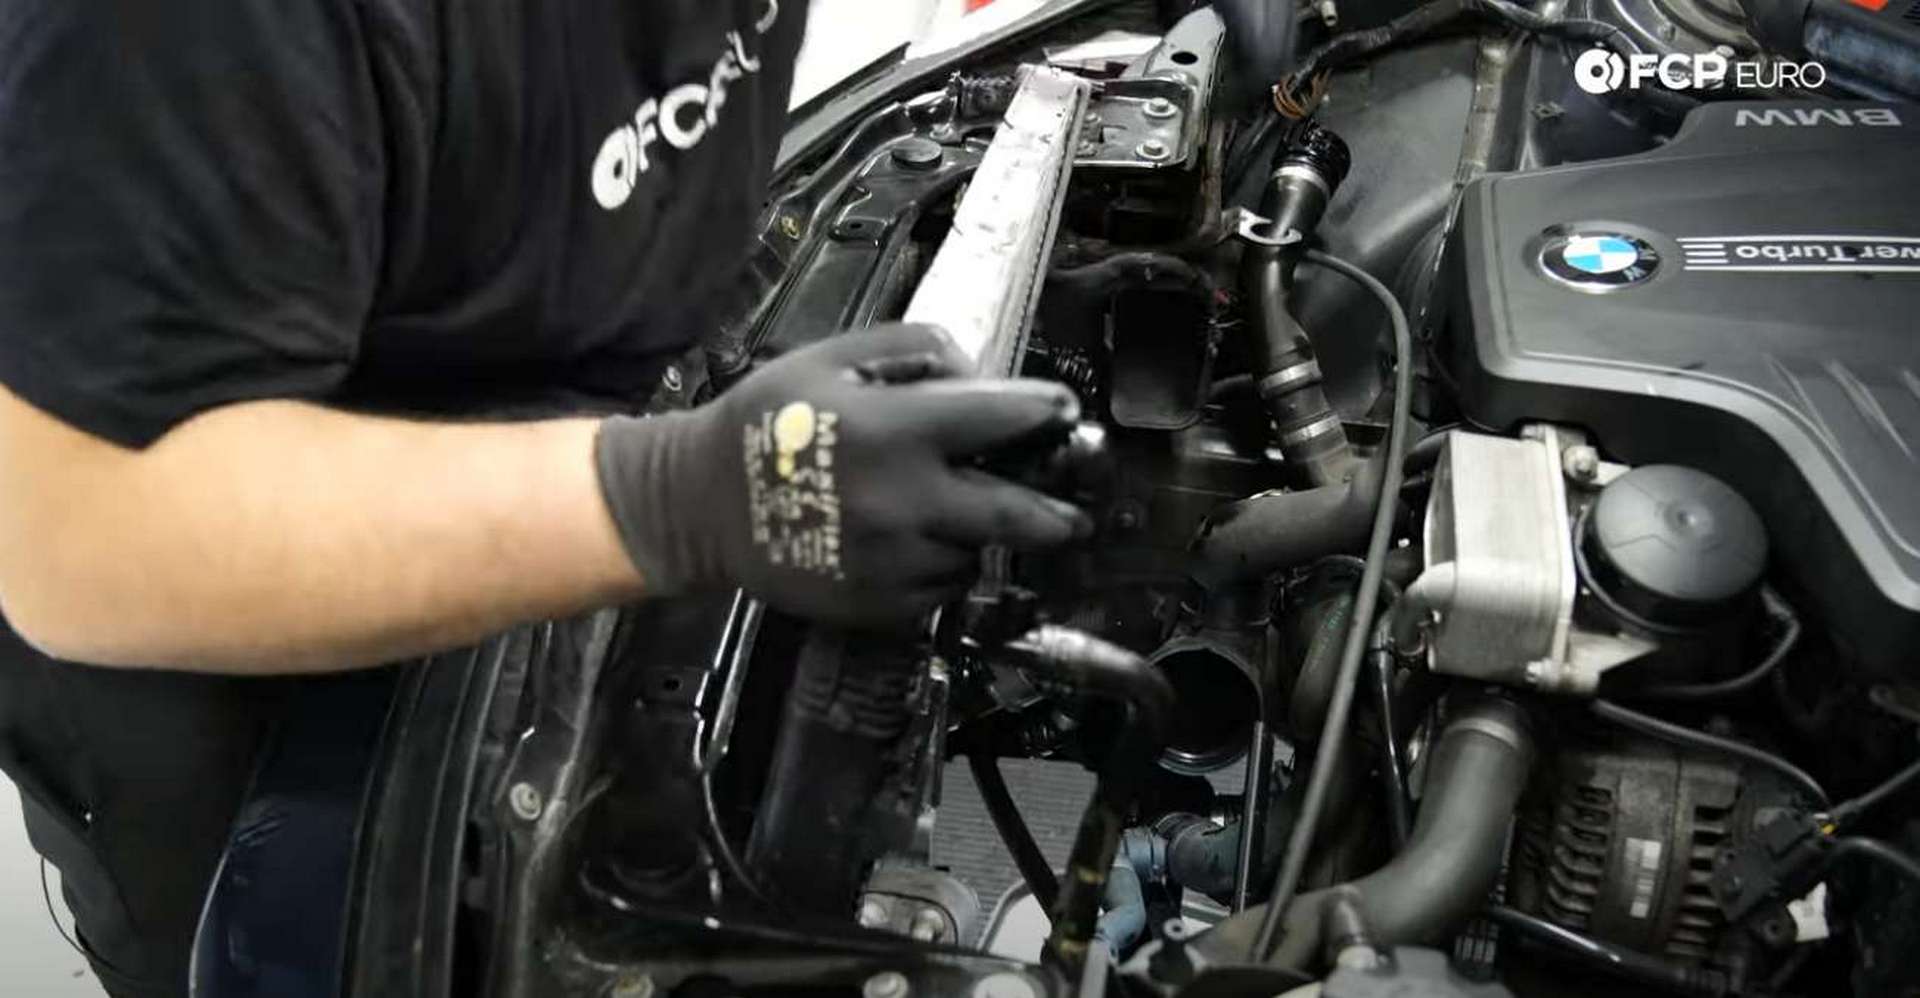
Step 4: Remove the radiator
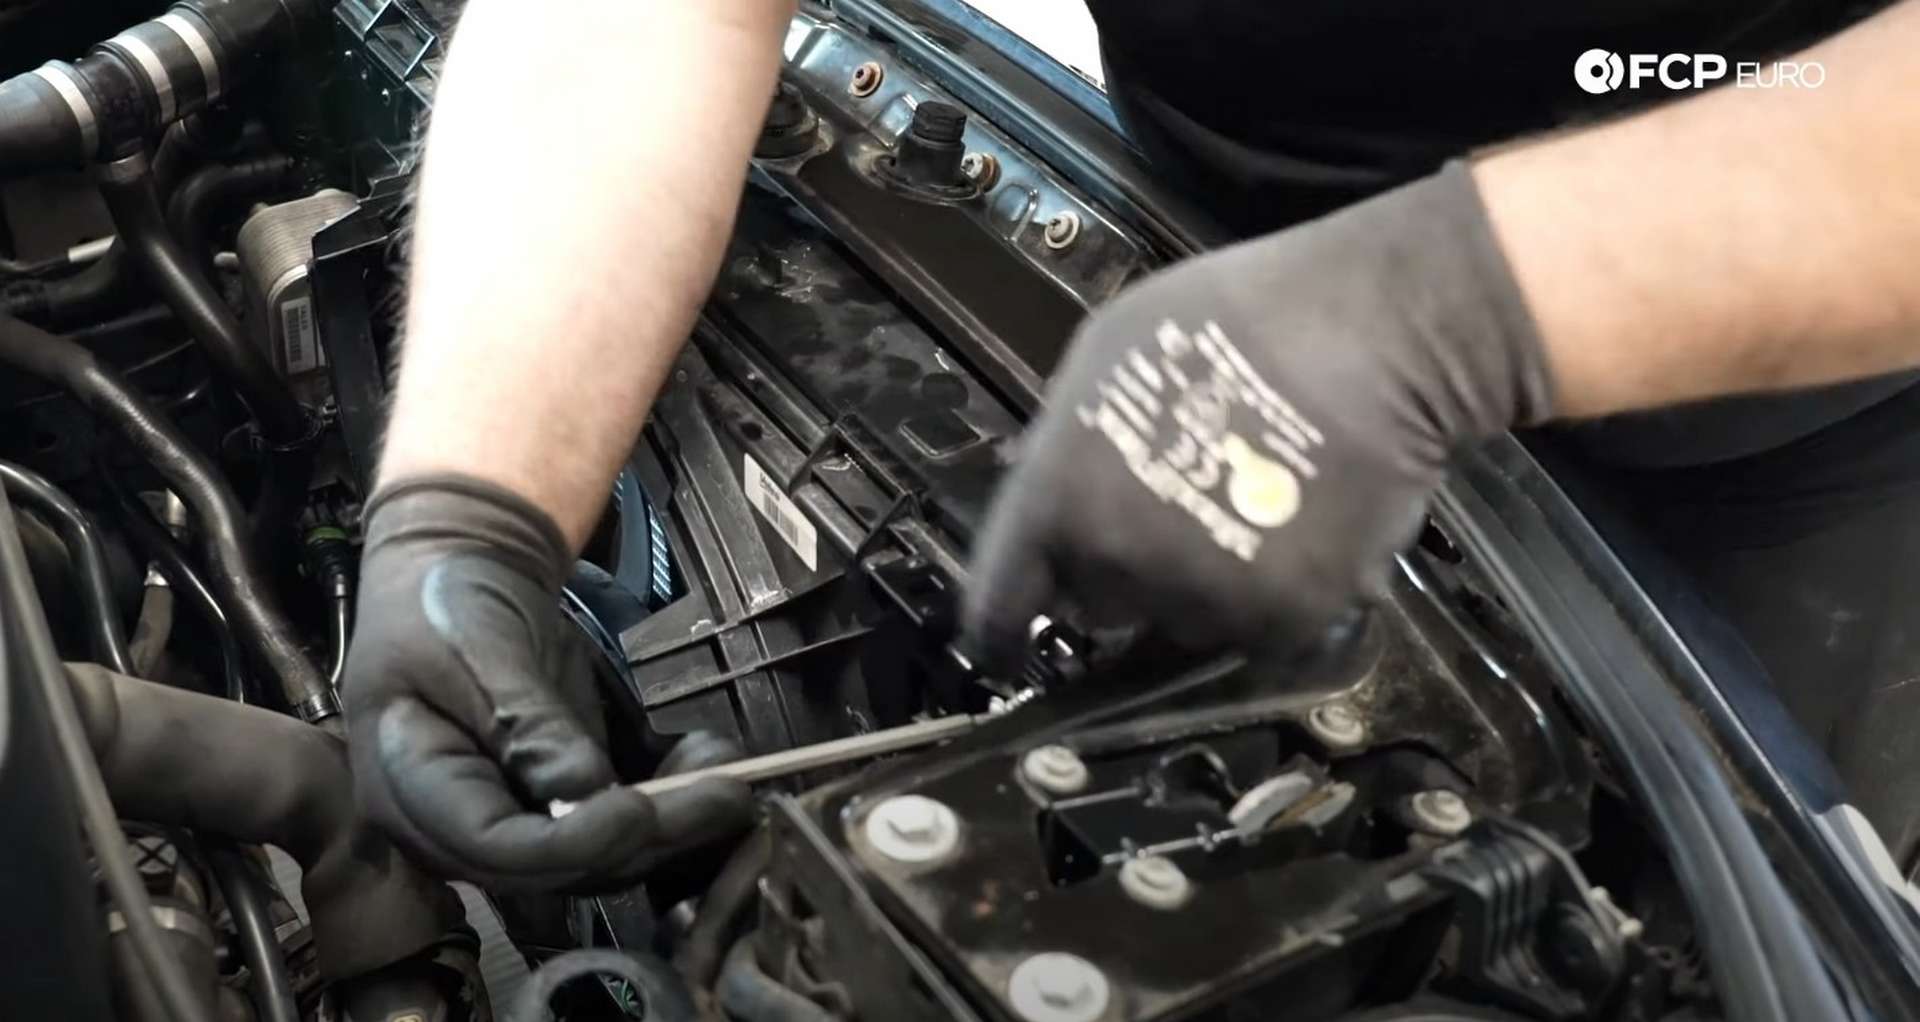
BMW uses a removable mounting plate between the radiator and the radiator support. Use a T25 Torx bit socket to remove each fastener, then pull out the plate.
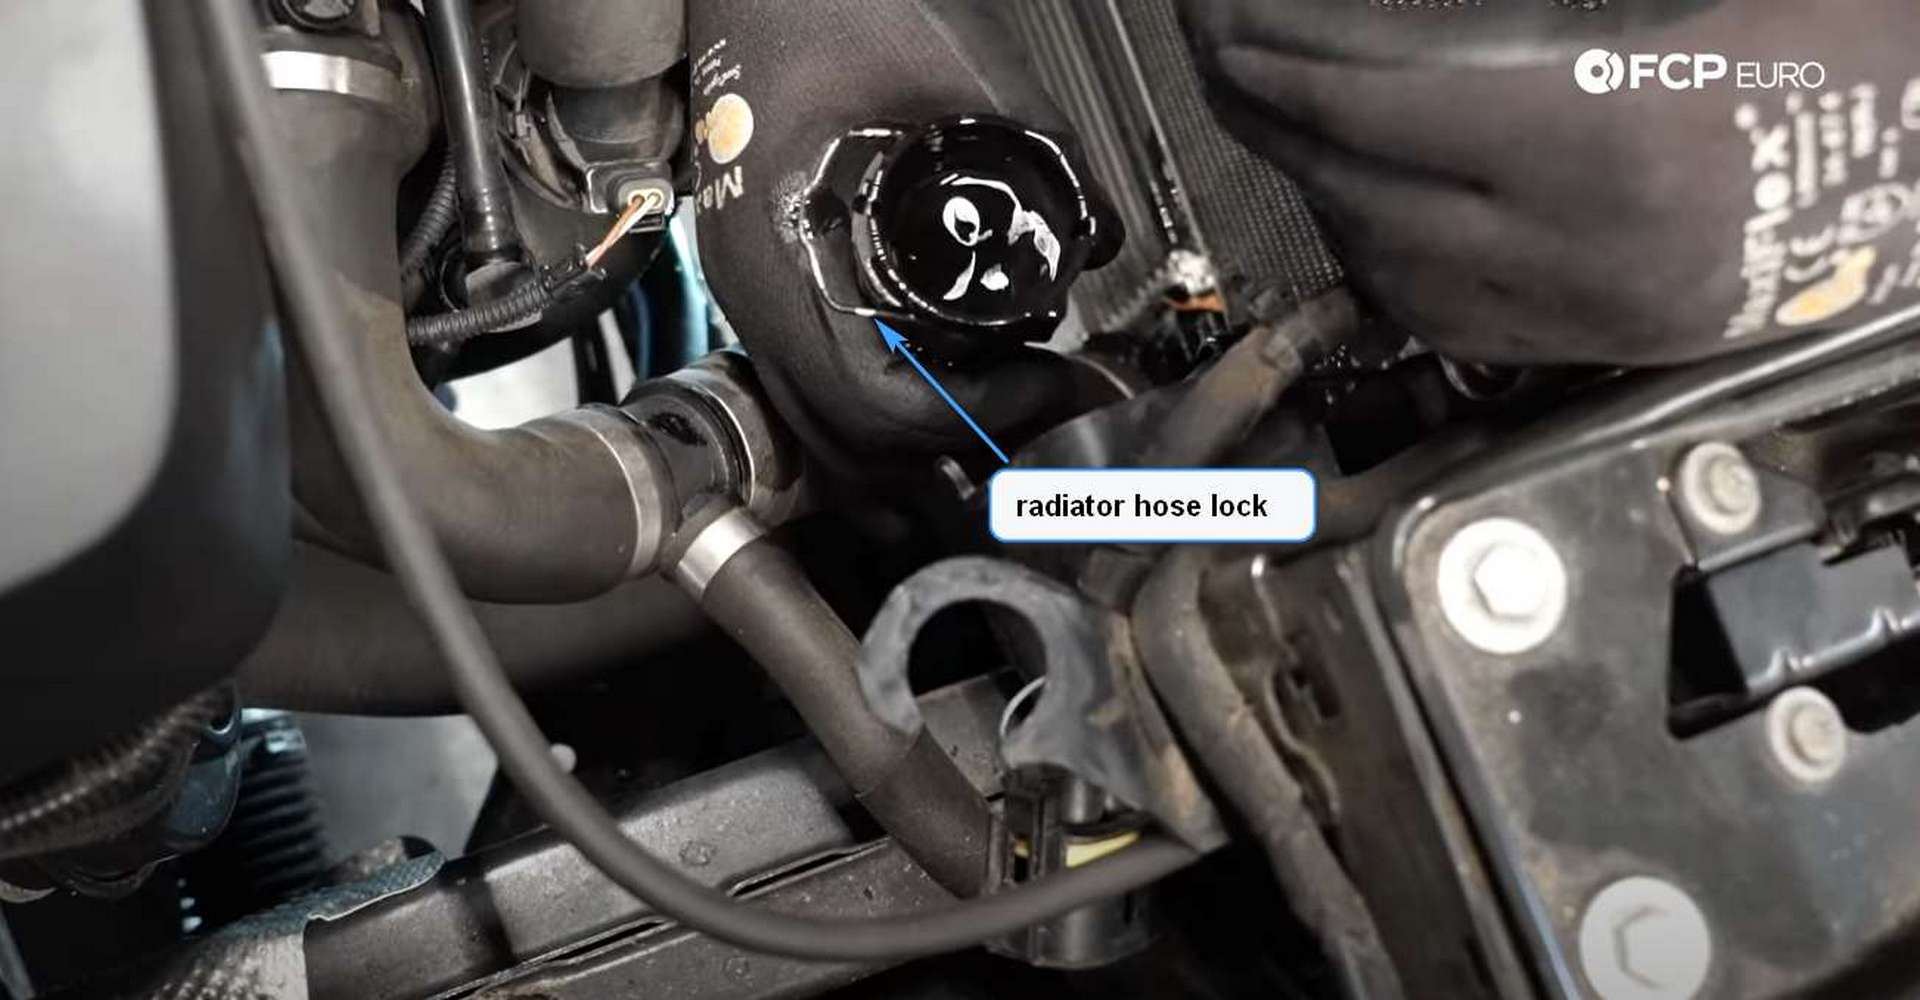
Next, disconnect the radiator hoses. Use a flathead screwdriver or pick to pull up on the hose locks, then pull the hoses off of the radiator. The hoses use an o-ring to seal against the radiator, so you will need to use some force to separate them.
There are two hoses on either side of the radiator. The upper hoses will be larger than the lowers ones, but all four use the same hose style. The lower hose on the driver’s side is connected directly to the transmission oil cooler, making the space to access the lock difficult to come by. If you can’t disconnect the hose at the radiator, disconnect it from the oil cooler, then swap the line over to the new radiator outside of the car.
Once all four hoses are disconnected, pull the radiator up and out of the engine bay. If you’re replacing the radiator on an N26 SULEV-equipped model, there is an extra sensor mounted to the radiator near the oil cooler. That just needs to be unplugged before you can remove the radiator.
Step 5: Install the new radiator
Take the new radiator and slide it into place in the engine bay. Do your best to keep the oil cooler from damaging the fins.
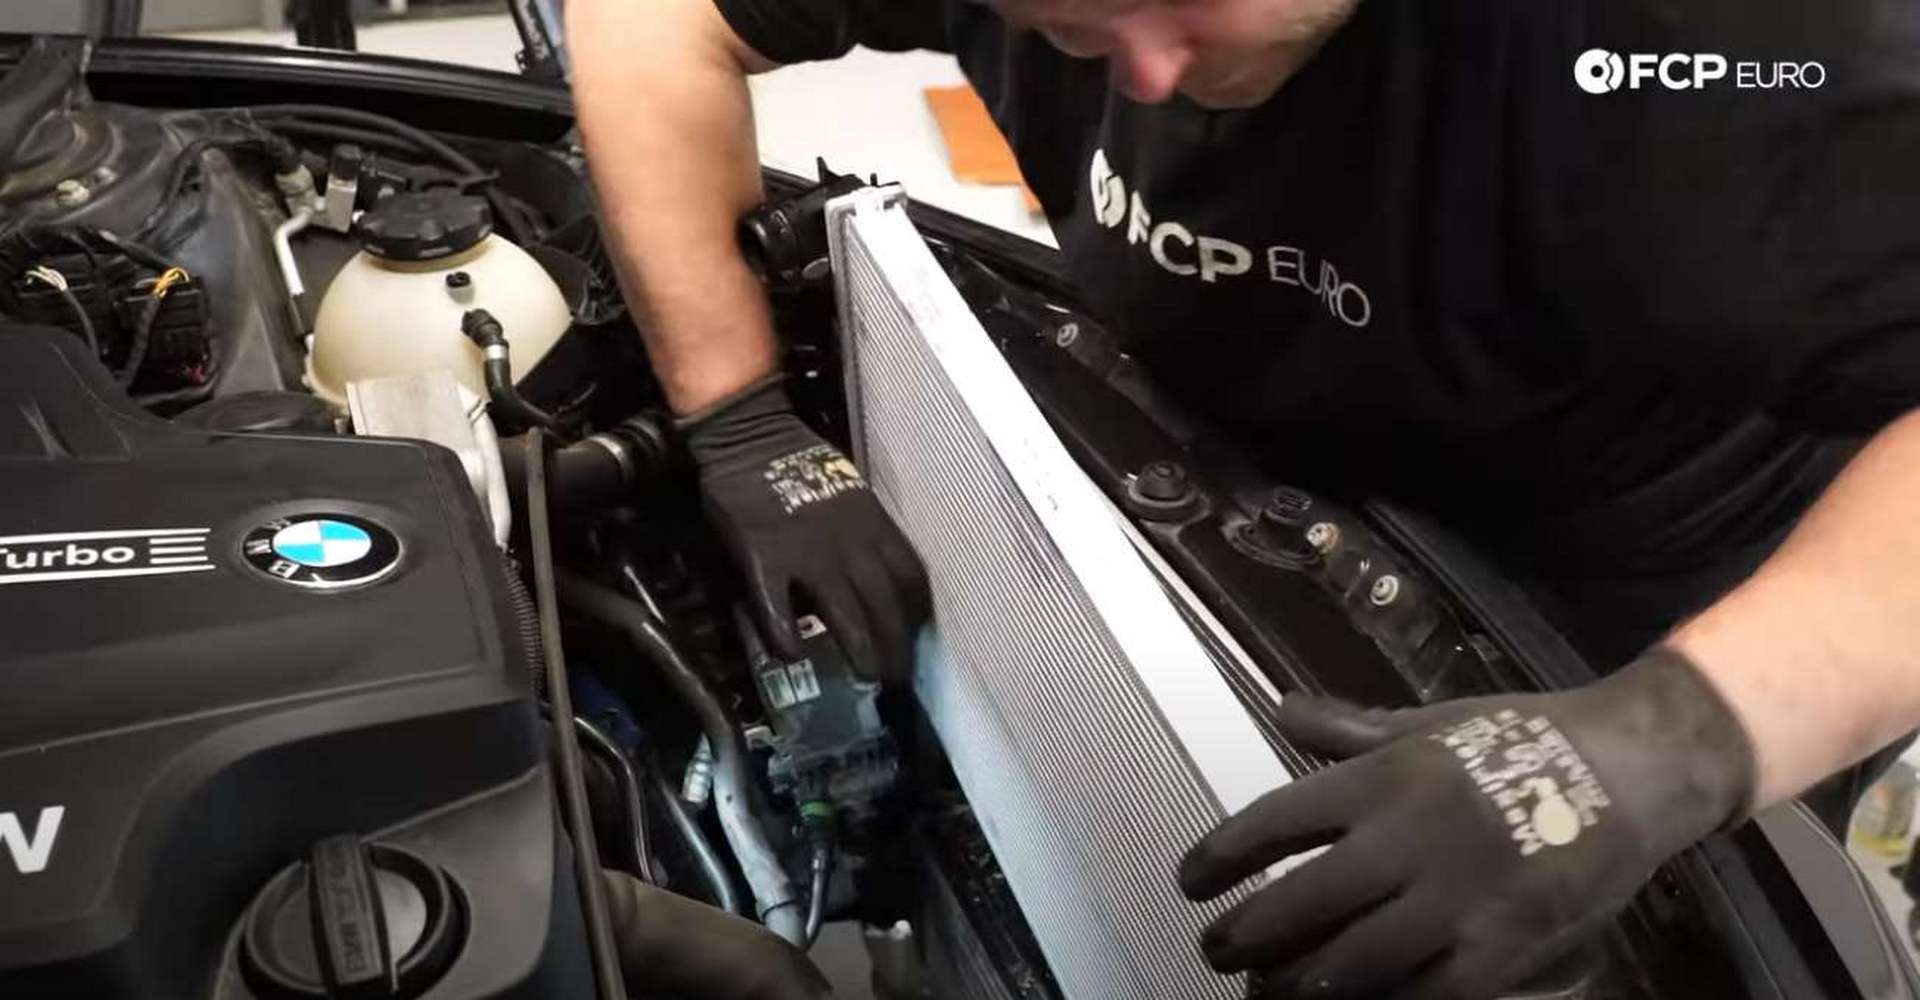
Then, attach and secure the four radiator hoses to the radiator. After that, fit the mounting plate to the top of the radiator, securing them together with the two screws. Drive them in with a T25 Torx bit socket.
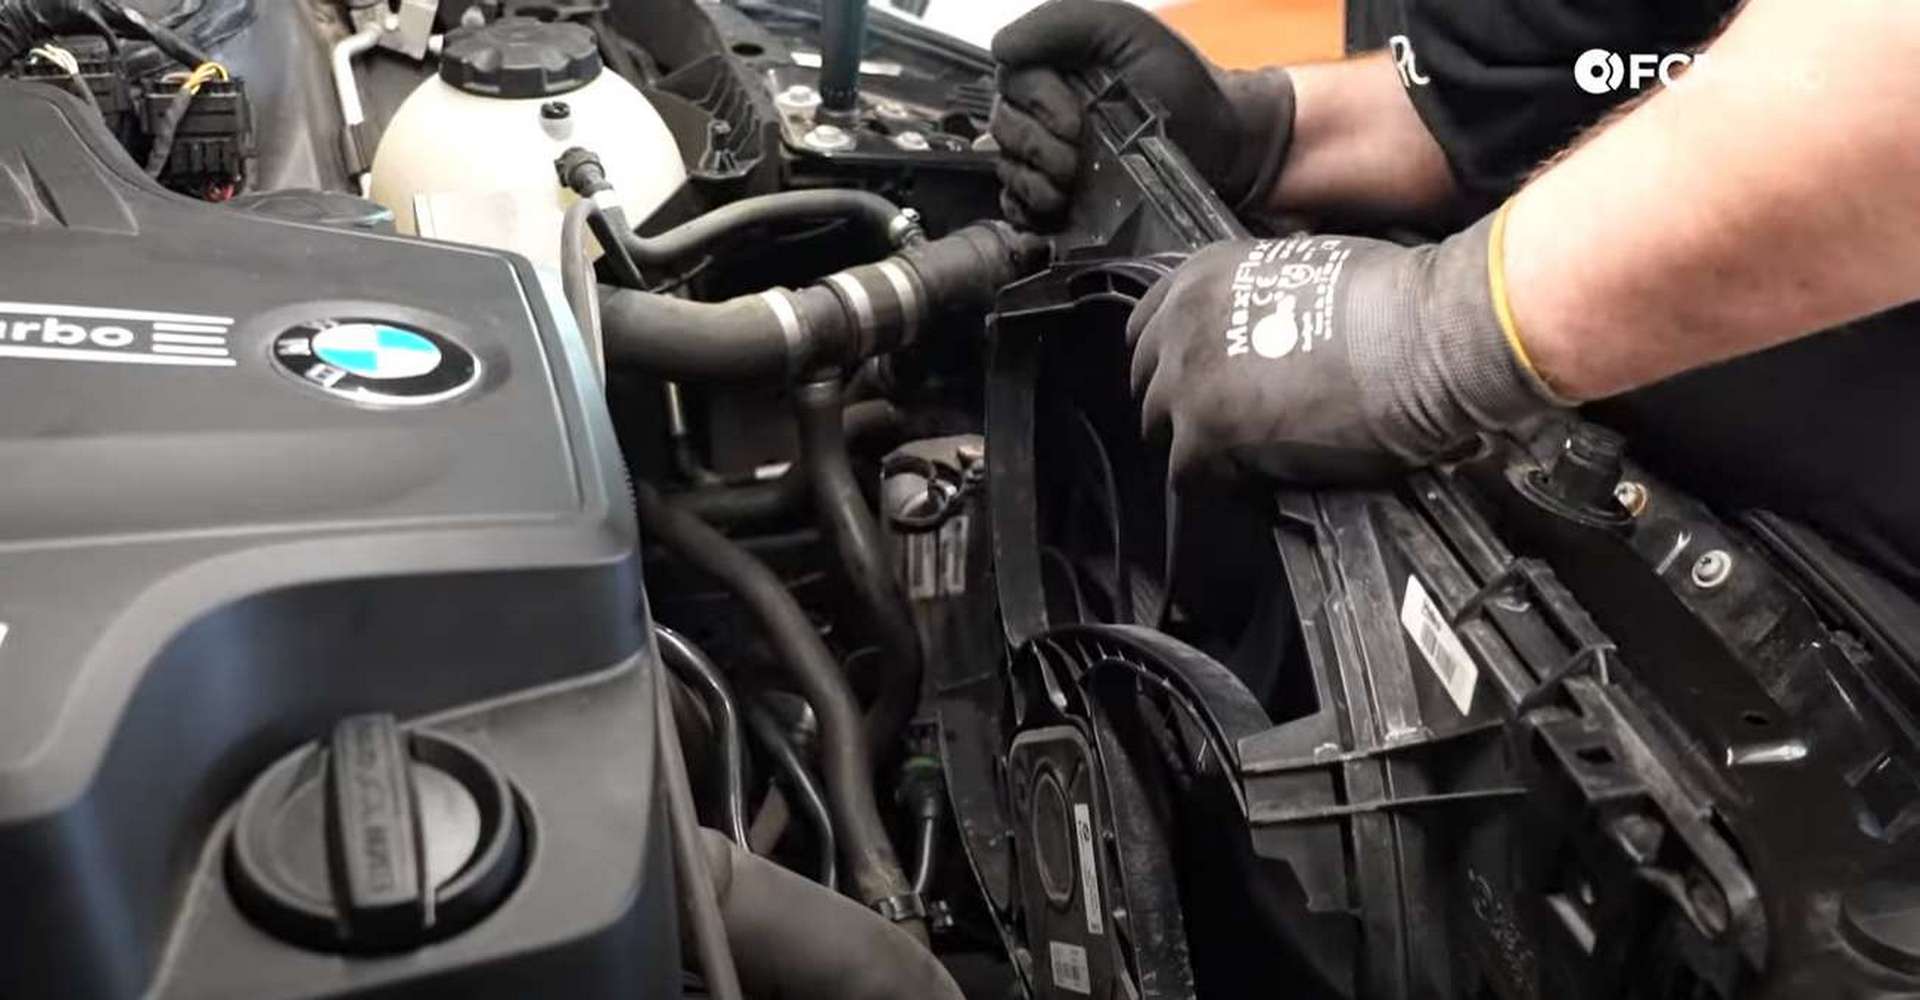
Step 6: Refit the fan assembly
Grab the fan assembly and slide it into position on the new radiator. That will be pretty tricky as you have to navigate around the hoses, and transmission oil cooler, while doing your best not to damage the fins on the radiator.
Check underneath the car once you think you have it in position. There are location tabs on the bottom and side of the fan housing that need to be in place before you fasten it to the radiator.
After you have the assembly into position, slide the transmission oil cooler down into place on the fan assembly. Then, secure the oil cooler to the shroud and the shroud to the radiator with the two T25 screws.
Step 7: Fill and bleed the cooling system
Read the bottle of coolant you have and determine whether or not you need to dilute it with water. Open the coolant expansion tank and pour in your coolant mix. Then start the bleeding procedure.
To initiate the self bleeding procedure, have the key with you and get into the driver’s seat. Press the start button once to put the ignition into accessory mode. Then, set the heater to max temp and the fans to their lowest setting.
After that, depress the accelerator pedal for about ten seconds to start the bleeding. You’ll know the process has begun when you hear the coolant moving inside the engine and radiator. Once the process has started, leave the car be for 8-10 minutes. Watch the expansion tank and top it off with coolant as needed. After that, the process will be complete, and you’ll be ready to drive with a fully bled cooling system.
Step 8: Refit the intake
Slide the intake tube into position and ensure it’s appropriately aligned on its tabs. Use a 7mm nut driver or socket to tighten its hose clamp.
Once in place, resecure the coolant line to the bottom of the tube. Then, refit the intake airbox to its mounting studs. Slide the intake tube onto the airbox and then secure them together using a 6mm socket or nut driver to tighten the hose clamp.
Lastly, plug in the mass airflow sensor and refit the hood cable back into its clips on the airbox.
Step 9: Reinstall the splash shields
First, sit the smaller shield into position. Fit it into place below the power steering motor and thread in its three mounting bolts. Tighten them with an 8mm socket.
Then, get the large splash shield into place and thread in all of its fasteners before tightening them with an 8mm socket.
And that's how to replace your BMW F30 radiator at home in your garage or your driveway. If you want to learn more about the BMW F30 or any BMW, you can find it all on our BMW hub, bmw.fcpeuro.com.


