Since I first purchased my Volvo V70XC the hood has been a bit of an eyesore. The paint on these cars is very tough and for the most part should last the life of the car without major issues. However when someone decides to get it repainted for whatever reason the results can easily be subpar.
(You may also notice the photo car change midway through the article. I appear to not be able to open my hood right now on the black wagon.)
Having finally come across a suitable replacement hood at a junkyard I was able to swap my hood over in about 15 minutes and leave the old one for the wreckers. Here’s how.
What you’ll need:
- New Hood
- An assistant - Really really need an assistant
- Socket set
- Plyers
- Snips of some sort.
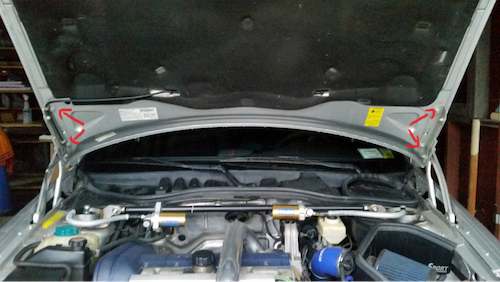
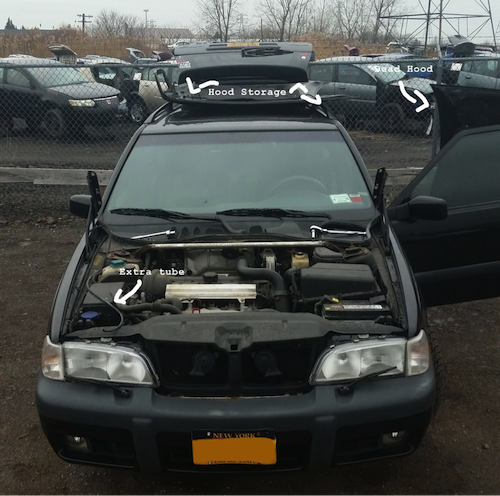
Removing the old hood is very straight forward. When lifting the hood look to either side closest to the wind shield, there will be 4 bolts that hold it to the hinges. Remove the bottom bolts on either side. Next remove the top bolts slowly. You’ll notice the hood slide back on to the holding tabs and rest in place. Next yank pull or cut off the washer fluid hose on the passenger side of the car, just leave a long tail end on it.
With an assistant, or by yourself if you dare, lift the hood off the car. It should weight about 45lbs and is awkward to maneuver.
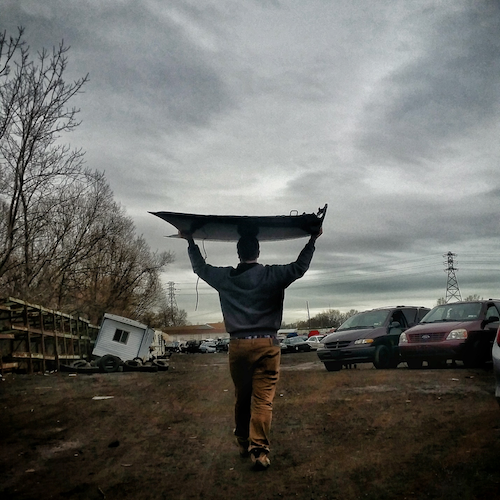
Be careful when setting it down as the points at the top of the hood (the windshield side) can deform easily and are in no way sturdy. I had to rest mine upside down on the top of the car while I took off the old hood, grass would probably be a better option.
Remove your old hood in the same fashion, this time cutting the washer fluid tube at the point where it joins the passenger side nozzle.
When getting the new hood in place it is important to match up the bolt positions and best as you can. Marks should be visible where the previous one was attached both on the brackets touch the hood and where the bolts touch the brackets.
Because of a previous accident my hood too a little bit of tweaking to get perfectly into place. It’s best to fit the bolts snug but not tight so you have some play to work with. You can also adjust the position and height of the hood releases brackets with a 10mm wrench.
With the hood in place you have to connect the washer bottle again. You should have a long end on both the new hood and car. To pull the old piece through I used a spare T junction and cut the perpendicular outlet off as to join the two pieces and feed the original into the new hood.
The fitment of the new hood leaves a little bit to be desired, however I think the shape of the opening changed during the front end accident years back so it can’t be too perfect. New hood looks much much better than the old one though.