- 02/20/2019
- 2 Min Read
- By: Gareth Foley
How To Install Syncro Design Works RTABs In Your BMW E36 (E46, E83, E85, and E86)

After months of anticipation, I'm so excited to get this trailing arm mounted up to the E36. With a moderate set of tools, you can easily upgrade and improve the performance of your trailing arms with these Monoball RTABs.
At FCP Euro, we've been working with Syncro Design Works for some time now. Our first project together was a set of thrust arm bushings for our 2010 Mercedes C300 endurance car (which have worked out amazingly). However, as of late, I've been putting some time into building my own track car for next year in the form of a 1998 BMW 328i. When it came time to refresh the E36 M3 trailing arms I just picked up, I logically only had one choice to replace the factory RTABs—the Syncro Design Works RTAB kit. The reason I wanted to go with these spherical RTABs is that they allow free suspension movement without any significant increase in noise, vibration, and harshness or "NVH."
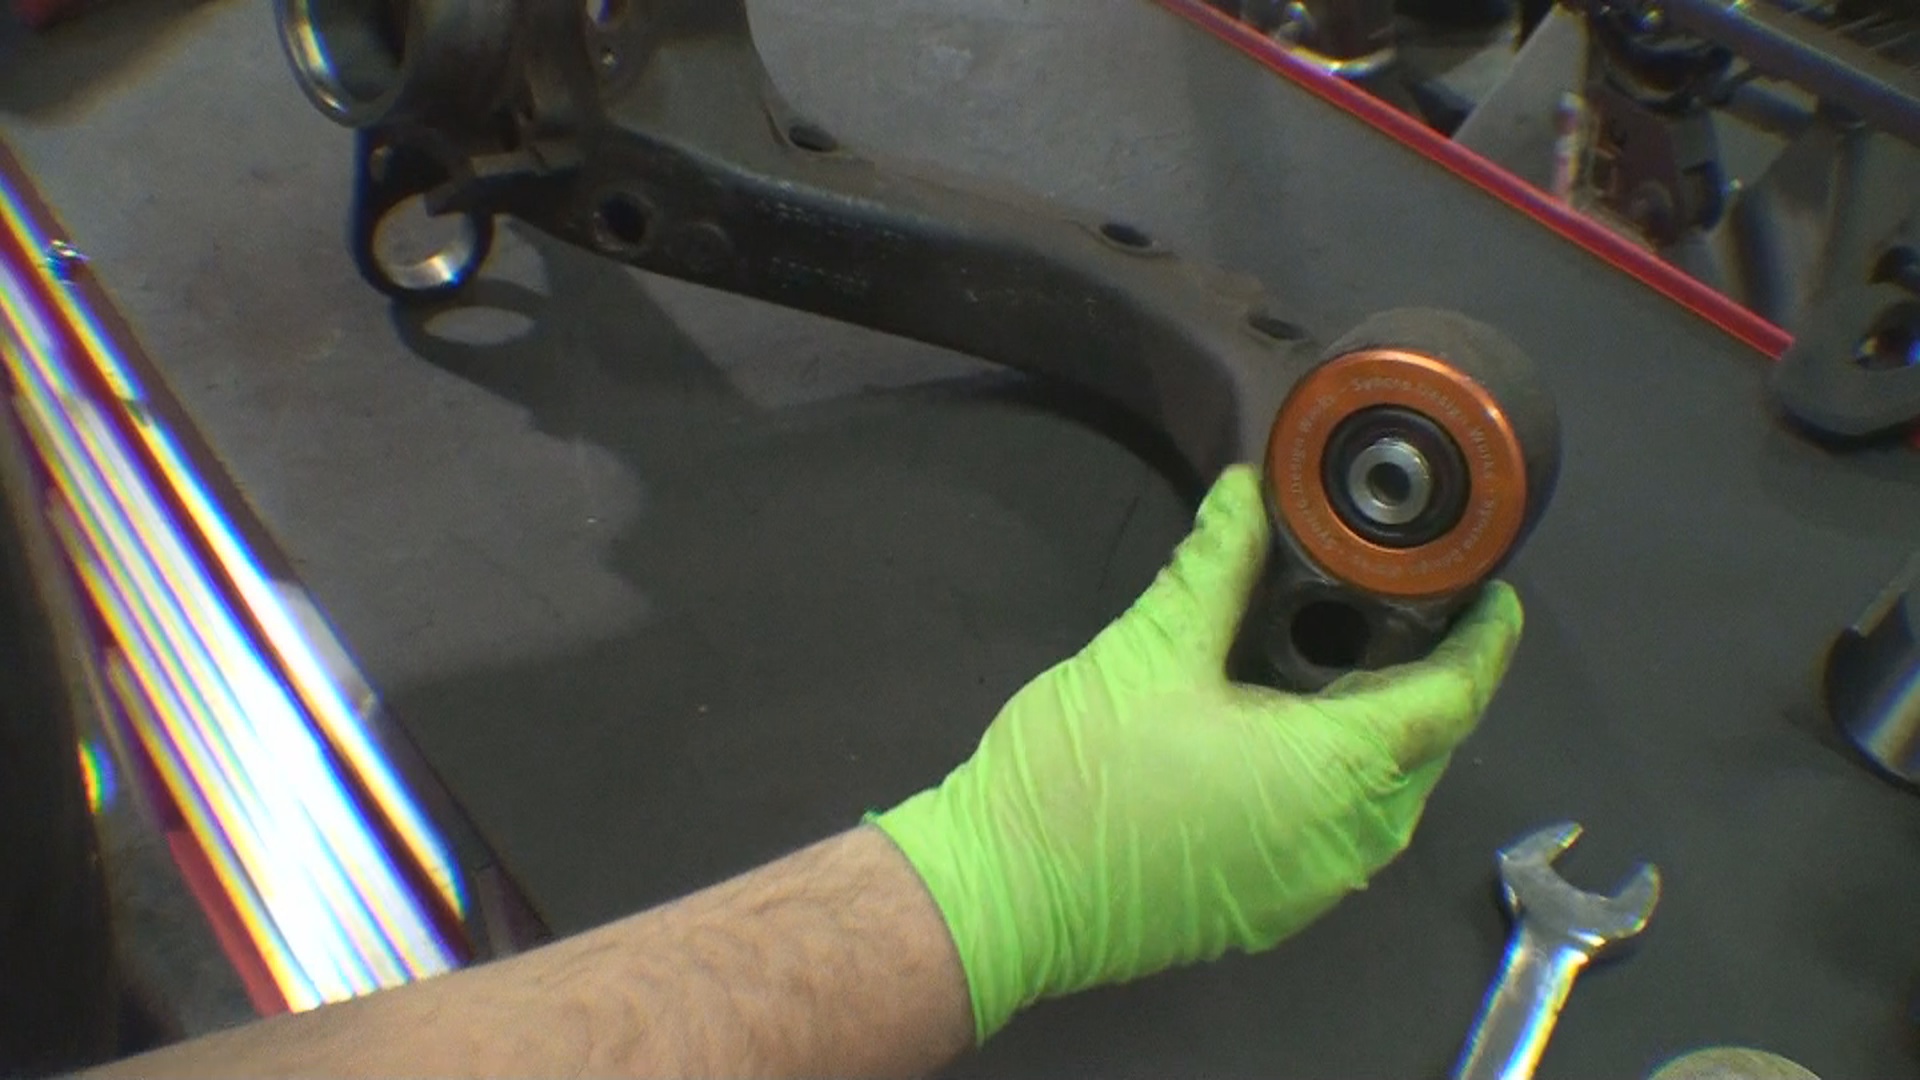
The spherical bearings used in these RTABs are sealed OE units that have plastic inner sleeves. Functionally, they work the same as heim joints, but since there isn't any metal on metal, none of the harshness typically associated with spherical bushings transfers into the chassis. For once, you can have the best of both worlds! Stock rubber RTABs from BMW and aftermarket poly bushings have deal-breaking drawbacks, especially if you plan to track your car. These Syncro Design RTABs require no lubrication like poly bushings, so they are simply "install and forget."

Tools Needed To Replace RTABs:
Parts Needed To Replace RTABs:
Step 1: Lower Or Remove Trailing Arm To Access RTAB
To remove the factory RTABs, you first have to lower the trailing arm either while on the vehicle or remove it entirely (in my case I have the entire rear end apart). To lower the trailing arm, remove the lower shock mount bolt and then remove the three bolts that secure the trailing arm mounting bracket to the chassis. The entire assembly will be free to drop down. I recommend using a 2x4 between the trailing arm and the chassis to keep the front of the trailing arm so that the bushing end is pointed downward.
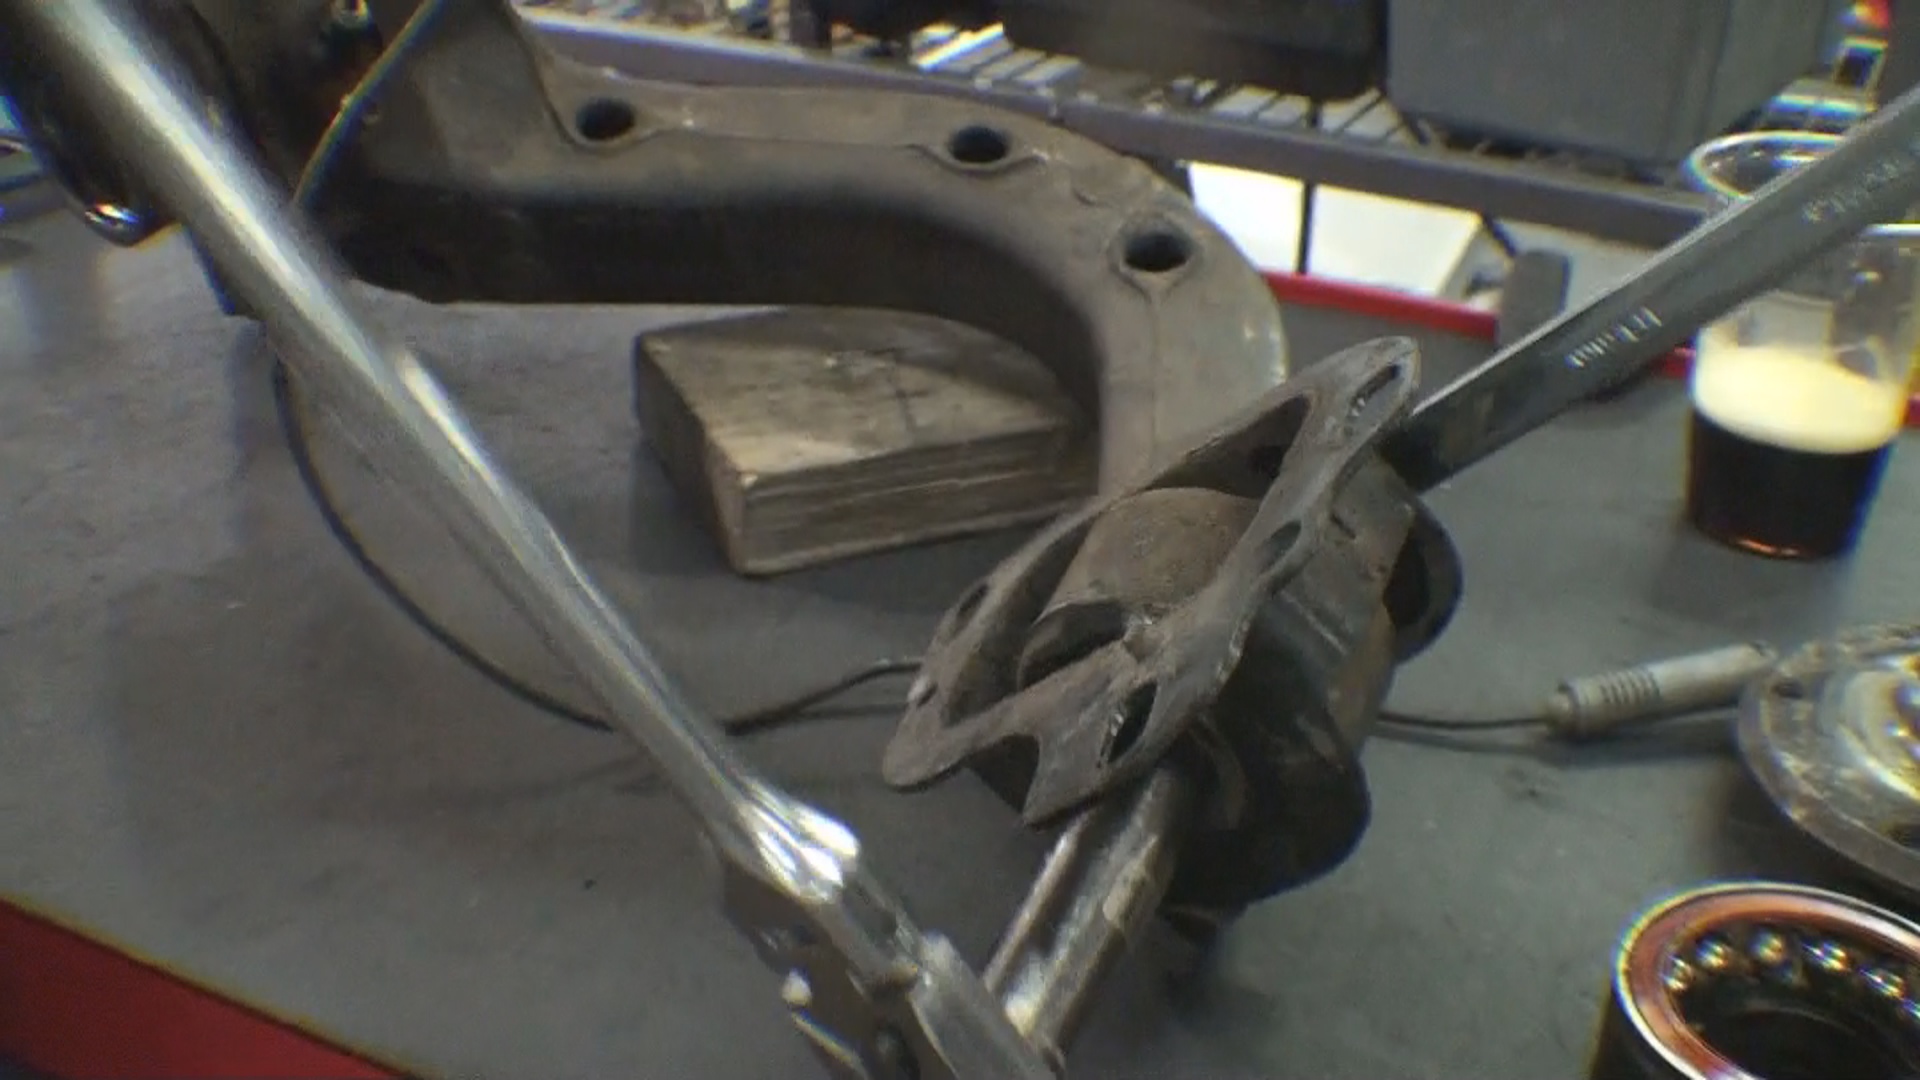
Step 2: Determine If You Have An Original Or New "Split" RTAB
The factory-installed RTAB are generally a solid one-piece bushing. These are a pain to remove (especially in the rust belt) while the newer "split style bushing is much easier to remove (and install). For removal, I use CTA 7642. This tool is basically a must-have, as it leverages against the trailing arm while the screw and cup adapter pull the bushing through. If you find the bushing incredibly tough to remove, use heat around the trailing arm where the bushing is pressed in until it starts to smoke. Do not apply direct heat to the bushing. After some wrenching, the bushing will begin to move out of the trailing arm.
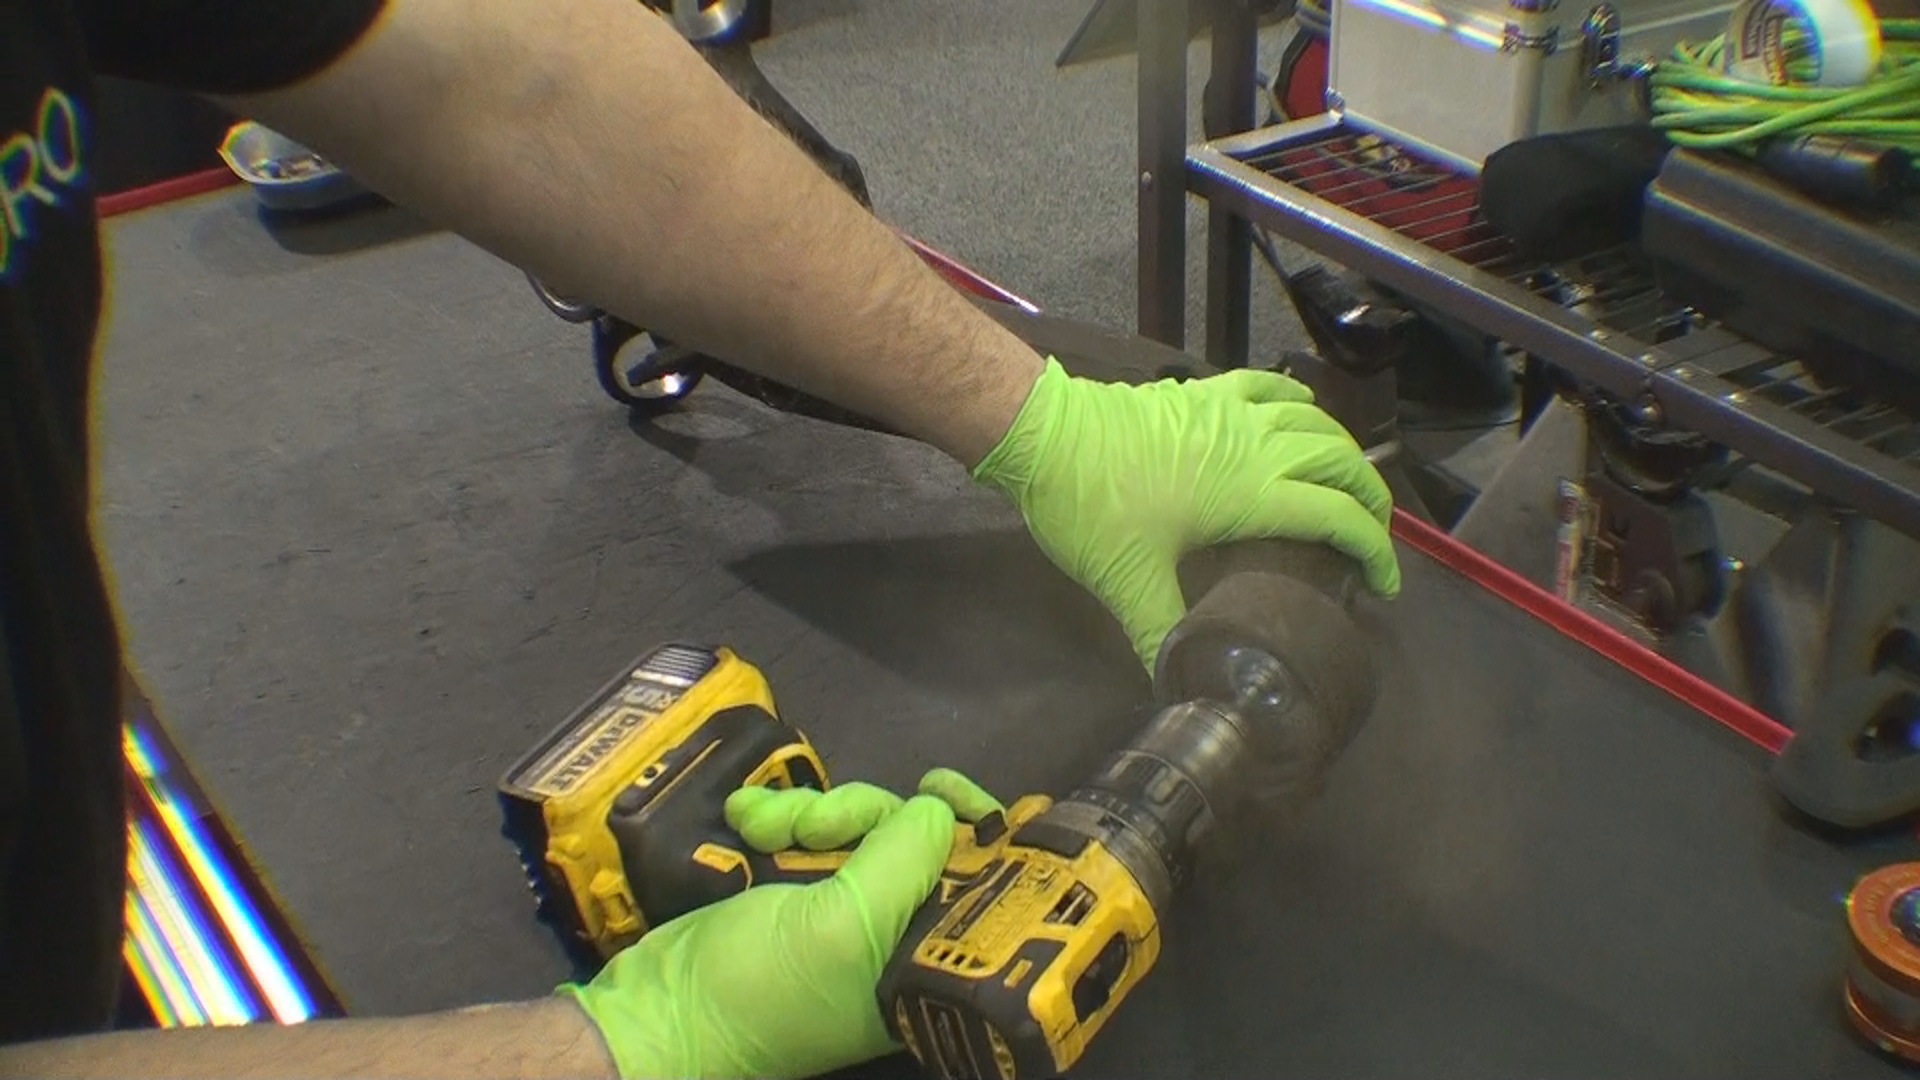
Step 3: Clean The Bore Of The Trailing Arm
Use a wire wheel on a drill to clean out the corrosion inside the bore in which the bushing presses into. This will make installation of the new bushing much easier.
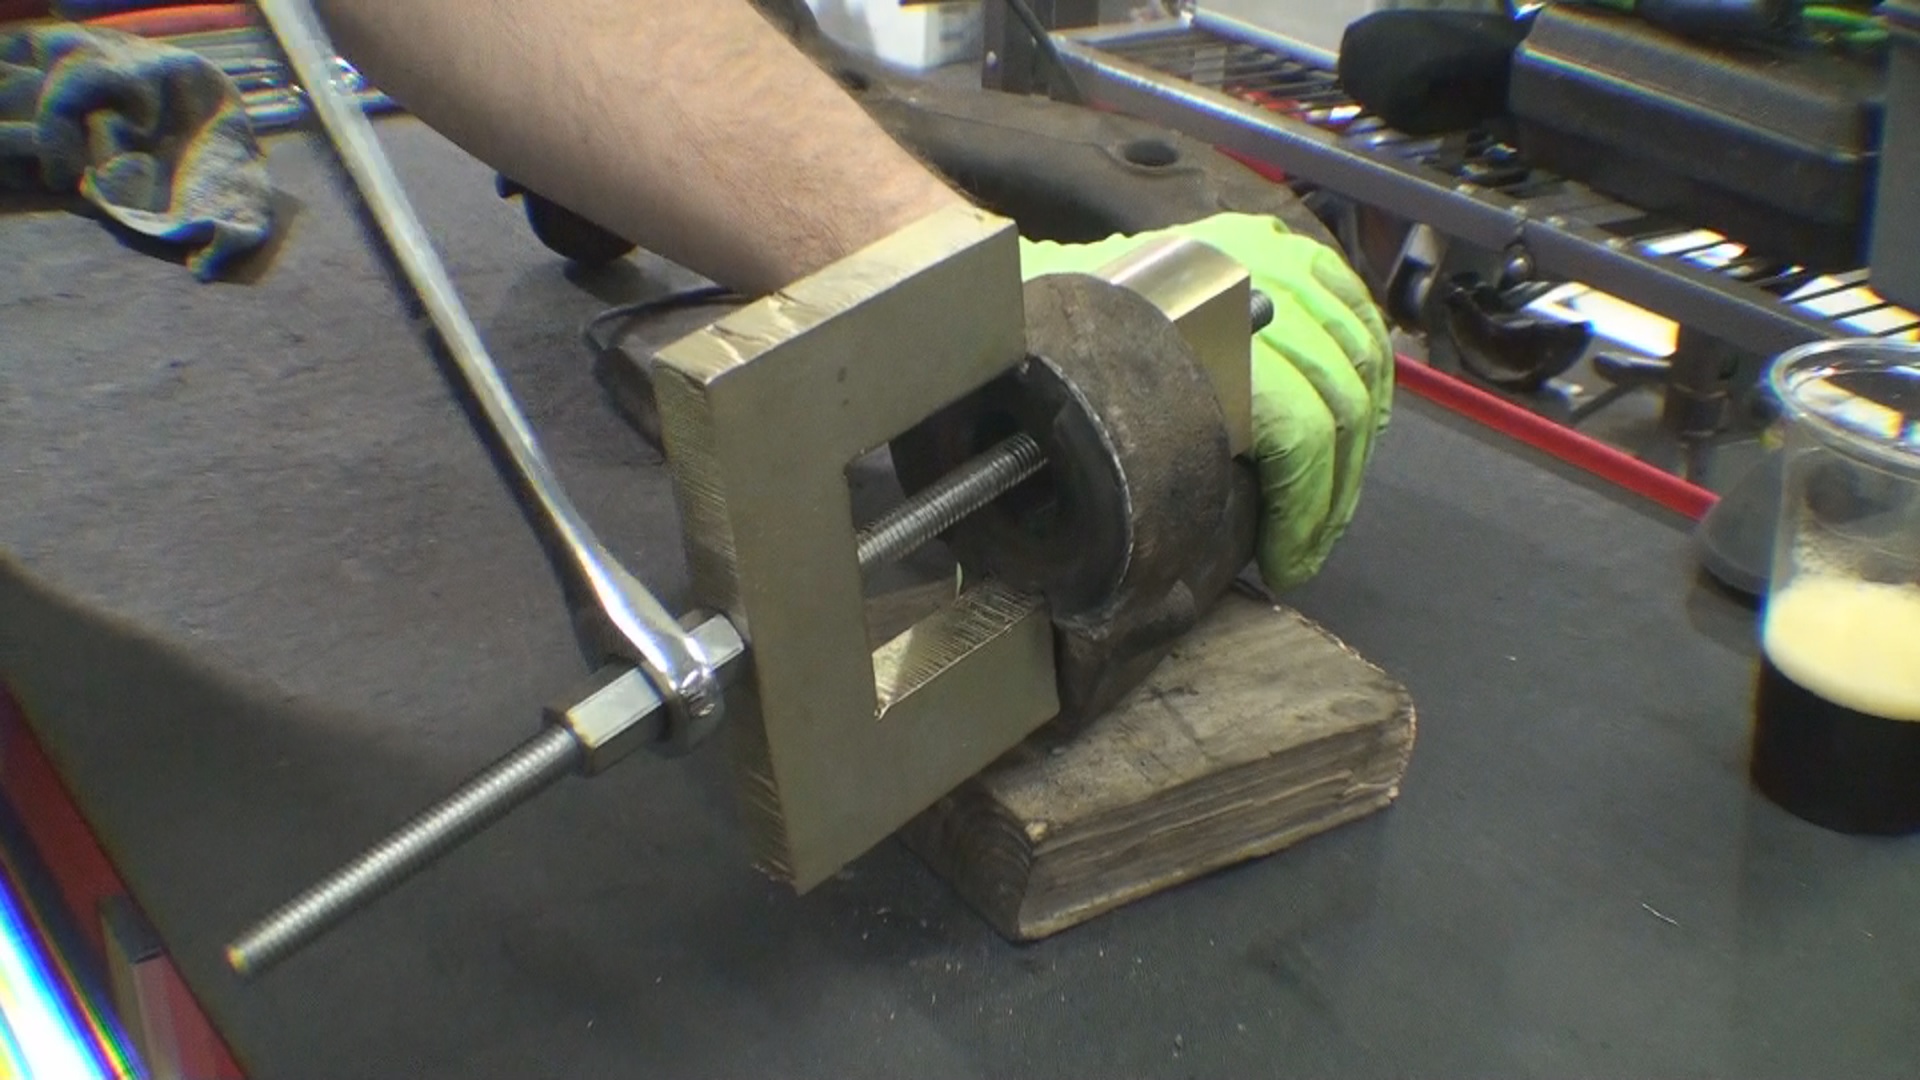
Step 4: Determine Press Cup Size
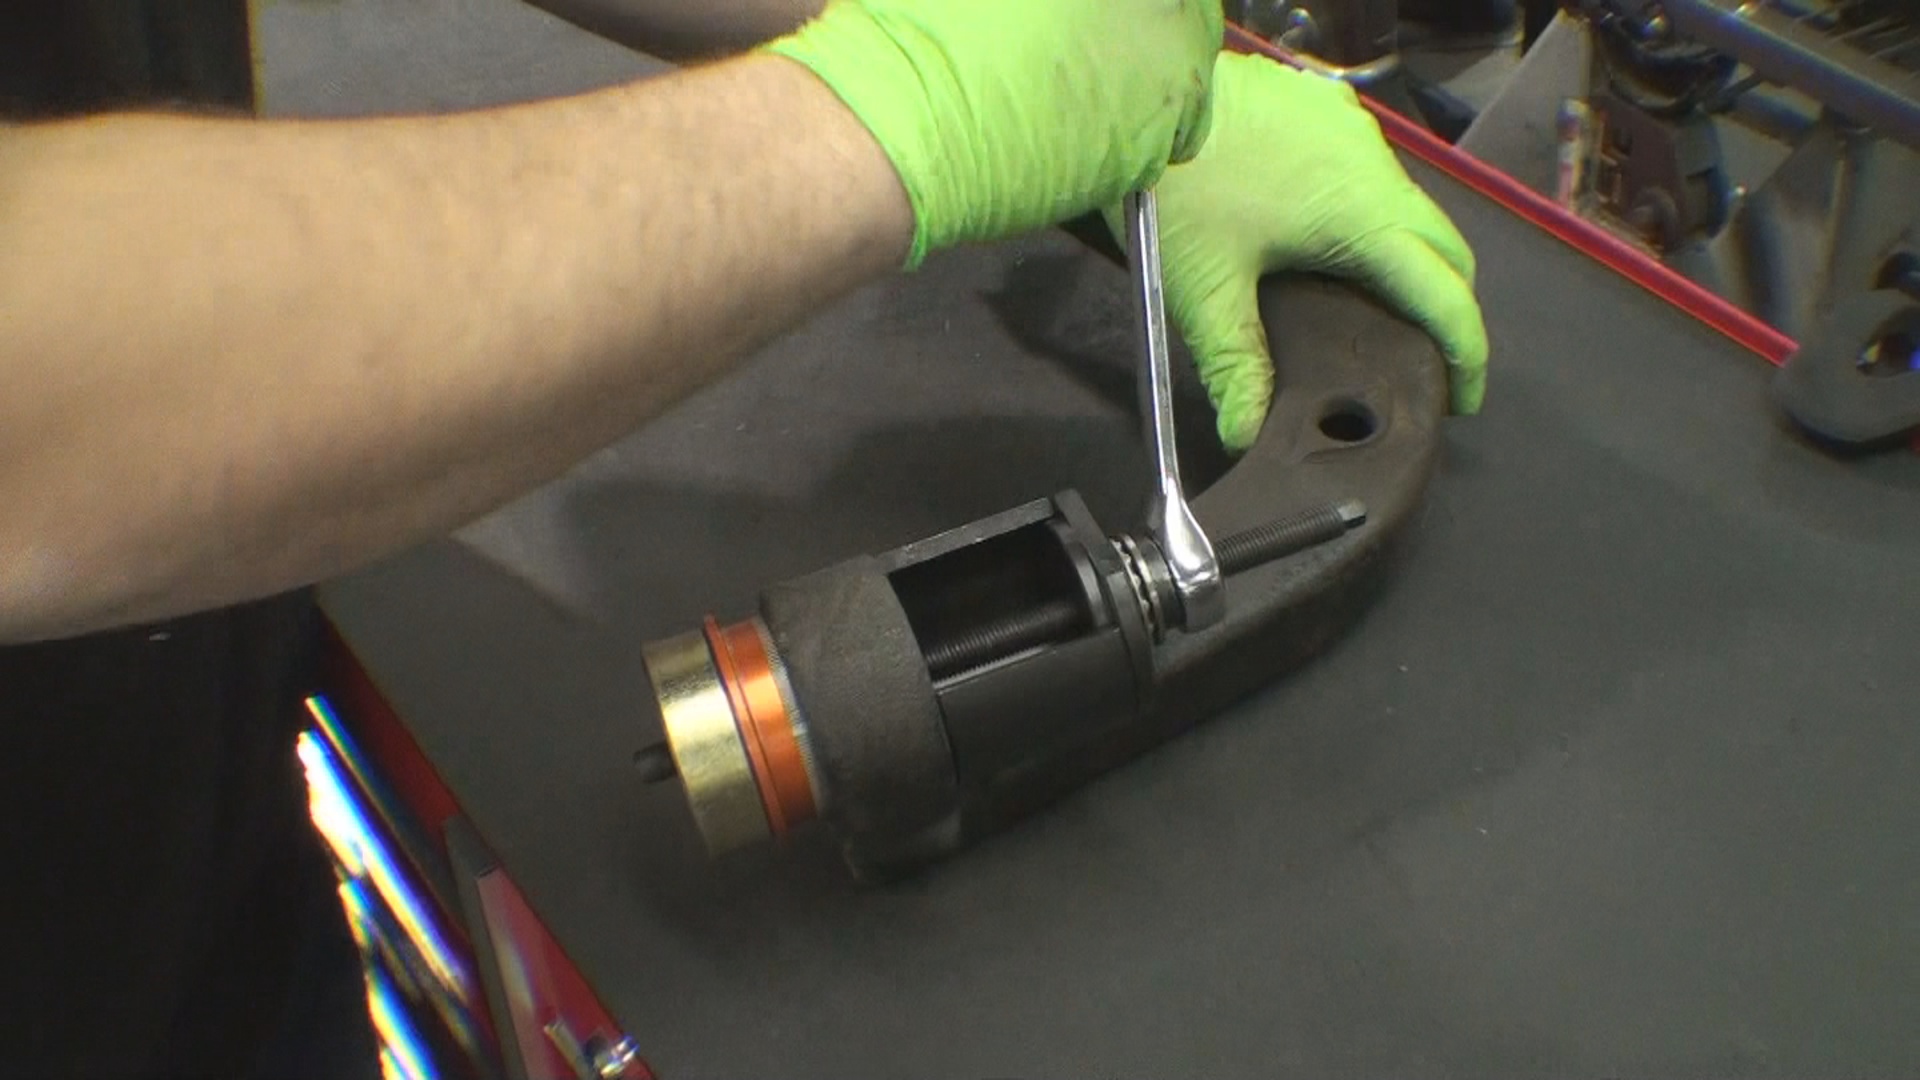
To press the Syncro Design Works RTAB in, I am going to use an alternative tool than the CTA Trailing Arm Bearing Tool mentioned in the second step. The reason for this is that I want to be entirely sure I'm pressing the housing of the RTAB and not the joint. The adapter of the CTA 7642 tool comes very near to touching the joint, and under no circumstances should the new bushing be pressed in against the joint. The press kit I'm using is a general rear end service tool for BMWs and covers many different styles of bushings in many applications (it's actually a cool tool kit).
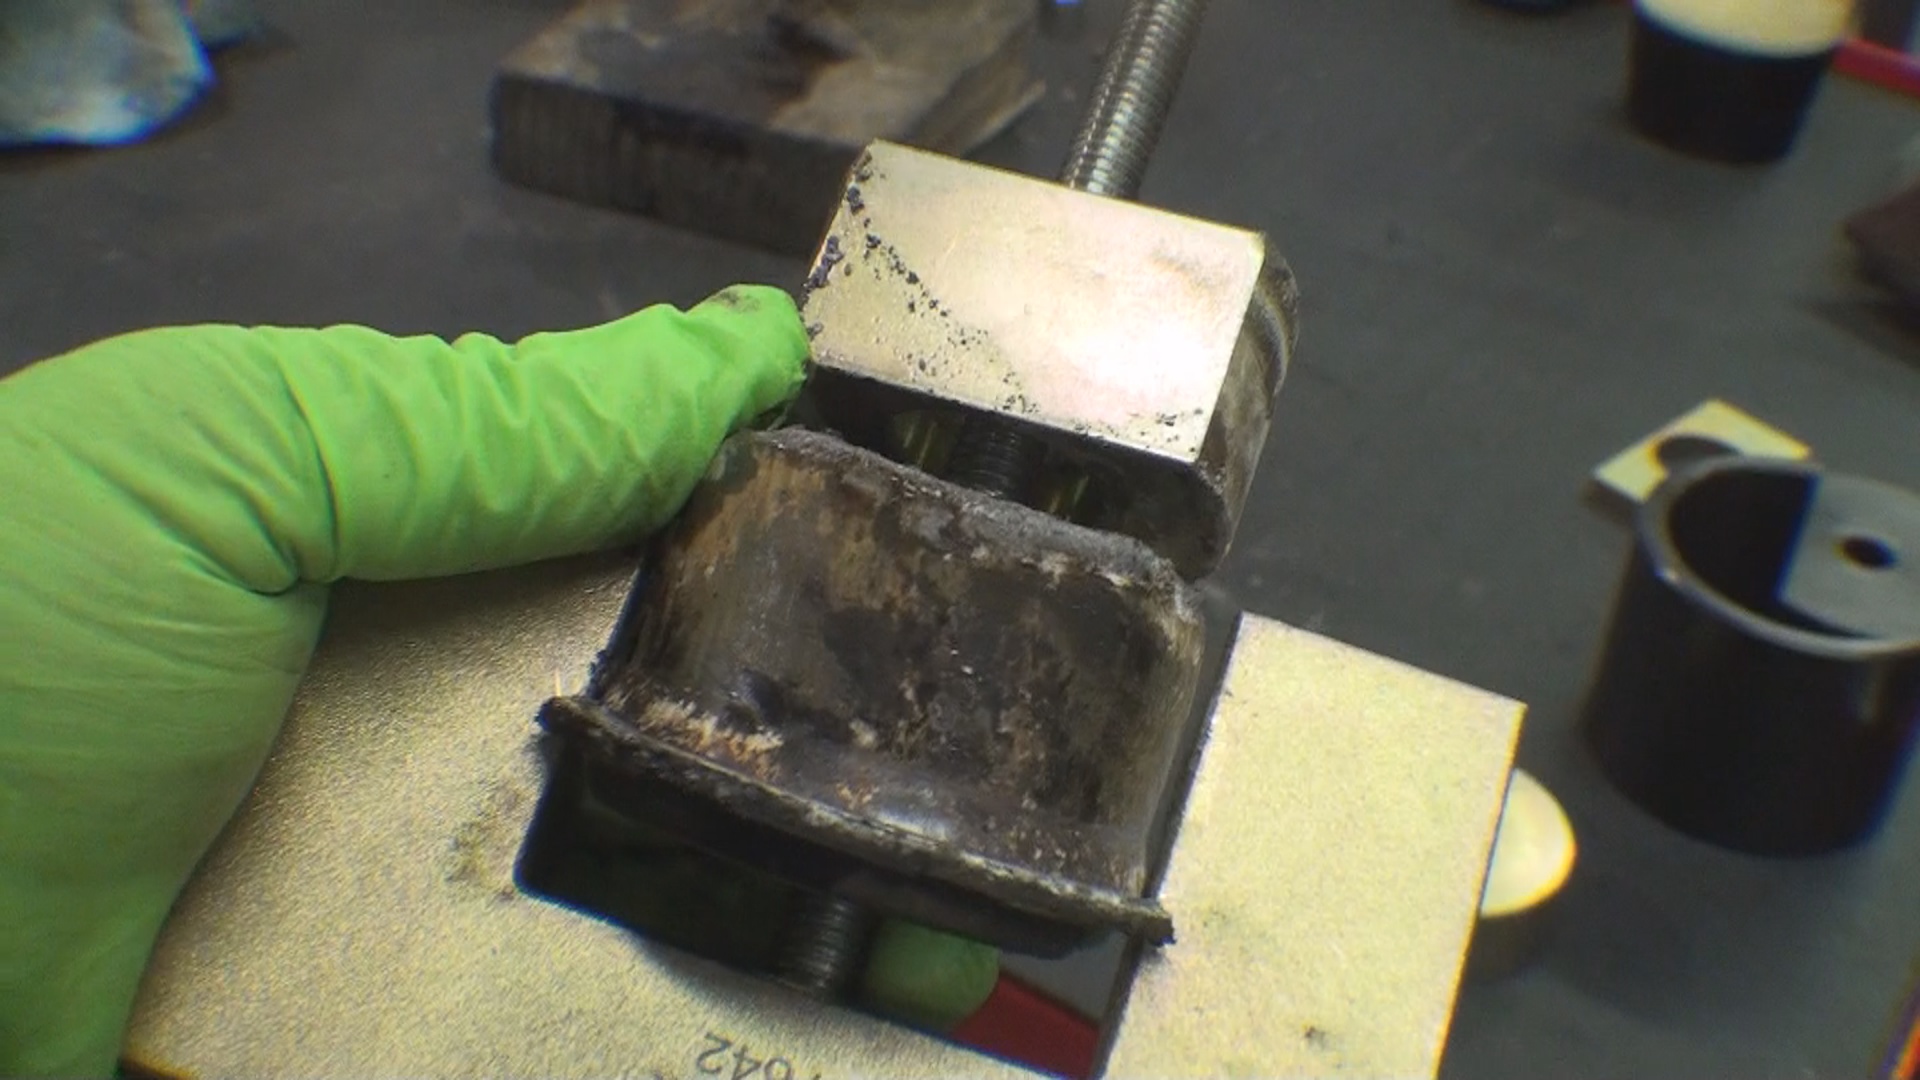
Step 5: Press In The RTAB
While pressing in the RTAB, make sure it starts straight on the side of the bore with the beveled edge (you can get it to the point where it's firmly in place by hand). Next, install the press cups and the forcing screw, and by hand using the appropriately sized wrench, start pulling the bushing in smoothly. The Syncro Design Works RTAB has some knurling on the bushing housing which keeps the bushing firmly secured in the trailing arm. You know you have the new bushing fully seated when the leading edge bottoms out.
Step 6: Reinstall Your Trailing Arm
I told you it wasn't that difficult! You should now have the stock RTAB replaced with this far superior alternative. All that's left is to reinstall the trailing arm into location, torque all fasteners to specification, have your alignment checked, and enjoy.
If you found this DIY useful, make sure to subscribe and follow along with my "Edirty6" dual-purpose build right here on the blog.