- 07/31/2019
- 4 Min Read
- By: Gareth Foley
Why You Want Polyurethane Offset FCABs On Your BMW E30, E36, & Z3 (And How To Install Them)

Polyurethane front control arm bushings (in this specific case, Revshift bushings) are much easier to install than their OE counterpart; however, a small modification is required on offset polyurethane FCABs since they can physically spin in the bushing retainer. It's an easy DIY, is satisfying once complete, and offers many benefits over stock.
A popular modification on many BMW E30s, E36s, and Z3s, is to utilize an offset front control arm bushing (FCAB) originally used on the BMW E30 M3. Since the control arm bushing mounting point and control arm bushing retainers are the same on all of these models, the bushing options are interchangeable.
Why You Want Offset Front Control Arm Bushings
The advantage of the offset FCAB over the standard center-hole FCAB is that it pushes the mounting point of the control arm outward, which in turn pushes the wheel further forward (more positive caster) and slightly more to the outside (more negative camber). The primary advantage of increased positive caster is that it increases steering effort and straight-line stability. It also increases tire lean when cornering, which improves front end grip. The only negative to this modification is the increase in steering effort, but this will only be noticeable for those without power steering.
In regards to the BMW E36, "non-M" cars have suspension that was designed with the intention of running centered FCABs, and that's why this mod works. In 1995, the M3 shipped with offset control arm bushings just like these Revshift bushings, just instead of polyurethane, they were rubber. After 1996, M3s shipped with a modified suspension geometry that offers the same benefit of offset bushings, while still running centered bushings. Since the geometry is already modified, offset bushings aren't necessary unless you drastically lower the car.
In my specific case, I'm building a weekend track toy, so it makes sense for me to go with the offset bushing to increase the positive caster angle. I also plan on running power steering so there are no negative effects I can experience from this modification. In terms of my bushing selection, I have chosen Revshift's 95A durometer offset FCAB kit. Unlike an OE bushing with a metal outer sleeve, polyurethane and Delrin style offset bushings can rotate in the retainer bracket. Because of this, it's a requirement to install a set screw in the bracket.
Tools needed to complete this repair:
Parts needed to complete this repair:
- Control Arm Bushing Retainer (Left)
- Control Arm Bushing Retainer (Right)
- Revshift Control Arm Bushing Kit (95A Durometer)
- M6x20 Cap Screw
- M6 Stainless Steel Washer
Step 1: Take a look at your parts and lay it all out
I chose to do this particular job with new bushing retainers because they are relatively cheap and pulling the RTABs off the original control arms from my BMW E36 and then pushing the OE bushing out is additional work I really just didn't feel like doing. Plus, sometimes it's nice to start with all new parts. The first step in this whole process is to verify which bracket is the left side and right side. Once this is known, you also need to make sure you're aware of the alignment marks on the brackets as well as the alignment marks on the bushings themselves. This will be important later on when you push the bushings into the retainers. To make life easier, I used a paint marker to mark the retainer and a sharpie to mark the bushing.
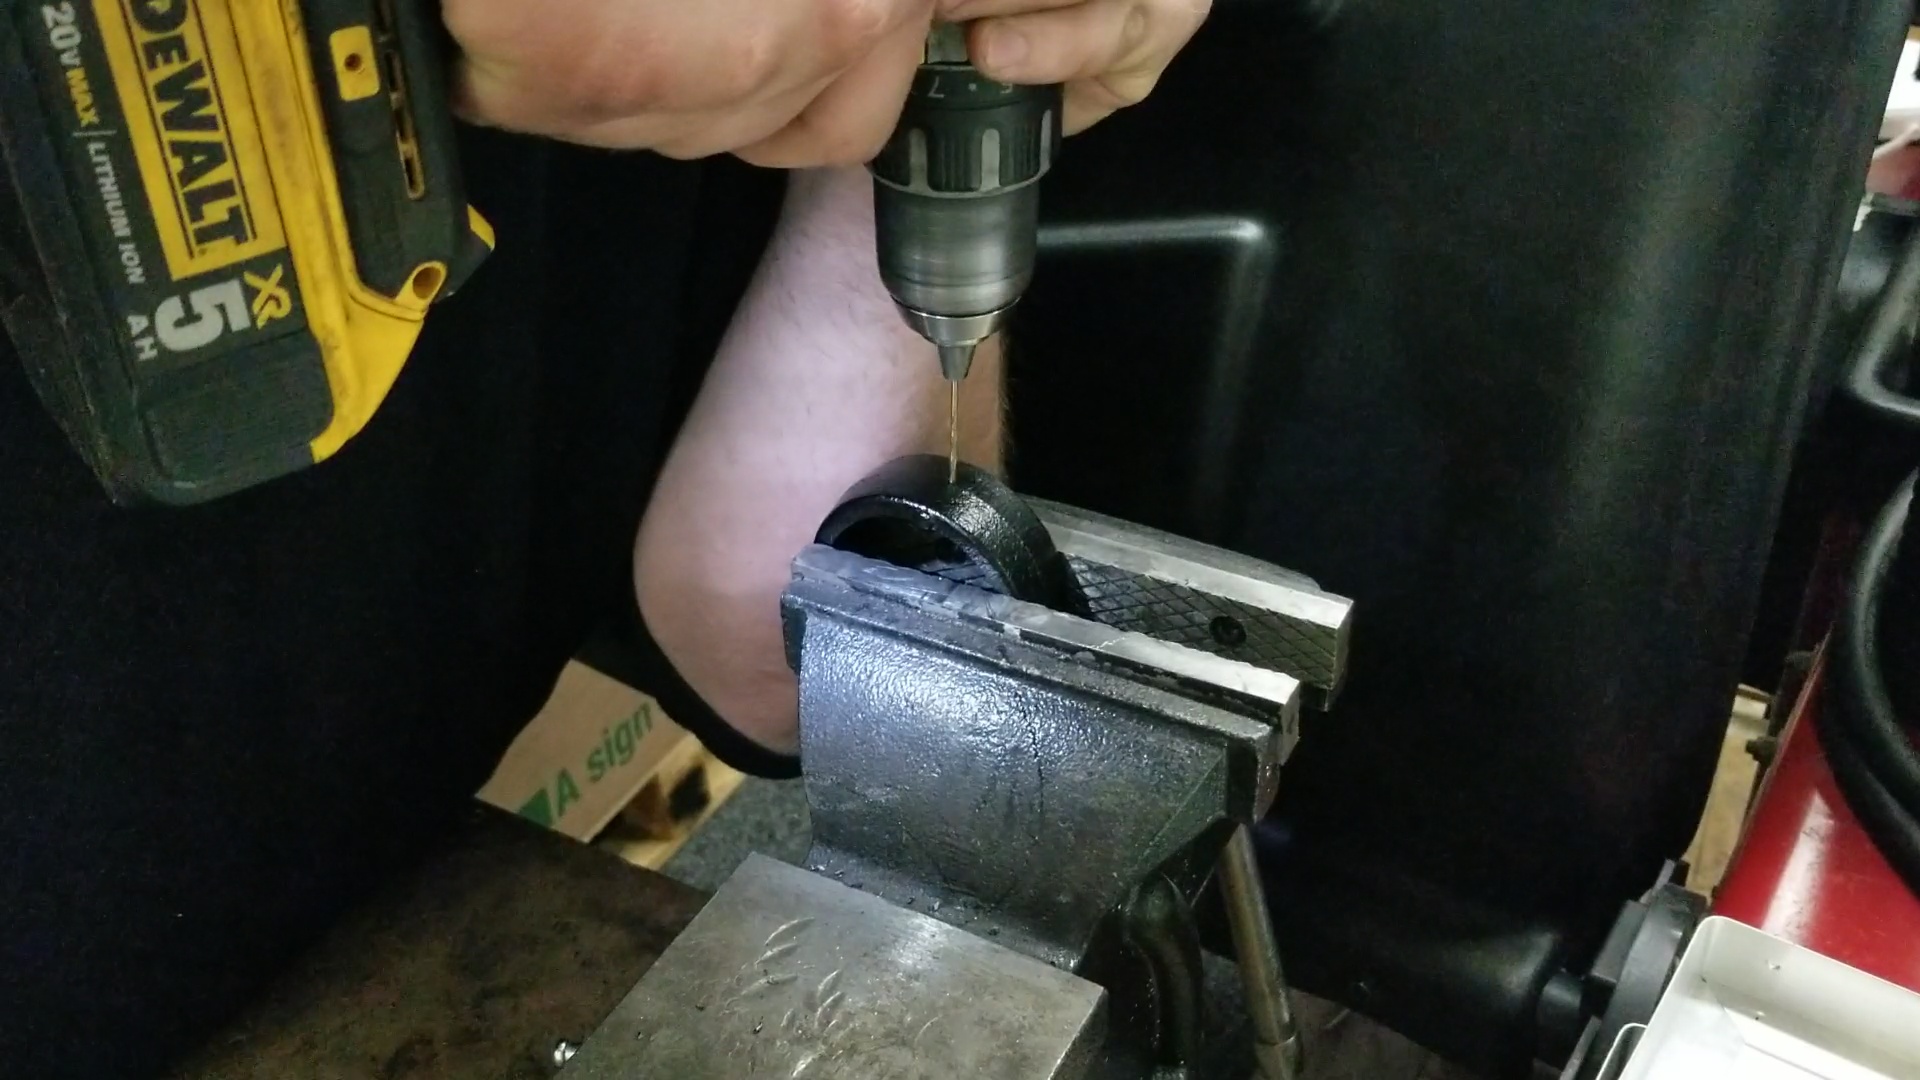
Step 2: Drill and tap a hole into the retainer bracket exactly opposite of where it mounts
To install a set screw into the bushing, you must first drill a hole into the retainer bracket. You will want to reference the max hole size needed for the tap size you will be using. Using a center punch, mark the location where you want to drill the hole. It's best to start with a smaller drill bit and work your way up to the final size. In my case, I used a 13/64 drill bit as I will be tapping the hole to M6x1 thread size. It's pretty easy to drill through the retainer bracket, but my advice is to use decent drill bits. For the tap, I was able to use a tap socket to drive the tap through. For a clean-finished product, I recommend using a round file on the backside of the retainer to deburr any leftover material from the drilling process.
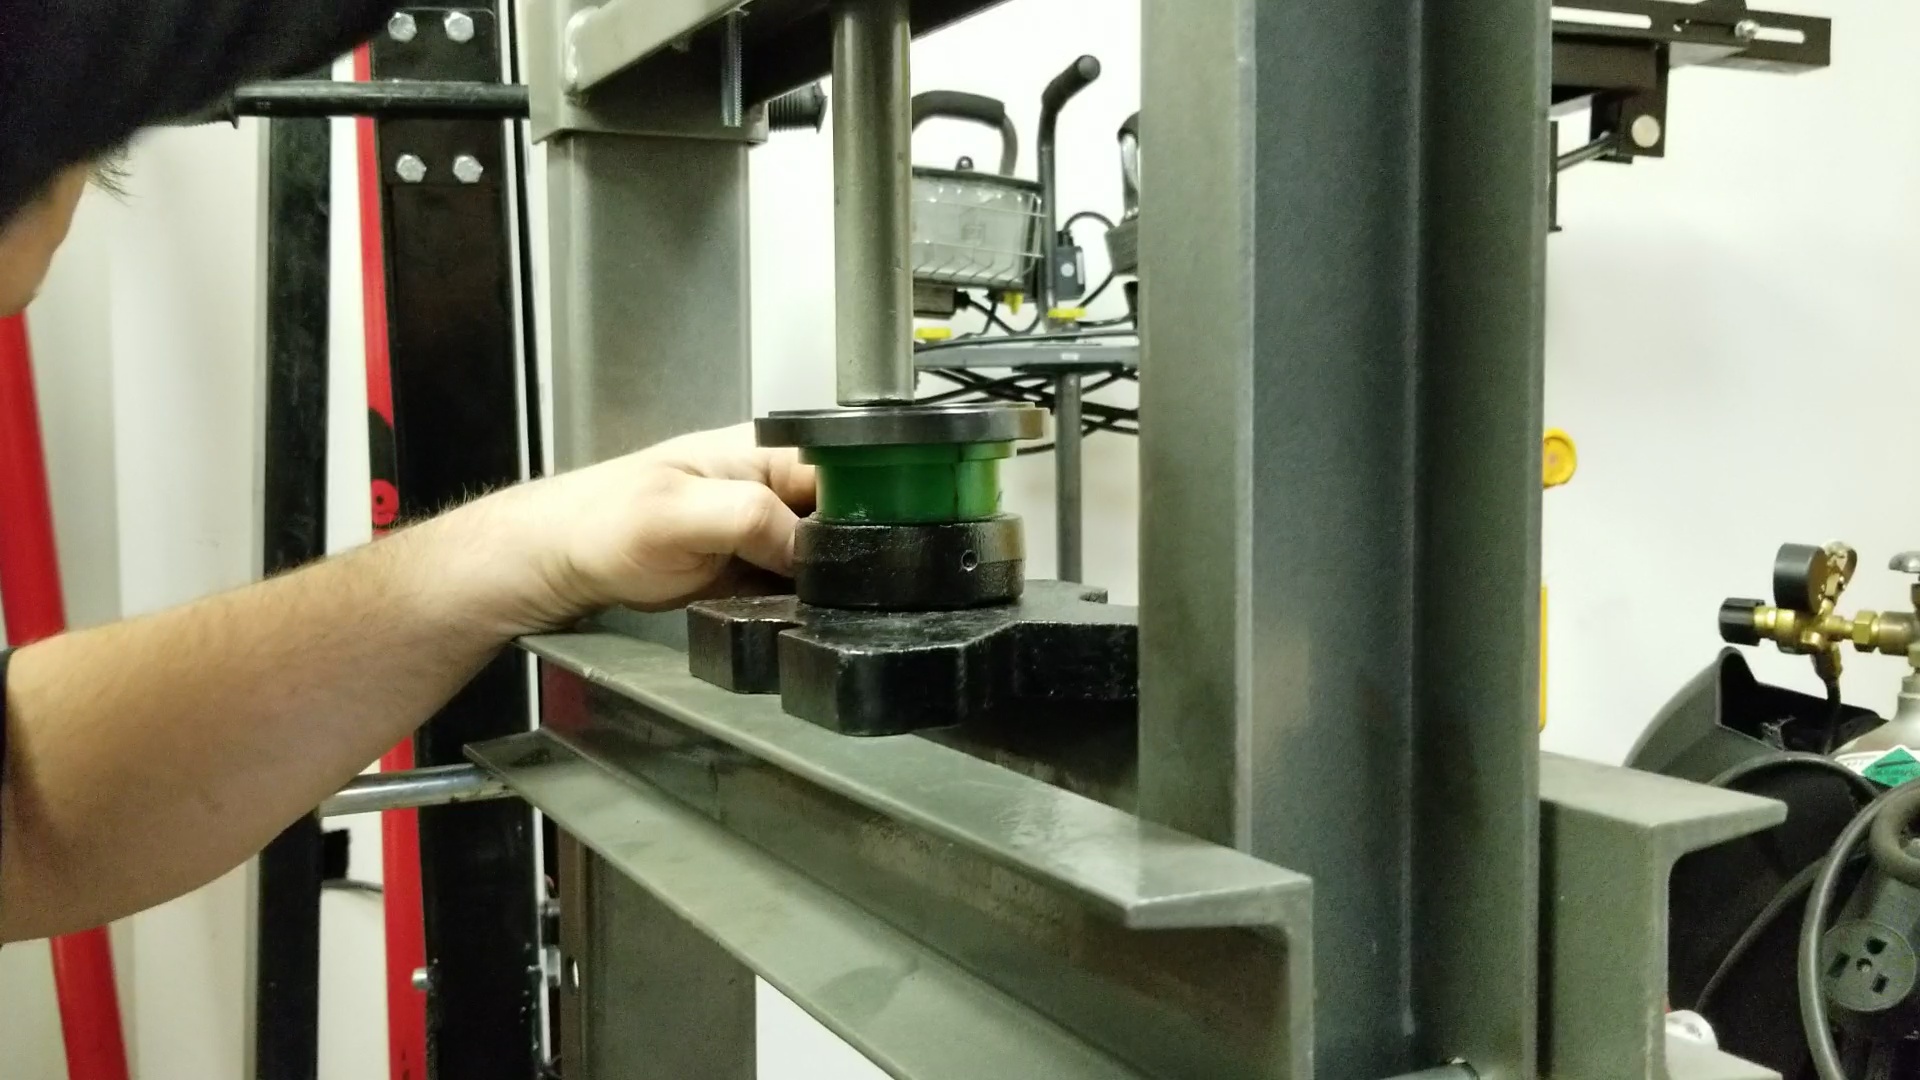
Step 3: Align and press the bushing in
In this particular instance, I'm using a shop press, but there are certainly other tools that can do this job. The tricky thing with the shop press is getting the retainer to sit evenly. If you have an adapter cup that can hold onto the outside edge of the retainer that would be the most ideal situation. The most important thing here is to make sure the bushing is lined up correctly before pressing it in. I used the supplied silicone lubricant to evenly and thinly coat the inside edge of the bushing to aid in pressing it in. Once you have it lined up (the alignment marks in step 1 greatly help with this) slowly start pressing the bushing in, making sure that it starts evenly. Once the bushing is started evenly keep pressing it in until it bottoms out in the retainer.
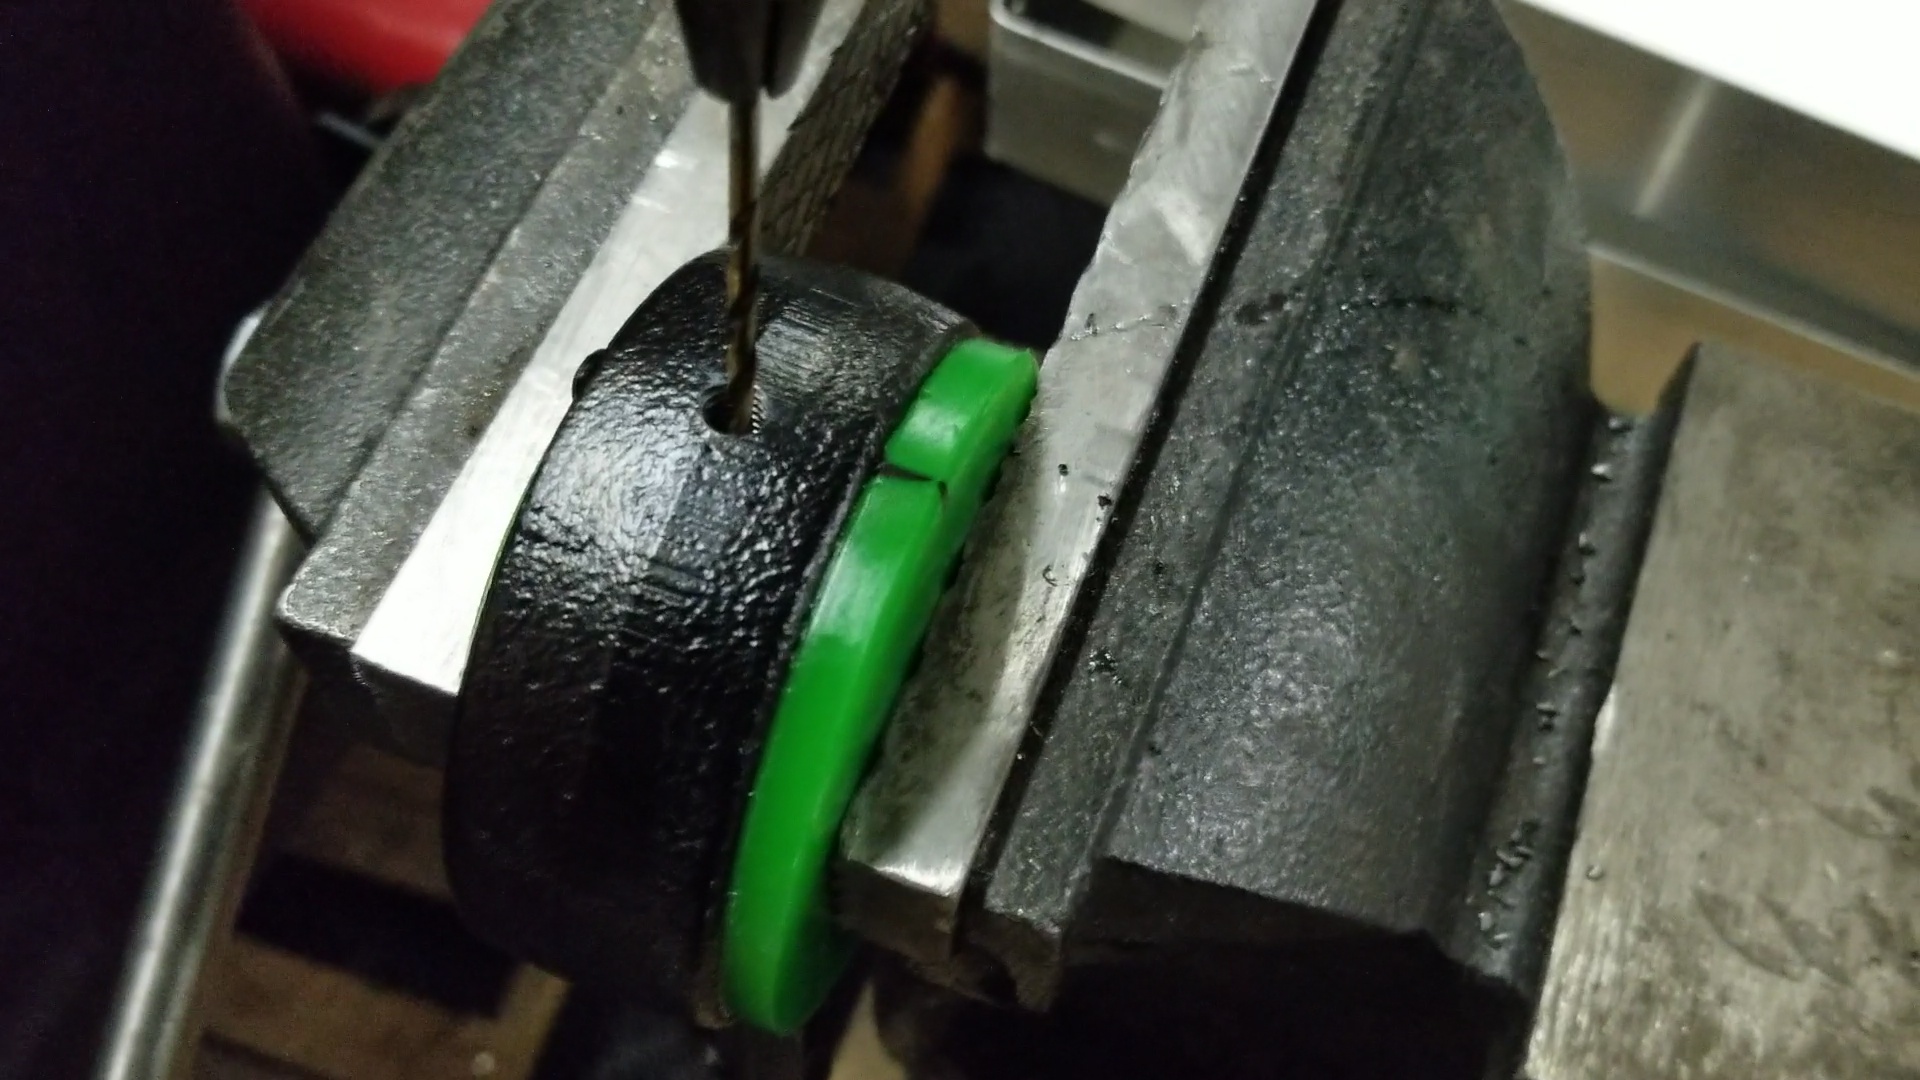
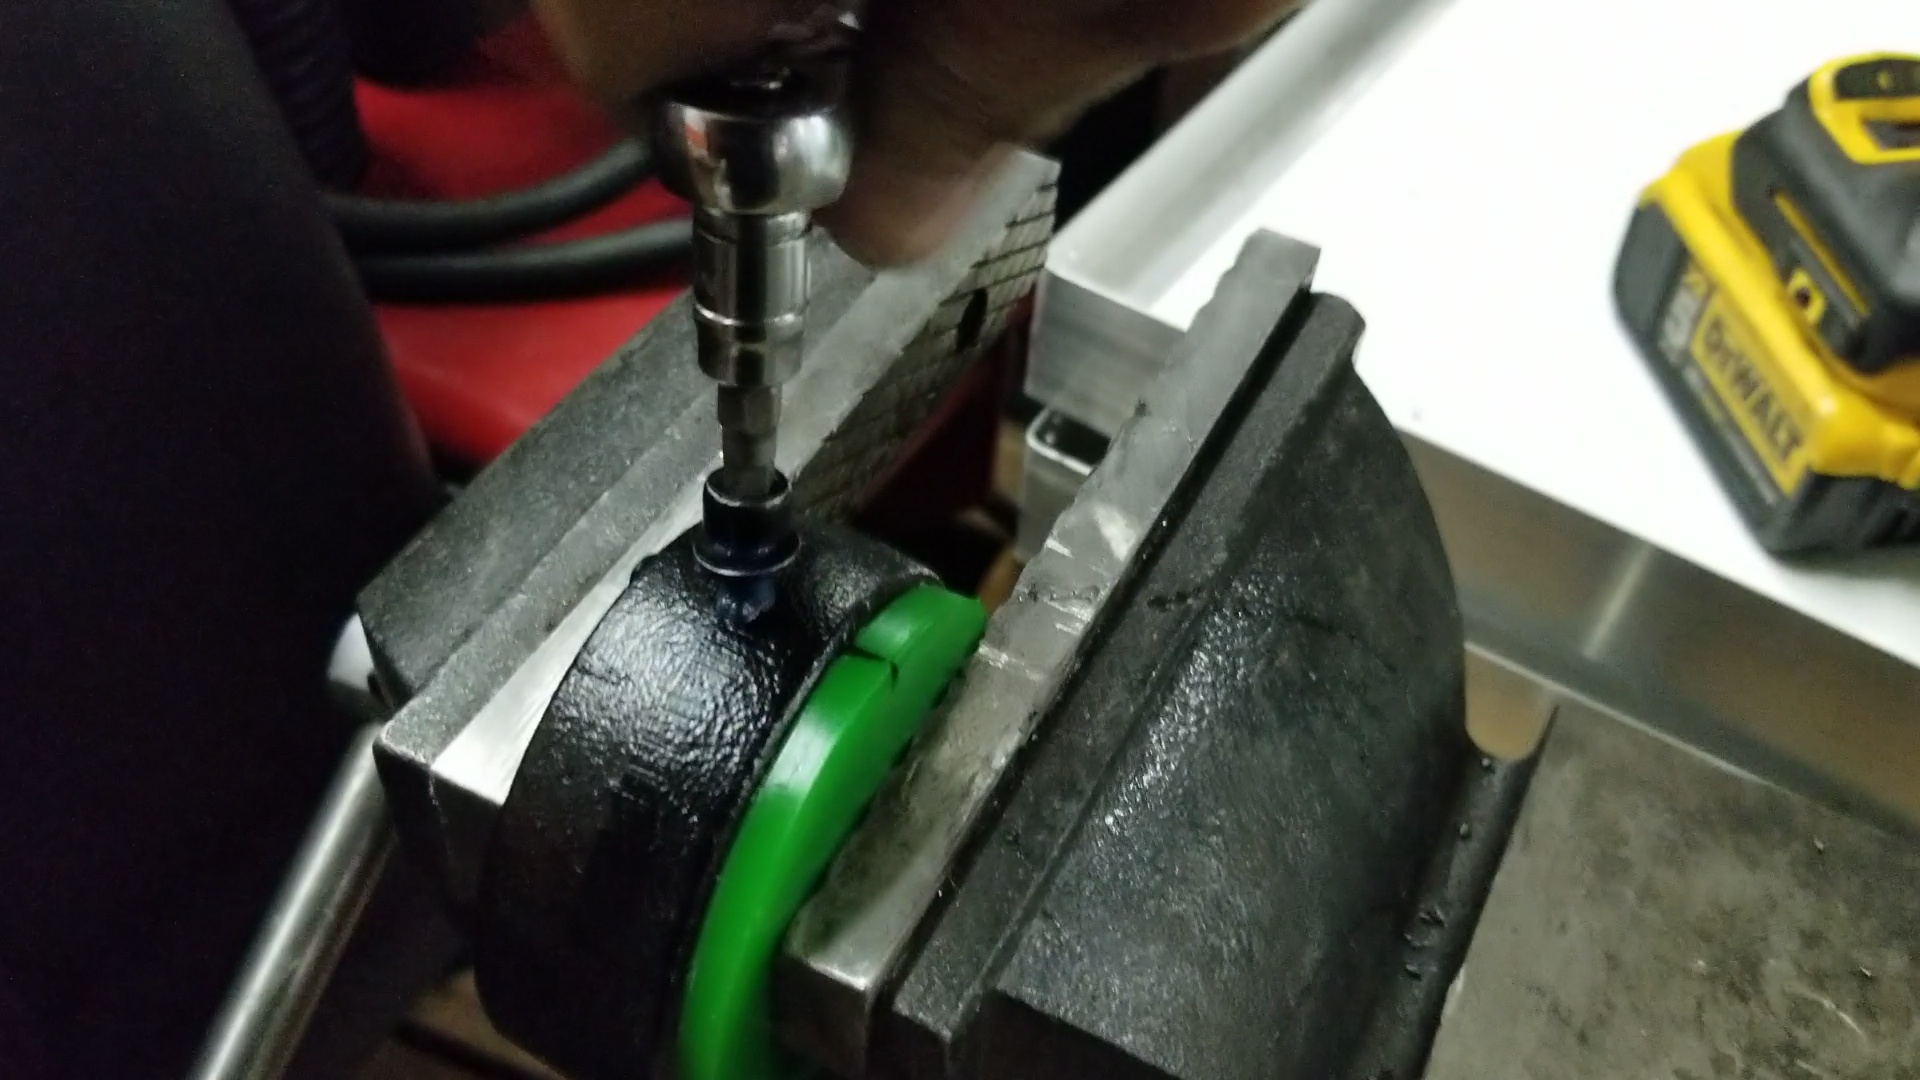
Step 4: Drill a small hole into the bushing roughly half the size of the set screw
To aid in installing the set screw, drill a small pilot hole into the bushing (roughly half the size of the screw itself) via the hole you have drilled into the retainer bracket.
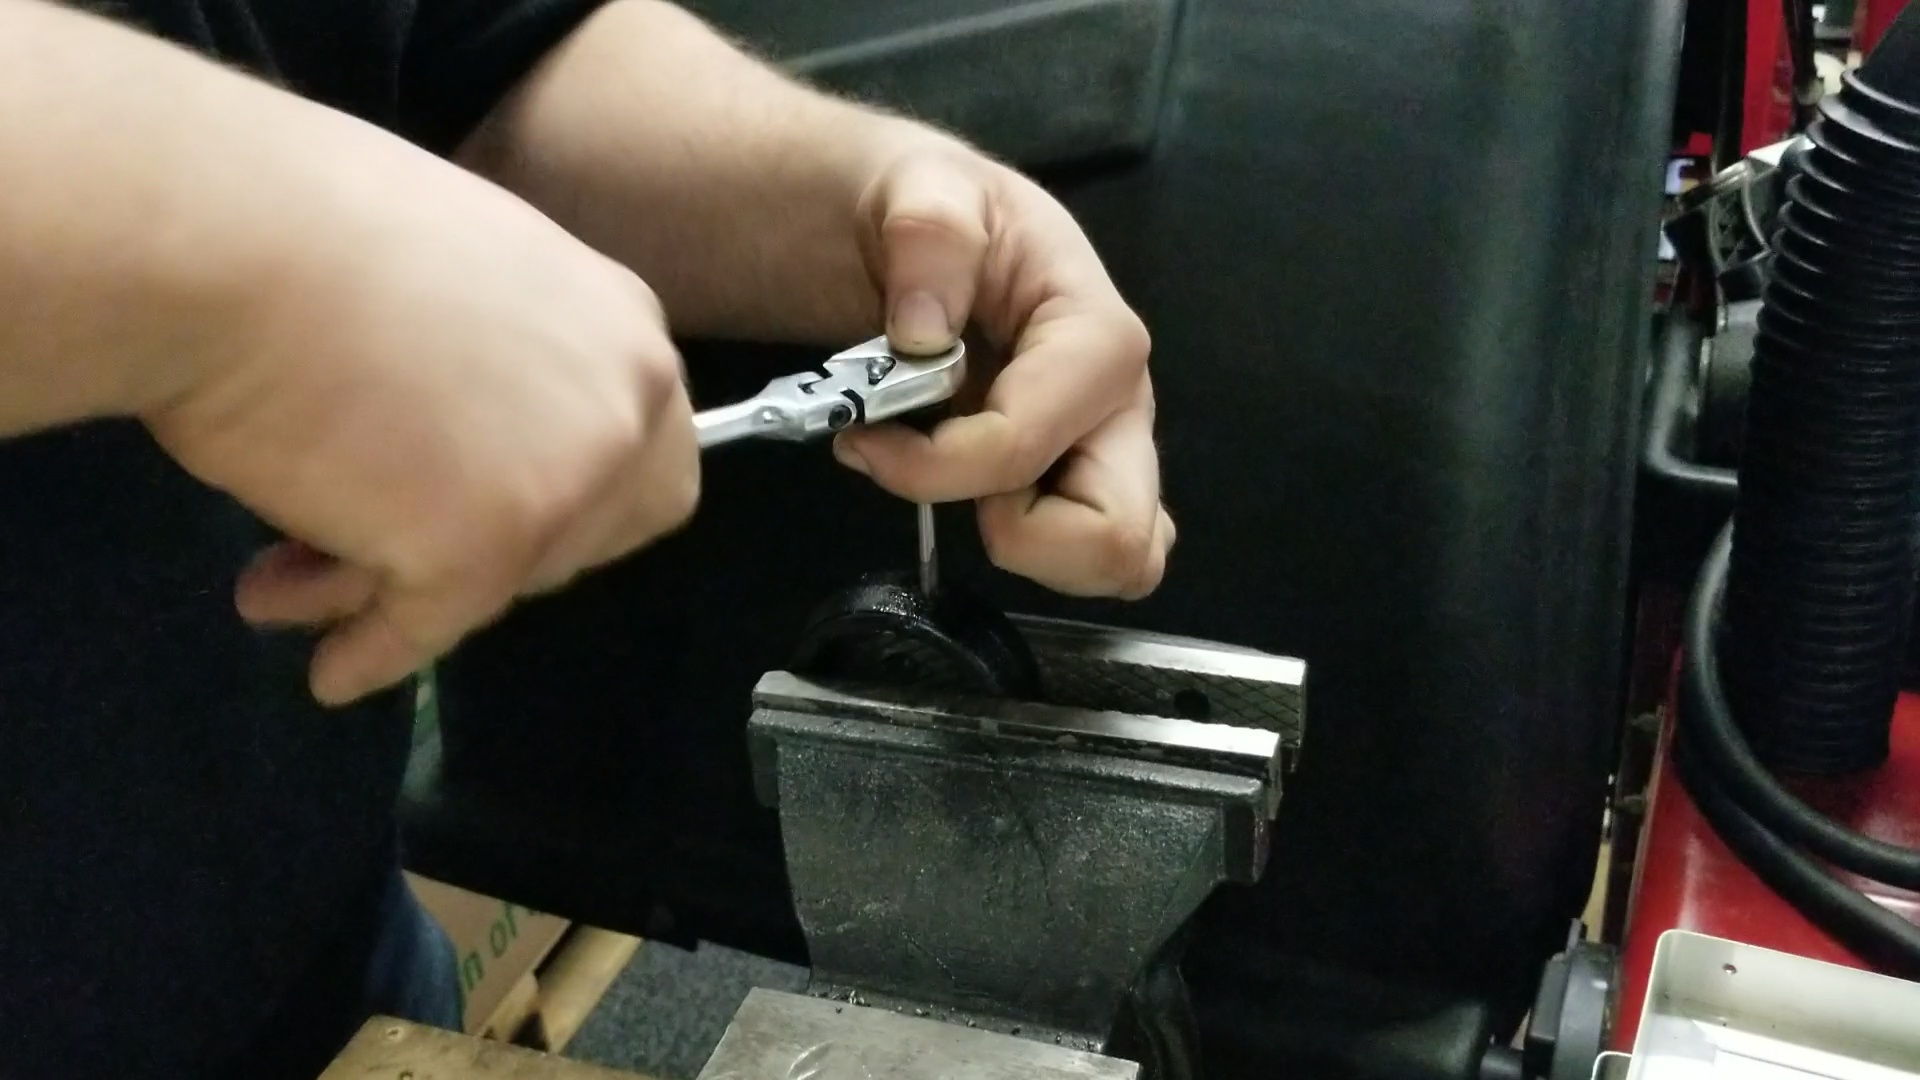
Step 5: Install the set screw into the retainer bracket
I applied a small dab of blue Loctite to the set screw and then threaded it into the retainer/bushing. No real torque spec needed for this. You just need to get it so the screw is tight. Once this is done, the bushing will not be able to rotate in the retainer which locks your caster angle in permanently.
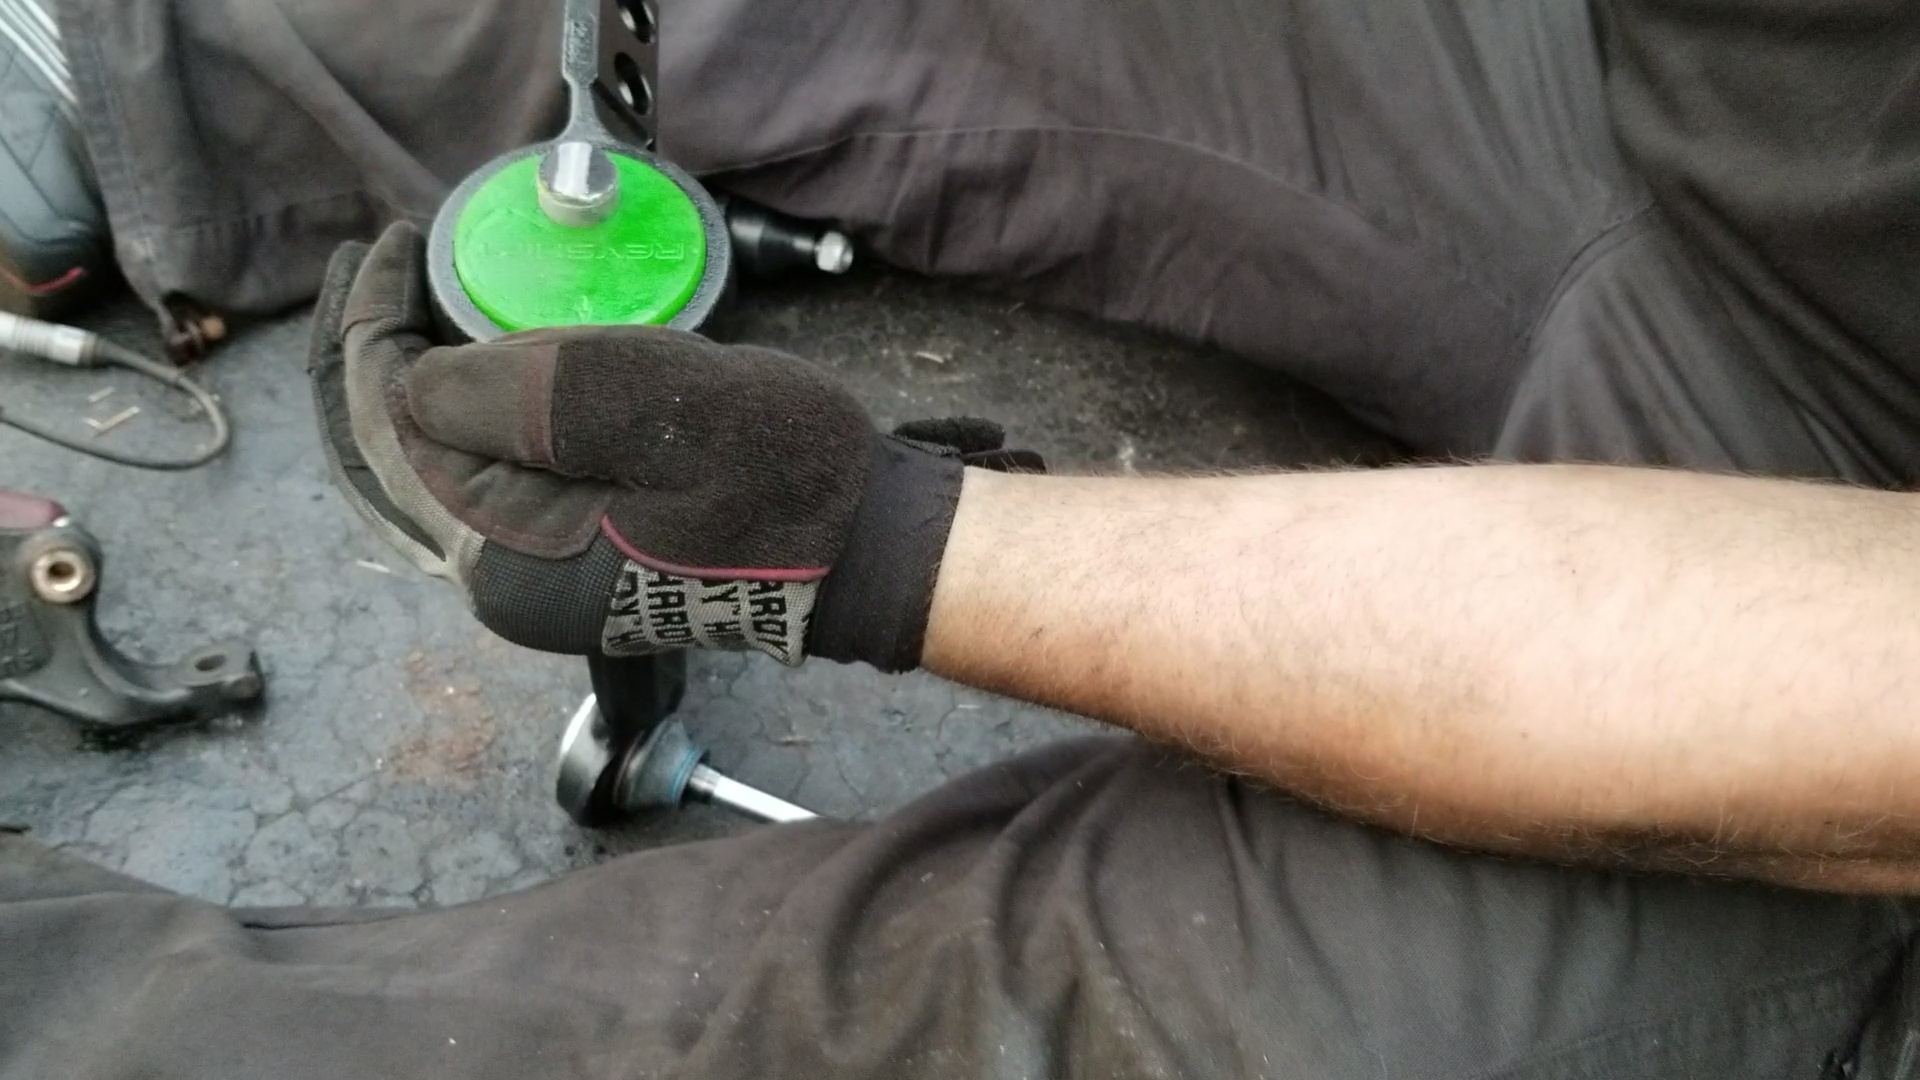
Step 6: Install the bushing onto the control arm
Installing the bushing onto the control arm is much easier with the Revshift bushing than a standard OE rubber bushing. Apply a coat of the supplied lubrication and tap it into place with a dead blow hammer. Unlike a standard rubber bushing, you do not need to worry too much about how the bushing is loaded as the control arm can still rotate inside the bushing.
Tip: It is possible for the lubrication to wash out/dry out over time. This will create a clunking/binding noise in the front end over bumps or while turning. If this happens simply remove the bushings (they can be pulled off) and reapply the lubrication. In environments where moisture is more prevalent, you can use a thicker synthetic lubricant such as a synthetic grease vs. the supplied silicone. The thicker grease should last longer and resist washing out.
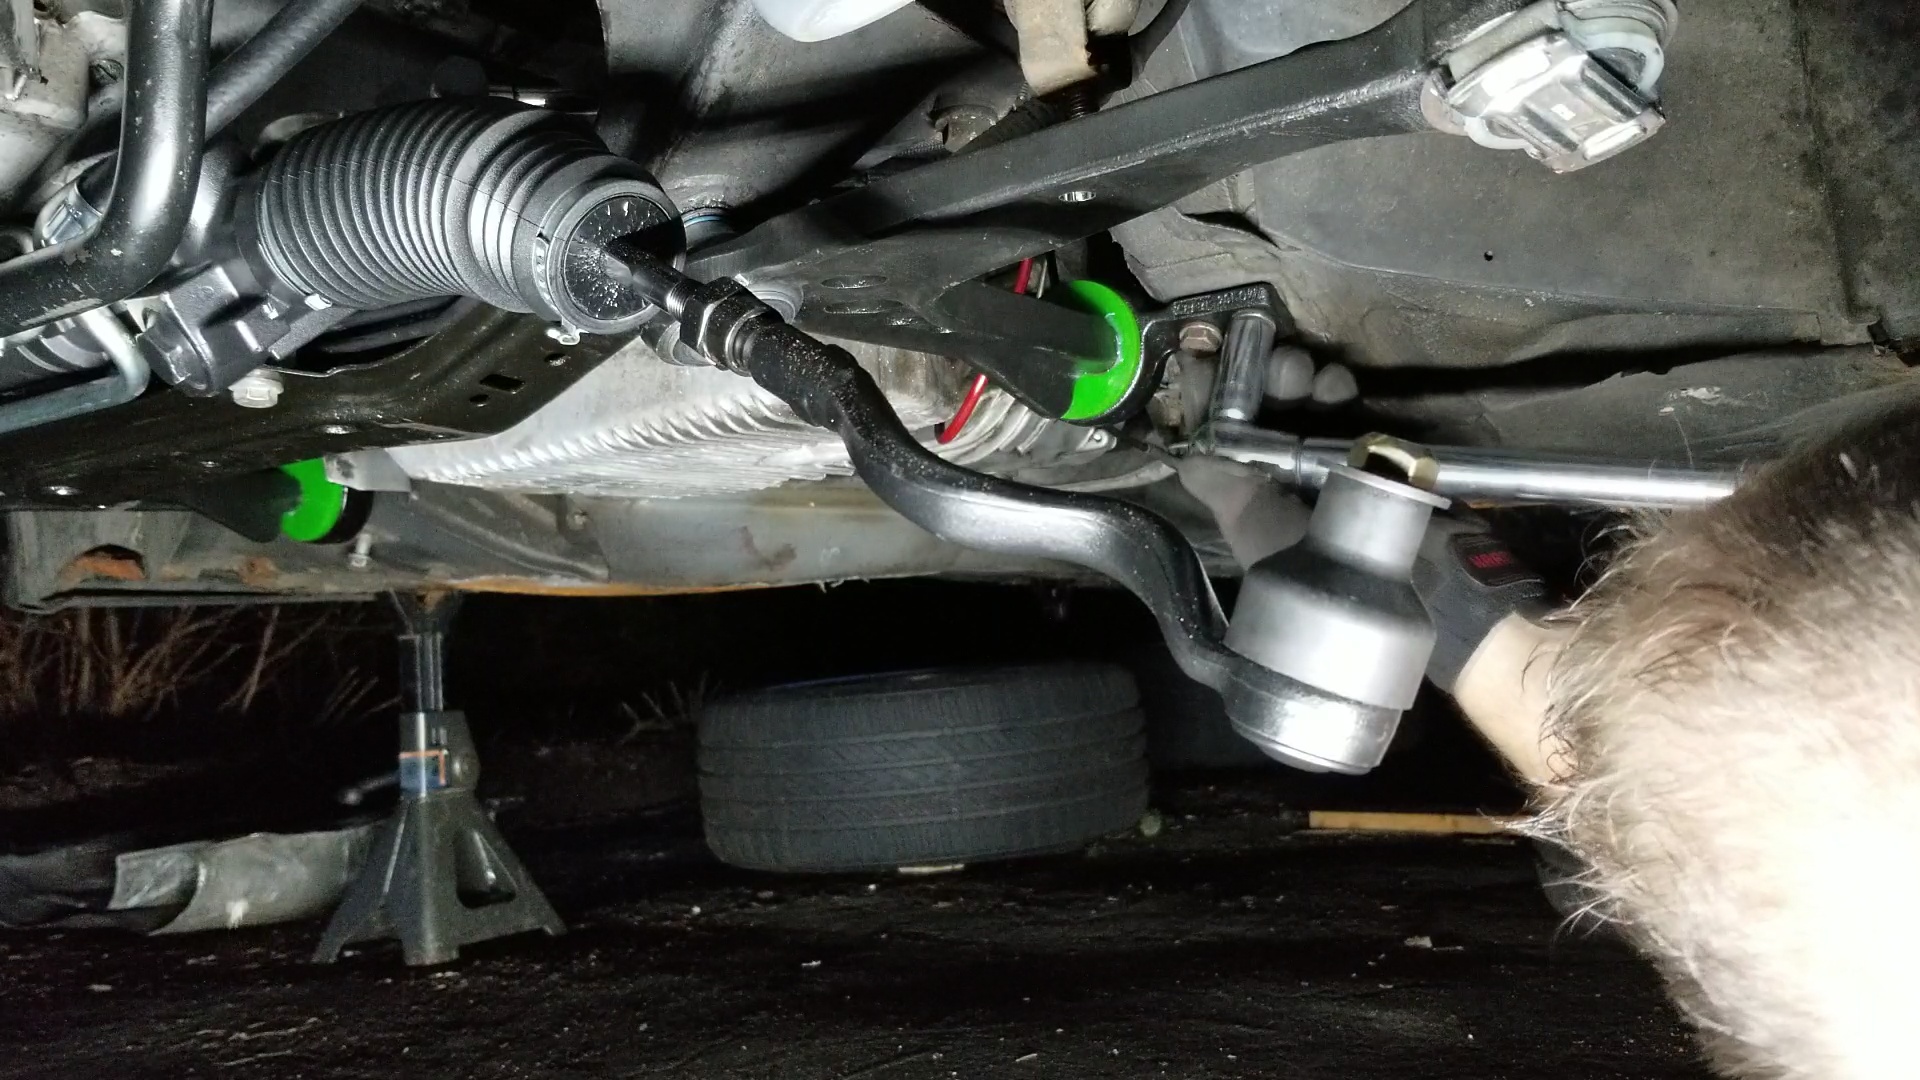
When installing the control arm bushing retainer to the chassis with the control arm affixed to the subframe/knuckle, you may find it difficult to get the retainer to line up with the dowels on the chassis. It will require some effort to get it lined up, but you want to make sure the dowels are physically positioned inside the retainer before installing the retainer bolts to the chassis. Torque spec for the retainer bolts to the chassis for the E36 and Z3 is 47Nm.
Overall, this modification is pretty simple when you have the correct tools. The nice part about this modification is that you don't have to worry about the bushings spinning inside the retainer. The fit and finish of the Revshift 95A FCABs are fantastic, and they easily fit into the OE retainers and onto the end of the control arm with ease (compared to the OE style bushing).
If you'd like to read more about my E36 track car build, follow this link for the rest of the build series. If you have any questions about the process or any jobs that I should do, feel free to leave them in the comments below.