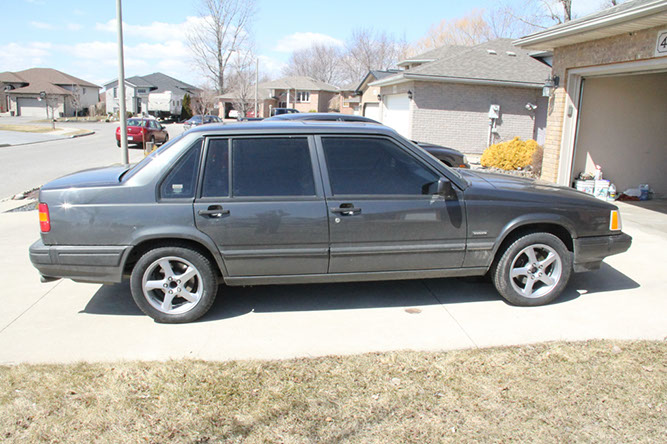
Last week, I posted about understanding wheel spacers for RWD Volvos. In case you might be wondering no, I am not planning on joining the hellaflush stanced car club, but instead simply changing the offset of my car to allow the installation of a new set of wheels.
In order to install my set of 16” Volvo OEM Meteor wheels, I picked up a set of H&R Trak+ 25mm wheel spacers. I decided to pony up on the good stuff to ease my mind about a wheel falling off in the middle of the highway.
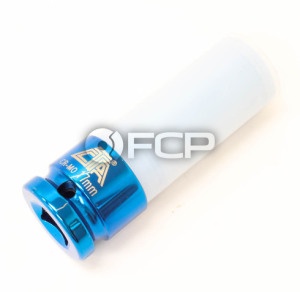
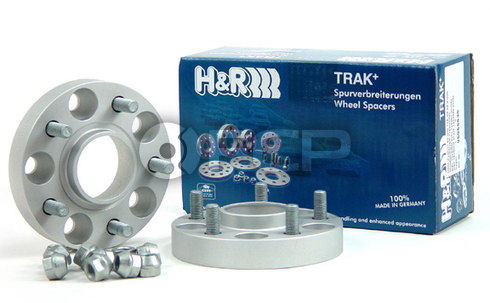 Hubcentric spacer from H&R
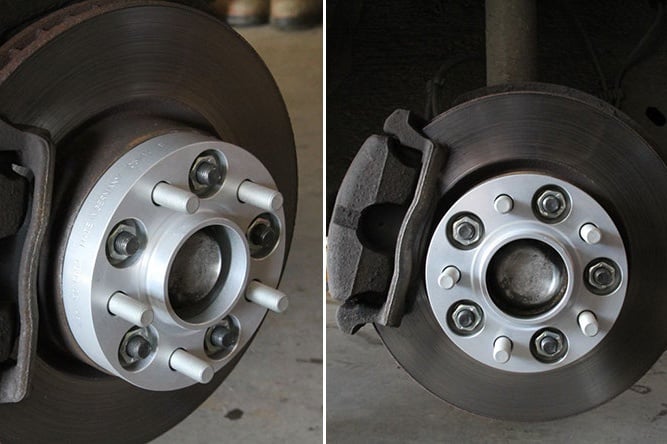
Make sure your parts fit
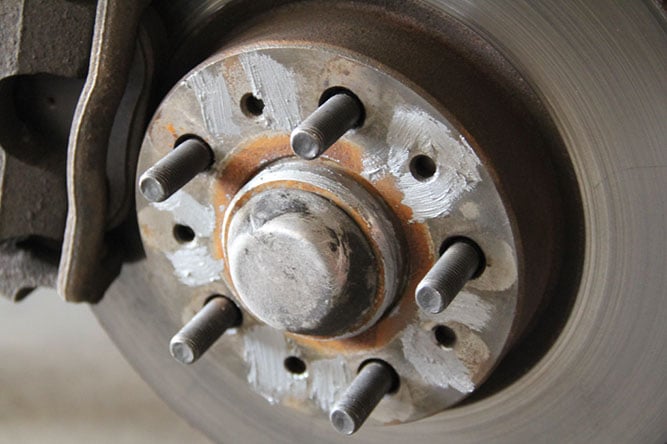
Before you install your spacers, make sure everything lines up. Its possible that your offset might be different than what you were expecting or the bore size doesn’t match up. In any case, always test fit your spacers so you know what to expect.
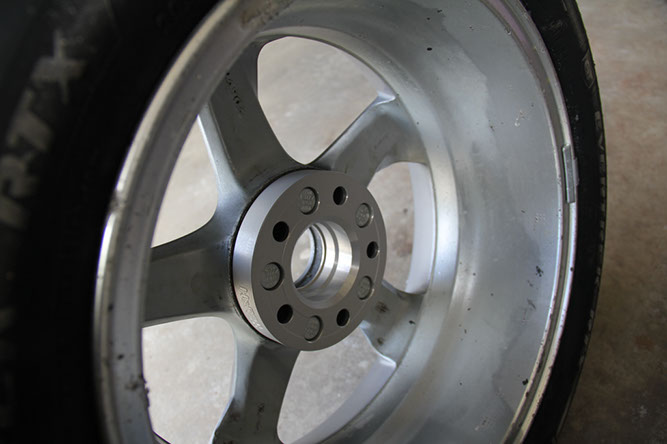 Step 1: Make sure your parts fit
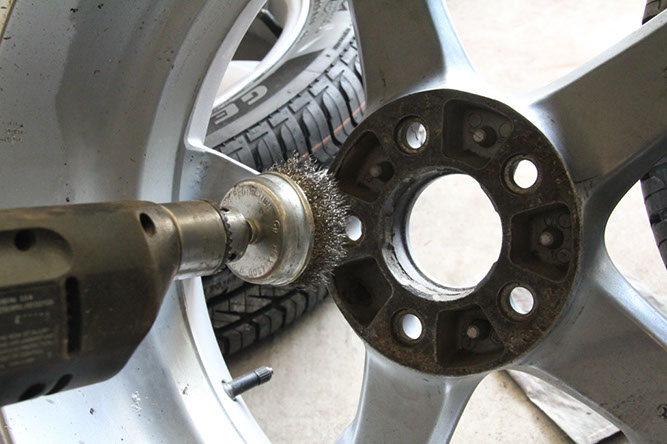
Clean wheel & hub surfaces of rust
Using a wire wheel, take off any rust that has accumulated on both the rim face where it meets the hub, and the hub itself. With a lot of rust buildup, it is possible that your wheels may not sit properly, and thus throwing things off completely.
Apply anti-seize to the mating surfaces
You’ll want to apply a light coat of anti-seize to all mating surfaces. Mainly the hub face, and around the hub. This will aid in removal later. You don’t need to put a heavy coat, as when you tighten down the spacer, the paste will spread out.
Note: I have seen many online tutorials recommending putting anti-seize on the lug nut stud threads where the spacers mount. Not only can I not recommend this, it is downright DANGEROUS. Anti-seize essentially acts as a lubricant, significantly lowering the friction between the threads of the nut and the stud. Even torquing the lugs to spec won’t do anything. Over time, these nuts will loosen, in the least, causing vibration in your wheels, but in the worst case causing so much damage to your spacer and making it separate. As these lugs are hidden beneath your wheel, you will never be able to tell when they have begun to loosen on their own until it is too late.
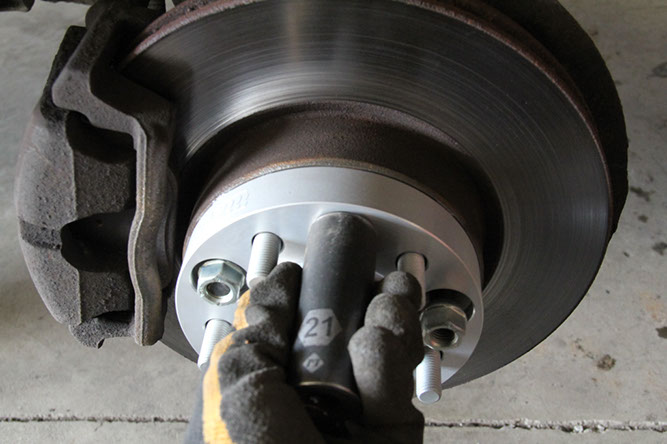
 Step 4: Install the spacer
There’s nothing different about installing a spacer rather than installing a wheel. You’ll be using the same torque specification as required for your regular wheels. In my case, the torque called for was 63 ft-lb of torque.
Interestingly, when installing the spacers, my trusty 21mm impact socket didn’t fit. In this case it back to the old school cross wrench to tighten the lugs. I used my muscle memory to perfectly tighten the lugs to 63 ft-lbs of torque. It wasn’t optimal, but close enough for my satisfaction.
A set of thin-walled, wheel specific sockets would be optimal here if you have access to them.
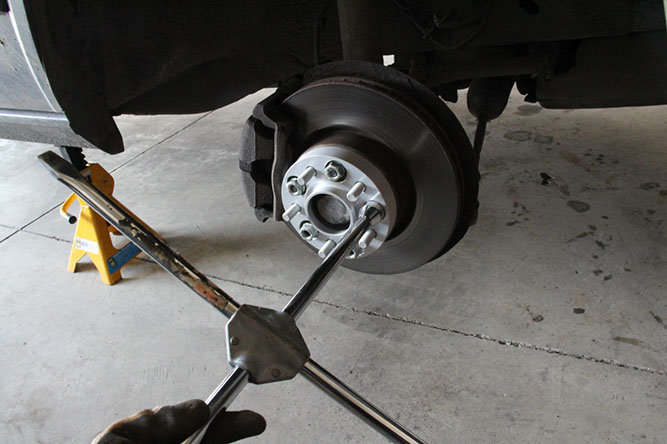 Going back to old school and using a cross wrench to tighten the spacers.
Step 5: Install your wheels
Take your wheels and mount them, ensuring they sit flush on the hub. Tighten your lug nuts down to spec visually noting the clearances you have between your suspension and your brakes.
Take a step back , snap some pictures, and enjoy the fruits of your labour. Easter weekend couldn’t have come at a better time!