Axles are an item that are replaced all too often, when they can be repaired nine times out of ten. Just because your CV boots are torn and slinging grease doesn't mean you need to replace the axle with a cheap aftermarket part! Using factory parts is always better, and in the case of axle boots, pretty cheap. A new axle boot is between $10 and $30, and you get the peace of mind that you are not installing garbage in your highly engineered European vehicle.
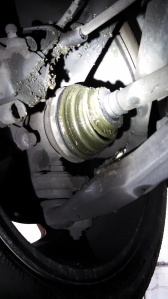 A common sight - A torn axle boot
Chances are, you've seen this before. But, unfortunately, most do-it-yourself mechanics will replace the entire axle rather than just the boot. Most aftermarket axles - but not all - are either Chinese junk, or way overpriced remanufactured factory axles. Remanufacturing processes vary, and some axles come with joints that are so poorly made, they fall apart coming out of the box, or cause noise and vibration on the road. Rather than roll the dice on an aftermarket axle, I think it's worth it to replace the boot, inspect for damage, and reuse your factory joints.
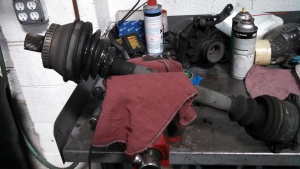
Step one: remove the axle. You can replace the boot with the axle still in the car, but I prefer to have it out. Just my preference. I like to hold it in a vice to keep it compliant.
Step two: cut the old clamps off and peel the boot back. Wipe the bulk of the grease off with a rag - you don't need to get it perfectly clean just yet. Do an initial inspection; does it look dry? If the joint was super dry, you should still disassemble it and check for wear. If you need to replace the joint, they are available separately and are not too expensive.
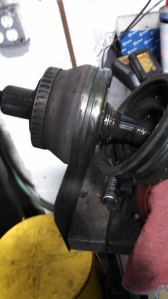
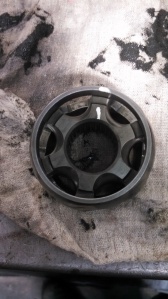
Step three: pound the joint off with a hammer. I use a brass hammer because it won't damage the joint like a sledge hammer would, but you can use a deadblow. Putting the axle bolt (if your axle uses one) in will help keep a good grasp on it while hitting. Once the joint is off, use a paint pen or white-out to put three marks on the joint to help index it, as shown here.
[gallery columns="2" ids="5816,5817"]
Step Four: Clean the axle shaft and get it prepped. I do this while the paint dries on the joint, as exciting as that process is to watch. Make sure you pay attention to how everything was when you pulled it off, and put it back on in the same order. Don't clamp the boot on yet, just leave the clamp on loose. Replace everything you get in the boot kit!
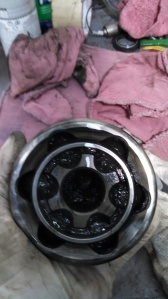
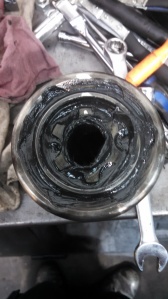
Step Five: Disassembly and cleaning. First, pull out the balls. I like to go in a Star of David pattern, to prevent the joint from binding as I pull them out.
Next, pull the inner cage out. It will come out easily, if it is resisting than you're doing it wrong. The little window needs to be lined up with the edges of the cup and it will pop right out.
Separate the inner race from the cage, using the same principle as before. Line up the edges of the inner race with the cage and it should come apart easily.
Beautiful! Now clean everything. Don't use parts wash though, that will wash off the paint marks. Use a hundred rags instead, and take your time to get all the grease off.
[gallery columns="2" ids="5820,5822"]
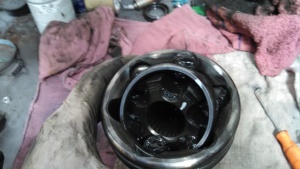
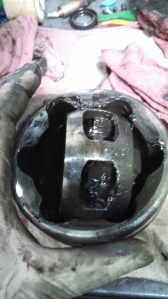
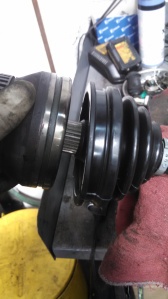
Step six: check for wear. The major part that I've seen wear is the cup - the outermost part of the axle joint. When it wears out, it creates noise, and needs to be replaced. Check for pitting and grooves by running your finger along the cup where the balls sit normally. A slight ridge or step is not a big deal, but pitting is game over.
Luckily, ours was in good shape. You can see some slight ridges, but nothing serious. For 130k, this joint looks beautiful.
[gallery columns="2" ids="5823,5834"]
Now, put the inner race back in the cage the same as it came out.
Then put those two back in the cup, the same as they came out. Make sure those paint marks from earlier line up! Then, put the balls back in.
[gallery columns="2" ids="5825,5826"]
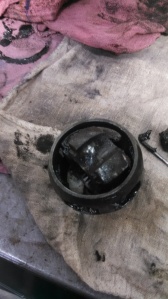
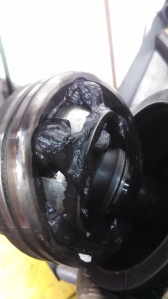
Now it's time for grease. Put the axle bolt in until you see it sit flush with the inside of the cup if you have a hollow joint, otherwise the grease will come out. Cut off a corner of the bag of grease, like you're making a little pastry bag.
Now shove it in the center of the joint, where the splines of the axle shaft would go, and squeeze it all in. The idea is to shove the grease behind the balls and cage until they come out the top. This may take more than one bag of grease.
[gallery columns="2" ids="5828,5827"]
Finally, shove a finger in and take the excess grease and smear it on the top. Think of it as icing a cake. Try not to make a huge mess, you don't want any on the outside where the boot clamps on.
Step seven: installation of the axle. Put the joint on the shaft, and start it by hand. Make sure you don't have it going on crooked! If it's not perfectly straight, it will mess up the threads on the axle shaft, and you'll have to get out the file...
Pound it on. You'll know when to stop. If you want to be sure that it's fully seated, peel back the boot and check that the little plastic collar is sitting flush with the joint.
Clean off any excess grease that may be on the boot or outside of the joint, and then put the boot on and clamp it down. Now you have one axle, good as new, and it only cost $25 and a few hours!

Put the axle back in the car and you're good to go. To make sure your joint isn't totally worn out, drive in a circle with the steering wheel at full lock and accelerate. If you don't hear a clicking, you're golden.
A new axle from Audi costs around $300. Yes you can get an aftermarket axle for $50, but even cheaper than that is just replacing the boot and keeping your factory parts. Some of the inner joints I have seen on aftermarket axles are so cheap that they cause more vibration on the freeway than if you had just kept your worn out factory axles. Not to mention that boots for aftermarket axles are more difficult to come by than factory joints, so if your boot splits again in 6 months, you're just going to get stuck in a cycle of replacing axles.
If you have an afternoon to spend, I highly recommend doing this yourself. It doesn't require much effort, it's cheap, and it's the way the manufacturer recommends doing it. Just make sure to take your time, pay attention to how it all came apart, and remember the golden rule - installation is reverse of removal.
About the Author: Chris Stovall
 Chris is a journeyman mechanic from Berkeley, California, specializing in late model Volkswagens and Audis. A glutton for punishment, his spare time is spent rebuilding every component of his '83 Rabbit GTI.