I replaced every single component in my A/C system in my Volvo XC60 and my 940 to get them to work. Unfortunately, I learned the hard way when trying to find the root of the problem. If you’re lucky, your A/C system can be very cheap to fix. But the key to this is, you have to know where to look. When I first took on this job, I only had a faint idea of where to look. Without any specialty tools, if you follow these tips, you should be on the right path to air conditioning redemption.
Before we get into the nitty gritty, we need to know what’s what. In very simple terms, an A/C system comprises of the following components, in the order that they are located in the system.
- Evaporator – Sits in the cabin of your car and cools down the incoming air.
- Compressor – Compresses incoming gas from the evaporator and keeps refrigerant circulating through the system. The compressor will take gaseous refrigerant and compress it.
- Condensor – Takes the heated, compressed refrigerant from your cabin and cools it down. Usually mounted in front of your car’s radiator. The refrigerant will then move into a liquid state as it cools and condenses.
- Reciever/Dryer – Keeps the incoming liquid and gaseous refrigerant separate. Liquid will settle to the bottom allowing the gas to continue to the evaporator.
- Orifice tube/expansion valve – Allows the incoming refrigerant to expand, and subsequently cool down. This cool gas is routed to your evaporator, making the A/C system work.
- Refrigerant: The gas in an A/C system. R-134a is the most common refrigerant being used in vehicles today. Older vehicles may still have R12 or "Freon" and newer vehicles may use HFO-1234YF.
 Typical automotive A/C System
Diagnostic 0: Get familiar with your A/C System
Take a peek under the hood. The A/C dryer will be a large canister-like unit inline with the cold A/C lines. Your compressor will be mounted to the engine, looking like a large pulley roughly the same size as a medium sized can of peaches. Your low pressure switch will be mounted on or near the receiver/dryer. Observe all the lines routing from the A/C dryer and compressor. The larger diameter lines are your cold, low pressure lines. The condenser fan will be located right behind your grill, in front of the condenser and radiator.
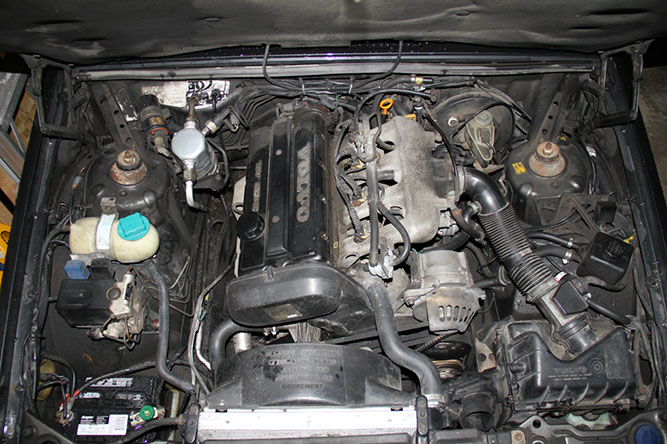 Volvo 940 Engine bay
Diagnostic 1: Is your A/C cooling sufficiently?
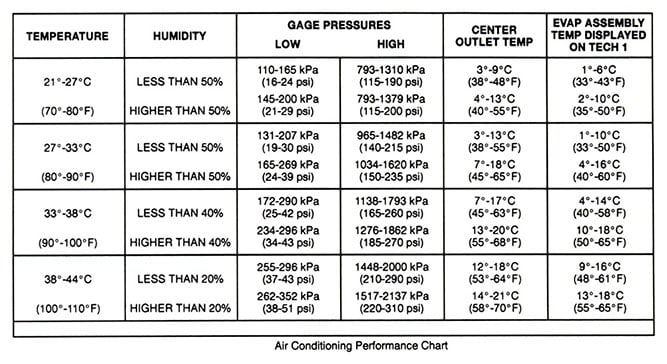
Grab yourself a meat thermometer and put it in the main center vent of your car. A properly working A/C system should have a center vent temperature between 40F-60F under normal conditions. Reference the following chart for a more exact estimate of what center vent temperatures should be. Your vent temperatures will be highly variable depending on the ambient temperature and humidity.
By measuring your temperatures, you can judge if they are acceptable or not. If not, continue to Diagnostic 2.
Diagnostic 2: Does your compressor work?
Turn on your air conditioning system and look at your A/C compressor. If the center portion of the compressor is spinning, you’re in good shape. That means your electronics are working properly and so is your compressor. In other words, all you need is a leak check and a new charge of refrigerant. Just pray the leak isn’t a serious one. If your compressor isn’t operating, continue to Diagnostic 3.
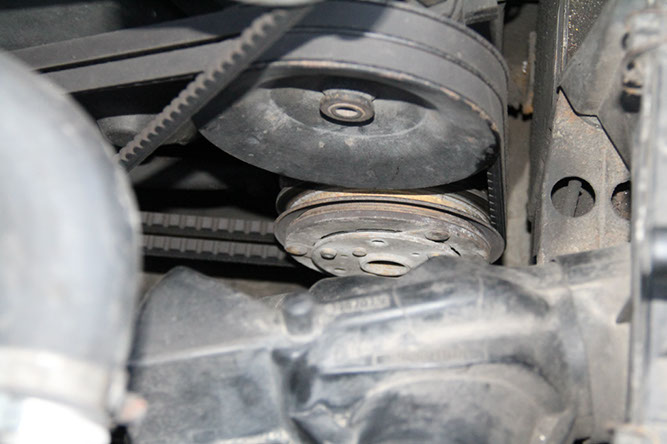 You can see the compressor nestled at the bottom.
Diagnostic 3: Test the low pressure switch
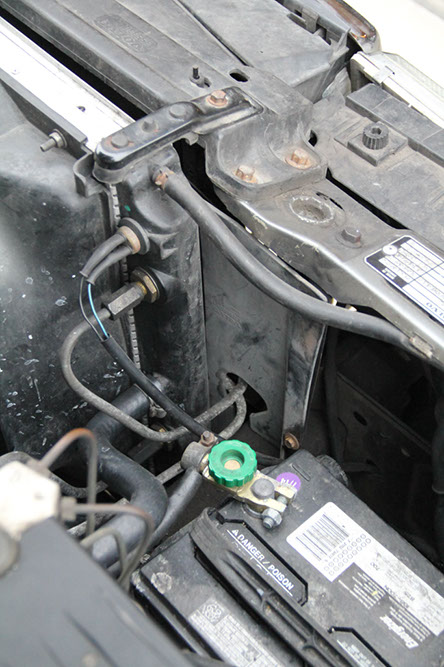
Find your low pressure switch and unplug it. Start up your A/C system and jumper the leads. If your compressor starts turning, you either have a bad switch, or a low charge of refrigerant.
Depending on what tools you have, you may find it cheaper to replace the switch than checking the pressure. Of course, if the new switch doesn’t work, get your system pressure checked before anything else. If your system doesn’t turn on despite a good switch and proper pressure, continue to diagnostic 4.
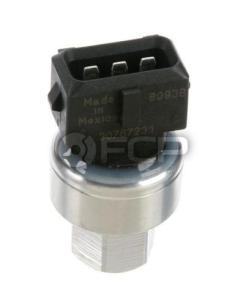 Volvo A/C low pressure switch
Diagnostic 4: Test the compressor.
Find the leads to the compressor and jumper it to the battery. You should hear a click as the clutch engages. If nothing happens, you might be looking at a compressor replacement. If it does work, then you’ll be back to a potential electrical issue.
Diagnostic 5: Time to spend some money.
You now have two options. Either buy a set of A/C gauges, or take your car to your trusted mechanic. By buying a set of gauges, you’ll know if you need a new charge of refrigerant, and you’ll even be able to charge your system on your own. On the other hand, if you need to take your car to the shop, at least with your simple diagnostic results, you’ll have a good idea of what to expect.
Side result: If everything works and A/C performance is still low, the below tips just might make the difference:
Check the condenser/pusher fan
This mainly applies to cars with mechanical fans because if you have an electric fan and it isn’t working, you have a lot more things to worry about such as an overheating car. The purpose of the condenser fan, or pusher fan as it is commonly known, is to move more air through the condenser when the car is at low speeds simply due to the fact that a mechanical fan with your engine at idle doesn’t have the ability to cool as effectively as a high speed electric fan.
Let your car idle for a bit after your car has warmed up and observe your condenser fan. It should turn on relatively quickly. If not, check your electrical system by jumping the leads. If your fan switches on, consider getting a new temperature switch. If it doesn’t, check your fan by hooking it directly to your battery. If it works, great! Otherwise there’s an electrical connection or wiring issue.
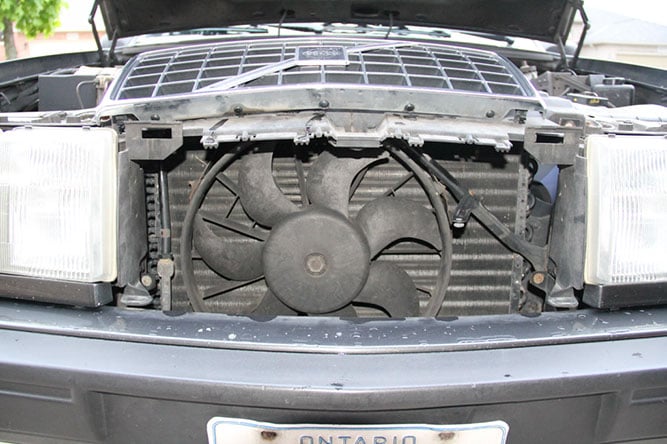 Volvo 940 Pusher fan
Is airflow through the condenser unobstructed?
Make sure your condenser is free of any major obstructions and the radiator fins aren’t bent. It is key to have proper airflow through the condenser for the system to work properly. Also, if your engine bay is missing any panels sealing off your radiator from the inside of your engine bay, make sure to get these replaced. In traffic, its very possible for the hot engine air to actually heat up your condenser. Obviously not an optimal condition.
 Close out panel in the engine bay doing its job.
Is the AC system insulated?
Most modern vehicles will have insulation around every A/C component and all the lines to improve the performance. The idea is to keep the refrigerant as cool as possible before it makes its way to the evaporator. On older cars like RWD bricks, you may not have this benefit. On my car, the low pressure (cold line) side of the A/C system was entirely open to the hot exhaust.
The cheapest, and very effective fix is to drop by your local hardware store and get some piping insulation. Make sure you get the quality stuff rated to a higher temperature. The insulation I have was made of EPDM rubber rated to 125C which is sufficient for use in engine compartments.
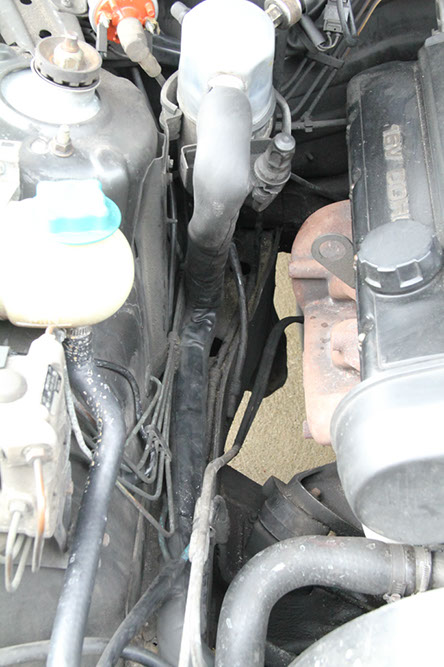 Insulation on low pressure A/C line. Reference above picture for what it used to be like.
There you have it. Even with the most basic of tools, being armed with little bit of knowledge can save you more than a few dollar bills. Feel free to leave any tips or suggestions in the comments below.