- 11/16/2020
- 5 Min Read
- By: Christian Schaefer
How To Change The Oil & Filter On A Volvo S90 (Volvo SPA & P3 V60, V90, S60, S80, XC60, XC70 & More)

Oil changes are an essential part of car ownership. The oil’s job is to keep everything inside the engine lubricated and happy. As the oil is used, its lubricating properties fade, leading to increased wear on the engine components. The new synthetic oils that companies like Volvo use can last up to 10,000 miles, more than triple that of conventional oil.
Changing your oil can be an important step in learning how to service your vehicle. Oil changes are some of the most basic jobs you can do at home and can make you more conscious of the importance of looking after your car.
Volvo models and years applicable:
|
|
|
|
|
|
|
|
Symptoms and effects of unchanged oil:
- Increased engine wear
- Decreased fuel mileage
- Decreased engine performance
In an engine, the oil’s job is to lubricate all of the moving parts. Without lubrication, parts wear rapidly, sending debris through the engine before it locks up.
Over time, the oil itself will degrade. The molecules inside of the oil break down, causing the oil to lose its viscosity. Modern synthetic oils last significantly longer than conventional oil but still require scheduled changes. Always check with your vehicle’s manufacturer or its manual to find out how often you should replace your oil.
Additionally, you can use the engine flush and CERA TEC products from LIQUI MOLY. These products work with the oil to provide a cleaner engine and longer-lasting bearing protection. They are completely optional and may give you a little more peace of mind between oil change intervals.
The engine flush gets used just before the oil change. While it circulates through the engine, LIQUI MOLY claims that it removes deposits, dissolves sludge, and improves the combustion process. Add the CERA TEC while adding in the new oil. LIQUI MOLY claims that it reduces friction, prevents direct metal-to-metal contact, and reduces fuel consumption.
What will it cost to complete a Volvo SPA & P3 oil change?
Our Mercedes oil change kit comes with everything you’ll need for $57.84. The kit includes 6 liters of LIQUI MOLY oil, a new crush washer, and the oil filter housing cap seals. The LIQUI MOLY Pro-Line Engine Flush costs $10.24 a bottle, and the CERA TEC costs $23.05.
It’ll cost around double that to have an oil change performed by an independent shop or dealership. On top of the extra charge, you’ll have to wait until they can get to your car.
How long will it take to complete a Volvo SPA & P3 oil change?
The oil change process is not long. With the kit we provide and the proper tools at your disposal, the job shouldn’t take longer than thirty minutes.
Tools required to complete a Volvo SPA & P3 oil change:
Parts required to complete a Volvo SPA & P3 oil change:
- Volvo Oil Change Kit
- LIQUI MOLY Pro-Line Engine Flush (Optional)
- LIQUI MOLY CERA TEC Oil Additive (Optional)
Steps required to complete a Volvo SPA & P3 oil change:
Step 1: Flush the engine and drain the oil
Open the hood and add the LIQUI MOLI engine flush additive. Then, start the car and let it run for 10 minutes. Don’t drive the car; just let it idle. Shut the engine off after ten minutes.
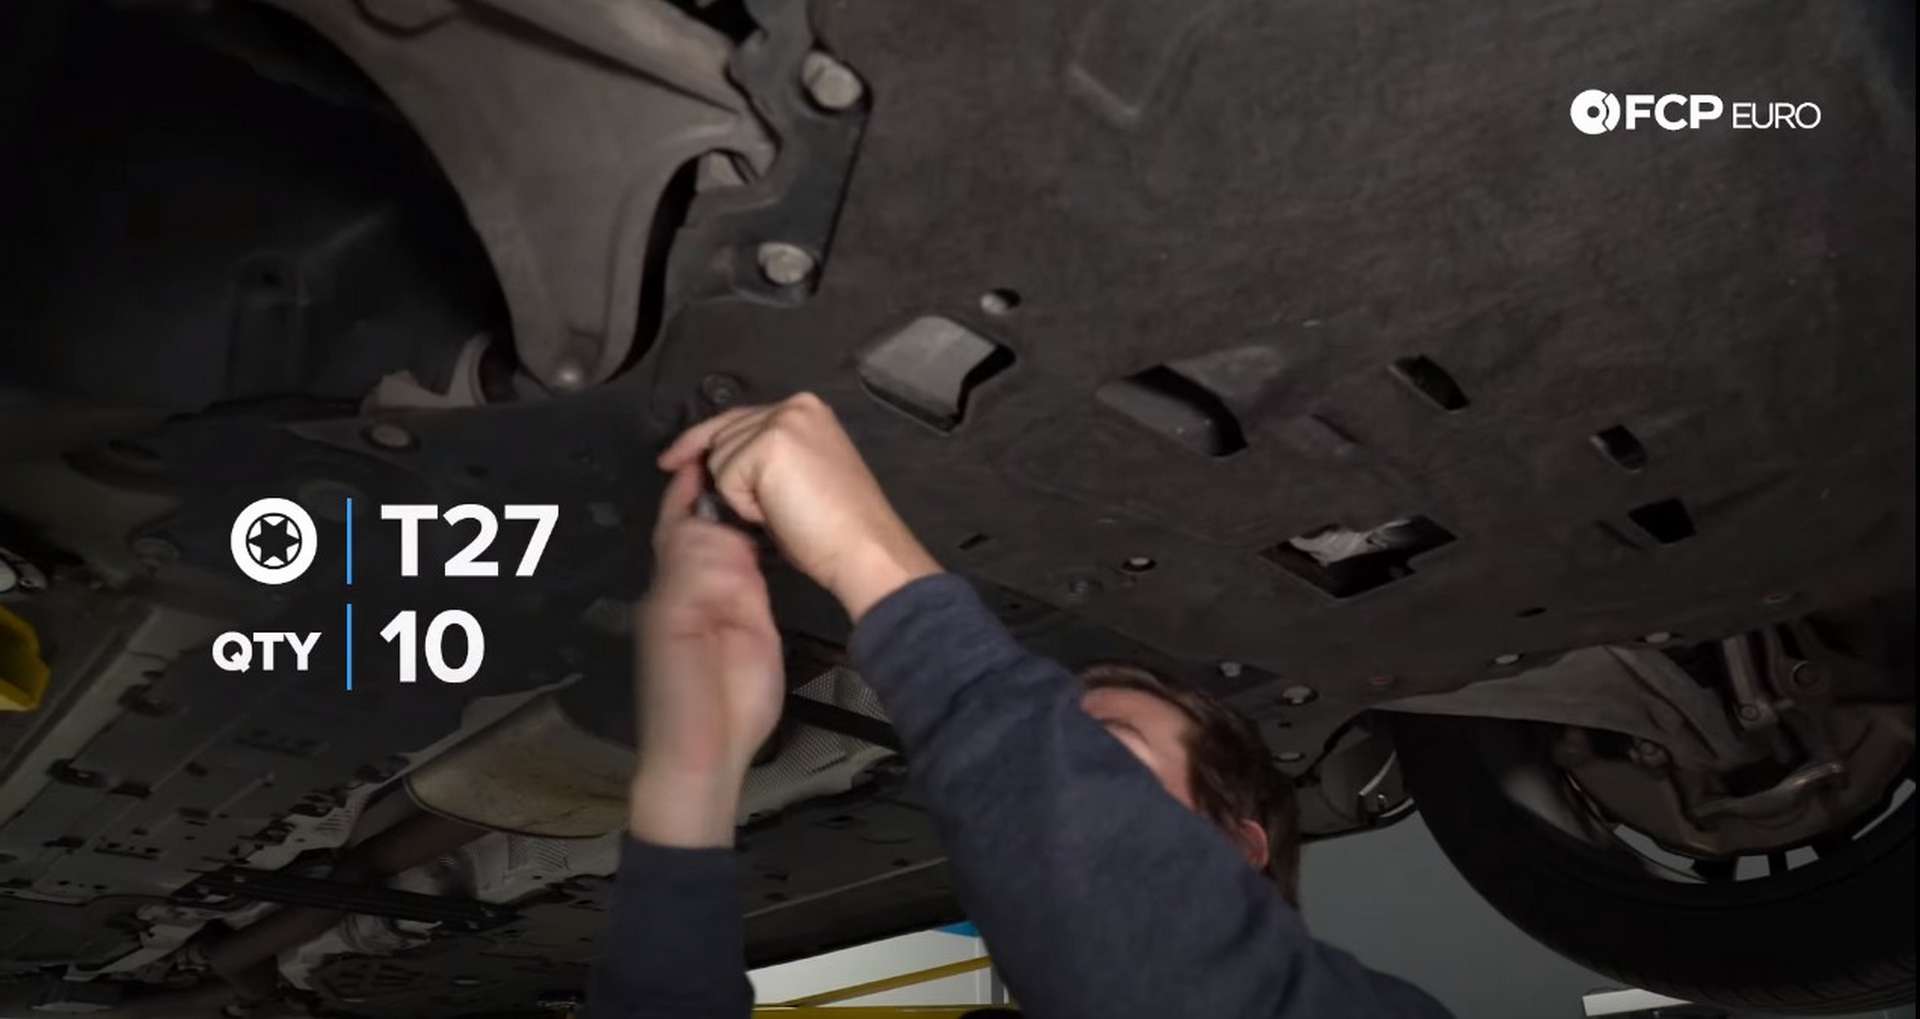
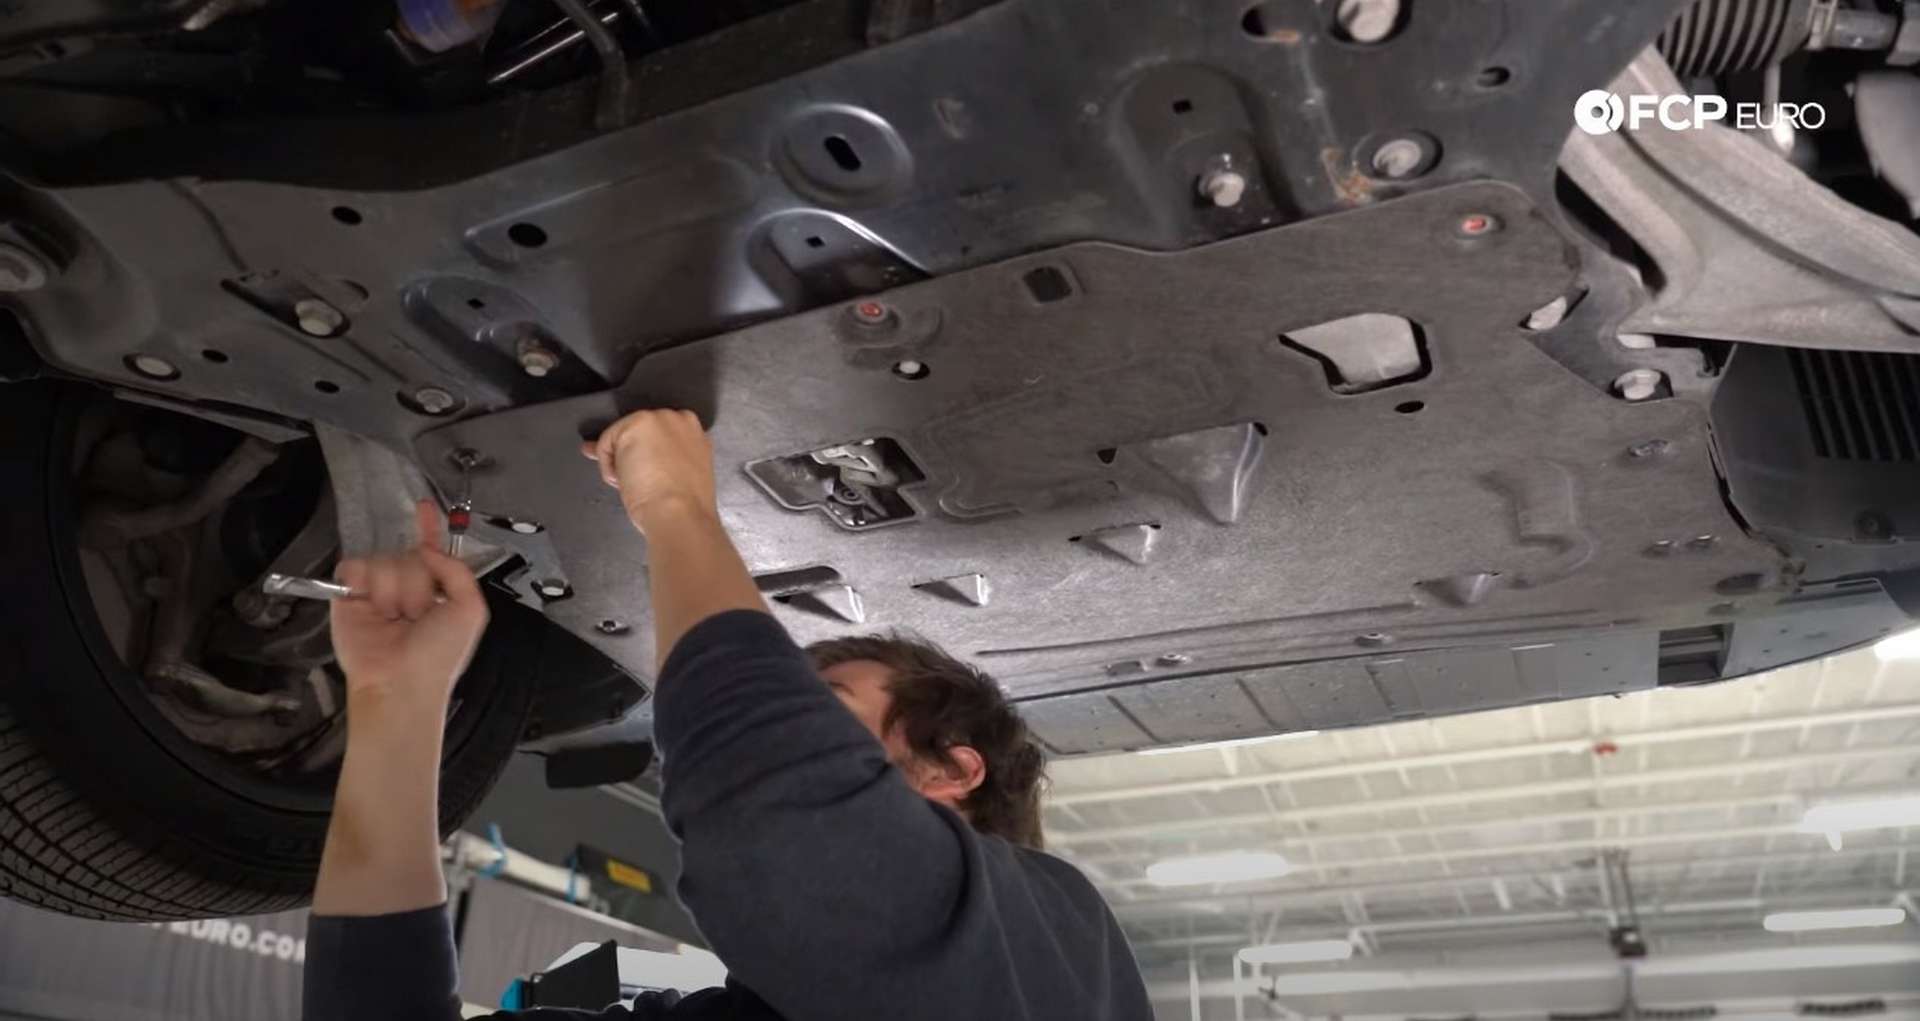
Next, jack the car up and set it onto jack stands. A plastic underbody panel blocks access to the oil drain plug. Use a T27 Torx bit socket to remove the ten fasteners that secure the panel to the underside of the car. Pop the two clips securing the underbody panel to the chassis off by hand. Be aware that dirt and debris may fall down from the panel as you remove it.
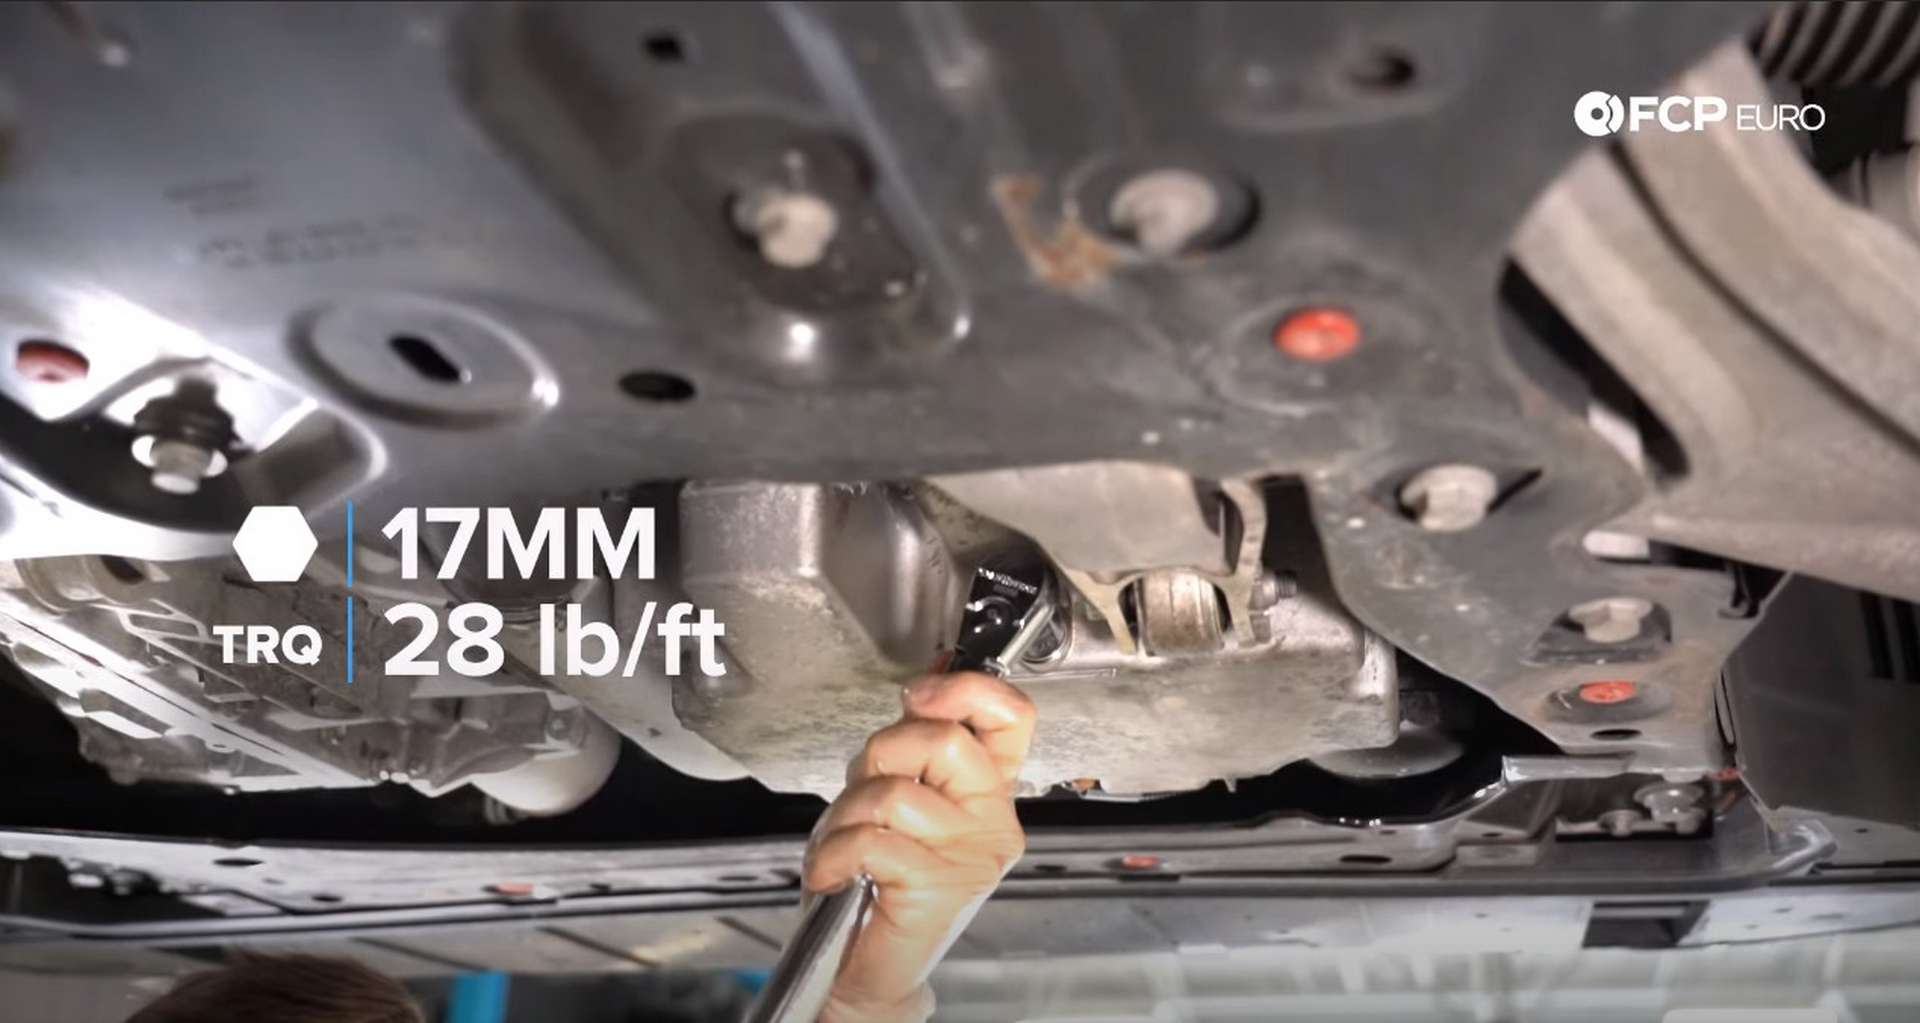
With the belly pan off of the car, locate the drain plug on the oil pan. Position a drain pan with at least 6 liters of capacity underneath the drain plug. Then, use a 17mm wrench or socket to remove the drain plug and allow the oil to drain from the engine.

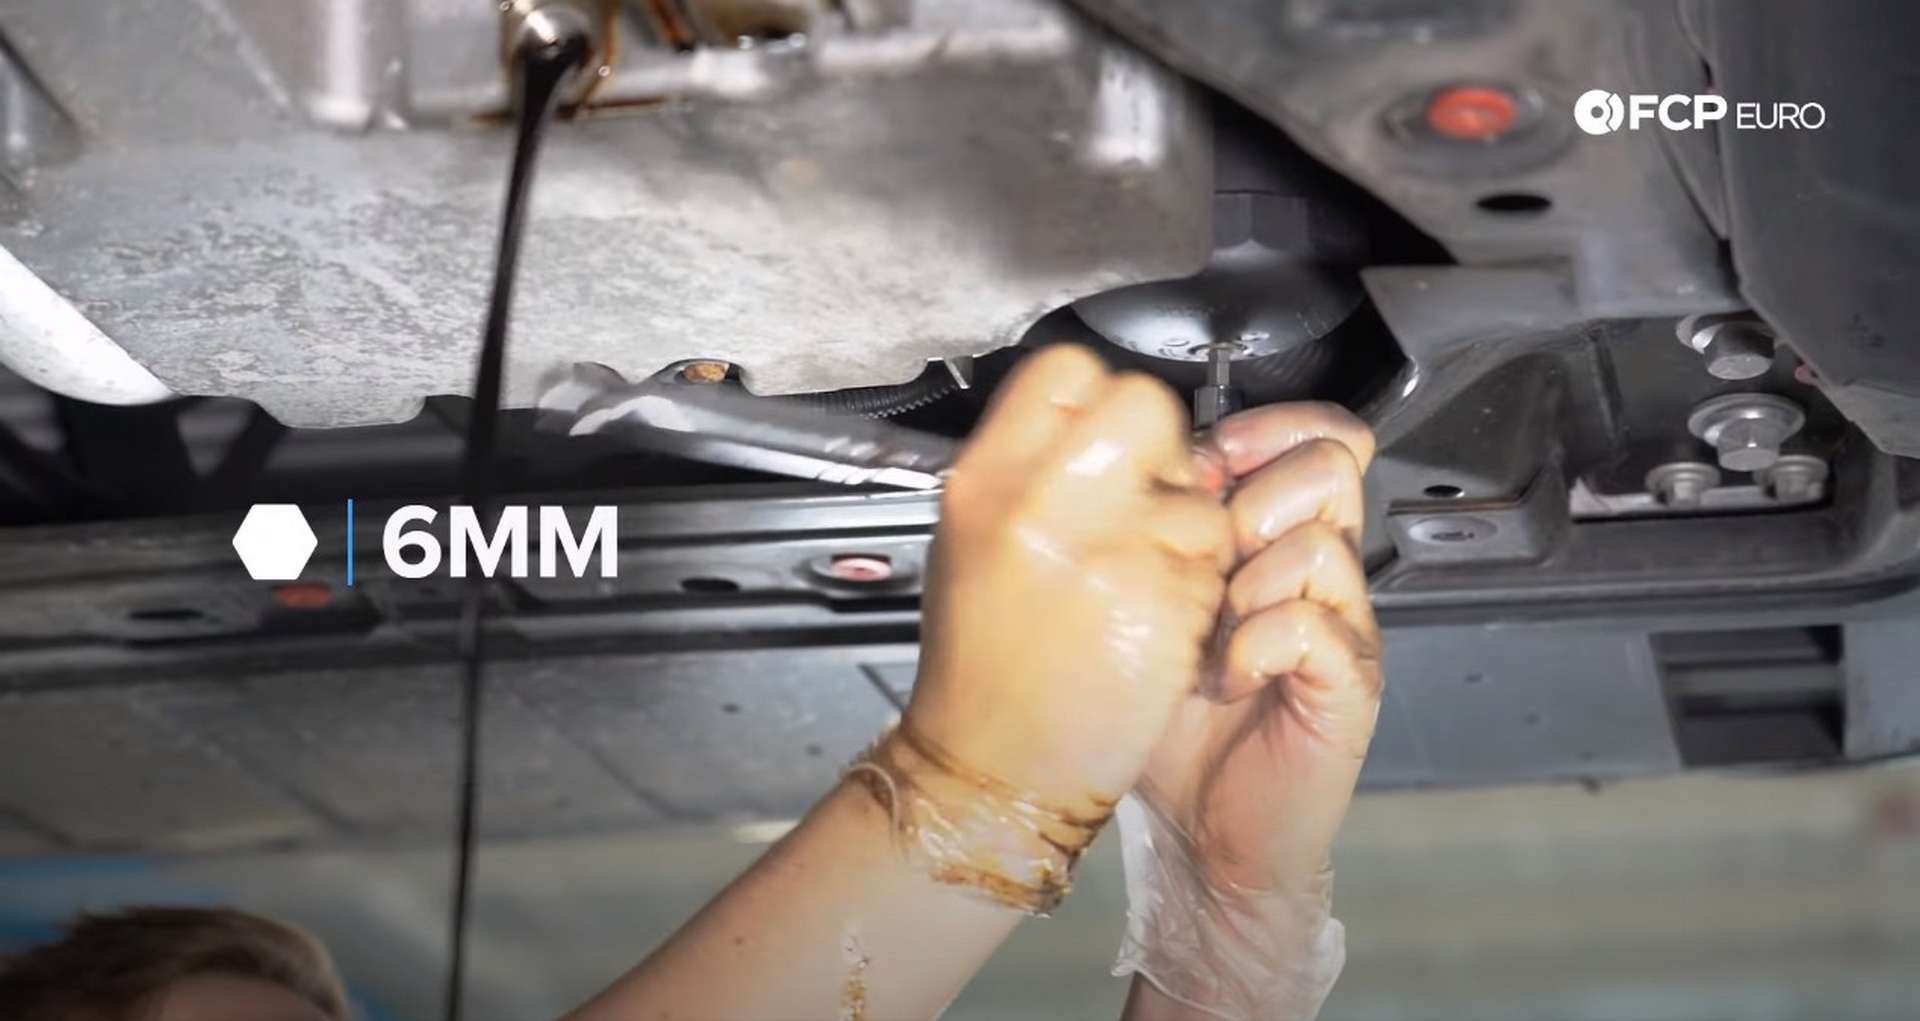
Move the drain pan under the oil filter housing once oil ceases to drain from the oil pan. Then, use a 6mm hex bit socket to remove the drain plug from the oil filter housing.
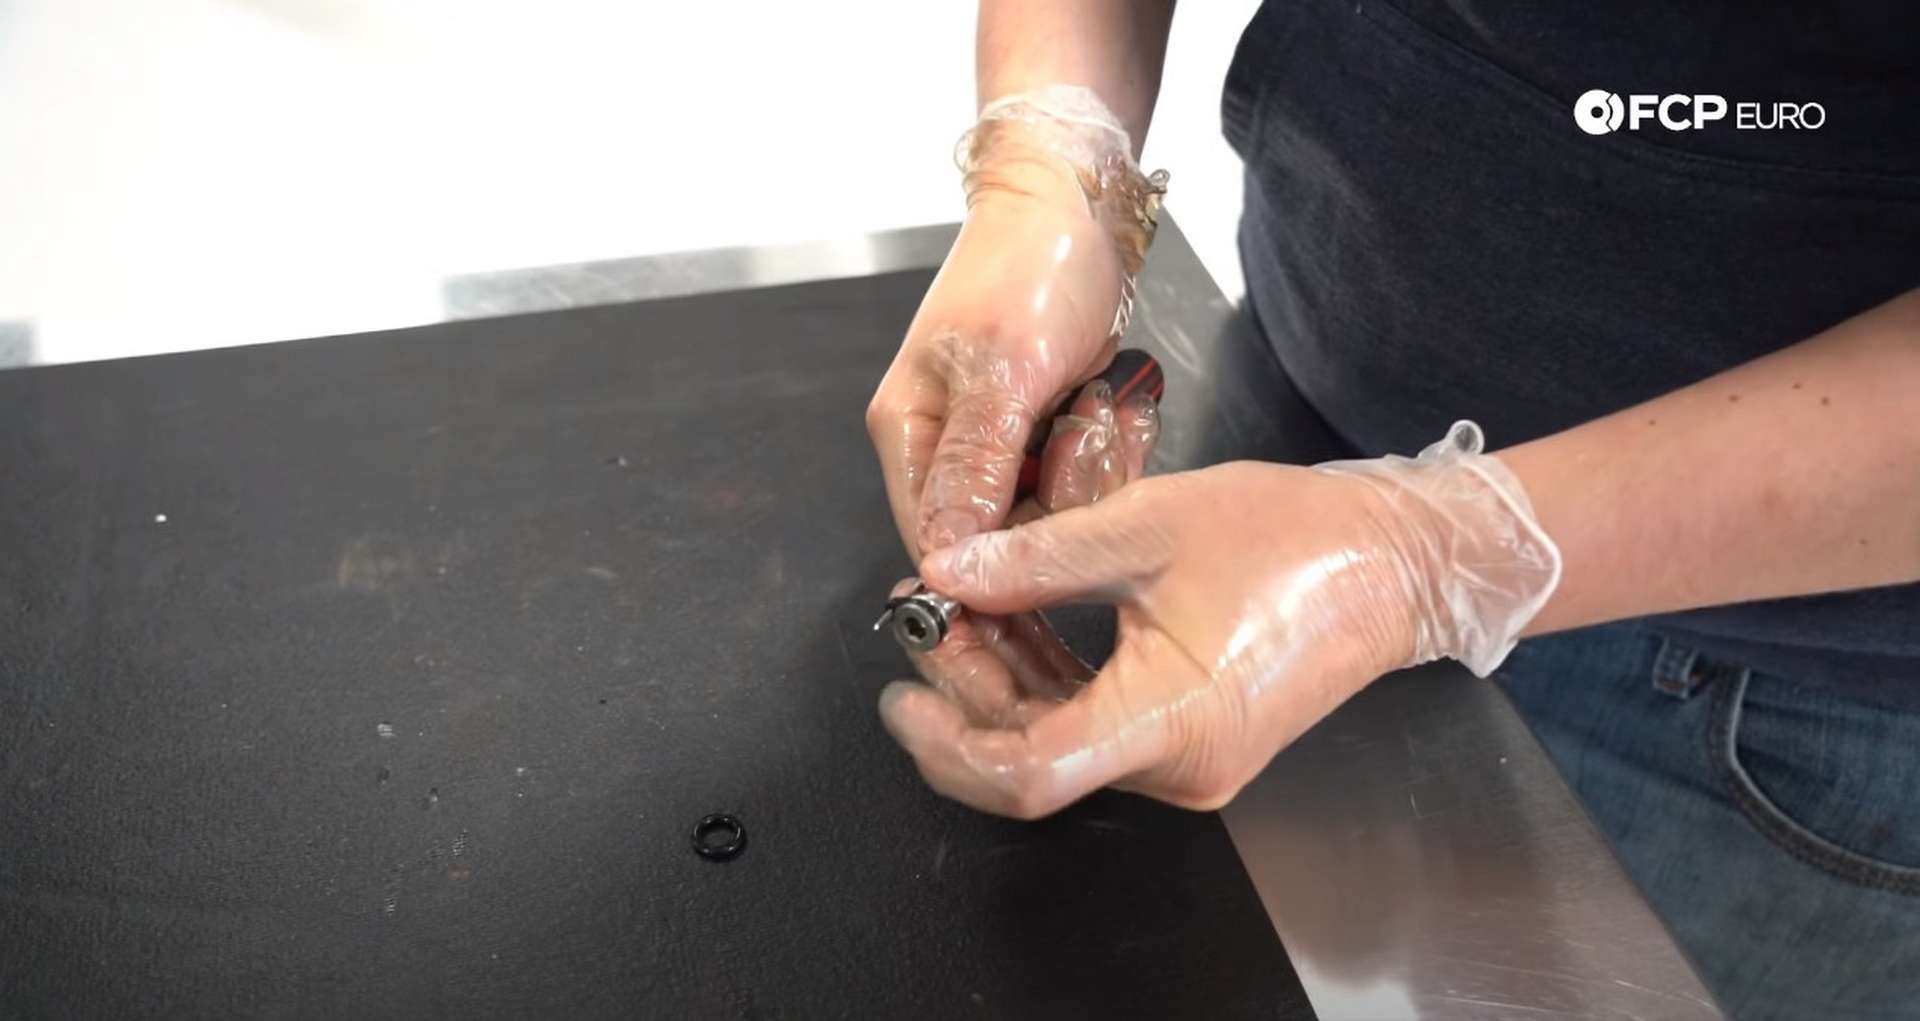
While the oil drains from the oil filter housing, replace the o-ring on the filter housing drain plug. Use a pick to remove the old o-ring. Wipe the drain plug clean with a rag and then install the new o-ring onto it. Reinstall the plug with the new o-ring.
Step 2: Change the oil filter
With the oil drained from the filter housing, you can change the oil filter. Use the CTA 2488 tool on a ratchet to remove the oil filter housing cap.
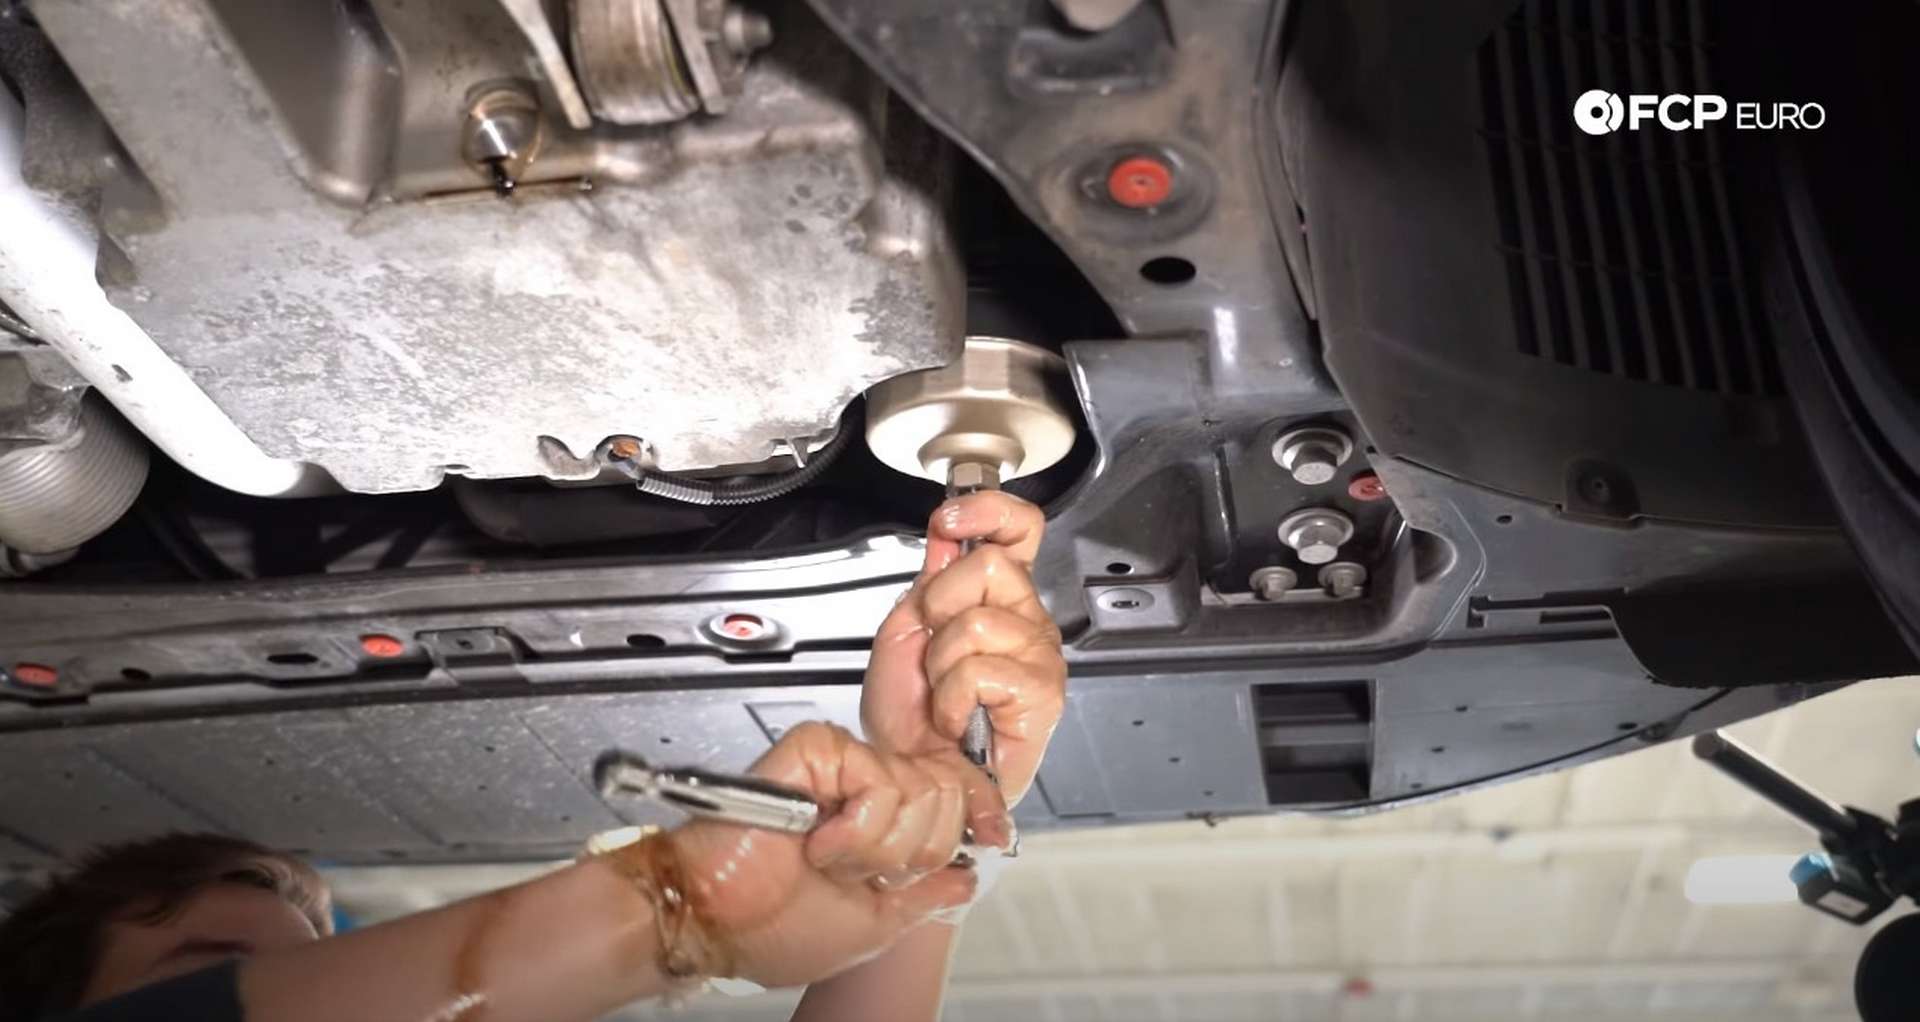

The oil filter sits in the inside of the filter housing’s cap. Remove the old filter and throw it away. Use a rag and some brake clean to rinse out the cap. Then, use a pick to remove the old o-ring from the oil filter housing cap. Wipe out the groove with a rag and then install the new o-ring.
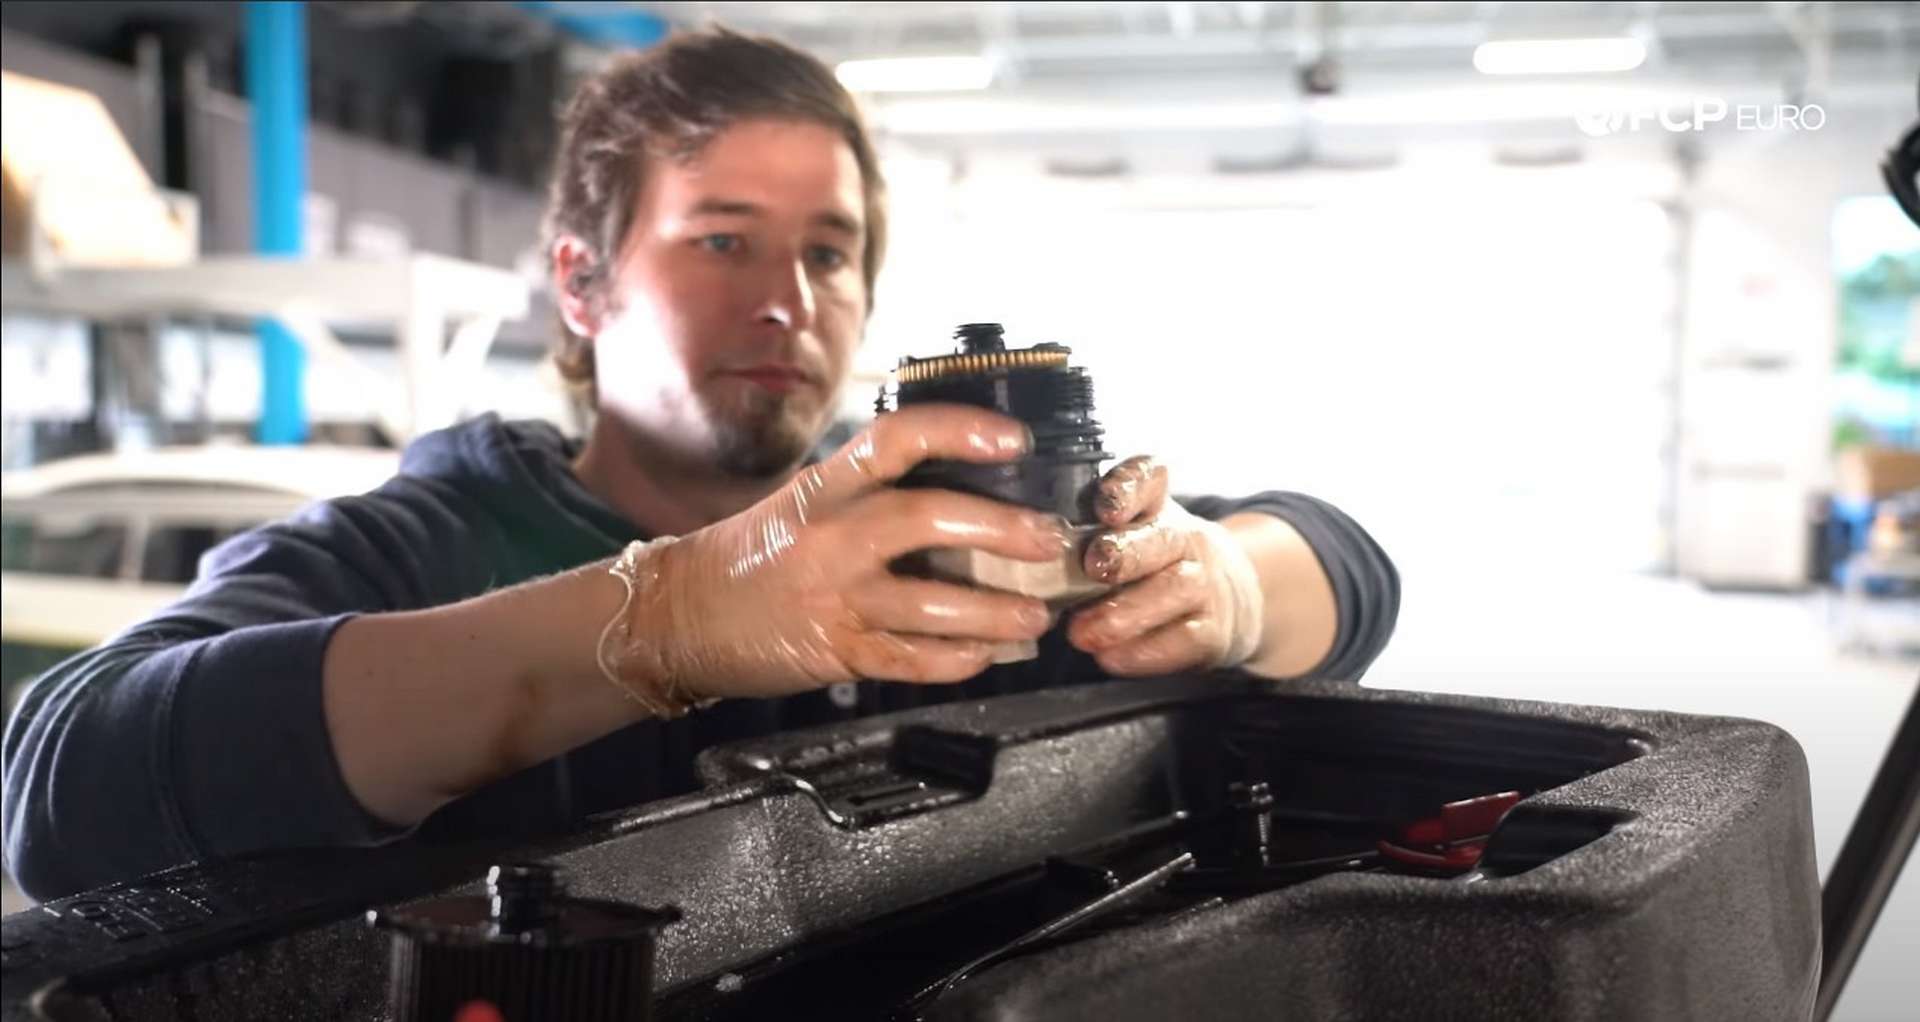
Install the new filter into the cap with the o-ring side facing upwards, out of the cap. Then thread the oil filter cap assembly back into the oil filter housing. Snug the cap with a ratchet, then torque the cap to 25.5Nm.
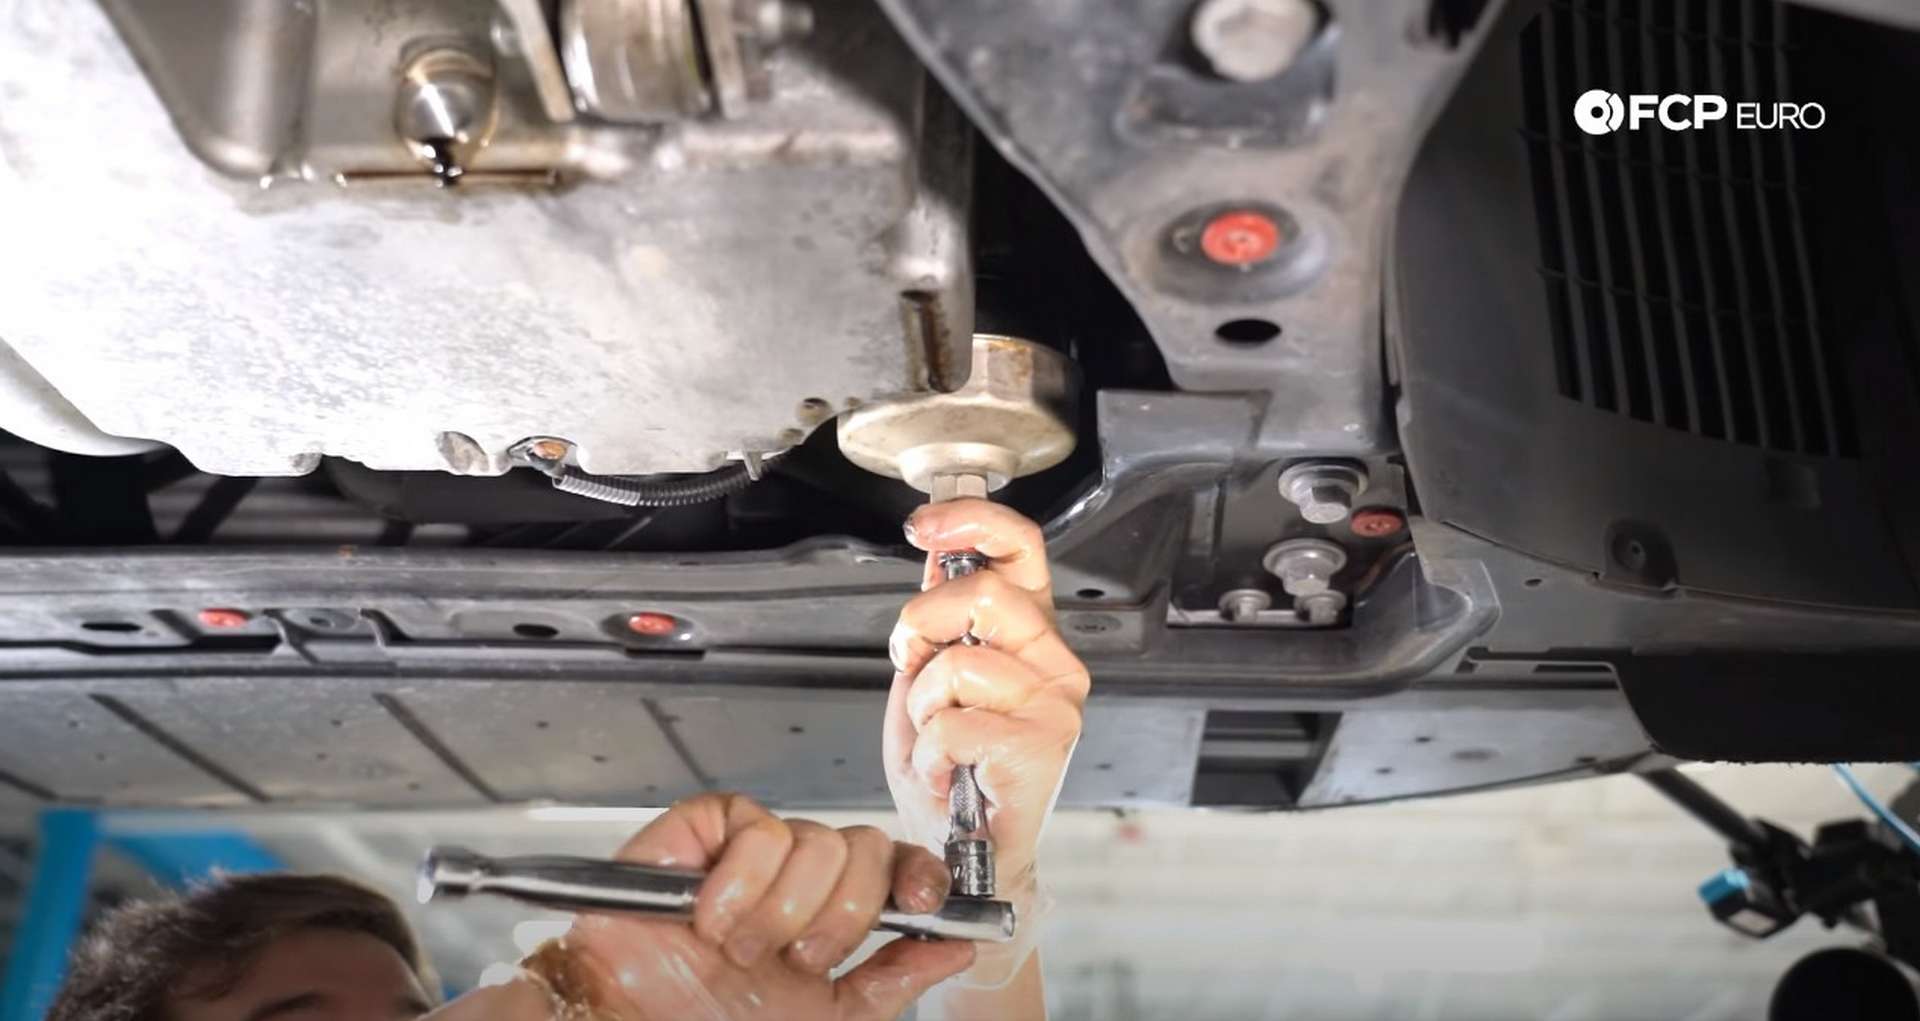
Lastly, place the new crush washer onto the drain plug and thread the plug back into the oil pan. Use a 17mm socket to torque the drain plug to 38Nm.
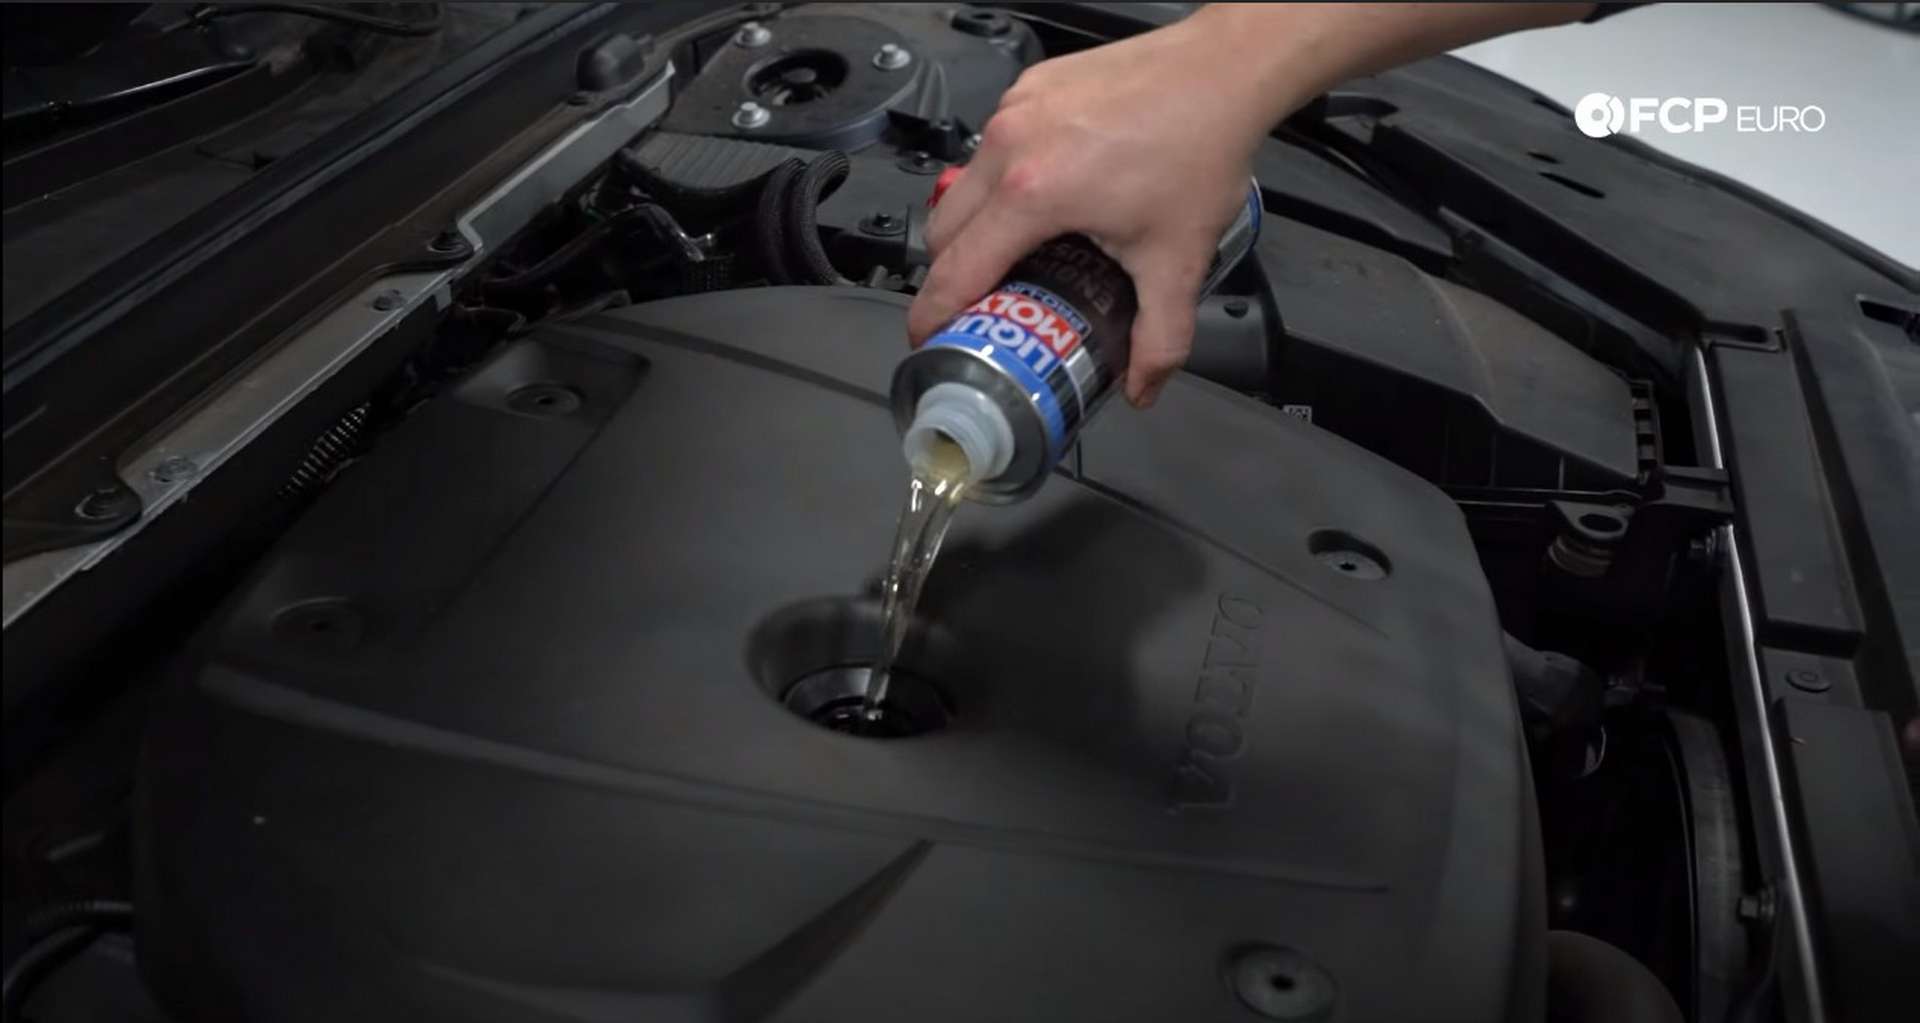
Step 3: Refill the engine with oil and CERA TEC additive
Refit the belly pan to the bottom of the car. Install the two clips first before installing the ten T27 fasteners.
Next, jack the car up, remove the jack stands and set the car onto the ground. Then, open the hood and remove the oil filler cap.
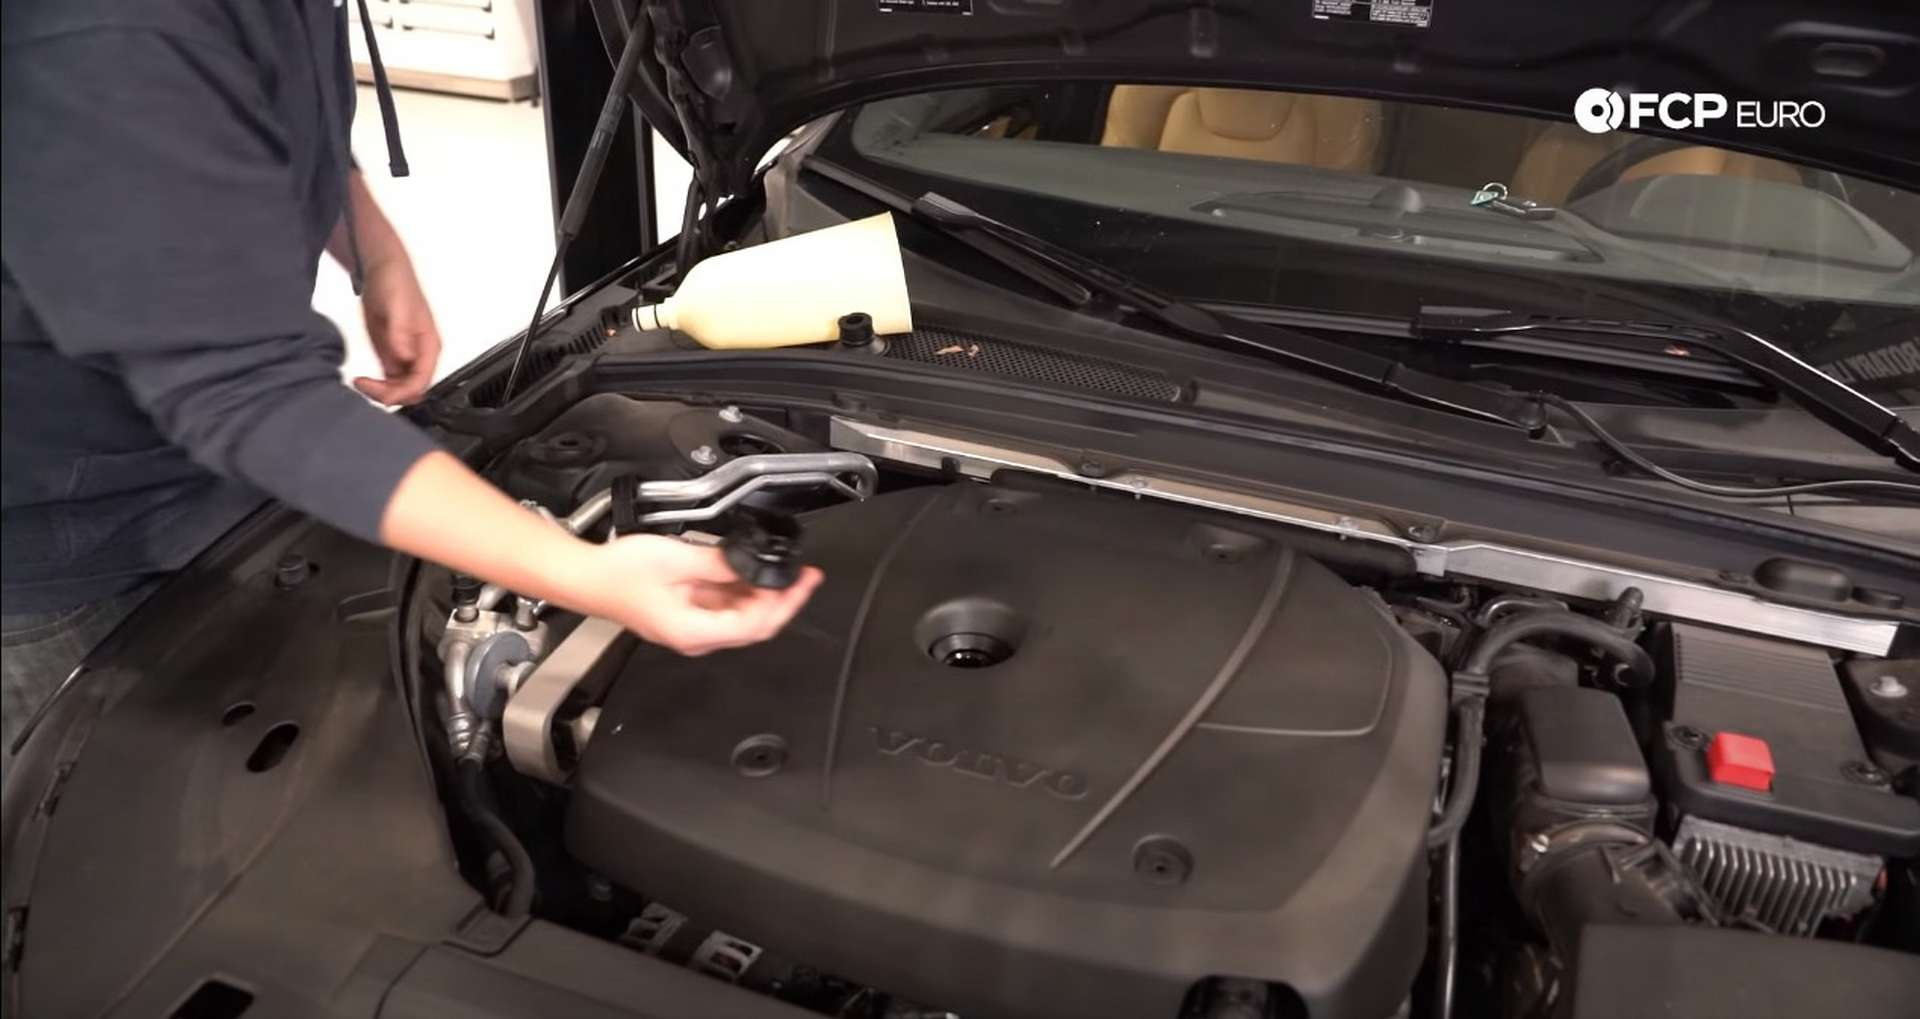
Place whatever funnel you’re using into the oil filler and add in the five-liter jug of oil. If you are using the CERA TEC additive, add in about half of one bottle and then half of the one-liter jug of oil. If you aren’t using the additive, pour in the sixth liter of oil.
Next, start the car and head into the apps on the infotainment system. Select the “Car Status” app and take note of the oil level. If it isn’t reading at “Max,” add in more oil slowly.


Take the car for a drive, then park it for a few minutes on level ground. Check the oil level once more to ensure it hasn’t moved. Add oil as necessary.
Volvo SPA & P3 Oil Change Torque Specs:
- Volvo Oil Filter Housing Cap = 25.5Nm or 19 ft-lbs of torque
- Volvo Oil Drain Plug = 38Nm or 28 ft-lbs of torque
Just like that, your Volvo is full of fresh oil and is equipped with a clean filter. If you’re interested in more DIYs for your Volvo, you can visit fcpeuro.com and subscribe to our YouTube channel.


