- 09/14/2018
- 3 Min Read
- By: Dave Greco
How To Install Rear Lower Control Arms & Shocks On A BMW E46

We'll show you how to do it in just a few simple steps.
Install performed on a 2004 BMW 330i ZHP Sedan
Tools Used:
-Sockets 10mm, 13mm, 18mm, 21mm, E12
-Wobble extensions, breaker bar, punch, jacks or supports for the exhaust & differential
-14-Piece Strut and Shock Absorber Tool Kit - CTA 3039
https://www.fcpeuro.com/products/14-piece-strut-and-shock-absorber-tool-kit-cta-3039
Parts Installed:
BMW Control Arm - Lemforder 33326770813
https://www.fcpeuro.com/products/bmw-control-arm-rear-lower-e36-e46-33321092237l
BMW Shock Absorber - Bilstein Touring 19-103150
https://www.fcpeuro.com/products/bmw-shock-absorber-rear-e36-e46-w-standard-suspension-touring-19-103150
Estimated Installation Time: 2 1/2 hours

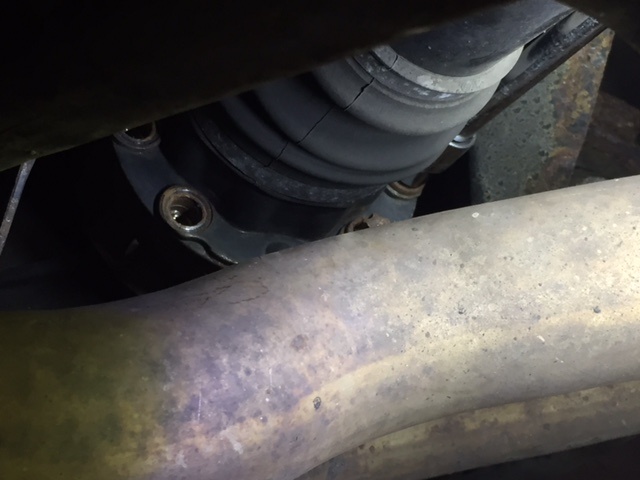
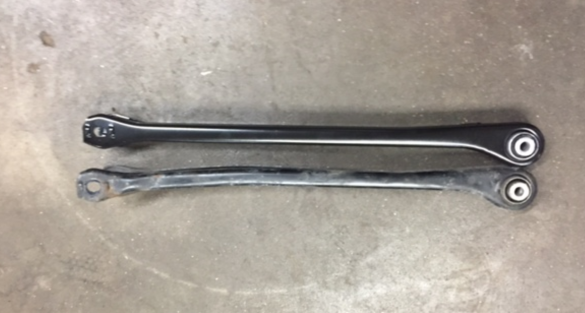
During inspection of the rear suspension we noticed that the rear control arms were bent and the rear shocks were in need of replacement. Lemforder lower control arms were ordered along with Bilstein B4 Touring shocks as replacements.
At first glance we knew the axles would need to be unbolted from the differential to gain access to the bolt mounting the rear control arm to subframe. An E12 socket was used to unbolt the axle and drop it down on each side, we also unbolted the rear differential using a 21mm socket and supported the differential with a floor jack to gain additional access.
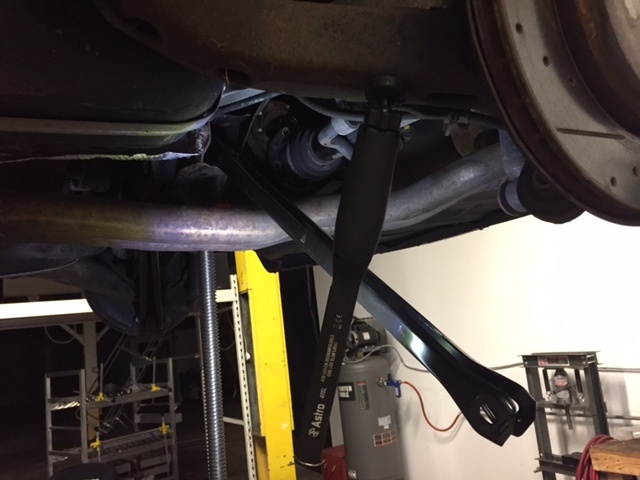
At this point the control arm was able to be unbolted using an 18mm socket at rear subframe and 18mm at carrier. The passenger side has more clearance because the differential is offset.
The driver's side is the main reason why we decided to unbolt the differential because of the lack of clearance. We removed the differential brace and lowered the rear exhaust by popping off the hangers to make things easier. Another jack support was placed under the middle of the exhaust once the middle support was removed.
The differential was jacked up with the floor jack and tilted slightly to unbolt the rear control arm from subframe. Once the control arms were removed it was immediately apparent that replacement was long overdue because of the bends and cracks within the bushings. The picture below shows the differential supported by the floor jack.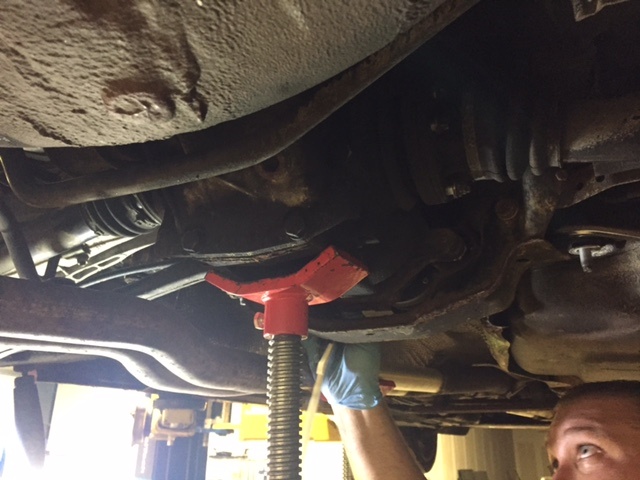
Installing the new control arm may take a couple tries because of the tight fit in pushing the arm into the subframe mount location. Once bolted into place using the 18mm socket we were then able to re-attach the axles on both sides with an E12 socket. A screw driver was placed in between the brake rotor to prevent the axle from spinning while tightening. You'll need to rotate the brake disc and re-position the screw driver to tighten all the bolts.
Once the axles were bolted back up we were able to bolt the differential back into place using a 21mm socket and a 10mm socket to re-install the differential bracket and heat shield. The middle support for the exhaust was re-installed and exhaust was raised with the floor jack and the rubber hangers were mounted back up.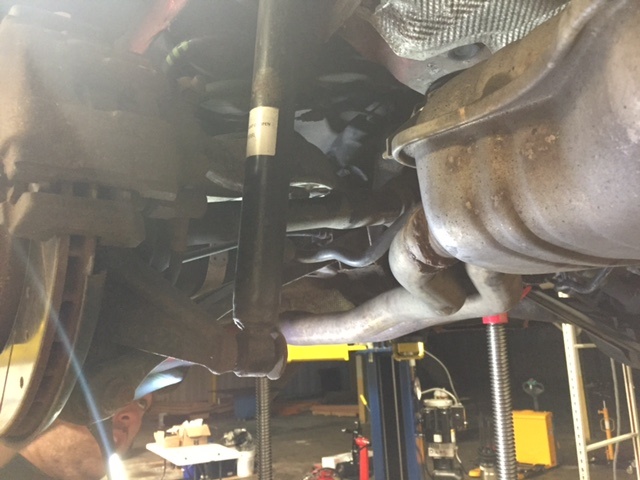
Now we were able to move onto the rear shock replacement. At this point we opened the trunk and removed the rear trays, carpeting & sound insulation to gain access to the shock mounting location. The two 13mm nuts were removed and the 18mm nut at the bottom of the shock was unbolted. You'll want to have a floor jack under the carrier to relieve tension on the shock to remove it.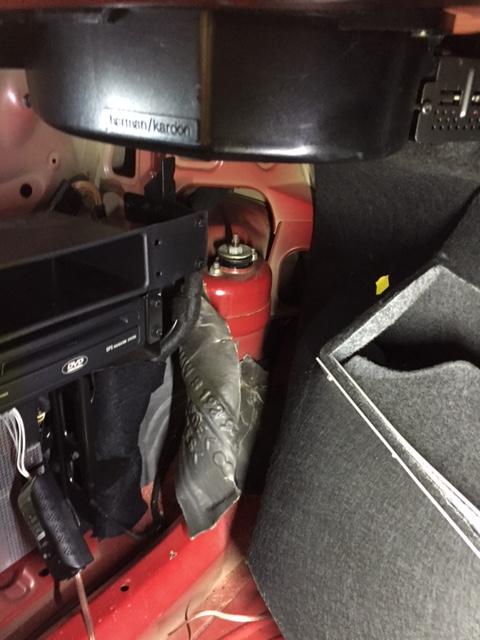 Next step is disassembling the rear shock by removing the top bolt to remove the shock mount, bump stop, washers and dust boot. We used a specialty hold shock tool by CTA Manufacturing to make things go smoother but you can use vice grips to keep the shock shaft from spinning while taking everything apart.
The shock mount, bump stop, washers and dust boots were able to be reused. The mounts looked like they were replaced not too long ago and everything else looked to be in good shape with no signs of deterioration.
Everything was transferred over to the new Bilstein B4 Touring shocks to make a complete assembly to bolt back into place.
The CTA Manufacturing hold tool was used once again to assist in assembly saving us time.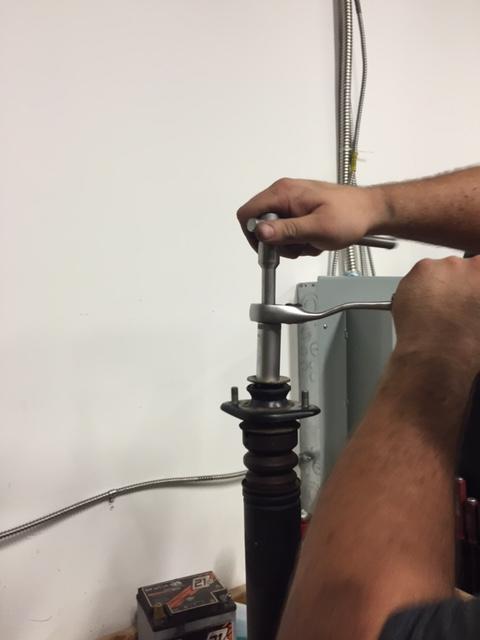
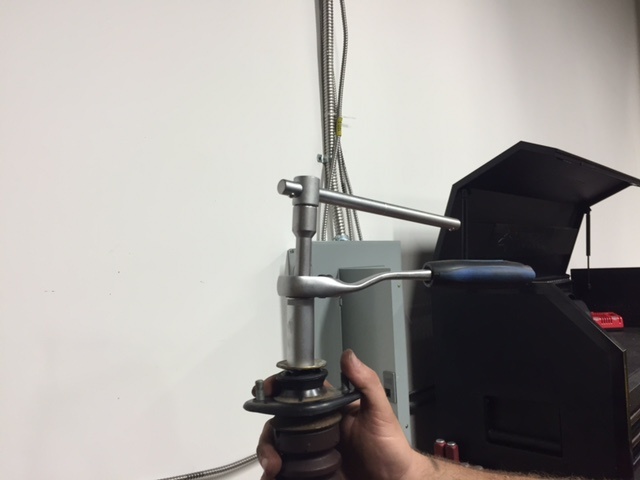
After we had both assemblies back together we were able to install back into the car.
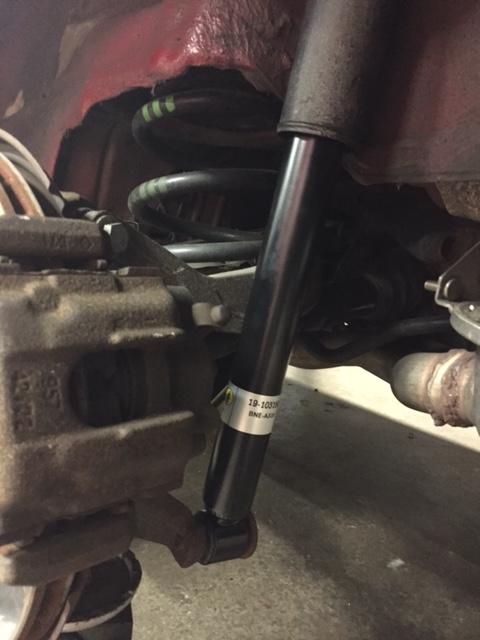 The two 13mm nuts attaching the mounts to the shock tower were tightened and then the 18mm nut and bolt at the bottom was put back into place and tightened. The jack still placed under the carrier to assist with lining up the lower shock mounting bolt.
Now that the shocks are re-installed in the vehicle, you'll want to double check to make sure everything is tight to recommended factory torque specs.
In the trunk area tuck the sound insulation and carpet back into place, on the drivers side you'll have to re-install 3 plastic push pins holding on the carpeted side panels.
Once everything is complete you'll want to schedule an appointment for an alignment. After putting the rims on and taking the car for a test drive you'll notice the steering wheel won't be totally straight and the car may wander a little at speed. An alignment will be the last part to get the caster within spec.